In this guide, we will show you the steps to flash the Android 12 QPR3 Beta 3 Modem on Android 13 Beta 1. There’s quite a lot going on in the Android ecosystem as of now. At the time of writing, the Silicon Valley giants are long done and dusted with Android 12 and have even surpassed the developer preview phase of Android 13 [currently, they are testing the Beta build of the latest OS build]. But even then, they haven’t left the Android 12 in the lurch. Google is still rolling out performance and enhancement updates for this OS version in a quarterly manner.
Dubbed as Quarterly Platform Releases (QPRs), they make their way onto the Pixel devices alongside the Feature Drop. However, now that the Android 13 has reached the beta stage, various tech enthusiasts have already jumped ships from 12 to 13. However, being the first beta build, a few bugs and issues are along the expected lines. And that has indeed been the case with some users as they have reported intermittent network, call drops, and internet suddenly disconnecting on the thirteenth iteration of the OS.
So what could be done to resolve this issue? Well, rather than downgrading to Android 12 and missing out on all the new goodies, you could just flash the modem file from Android 12 onto your device running Android 13. This way you will continue to be on the latest OS and at the same time, have a perfectly working network as well.0 So without any further ado, let’s get started with the steps to flash the Android 12 QPR3 Beta 3 Modem on Android 13 Beta 1.
Table of Contents
Flash Android 12 QPR3 Beta 3 Modem on Android 13 Beta 1
The below instructions are listed under separate sections for ease of understanding. Make sure to follow the same sequence as mentioned below. Droidwin and its members wouldn’t be held responsible in case of a thermonuclear war, your alarm doesn’t wake you up, or if anything happens to your device and data by performing the below steps.
STEP 1: Install Android SDK

To begin with, install the Android SDK Platform Tools on your PC. This is the official ADB and Fastboot binary provided by Google and is the only recommended one. So download it and then extract it to any convenient location on your PC. Doing so will give you the platform-tools folder, which will be used throughout this guide.
STEP 2: Download Android 12 QPR3 Beta 3 Firmware
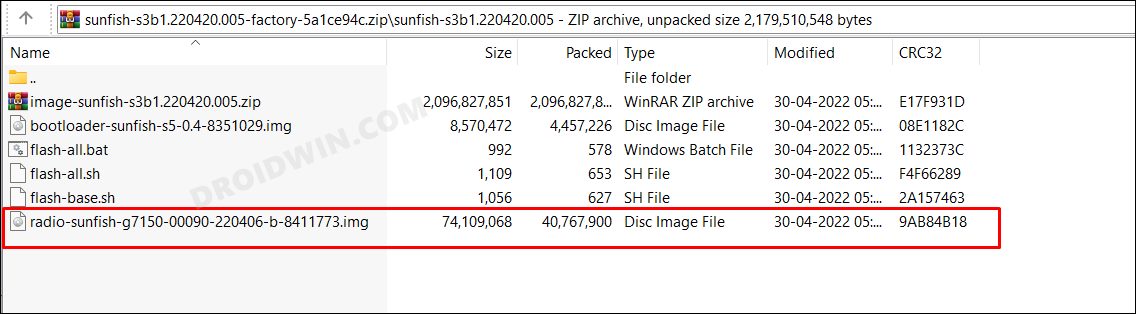
Now get hold of the Android 12 QPR3 Beta 3 firmware for your device from the official Google website. Once downloaded, just extract the modem file to the platform-tools folder on your PC. Moreover, the file will be named something like radio-sunfish-g7150-00090-220406-b-8411773, rename it to radio, so that the complete name becomes radio.img.
STEP 3: Enable USB Debugging and OEM Unlocking
Next up, you will have to enable USB Debugging and OEM Unlocking on your device. The former will make your device recognizable by the PC in ADB mode. This will then allow you to boot your device to Fastboot Mode. On the other hand, OEM Unlocking is required to carry out the bootloader unlocking process.
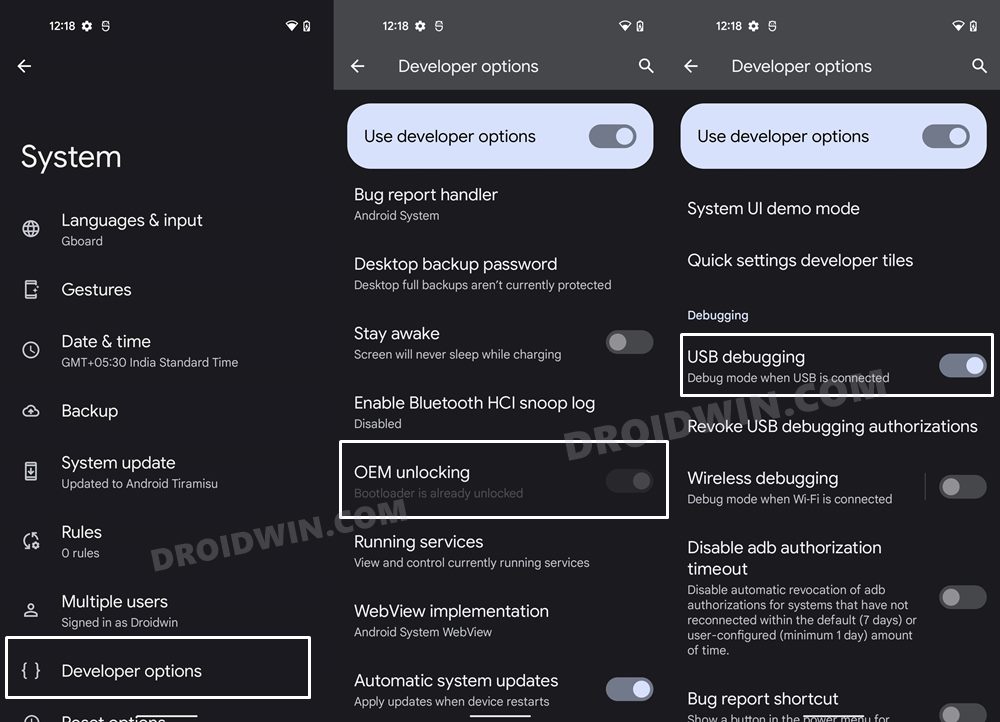
So head over to Settings > About Phone > Software Information > Tap on Build Number Number 7 times > Go back to Settings > System > Developer Options > Enable USB Debugging and OEM Unlocking.
STEP 4: Unlock Bootloader
You will also have to unlock the bootloader on your device as well. Do keep in mind that doing so will wipe off all the data and might make the device’s warranty null and void as well. So if that’s well and good, then refer to our guide on How to Unlock the Bootloader on Google Pixel Devices.
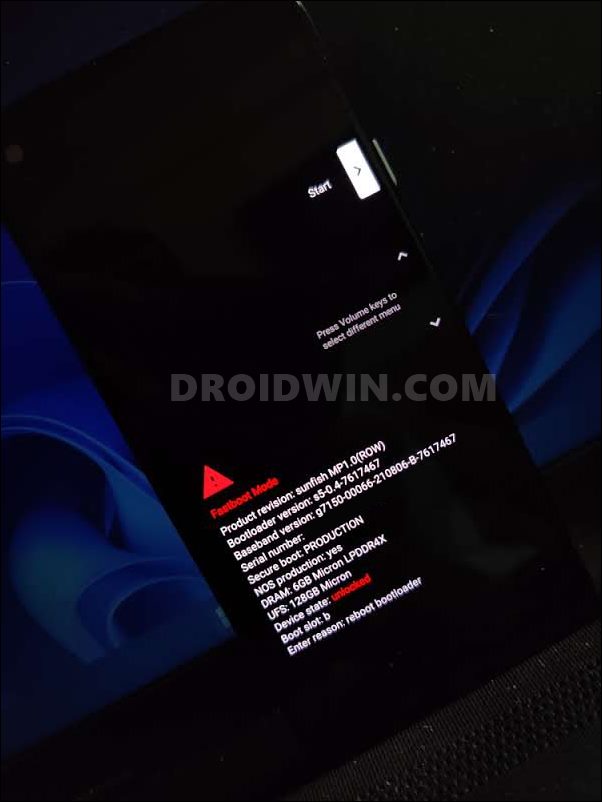
STEP 5: Boot to Fastboot Mode
- Connect your device to the PC via USB cable. Make sure USB Debugging is enabled.
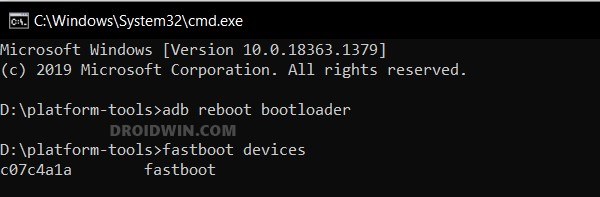
- Then head over to the platform-tools folder, type in CMD in the address bar, and hit Enter. This will launch the Command Prompt.

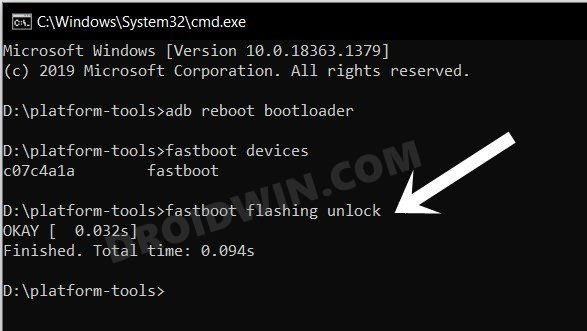
- After that, type in the following command in the CMD window to boot your device to Fastboot Mode
adb reboot bootloader
- To verify the Fastboot connection, type in the below command and you should get back the device ID.
fastboot devices

STEP 6: Flash Android 12 QPR3 Beta 3 Modem on Android 13 Beta 1
Now just execute the below command in the CMD window [that is opened inside the platform-tools folder] to flash the modem file.
fastboot flash radio radio.img
That’s it. These were the steps to flash the Android 12 QPR3 Beta 3 Modem on Android 13 Beta 1. If you have any queries concerning the aforementioned steps, do let us know in the comments. We will get back to you with a solution at the earliest.


