In this guide, we will show you the steps to carry out ADB Sideload without using a PC. Nowadays, most custom ROMs come with their own set of recovery and the developers recommend you use that recovery itself for flashing their ROM. These AOSP recoveries don’t have the normal Install option to flash the ROM, rather you’ll have to use the ADB Sideload option to get this job done.
Apart from that, the Sideload process also comes in handy if you are planning to install official updates onto your device in a stock environment. In this regard, it goes without saying that having a PC is one of the first and most obvious prerequisites for carrying out this task. Or is that really the case? Well, as surprising as it may sound, you could carry out ADB Sideload even without using a PC! And in this guide, we will show you how to do just that. Follow along.
Table of Contents
ADB Sideload Without PC: Flash Firmware/OTA/Custom Rom
Before starting, please take a backup of all the data on your device. Droidwin and its members wouldn’t be held responsible in case of a thermonuclear war, your alarm doesn’t wake you up, or if anything happens to your device and data by performing the below steps.
STEP 1: Enable USB Debugging and OEM Unlocking
First off, you will have to enable USB Debugging and OEM Unlocking on your device. The former will make your device recognizable by the PC in ADB mode. This will then allow you to boot your device to Fastboot Mode. On the other hand, OEM Unlocking is required to carry out the bootloader unlocking.
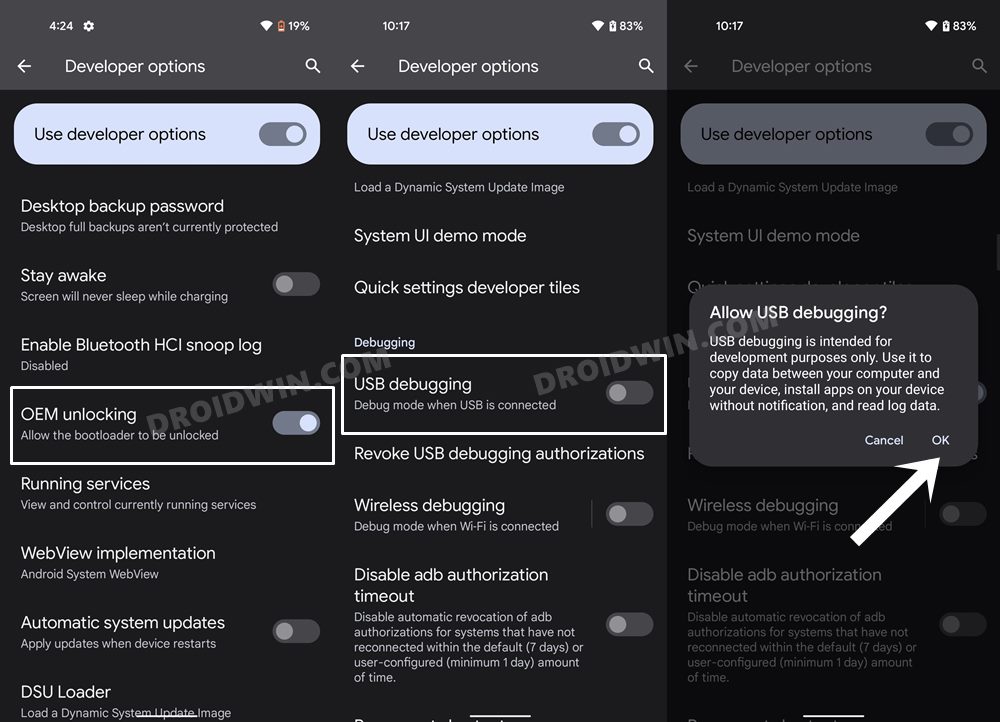
So head over to Settings > About Phone > Tap on Build Number 7 times > Go back to Settings > System > Developer Options > Enable USB Debugging and OEM Unlocking.
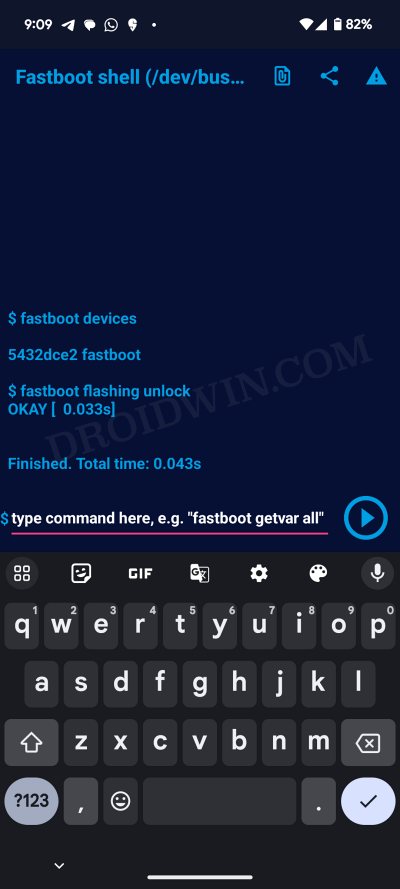
STEP 2: Unlock Bootloader Without PC [If Needed]
If you are planning to install/update a custom ROM via ADB Sideload, then you’ll have to unlock the bootloader. On the other hand, if you simply wish to install an official OTA update, then there’s no need for that. So if the former is the case with you, then refer to our guide on How to Unlock Bootloader on any Android without PC [Video].
STEP 3: Download ROM/Firmware
Download the desired ROM and transfer it to your primary device. Make sure that the ROM version is either the same or higher than the currently installed [downgrading is not allowed via ADB Sideload]. Moroever, download the firmware on your secondary device [which is acting as a PC or in other words, where the Bugjaeger app is installed].
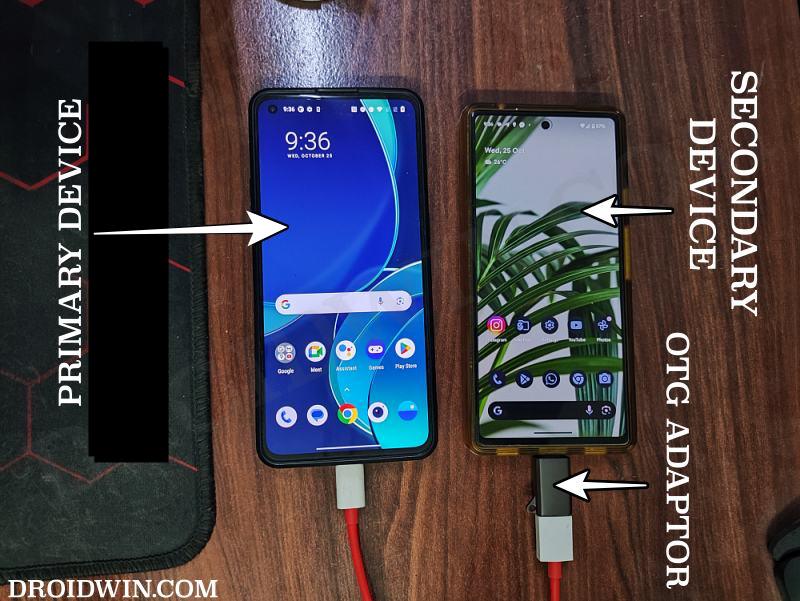
STEP 4: Set up working environment
- First off, connect the USB OTG adaptor to your second device.
- Likewise, plug in the USB Type A end to the OTG.
- On the other hand, plug the Type C end to your primary device.

- Now download and install the Bugjaeger app on your second device.
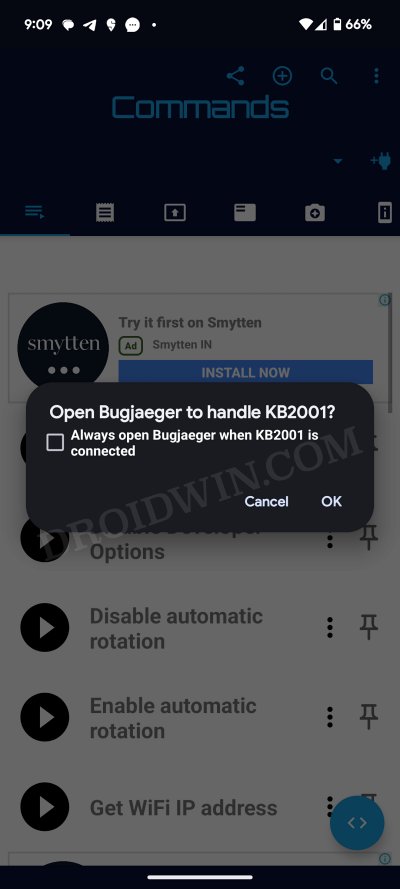
- Then launch the app and you’ll get a prompt “Open Bugjaeger to handle <device name>”. Tap OK.
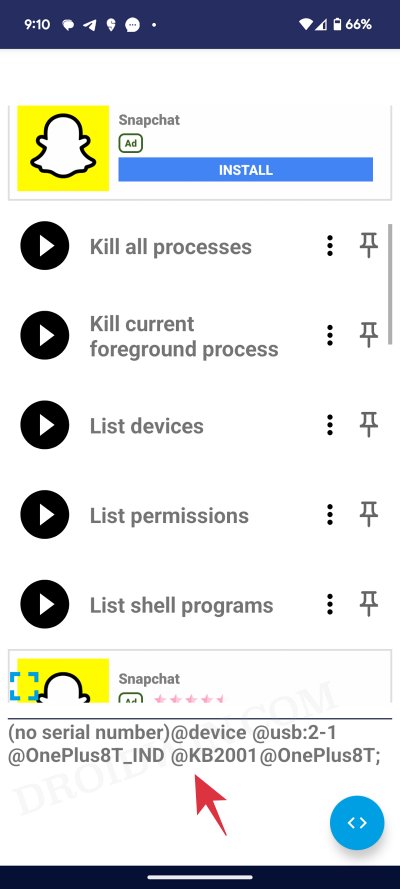
- Now from the Commands page of the app, tap on List Devices. Your primary device should be listed at the bottom.
- If that doesn’t happen, then unplug and replug the USB cable/OTG. You might have to do this a few times until you get the prompt/device name.
- Once that happens, go to the Fastboot tab and tap on Reboot Recovery. Your primary device will now boot to Recovery Mode.
- From the Recovery Mode, go to Apply Update > Apply from ADB. Your device will now boot to the Sideload Mode.

Perform ADB Sideload Without PC
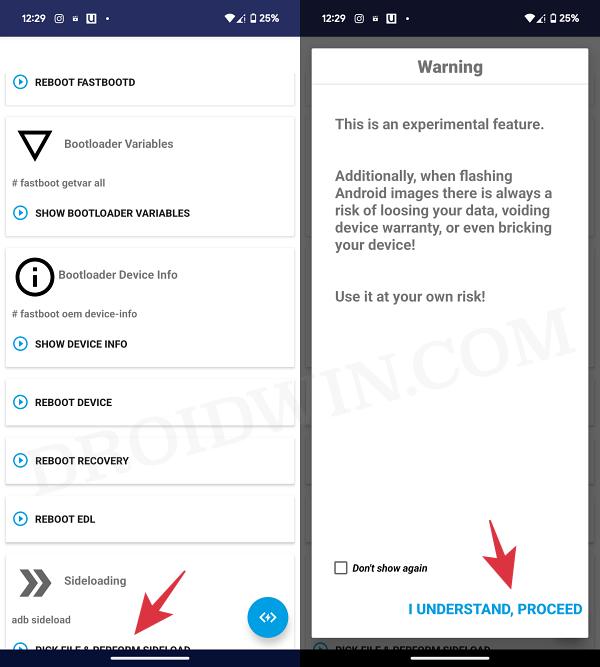
- From the Bugjaeger app, go to the Fastboot tab.
- Then select Pick file and perform a sideload.
- Now choose the downloaded ROM/firmware ZIP.
- The sideloading will now start. Once done, you’ll be notified of the same.
- You may then sideload other files [such as GApps] in a similar manner.
- Once done, simply unplug the OTG and reboot your device to the OS.
That’s it. These were the steps to perform an ADB sideload without using a PC. If you have any queries concerning the aforementioned steps, do let us know in the comments. We will get back to you with a solution at the earliest.


