In this guide, we will show you the steps to root your OnePlus 9RT via Magisk patched boot.img file. This OEM has picked up a rapid downfall trajectory as of late and is doing its every bit to make sure that it doesn’t end up making improvements of any sort. No, we aren’t exaggerating, it’s all facts that most of the OnePlus users might very well agree with. While it had already lost its flagship killer status, it put the final nail in the coffin by ditching the OxygenOS for ColorOS.
The ColorOS has already replaced HydrogenOS for the OnePlus 9RT, and it is only a matter of time (i.e. when Android 12 rolls out), before it does the same with OxygenOS as well. But keeping all these negatives asides, there’s still one aspect where it hasn’t seen a dent in its stature, and that is in the custom development. It is still among the most popular names in that domain, and the latest offering from OnePlus has further justified this statement.
In this regard, it is no denying the fact that the ability to gain administrative privileges is at the top of the priority queue for tech enthusiasts. From flashing mods to trying out a plentitude of tweaks, the possibilities stand endless. If you also echo this thought process, then this guide shall come in handy. In this tutorial, we will show you the detailed steps to root your OnePlus 9RT (running OxygenOS/ColorOS) via Magisk patched boot.img file. So without any further ado, let’s get started.
Table of Contents
How to Root OnePlus 9RT via Magisk Patched Boot

The below instructions are listed under separate sections for ease of understanding. Make sure to follow in the same sequence as mentioned. Droidwin and its members wouldn’t be held responsible in case of a thermonuclear war, your alarm doesn’t wake you up, or if anything happens to your device and data by performing the below steps.
STEP 1: Install Android SDK

First and foremost, you will have to install the Android SDK Platform Tools on your PC. This is the official ADB and Fastboot binary provided by Google and is the only recommended one. So download it and then extract it to any convenient location on your PC. Doing so will give you the platform-tools folder, which will be used throughout this guide to root your OnePlus 9RT via Magisk.
STEP 2: Download OnePlus 9RT OxygenOS/ColorOS Firmware
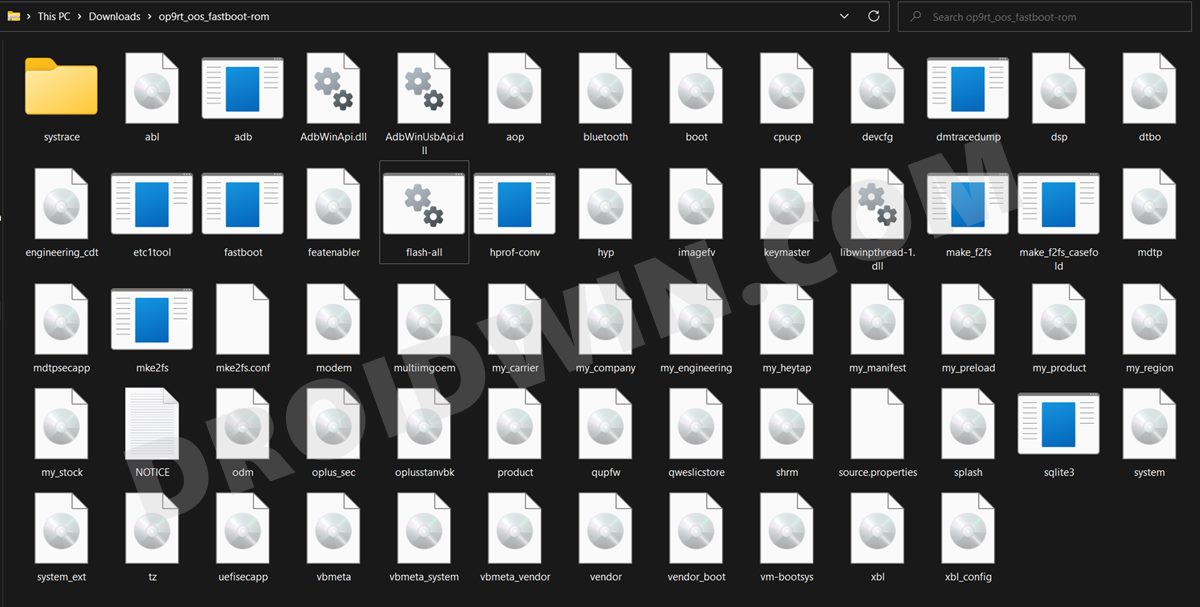
Next up, download the stock firmware based on Android 11 for your OnePlus 9RT device from the below link. At the time of writing, the official site of OnePlus hasn’t uploaded the firmware. But still, we have managed to grab hold of the OxygenOS 11 and ColorOS 12 firmware for your OnePlus 9RT from various sources, which you may get hold of from the below link. Just make sure to get the one that corresponds to your device’s build number:
OnePlus 9RT OxygenOS and ColorOS Firmware Collection: Download Link
STEP 3: Extract OnePlus 9RT Boot.img from Firmware
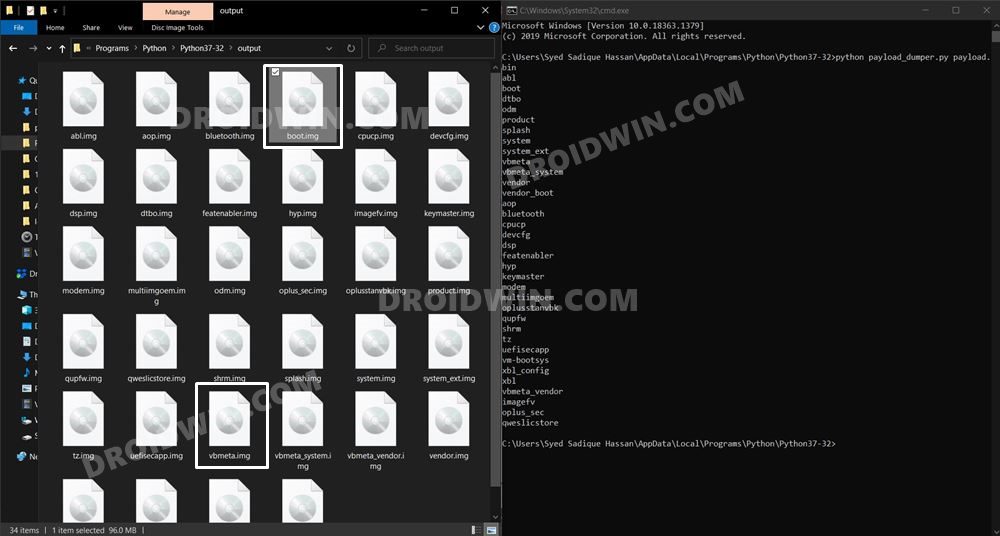
As far as the OxygenOS 11 firmware goes, we already have its Fastboot ROM. So just extract it and you will get the boot.img file. Then if we talk about the ColorOS 12, we have extracted the boot.img from the payload.bin, so you may directly download the one that corresponds to your device from below:
OnePlus 9RT Boot.img Files: Download Link
However, if you wish to manually extract the payload.bin file, then you check out our guide on How to Extract payload.bin and get stock boot image file.
STEP 4: Enable USB Debugging and OEM Unlocking
Next up, you will have to enable USB Debugging and OEM Unlocking on your device. The former will make your device recognizable by the PC in ADB mode. This will then allow you to boot your device to Fastboot Mode. On the other hand, OEM Unlocking is required to carry out the bootloader unlocking process.
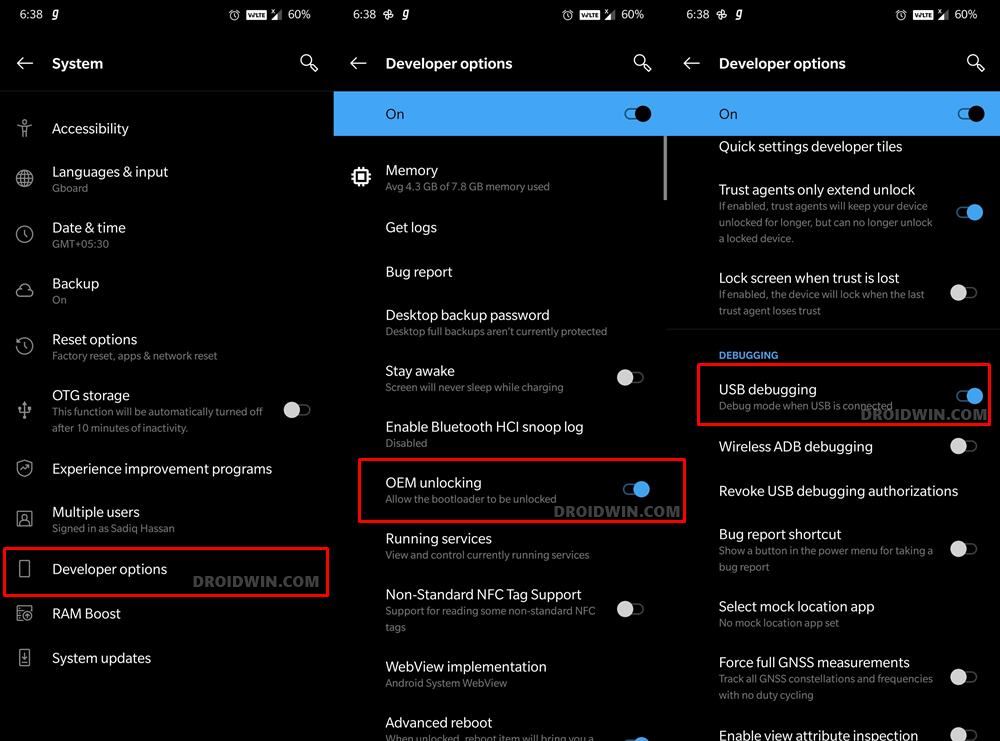
So head over to Settings > About Phone > Tap on Build Number 7 times > Go back to Settings > System > Advanced > Developer Options > Enable USB Debugging and OEM Unlocking.
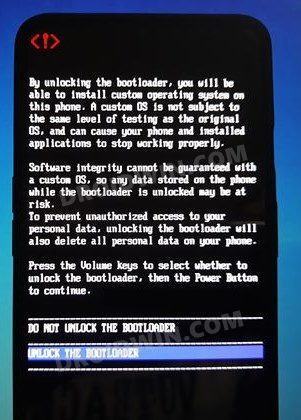
STEP 5: Unlock Bootloader on OnePlus 9RT
Next up, you will have to unlock the device’s bootloader as well. Do note that doing so will wipe off all the data from your device and would nullify its warranty as well. So if that’s well and good, then refer to our guide on How to Unlock Bootloader on OnePlus 9RT.
STEP 6: Patch OnePlus 9RT Boot.img via Magisk
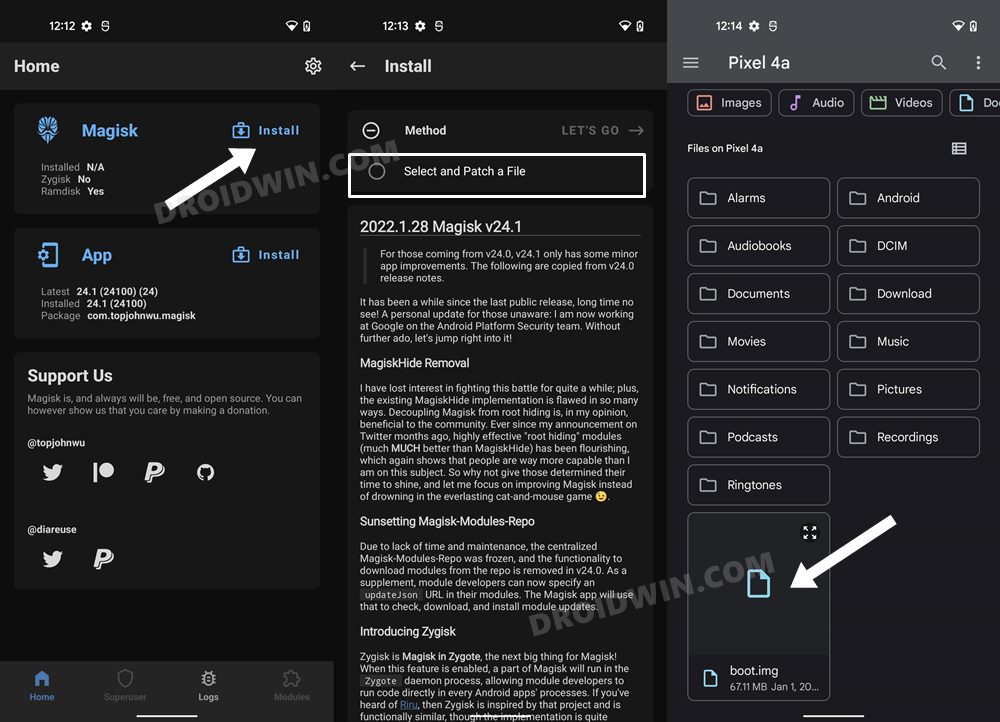
- Download and install the latest Magisk APK onto your device.
- Then launch it and tap on the Install button next to Magisk.
- After that, choose ‘Select and Patch a File’, navigate to the stock boot.img file, and select it.

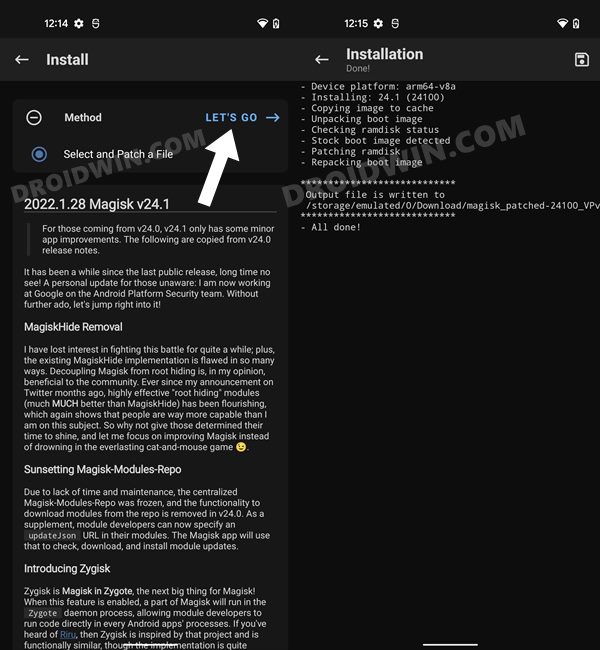
- Then tap on the Let’s Go button situated at the top right.
- The boot.img file will now be patched and placed under the Downloads folder on your device.
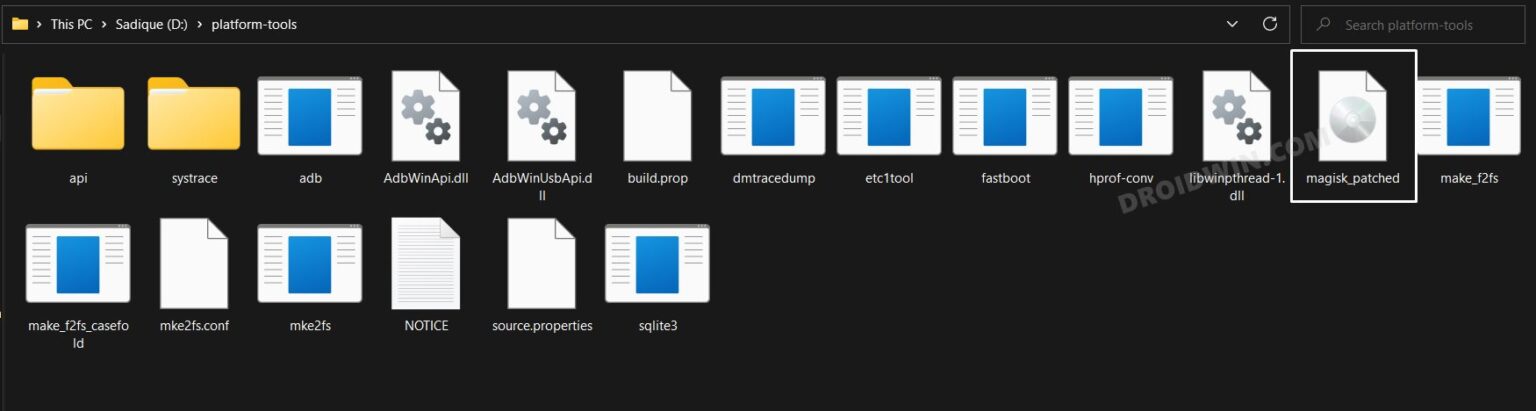
- You should transfer this file to the platform-tools folder on your PC. Also, rename it to magisk_patched. We will now be using this file to root your OnePlus 9RT via Magisk.
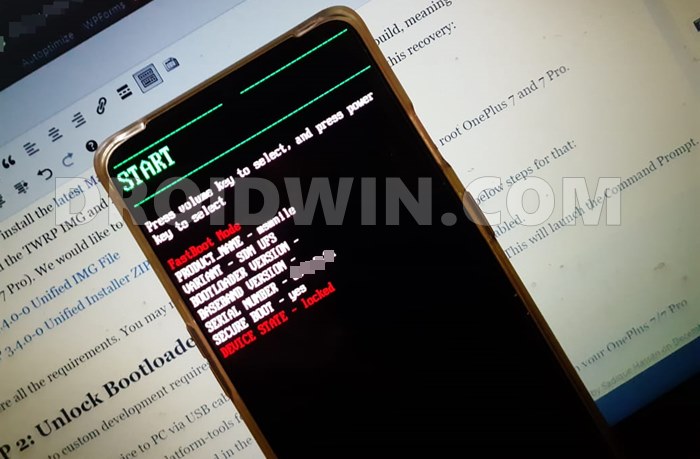
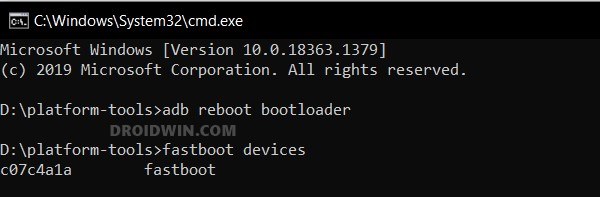
STEP 7: Boot OnePlus 9RT to Fastboot Mode
- Connect your device to the PC via USB cable. Make sure USB Debugging is enabled.
- Then head over to the platform-tools folder, type in CMD in the address bar, and hit Enter. This will launch the Command Prompt.
- Type in the following command in the CMD window to boot your device to Fastboot Mode
adb reboot bootloader
- Now type in the below command to verify the Fastboot Connection
fastboot devices
- If you get a device ID followed by the fastboot keyword, then the connection stands successful and you may now proceed ahead.
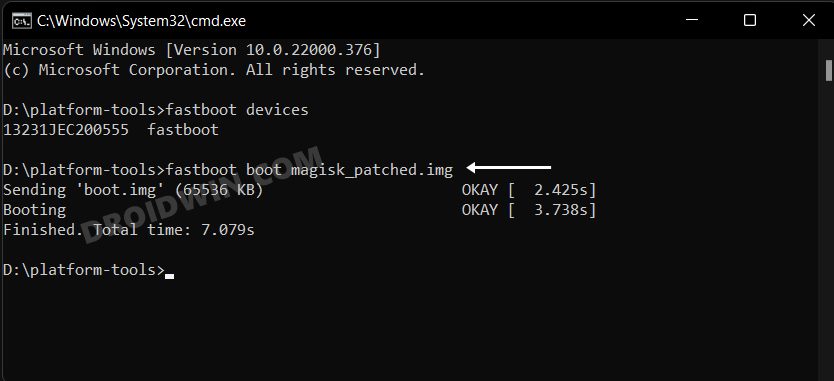
STEP 8: Boot OnePlus 9RT via Magisk Patched Boot.img
It is always recommended to first boot your device via the patched boot.img, rather than directly flashing it. This way you will be able to check if everything is working well or not. If everything is on the good side, then you may proceed to permanently root your OnePlus 9RT via Magisk. So use the below command to boot your OnePlus 9RT via Magisk patched boot.img and hence attain temporary root.
fastboot boot magisk_patched.img
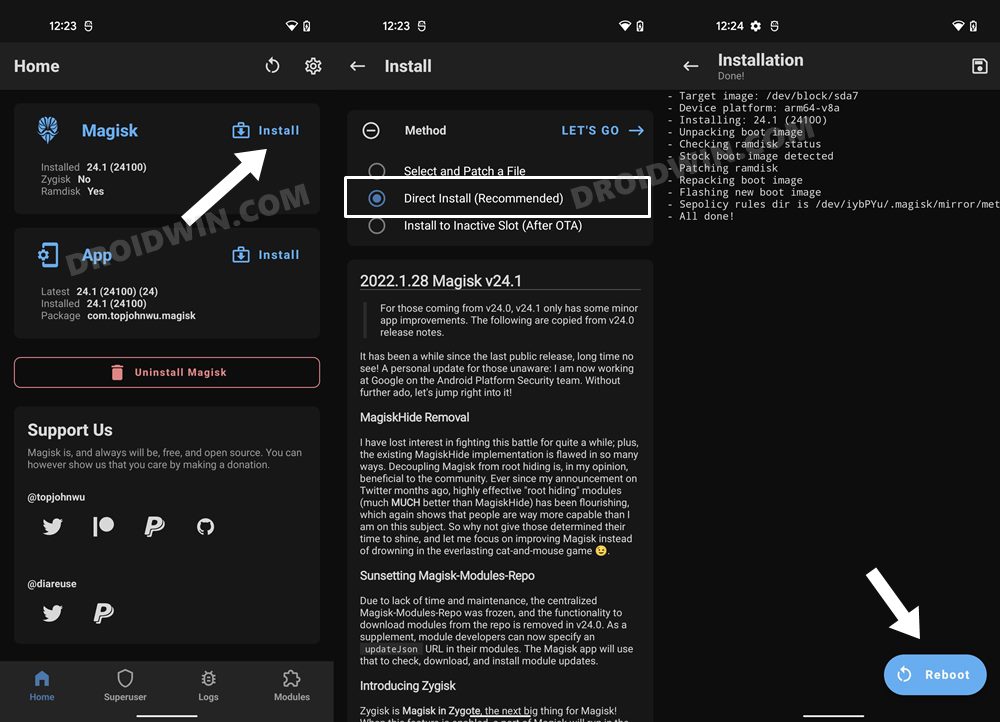
STEP 9: Permanent Root OnePlus 9RT via Magisk
Now that your device is booted without any issues with a temporary root, let’s now make this root permanent. So refer to the below instruction steps to try it out.
- To begin with, launch the Magisk Manager App.
- Then tap on Install > Direct Install (Recommended) and tap Let’s Go situated at the top-right.
- Once done, hit the Reboot button situated at the bottom right.
- That’s it, your device will now boot to the rooted OS.
So with this, we round off the guide on how you could root your OnePlus 9RT via Magisk patched boot.img. If you have any queries concerning the aforementioned steps, do let us know in the comments section below. We will get back to you with a solution at the earliest.