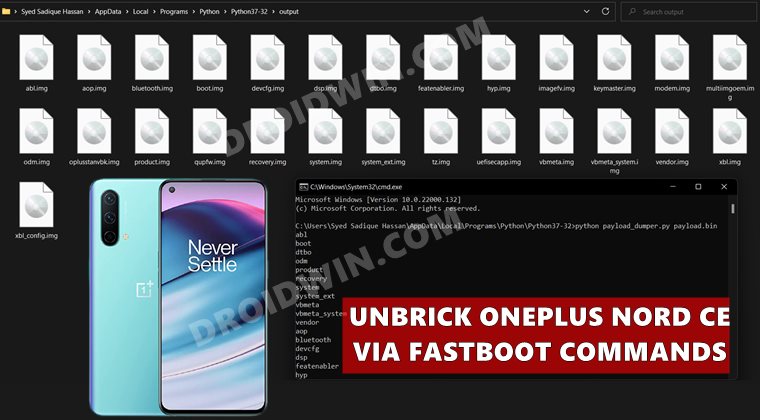
In this guide, we will show you the steps to restore the OnePlus Nord CE 5G device to stock via Fastboot Commands and hence unbrick it. There’s no denying the fact this OEM is perhaps the most active player in custom development. Once you bypass the sole restriction of a locked bootloader, there are a plethora of tweaks that you could welcome onto your device.
Right from flashing a custom ROM to installing a custom recovery like TWRP, there’s a lot to try out. Along the same lines, you could also gain access to the system partition by rooting your device via Magisk. This will then allow you to flash a plentitude of mods, such as Magisk Modules, Xposed Framework, Substratum Theme, Viper4Android. However, this is just one side of the coin.
These tweaks do bring in quite a few risks as well. Among them, the device going into a bootloop or getting softbricked is the most common phenomenon. Fortunately, there’s an easier way out to rectify this issue. And this guide shall make you aware of just that. Given here are the detailed instruction steps to restore the OnePlus Nord CE 5G device to stock via Fastboot Commands and hence unbrick it.
Table of Contents
How to Restore OnePlus Nord CE 5G to Stock via Fastboot Commands
The below instructions are listed under separate sections for ease of understanding. Make sure to follow in the exact same sequence as mentioned. Droidwin and its members wouldn’t be held responsible in case of a thermonuclear war, your alarm doesn’t wake you up, or if anything happens to your device and data by performing the below steps.
STEP 1: Install Android SDK

First and foremost, you will have to install the Android SDK Platform Tools on your PC. This is the official ADB and Fastboot binary provided by Google and is the only recommended one. So download it and then extract it to any convenient location on your PC. Doing so will give you the platform-tools folder, which will be used throughout this guide.
STEP 2: Download OnePlus Nord CE 5G Stock Firmware
- Next up, grab hold of your device’s official firmware from OnePlus’ official site [Direct Link].
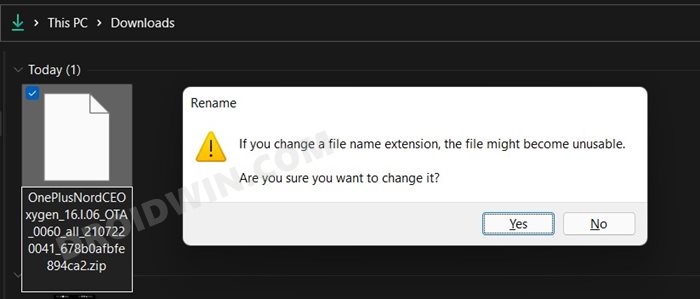
- Once downloaded, you will notice that the firmware is in JAR format. So right-click on it, select Rename, and change the extension to ZIP. You will get a confirmation prompt, click YES.

- Now extract this ZIP firmware via WinRAR/7ZIP, etc.
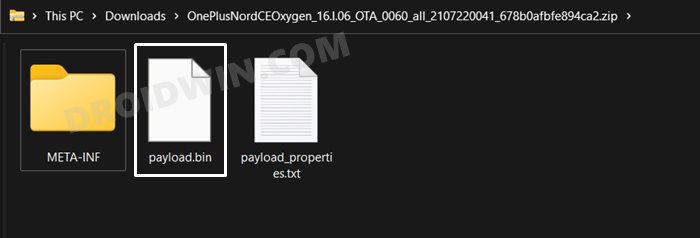
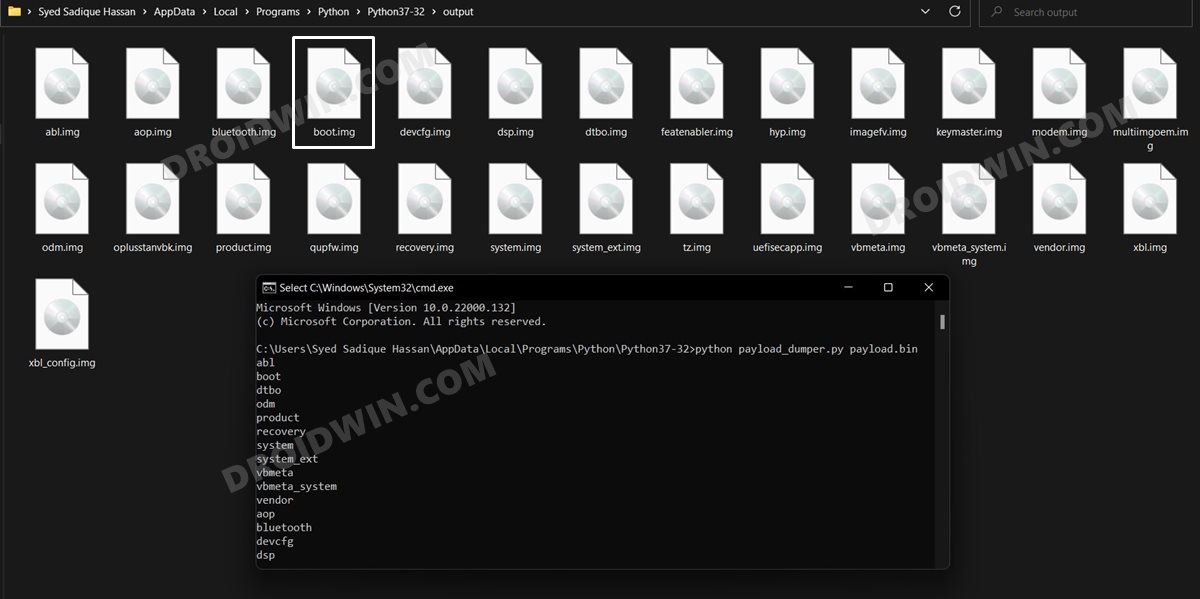
STEP 3: Extract Payload.bin and Get Fastboot IMG Files
OnePlus packs all its partition files inside the payload.bin file. So you will have to extract this payload.bin file to get hold of all the IMG files, such as boot.img, system.img, recovery.img, and the likes. For that, please refer to our detailed guide on How to Extract OnePlus payload.bin.
STEP 4: Boot Bricked Nord CE 5G to Fastboot Mode
You will now have to boot your soft-bricked/boot-looped device to Fastboot Mode. Here’s how it could be done:
- To begin with, power off your device.
- Then press and hold the Power and Volume Keys together.
- Keeping both these keys pressed, connect your device to the PC via USB cable.
STEP 5: Flash Stock Firmware on OnePlus Nord CE 5G via Fastboot Commands
- Head over to the platform-tools folder, type in CMD in the address bar, and hit Enter. This will launch the Command Prompt.
- Now type in the below command in the CMD window to completely wipe your device:
fastboot -w
- Once that is done, you may start off by flashing the Fastboot ROM files via the below commands. Make sure to execute one command at a time, don’t copy-paste all at once. fastboot flash boot boot.img
fastboot flash dtbo dtbo.img
fastboot flash modem modem.img
fastboot flash recovery recovery.img
fastboot –disable-verity flash vbmeta vbmeta.img
fastboot –disable-verity flash vbmeta_system vbmeta_system.img
- One-half of the commands have been flashed in the Fastboot Mode, the other half will now be flashed in the FastbootD Mode. So use the below command to boot your device to FastbootD Mode
fastboot reboot fastboot
- Your device will now boot to FastbootD, you may now flash the rest of the commands:
fastboot flash abl abl.img
fastboot flash aop aop.img
fastboot flash bluetooth bluetooth.img
fastboot flash devcfg devcfg.img
fastboot flash dsp dsp.img
fastboot flash featenabler featenabler.img
fastboot flash hyp hyp.img
fastboot flash imagefv imagefv.img
fastboot flash keymaster keymaster.img
fastboot flash oplusstanvbk oplusstanvbk.img
fastboot flash odm odm.img
fastboot flash qupfw qupfw.img
fastboot flash tz tz.img
fastboot flash uefisecapp uefisecapp.img
fastboot flash xbl xbl.img
fastboot flash xbl_config xbl_config.img
fastboot flash system system.img
fastboot flash vendor vendor.img
fastboot flash product product.img
- Once that is done, you could now reboot the device back to Fastboot Mode from the current FastbootD Mode. Use the below command for that:
fastboot reboot bootloader
- Finally, you may now reboot the device to the OS via the following command:
fastboot reboot

That’s it. These were the steps to restore your OnePlus Nord CE 5G device to stock via Fastboot Commands and hence unbrick it. If you have any queries concerning the aforementioned steps, do let us know in the comments.
Moreover, if any of the partition files show up an error during the flashing process, then please let us know the name of that file as well as the error message that you got. It will help us in quickly rectifying the issue.


Andy
Hi – struggling trying to fix my CE 5G lots of things in the tutorial dont work for me….firstly this command
fastboot –disable-verity flash vbmeta vbmeta.img
Then this one
fastboot –disable-verity flash vbmeta_system vbmeta_system.img
And finally this one….
fastboot reboot bootloader
So, at this point i cant go any further – thanks very much if you can reply…
Ben
Hey! I checked the command syntax for fastboot commands here:
The command for vbmeta.img and vbmeta_system.img are missing one “-“.
For me the following commands worked:
fastboot –disable-verity flash vbmeta vbmeta.img
fastboot –disable-verity flash vbmeta_system vbmeta_system.img
Andy
ok – so ive got a little further….i needed the latest SDK tools to carry out the last command, although the first 2 didnt work but if i took out the “disable-verity” out of each command they did work….i ran through the commands but on flashing some of them “system” for example i got this error…
FAILED (remote: ‘Not enough space to resize partition’)
Andy
Hi there – when i execute this command…
fastboot –disable-verity flash vbmeta vbmeta.img
i get a return – fastboot: unknown option — d
Could you help please? Thanks very much and thanks for taking the time to put this up….at the moment ive not been able to recover my CE 5G.
OBM
At last flash vendor vendor.img
The xommand saying not enough space to resize partition