In this guide, we will show you six different methods to stop sharing folders on your Windows 11 PC. The Redmond giant allows you to share various different types of files and folders over the network. It’s along the obvious lines that you would only share the contents with a trusted party and would also only give access to the folder that doesn’t have your confidential data.
However, even then, there might be a few instances wherein you would want to stop sharing a particular file or folder. Well, you’ll be glad to know that there exist six different methods through which you could carry out the said task. And in this guide, we will make you aware of all those six approaches. So without further ado, let’s get started with the methods to stop sharing folders on your Windows 11 PC.
Table of Contents
How To Stop Sharing Folders In Windows 11 [6 Methods]

It is recommended that you go through each of the below-mentioned workarounds and then try out the one that is in sync with your requirement. So on that note, let’s begin.
Via Right-Click Menu
- Right-click on the folder that you wish to stop sharing.
- Then select Give access to followed by Remove access.

- After that, click Stop Sharing in the Network sharing pop-up.

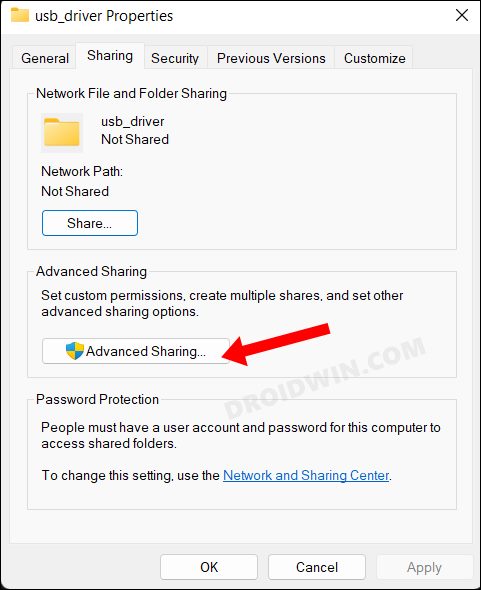
Using Properties Menu
- Right-click on the folder and select Properties.
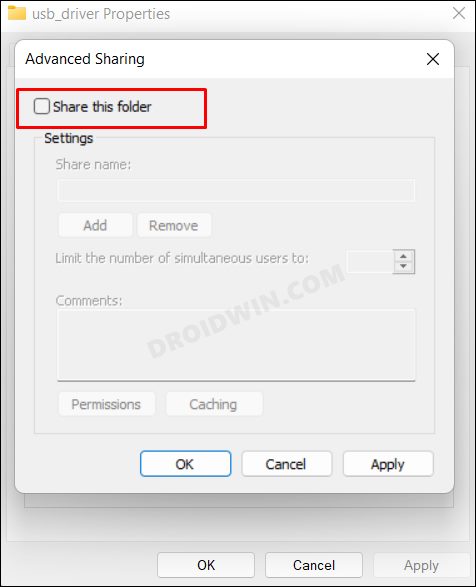
- Then go to the Sharing tab and click on Advanced Sharing.
- Now uncheck Share this folder and hit OK to confirm.
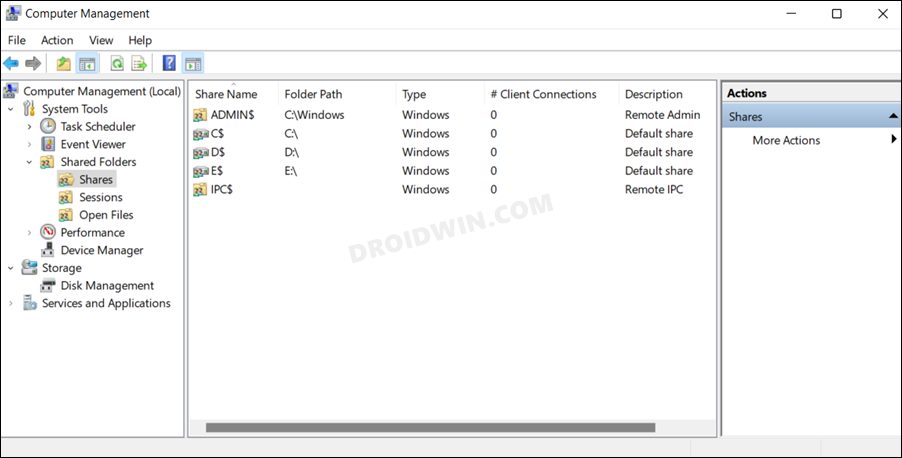
Using
- Launch Run via Windows+R and type in the below command
- This shall launch
- Now go to the following location from the left-hand side
System Tools > Shared Folders > Shared
- After that, right-click on the folder and select Stop Sharing.
- Finally, click YES in the confirmation dialog box to stop sharing folders in Windows 11.
Via Control Panel
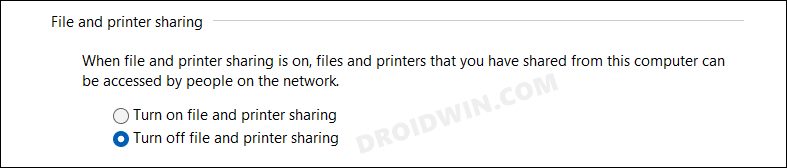
- Launch Control Panel and head over to the following location
Network & Internet > Network and Sharing Center > Change advanced sharing settings
- Then scroll to the File and printer sharing section.
- Finally, select Turn off file and printer sharing and click on Save changes.
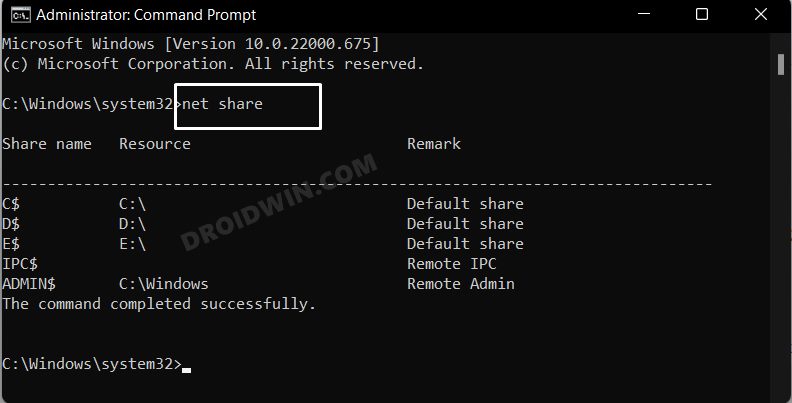
Via Command Prompt
- Launch CMD as an admin and type in the below command. It will bring up a list of all the shared folders.
net share
- Then execute the below command to remove the folder from being shared [replace Folder-Name accordingly].
net share Folder-Name /delete - Note that CMD will say that the folder will be deleted, however, that is not the case. It will just be stopped sharing.
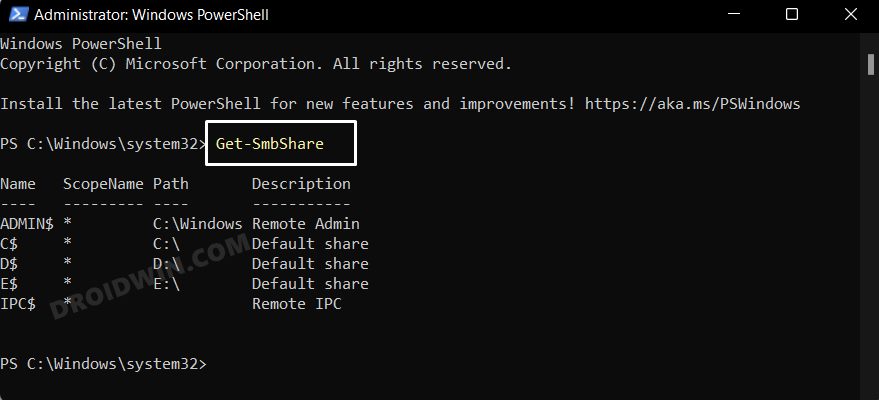
Via PowerShell
- Launch CMD as an admin and type in the below command. It will bring up a list of all the shared folders.
Get-SmbShare
- Then execute the below command to remove the folder from being shared [replace Folder-Name accordingly, but keep it in double quotes].
Remove-SmbShare -Name "Folder-Name"
- It will bring up a confirmation prompt, type in A and hit Enter to select “Yes to All”.
That’s it. These were the six different methods through which you could stop sharing folders on your Windows 11 PC. If you have any queries concerning the aforementioned steps, do let us know in the comments. We will get back to you with a solution at the earliest.
- Cannot Delete File/Folder in Windows 11: How to Fix
- How to Block Files, Folders, and Apps from being accessed in Windows 11
- Disable Quick Access in File Explorer in Windows 11
- Windows could not automatically detect this network’s proxy settings [Fix]


