In this guide, we will show you the steps to mount your USB OTG formatted as exFAT on your Android device. FAT32 is an older file system and falls behind in efficiency as compared to exFAT. However, it still tends to offer greater compatibility and support for other operating systems in comparison with exFAT.
With that said, since the exFAT drives are faster at writing and reading data, it has become the go-to choice for many users. However, some users are having a tough time in mounting their USB OTG which has been formatted as exFAT on their Android device. If you are also on the same page, then this guide shall help you out. Follow along for the fix.
How to Mount USB OTG Devices formatted as exFAT on Android

- To begin with, your Android device needs to be rooted [Read: How to Root Android Devices via Magisk Patched Boot].
- Likewise, you will need to have a custom kernel that comes with exFAT FS Support.
- You could check out your device’s XDA page for such kernels [Pixel 6/Pro users could try out the Kirisakura Kernel].
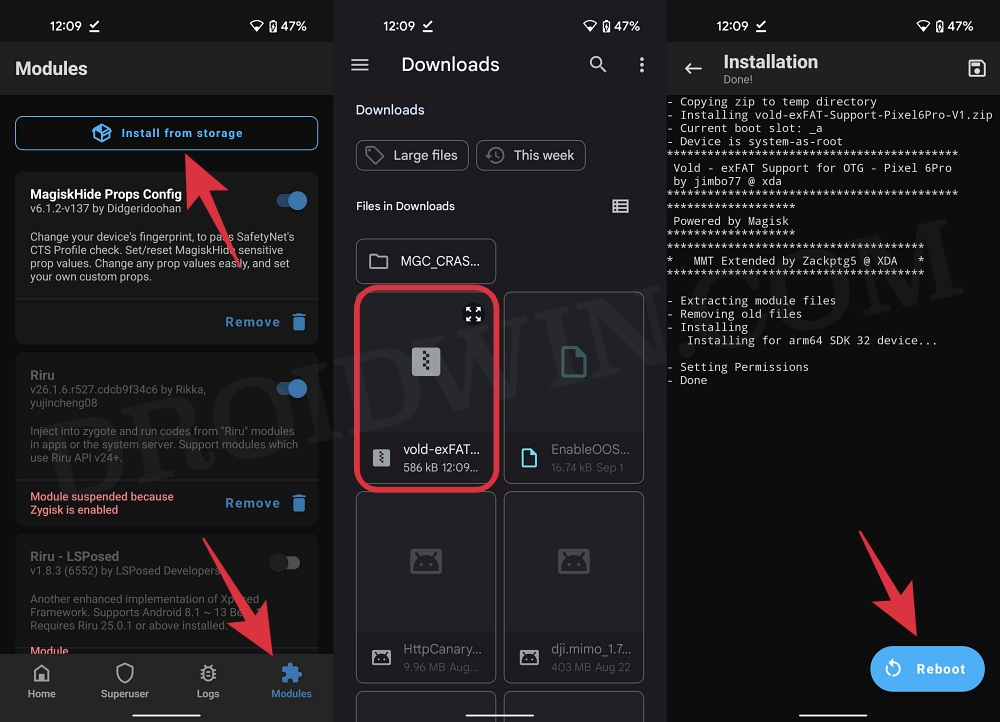
- Now download the vold-exFAT OTG Support Magisk Module. [Credits: XDA Recognized Contributor jimbo77].

- Then launch the Magisk app, go to the Modules tab, and tap on Install from Storage.
- Select the magisk module and it will be subsequently installed on your device.
- Once done, hit the Reboot button that appears at the bottom right. That’s it.
Once your device reboots, you will now be able to mount your USB OTG formatted as exFAT on your Android device. So on that note, we round off this guide. If you have any queries concerning the aforementioned steps, do let us know in the comments. We will get back to you with a solution at the earliest.


