In this tutorial, we will be discussing one of the most frequently committed error by the tech-holics. First off, let me explain this statement “Flash Custom ROM After Wiping Internal Storage Without SD Card or OTG”. The thing is many users end up wiping their device’s Internal Storage by mistake (or maybe as a requirement to decrypt their device). But they don’t realize that the custom ROM was placed right inside the Internal Storage.
Since the system partition was already wiped, and now you have wiped the Internal Storage, you are left with no OS! The issue only intensifies further when your device doesn’t have a Memory Card or OTG support. But fret not, there is still a pretty nifty workaround that will allow you to transfer and flash the desired ROM onto your device, without making use of OTG or Memory Card. In this guide, we will help you achieve just that. Let’s get on with the guide.
TWRP GUIDES
- How to Install OTA Updates in Rooted Android Device
- How to Permanently Install TWRP without TWRP ZIP File (only using TWRP.img file)
- Root Android Devices Without TWRP Recovery
- How to Fix TWRP Error 7 (While Flashing Custom ROM via TWRP)
Table of Contents
How to Flash Custom ROM After Wiping Internal Storage
One of the biggest perks of having an OS like Android is its open-source ecosystem. After you have bypassed the most critical restriction and unlocked the device’s bootloader, then you have literally opened the floodgates to a plethora of modifications. From trying out tons of mods, Magisk Modules, Xposed Framework, and Substratum Themes to gaining administrative privileges, the possibilities are endless.
Along the same lines, you could also gain administrative privileges by rooting your device via Magisk with or without TWRP. Apart from the root, another reason why people prefer to unlock the device’s bootloader is to enjoy an altogether new OS based on Android. In other words, to try out custom ROMs like LineageOS, Pixel Experience stands among the most important why people unlock their devices in the first place. However. flashing a Custom ROM is no easy task.
There are quite a few requirements that you need to qualify. Just a slight mistake and you might end up with a boot-looped or bricked device. Well, nowadays you could easily unbrick any Qualcomm device via EDL mode, but let’s keep that aside as of now. In this tutorial, we will be discussing how you could flash a custom ROM after wiping the Internal Storage, without using SD Card or OTG. Here are all the required instructions for the same.
STEP 1: Boot to TWRP (If not done already)
To begin with, your device should be booted to TWRP. For most of the users, that should already be the case. If not, your device might be booted to Fastboot. Even if that is not the case, then it would be in a bootloop state. Your ultimate aim is to boot your device to TWRP.
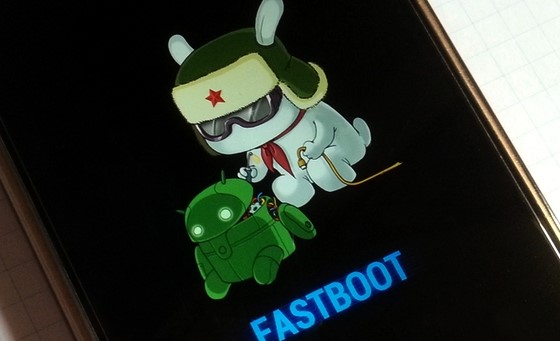
- If your device is in Fastboot, then follow the below steps:

Fastboot Mode in Xiaomi - Transfer the TWRP Recovery IMG file to the platform-tools folder (where all the ADB and Fastboot files are present). It is recommended to rename the recovery to twrp (the complete name will then be twrp.img).
- Now connect your device to PC via USB cable.
- Inside the platform-tools folder, type in CMD in the address and hit Enter. This will launch the Command Prompt.
- Type in the below command in that CMD window to boot your device to TWRP Recovery:
fastboot boot twrp.img

On the other hand, for a bricked device, you could use the device-specific hardware key combinations to boot your device to recovery. On some devices, it might reboot to stock recovery, maybe due to corrupt recovery or boot partition. In that case, you should consider rebooting to fastboot/bootloader mode via hardware keys and then use the fastboot method given above. If nothing works out, then you may ultimately have to take the EDL route (Xiaomi devices, OnePlus devices, Realme devices). Once booted to TWRP, you may proceed with the next step to Flash Custom ROM After Wiping Internal Storage Without SD Card or OTG.
STEP 2: Wipe Partitions
Now that you have booted to TWRP Recovery, you will have to wipe the device partitions. If you have already done so before, then you could this step and head over to the next one. Anyways, here are the required steps to wipe the partitions:
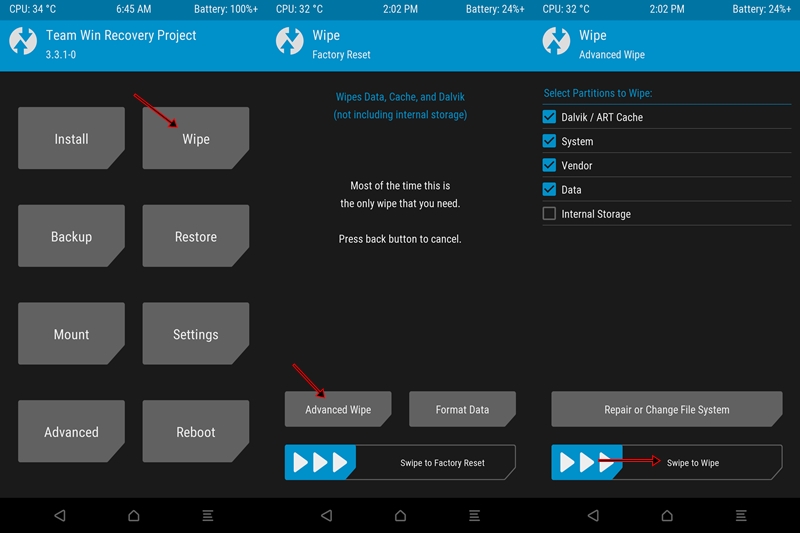
- From the TWRP, head over to Wipe. Then tap on Advanced Wipe.
- Select Dalvik Cache, Data, and System. If you are facing encryption issues as well, then you “will” have to wipe Internal Storage as well. Otherwise, leave it unticked.
- Once the selection has been made, perform a right swipe to Wipe the selected partitions.
Now that the wiping of Internal Storage and other such partitions have been done, its time to Flash the Custom ROM via TWRP. Here is what needs to be done for that.
Magisk Guides
- [GUIDE] Flash ROMs/Magisk/TWRP/Kernels on A/B Partition Devices
- Everything About Magisk- Manager, Modules, and More
- Best Magisk Modules of 2020 [PART-1]
- [3 METHODS] Unroot any Android Device-Uninstall Magisk
STEP 3: Transfer and Flash Custom ROM via TWRP
You will now have to transfer the custom ROM, that you are about to flash, from your PC to device. For that, one of the in-built features of TWRP will come in handy. Follow the below steps for that:
- To begin with, transfer the custom ROM file to the platform-tool folder. We would suggest you rename it to rom. The complete name will then be rom.zip.
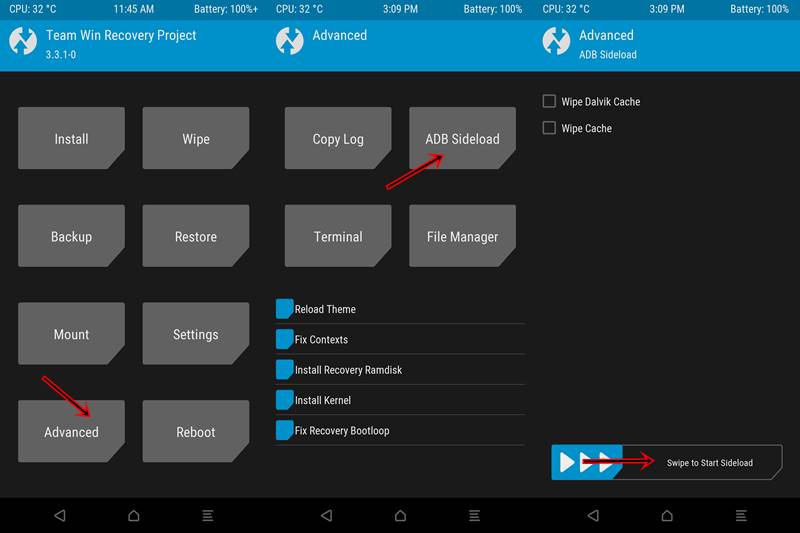
- Then head over to the Advanced section of TWRP and go to ADB Sideload.
- Perform a right swipe on the Swipe to Start Sideload button.
- At this instance, go to the Command Window that you have opened inside the platform-tools folder. Or re-open it, not an issue.
- Then type in the below command to flash the Custom ROM onto your device:
adb sideload rom.zip
- Now the ROM will be transferred from your device to PC and the installation process will start on the TWRP Recovery.
- Once that is done, you may reboot your device to Android System. For that, you should see the option to do so right from there only. If not, head over to Reboot and tap on System.
Concluding Remarks
With this, we conclude the guide on how to flash custom ROM after wiping Internal Storage without using SD Card or OTG. Do keep in mind that we have only temporarily booted the device to TWRP and not permanently flashed it. Because at that point in time, the permanent flash wasn’t the recommended option.
Now that your device is up and running, you may now boot to TWRP using IMG and permanent flash the TWRP ZIP onto the boot partition (A/B partition devices) or the recovery partition. On that note, we round off this guide. If you have any queries concerning the aforementioned steps, do let us know in the comments section.
A/B Partition Guides
- [GUIDE] Flash ROMs/Magisk/TWRP/Kernels on A/B Partition Devices
- How to Flash Various Files in A/B Partition Devices
- Install Custom ROMs on any Android Device- Includes A/B Partition
- How to Fix FAILED (remote: unknown command) Error


Vignesh
I wiped internal storage by mistake. I installed lineage os after that. But now play store is not installing apps, says not enough space. I think it’s because I wiped internal storage. How can I fix this?
Alex Mason
will this work even if i have orangefox recovery?
egedemete
Probably will. Unless you use stock recovery, which will not work.