In this guide, we will show you the steps to manually install the Kernel Sh in the service.d path. For tech enthusiasts, custom kernels are among the most powerful tools that they could have in their arsenal. From the most basic functions of maintaining a balance between performance, usability, and battery life to performing tweaks for overall improved IO scheduling latencies and Task scheduler tweaks for improved UI responsiveness, these kernels could do it all.
As far as their flashing is concerned, there are two major approaches that one could opt for- either via a Kernel Flasher app or by manually installing the Kernel Sh in the service.d path. While the former literally requires a couple of taps, the latter one is quite complicated. From finding the actual location of service.d path to giving it the correct permission, the steps might be a little bit complicated. And that is completely understandable. Well, this is where this guide will help you out. Follow along.
How to Manually Install Kernel Sh in the service.d path

Droidwin and its members wouldn’t be held responsible in case of a thermonuclear war, your alarm doesn’t wake you up, or if anything happens to your device and data by performing the below steps.
- To begin with, root your device via Magisk.
- Then download and install a root-supported File Manager app.
- Now download and extract the custom kernel of your choice.
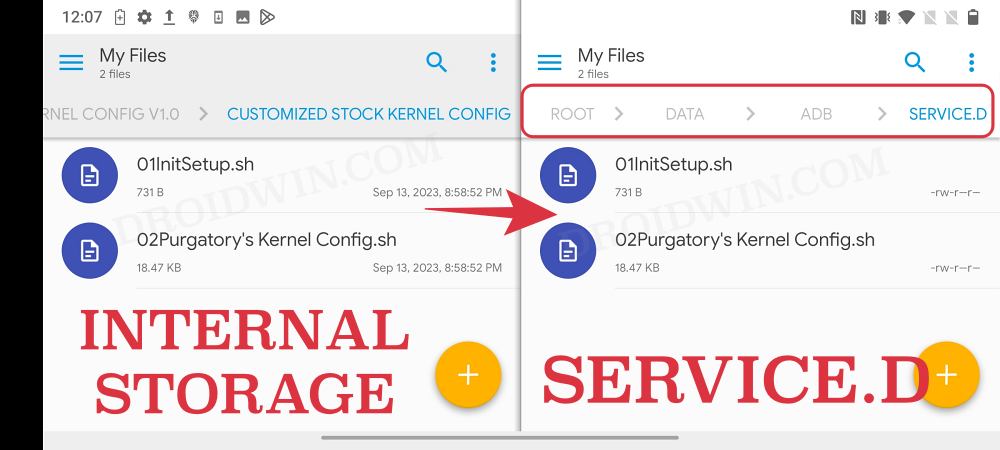
- You’ll get a [or a couple of] sh files. Transfer them to this location:
/data/adb/service.d

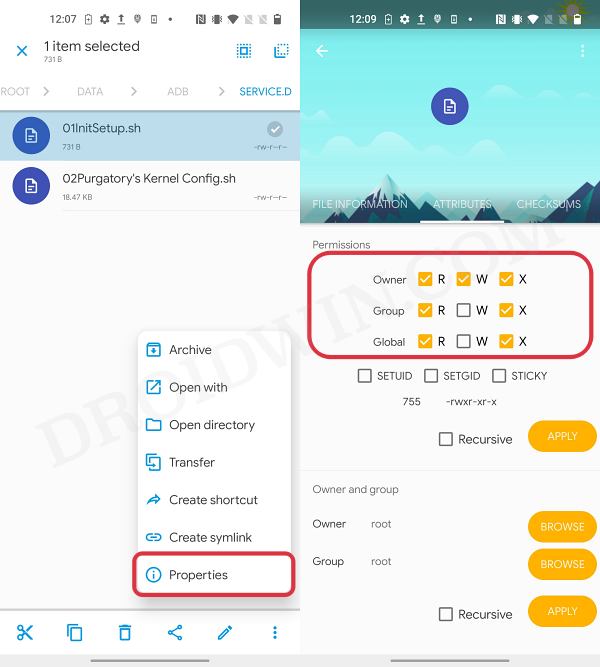
- Then change their permissions accordingly. If it asks for 755, then you’ll have to set it as follows:
Owner: RWX
Group: RX
Global: RX
That’s it. These were the steps to manually install the Kernel Sh in the service.d path. If you have any queries concerning the aforementioned steps, do let us know in the comments. We will get back to you with a solution at the earliest.


