In this guide, we will show you the steps to root your Android device via KernelSu. Up until now, you could gain administrative privileges by patching and flashing the boot.img/init_boot.img or directly flashing the Magisk ZIP via a custom recovery. Now there has been a newer approach to get this job done- and this involves taking the kernel route.
Table of Contents
What is KernelSU
KernelSU is a root solution for Android devices that beholds a Generic Kernel Image, it works in kernel mode and grants root permission to applications directly in the kernel space. Similar to how you could flash a single GSI file to any project treble device, similarly you will be able to root your device via a generic kernel image.
There is just one requirement for this tweak to work- your device should have a GKI Kernel [we will show you how to check that as well]. Moroever, since this is kernel-based aka it works in kernel mode, so it can easily provide a kernel interface that will allow you to open floodgates to a plethora of tweaks such as adding a hardware breakpoint to any process in kernel mode
The Prerequisites to Root Android Device via KernelSU
Before proceeding ahead, please take a backup of all the data on your device. Droidwin and its members wouldn’t be held responsible in case of a thermonuclear war, your alarm doesn’t wake you up, or if anything happens to your device and data by performing the below steps.
STEP 1: Check if Device has GKI Kernel
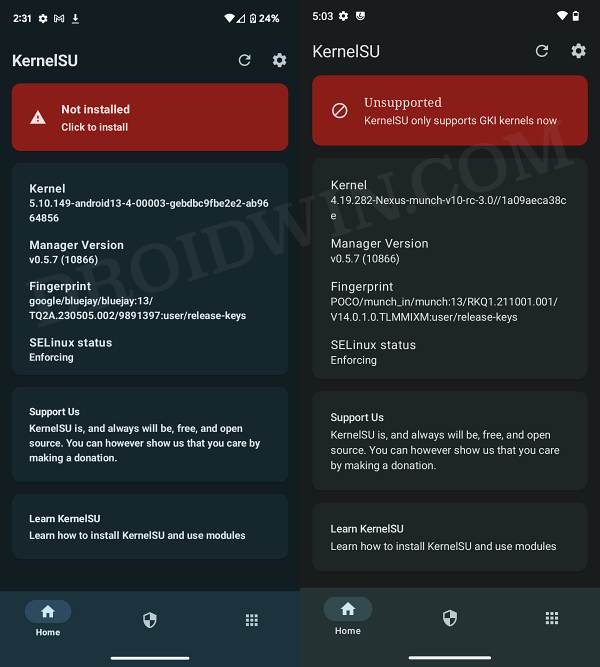
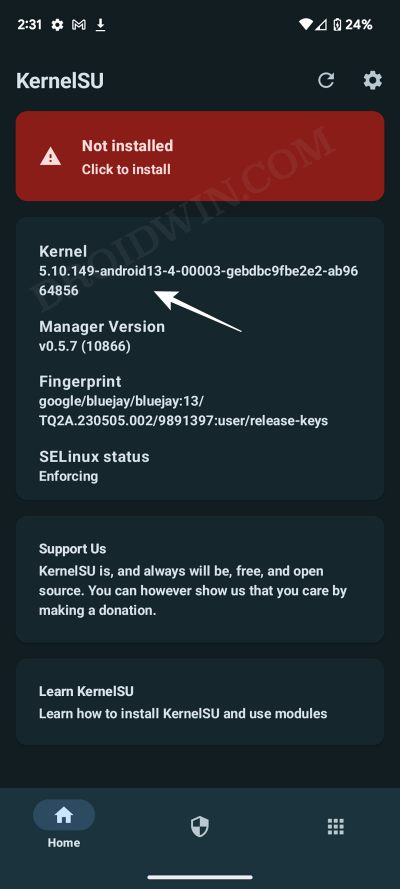
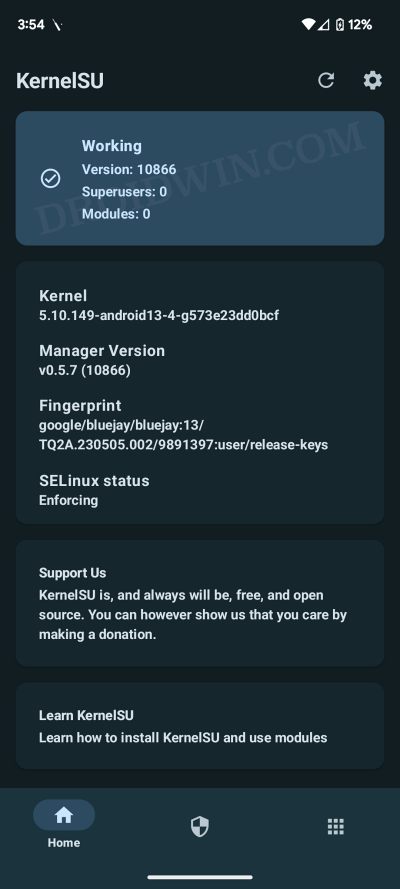
- First off, verify if your device has a GKI Kernel or not.
- To do so, download and install the KernelSU app from GitHub. Then launch it.

Left: Yes | Right: No - If it shows Not Installed, then you could root your device via KernelSU.
- However, if it shows Unsupported, then your device cannot be rooted via KernelSU.
STEP 2: Download Android SDK Platform Tools

Next up, you have to install the Android SDK Platform Tools on your PC. This is the official ADB and Fastboot binary provided by Google and is the only recommended one. So download it and then extract it to any convenient location on your PC. Doing so will give you the platform tools folder, which will be used throughout this guide.
STEP 3: Enable USB Debugging and OEM Unlocking
Next up, you will also have to enable USB Debugging and OEM Unlocking on your device. The former will make your device recognizable by the PC in ADB mode. This will then allow you to boot your device to Fastboot Mode. On the other hand, OEM Unlocking is required to carry out the bootloader unlocking.
![]()
So head over to Settings > About Phone > Tap on Build Number 7 times > Go back to Settings > System > Developer Options > Enable USB Debugging and OEM Unlocking.
STEP 4: Find the Kernel Module Interface
First off, let’s find the kernel module interface for the kernel installed on your device. All the kernels that have the same KMI are cross-compatible [hence the term Generic in GKI Kernel].
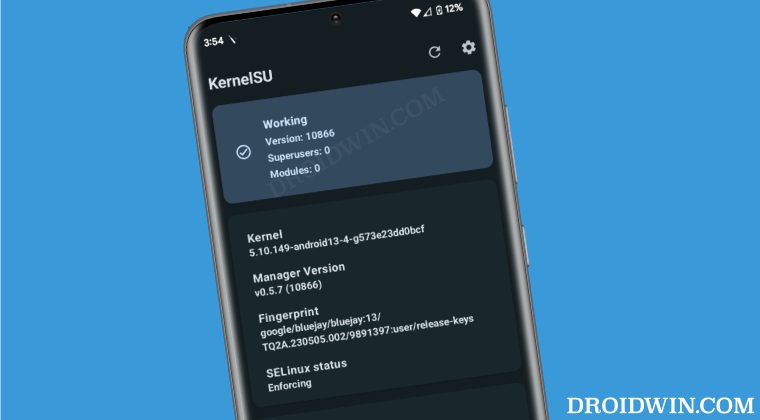
- Launch the KernelSU app and check out the Kernel Version.
- You could also verify the same from Settings > About Phone > Kernel version.
- It should be in the following format, where w.x-zzz-k will be the KMI version.
KernelRelease :=
Version.PatchLevel.SubLevel-AndroidRelease-KmiGeneration-suffix
w .x .y -zzz -k -something
- For example, on my device, the Kernel Version is 5.10.149-android13–4-00003-gebdbc9fbe2e2.
- So the KMI version for my device will be 5.10-android13-4.
NOTE: The SubLevel in the kernel version is not part of the KMI. So 5.10.137-android13-4-gebdbc9fbe2e2 has the same KMI as 5.10.149-android13-4-gebdbc9fbe2e2.
Install KernelSU via Generic Boot.img and Root Android
This is the generic method of installing and rooting your Android device via KernelSU and is supported across all GKI kernels. On the flip side, it is the lengthiest and most technical method out of the three out there.
Automatic Approach
This is for those sets of users who are aware of the kernel compression format of your official boot.img [such as gz for Xiaomi devices]. if you are;t aware of this, then please try out the manual approach
- First off, download the already patched boot.img corresponding to your device’s GKI from here.
- For example, if your KMI is 5.10.149-android13-4, then download the one which corresponds to this format:
android13-5.10.149_yyyy-MM.boot-<format>.img - Here, the format is the kernel compression format of your official boot.img [for example, Xiaomi usually uses gz].
- Once you have got the boot.img, transfer it to the platform-tools folder.
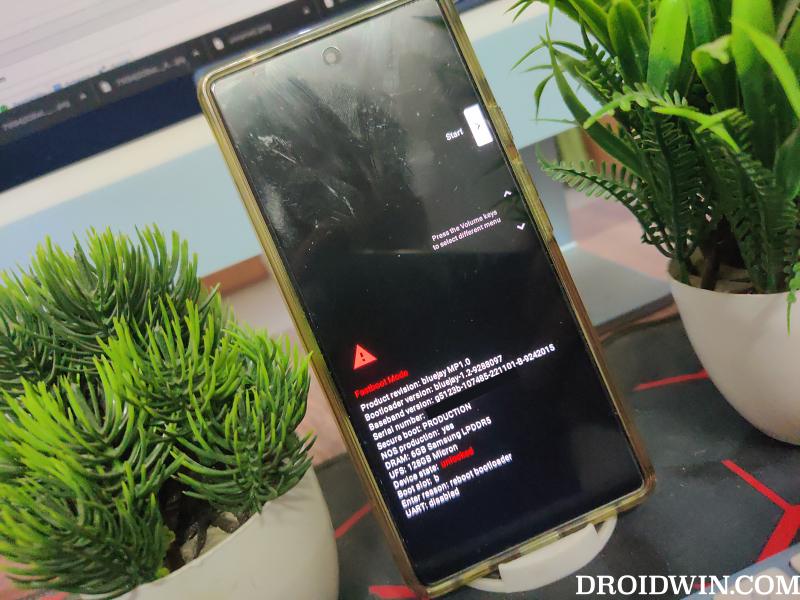
- Now open CMD inside platform tools and type in the below command to boot your device to the Fastboot Mode
adb reboot bootloader
- Then execute the below command to temporary boot via the patched boot.img:
fastboot boot boot.img
- If everything’s working well and good, then reboot your device to Fastboot Mode.
- If it’s not, then just do a normal restart, and your device will be booted to the OS.
- Now type in the below command to permanently flash this boot.img:
fastboot flash boot boot.img
- Finally, type in the below command to boot your device to the rooted OS:
fastboot reboot
Manual Approach
If you are not sure of the format or if the patched boot.img is not available for your device [such as Pixel uses lz4_legacy, for which the boot.img is not present], then you’ll have to manually get this job done, as explained below:
- To begin with, extract the boot.img from the stock firmware.
- Make sure it is the same version that is installed on your device.
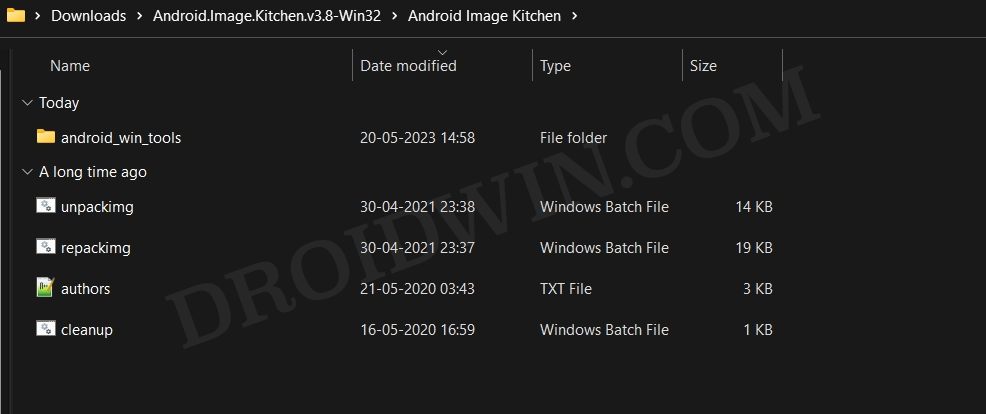
- Then download and extract Android Image Kitchen on your PC.
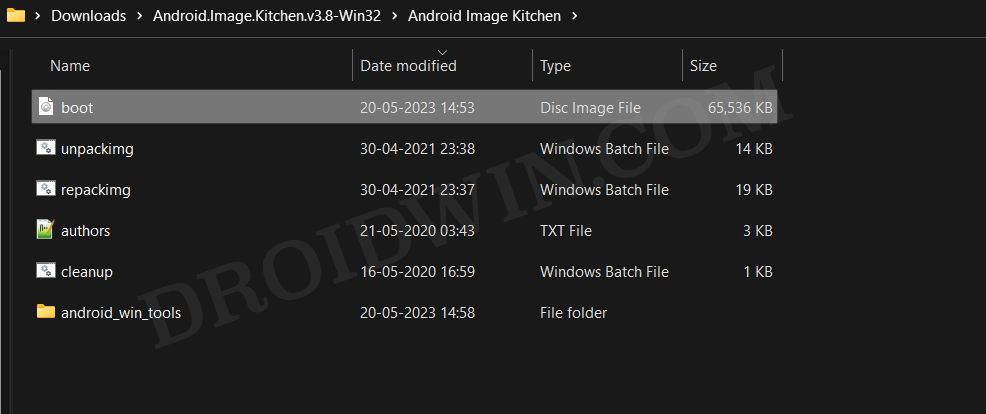
- Now transfer the stock boot.img inside the Android Image Kitchen folder.
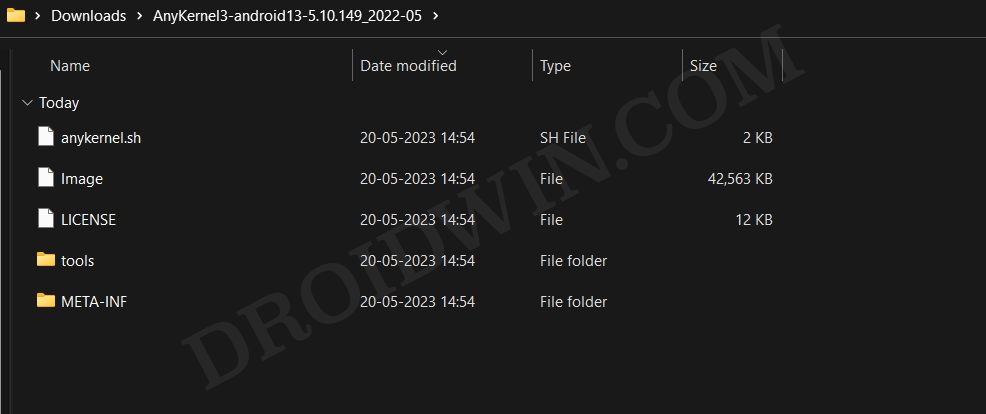
- Then download and extract AnyKernel3 ZIP file that corresponds to your KMI.
- For example, if your KMI is 5.10.149-android13-4, then download the one which corresponds to this format:
android13-5.10.149_yyyy-MM.boot-<format>.img
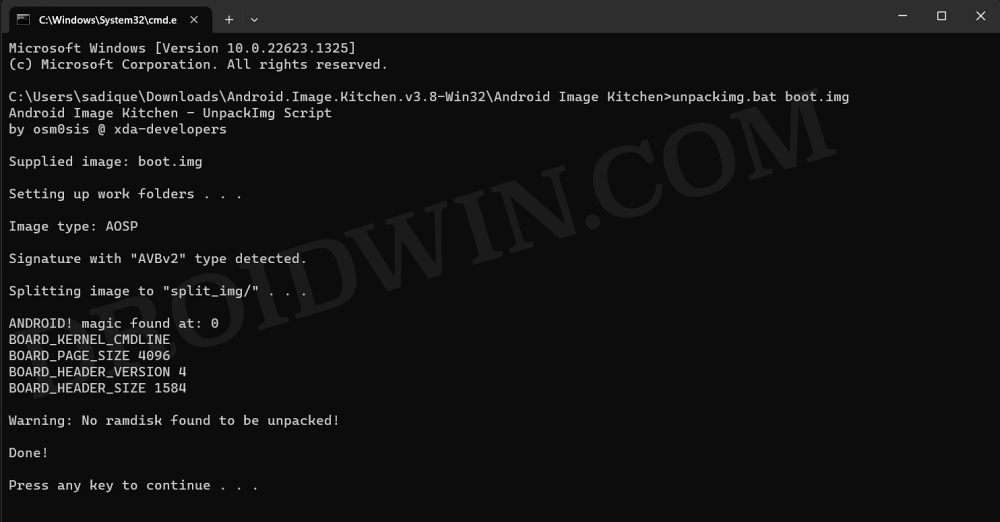
- Now open the CMD window inside the Android Image Kitchen folder and type in the below command to extract the boot.img
unpackimg.bat boot.img
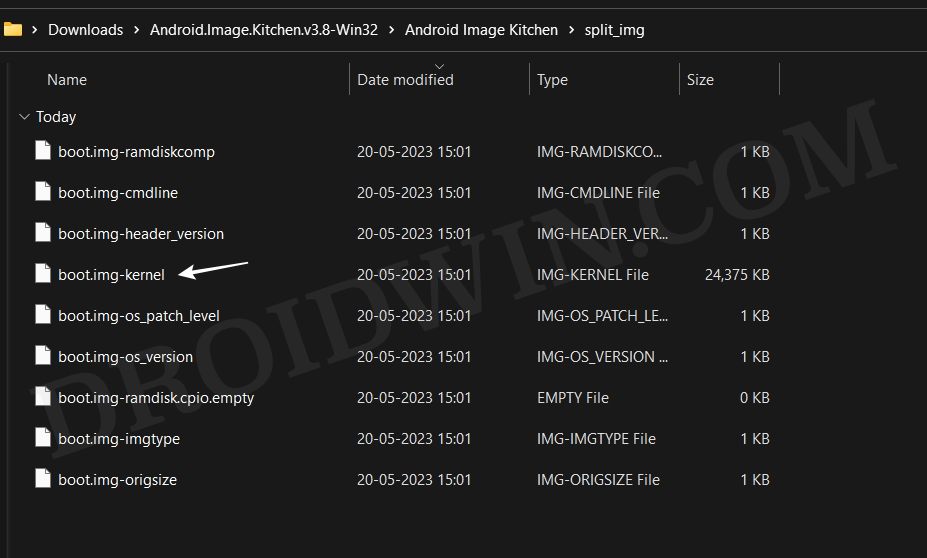
- It will now unpack boot.img and you will get a couple of files. Replace boot.img-kernel in the split_img directory with the Image you extracted from AnyKernel3.
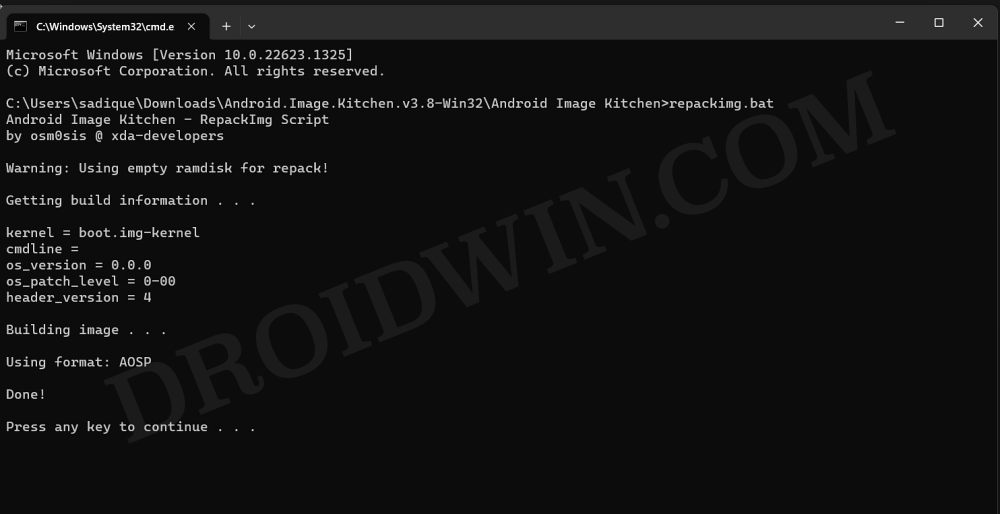
- Make sure to rename the Image boot.img-kernel. Once done, type in the below command to repack the boot.img
repackimg.bat
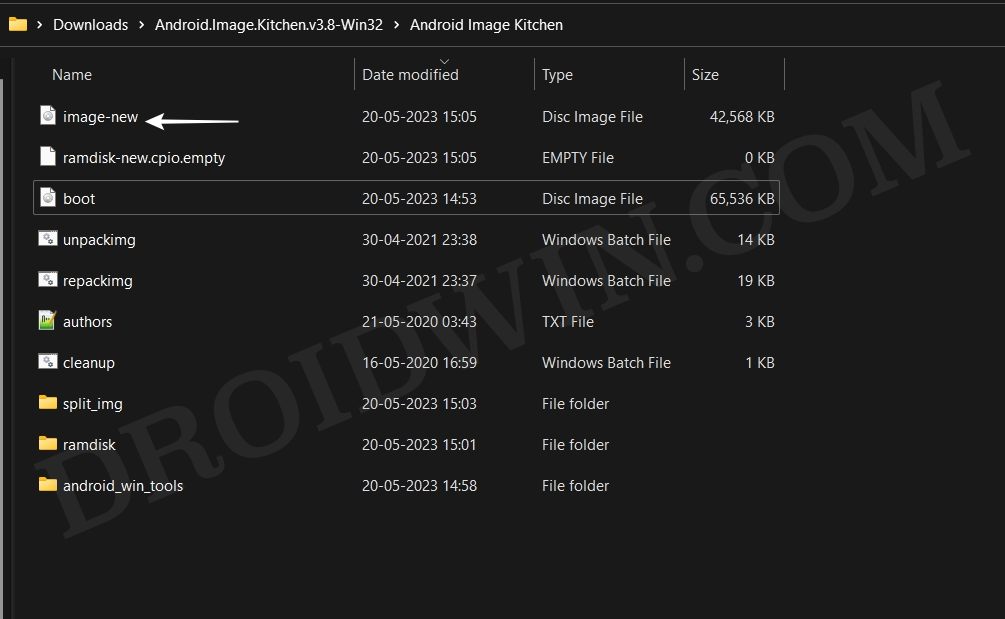
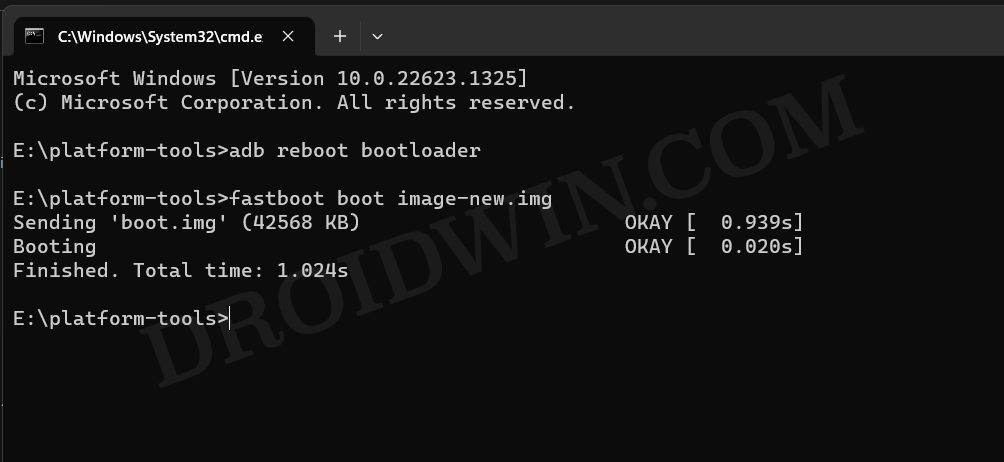
- You’ll get image-new.img, and transfer it to the platform-tools folder. Then open the CMD window inside this folder.
- Now type in the below command to boot your device to Fastboot Mode
adb reboot bootloader
- Then execute the below command to temporary boot via the patched boot.img:
fastboot boot image-new.img
- If everything’s working well and good, then reboot your device to Fastboot Mode.
- If it’s not, then just do a normal restart, and your device will be booted to the OS.
- Now type in the below command to permanently flash this boot.img:
fastboot flash boot image-new.img
- Finally, type in the below command to boot your device to the rooted OS:
fastboot reboot

Install KernelSU via TWRP
The benefit of this method is that it’s quite easy to execute. But on the flip side, not every device has a working custom recovery like TWRP. If yours has one, then let’s get started.
- Download the AnyKernel3 ZIP that corresponds to your device’s KMI.
- For example, if your KMI is 5.10.149-android13-4, then download:
AnyKernel3-android13-5.10.149_yyyy-mm.zip
- Once downloaded, transfer it to your device.
- Then open Command Prompt inside the platform-tools folder.
- Now type in the below command to boot your device to TWRP.
adb reboot recovery
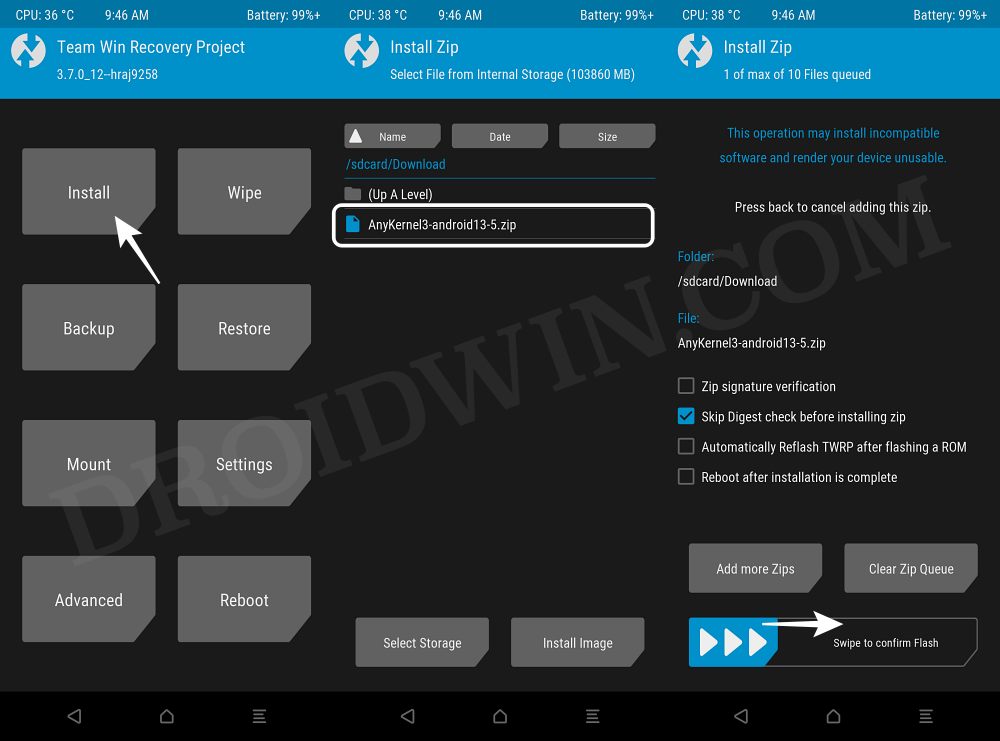
- Then go to Install, select the kernel.zip, and perform a right swipe to flash it.
- Once done, go to Reboot and select System. Your device will boot to the rooted OS.
Install KernelSU via Kernel Flasher and Root Android
The benefit of this method is that it’s extremely easy to carry out. However, its prerequisite is its biggest drawback- your device needs to be rooted beforehand. So in what case will it come in handy? Well, if you have installed an older version of KernelSU and want to update it to the latest version, then this should be your go-to choice.
- Download and install Franko Kernel Manager from the Play Store
- Then launch it and tap Grant in the Magisk pop-up.
- Now tap on Manual Flasher and select Flasher.
- Then select the kernel.zip file and hit Flash & Reboot.
- The flashing will now begin. Once done, your device will boot to the rooted OS.

Root via Kernel SU Specific Boot.img
If none of the aforementioned methods spelled out success, then your last course of action should be to use the stock boot.img/init_boot.img corresponding to your device, patch it via KernelSU, and flash it via Fastboot Commands [similar to how you do so via Magisk]. Here’s how it could be done:
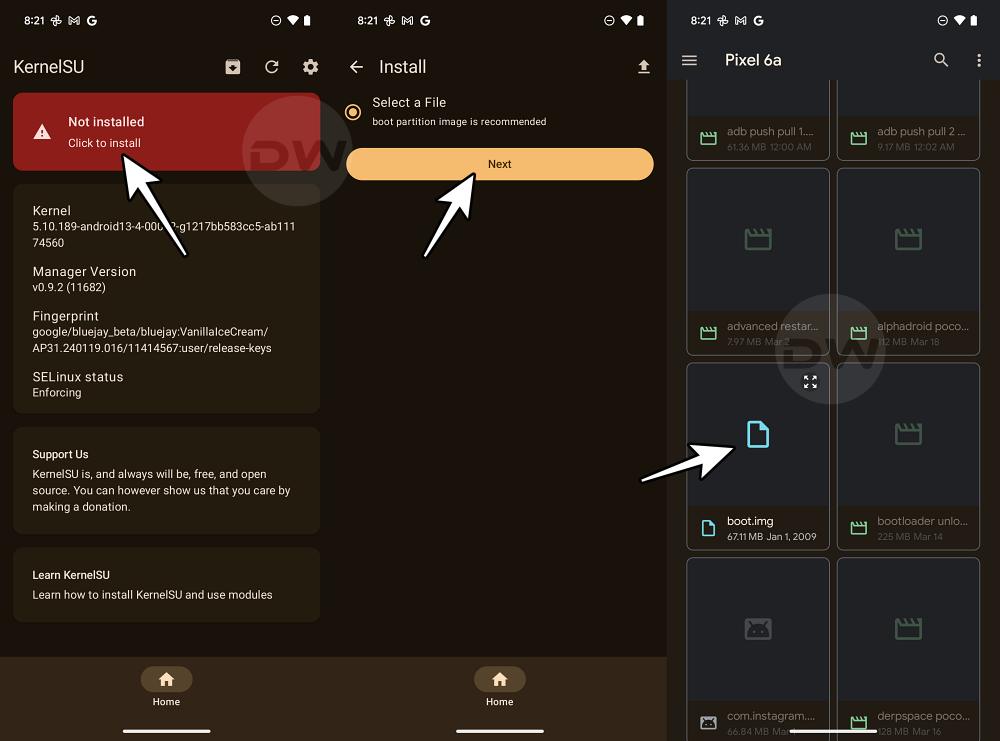
- Extract the boot.img/init_boot.img from the currently installed firmware and transfer it to your device.
- Then launch KernelSU, tap on Not Installed > Select and patch a file, and choose the boot.img/init_boot.img.
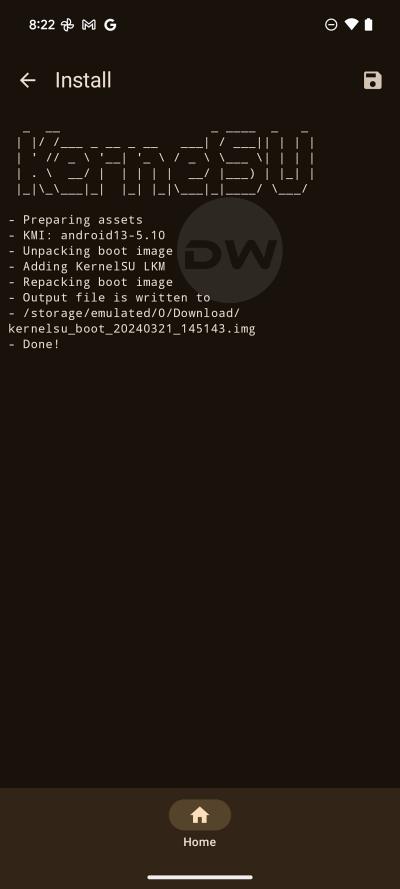
- KernelSU will now patch the file and place it in the Downloads folder.
- You should transfer it to the platform tools folder on your PC.
- Now boot your device to Fastboot Mode via the below command:
adb reboot bootloader
- [This and the next step is only for Boot.img users, init_boot users should skip both these steps] Temporarily boot your device via this patched boot.img via the below command:
fastboot boot patched_boot.img
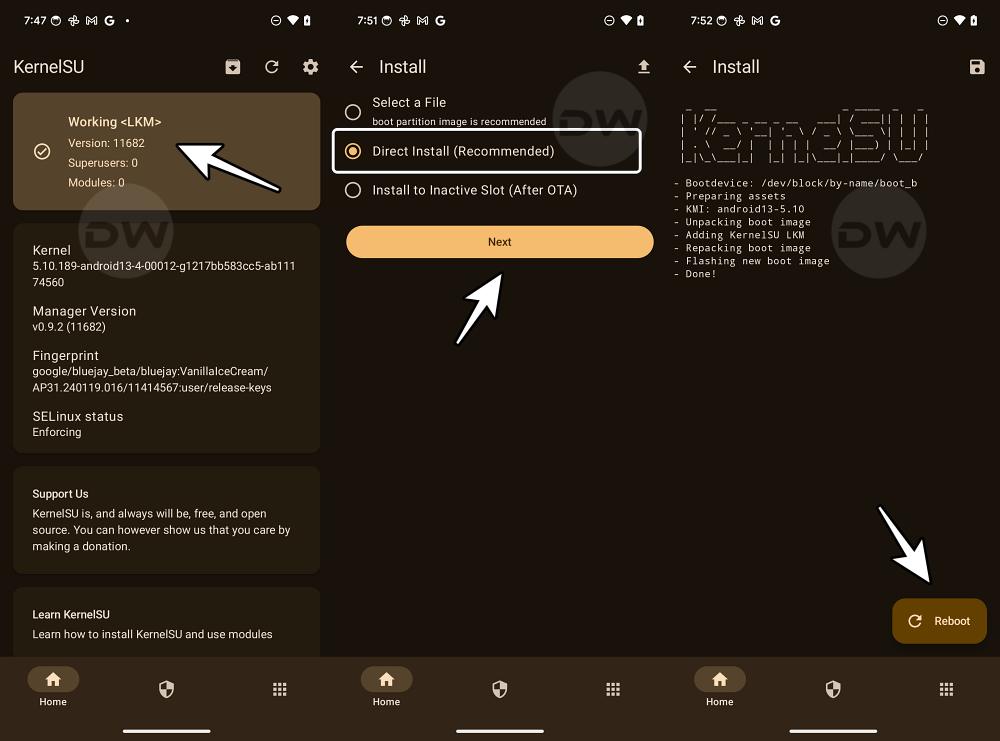
- Once booted, launch KernelSU, tap on Working > Direct Install [Recommdended] > Next.
- Wait for the process to complete. Once done, hit Reboot. Your device will boot to the rooted OS.
- [This step is for init_boot users, boot users should skip this step it] Now use the below command to flash the patched init_boot.img file:
fastboot flash init_boot patched_init_boot.img
- Finally, use the below command to boot to the rooted OS:
fastboot reboot

NOTE: Instead of temporary booting, you may also directly flash the patched boot.img, but that is generally not the recommended approach because if something goes wrong in the case of the latter [permanent flash], then it might prove to be a challenging task to rectify the issue. Whereas in the case of the former [temporary boot], a simple restart will fix the underlying issue, if any. On the other hand, in the case of init_boot, you have no such liberty as you cannot temporarily boot an init_boot file, you can only permanently flash it.

That’s it. These were the three different methods that should help you root your Android device via KernelSu. If you have any queries concerning the aforementioned steps, do let us know in the comments. We will get back to you with a solution at the earliest.


Sam
Yeah, it’s sad to know that KernelSU is only support GKI’s kernel, and also that KernelSU is only support Android 12 and above.
It’s very frustrating to know that KernelSU is only for some device only.