In this guide, we will show you the steps to limit the upload and download data transfer speed on your Windows 11 PC. Quality of Service (QoS) is the set of rules and policies that allows you to control the exchange of data packets in an environment having limited network capacity. This functionality gives you granular control over the network by providing you with a platform to monitor, manage and allocate the required amount of data that should be used by or allocated to a particular app or a system as a whole.
For example, you could create and implement network throttling rules just for Google chrome. Or take a more aggressive approach and enforce it on your Windows 11 PC in which case all the apps and programs will have to adhere to these policies. Along with that, you could also apply these rules to a particular IP address, which would come in handy if you are on a shared network. On that note, let’s check out the steps to limit the upload and download data transfer speed on your Windows 11 PC. Follow along.
Table of Contents
How to Limit Download Data Transfer Speed in Windows 11
- To begin with, bring up the Run dialog box via the Windows+R shortcut keys.
- Then type in the below command and hit Enter to open the Network Connection page.
ncpa.cpl
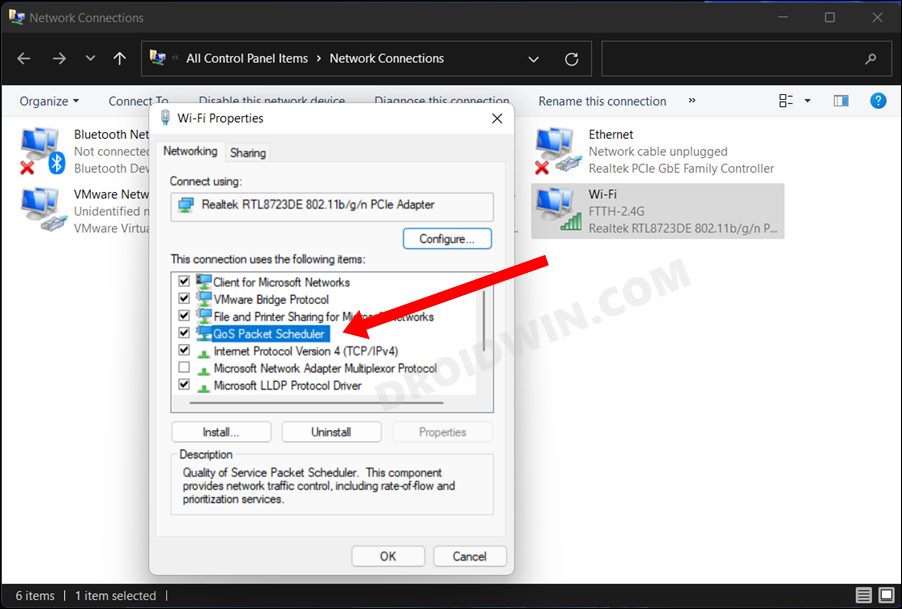
- Now right-click on your current network and select Properties.
- Then checkmark the QoS Packet Scheduler (if it isn’t enabled by default) and click OK.

- After that, enable Local Group Policy Editor on your Windows 11 PC.
- Then bring up the Run dialog box, type in the below command, and hit Enter to open the Group Policy Editor.
gpedit.msc
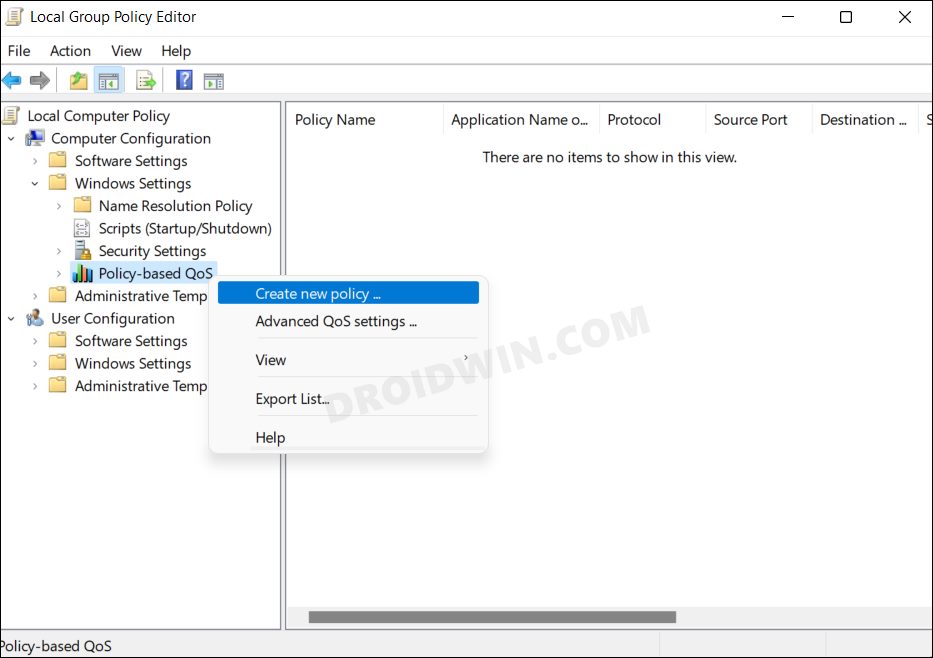
- Now go to the following location from its left-hand menu bar;
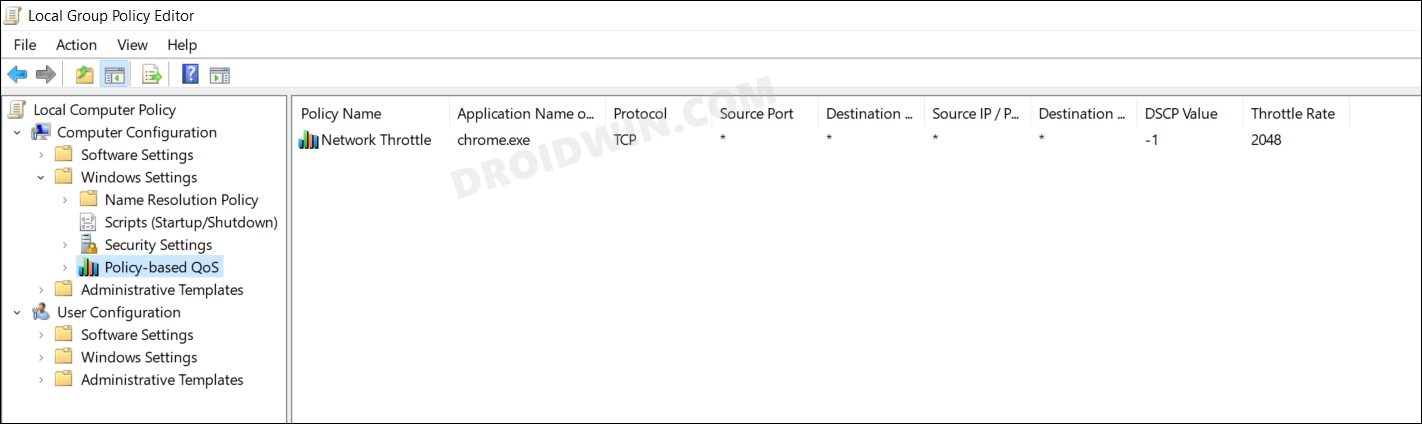
Computer Configuration > Windows Settings > Policy-Based QoS
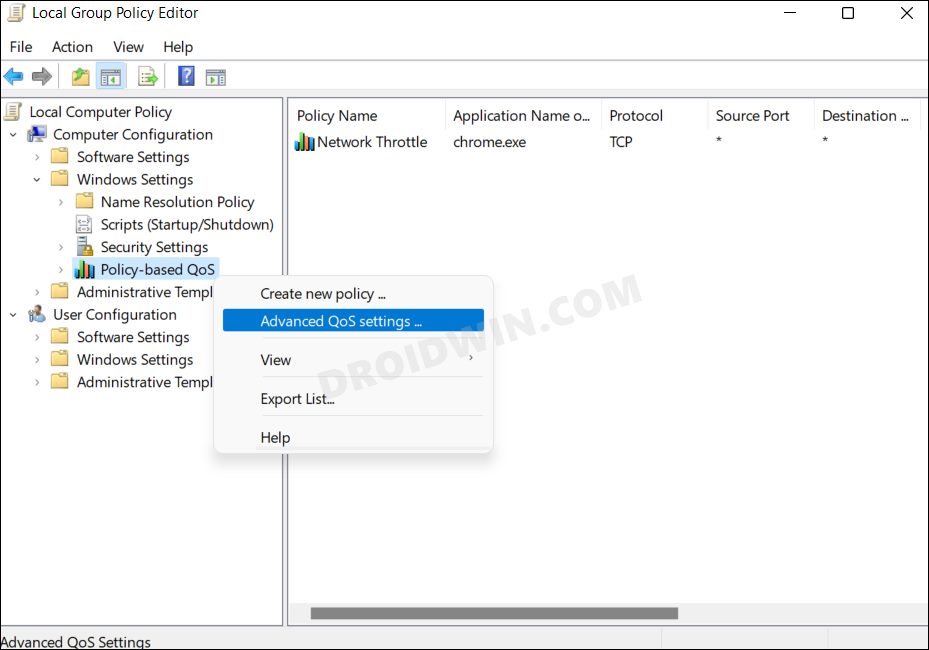
- Then right-click on Policy-based QoS and select Create new policy.
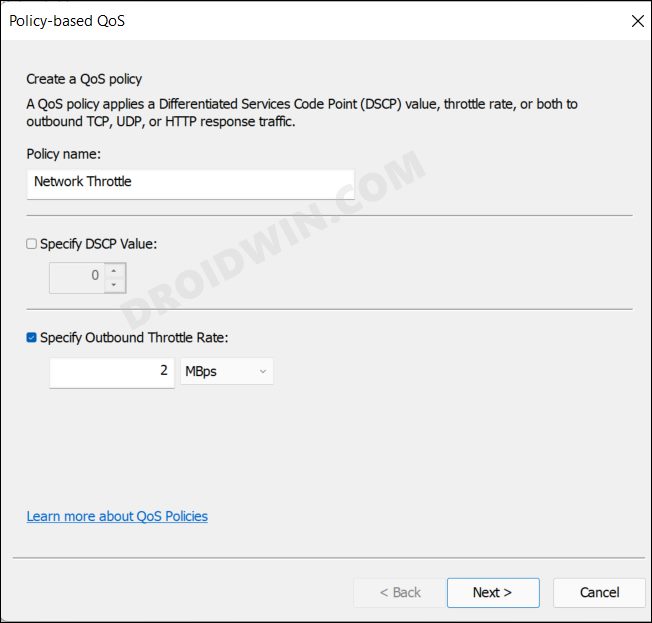
- Give your policy a name, uncheck Specify DSCP Value, and checkmark Specify Outbound Throttle Rate.
- Now select KBps or MBps, input the desired network throttle value, and click Next.
- Choose whether you wish to limit the download data transfer speed for all the apps or just for a single app. In the case of the former, select All Applications whereas in the case of the latter, choose Only applications with this executable name.
- Now type in the name of the executable file (or its location) and click Next.
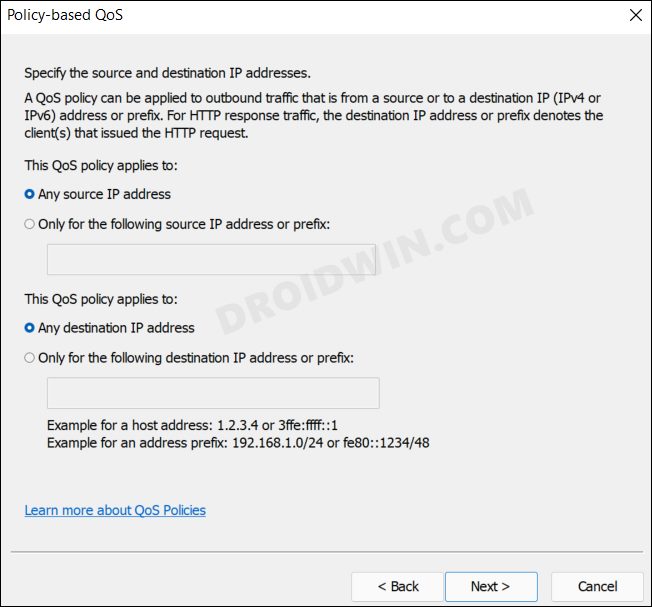
- Next up, if you are not on a shared network, then let the preselected options remain as they are and click Next.
- On the other hand, if you wish to throttle the speed of data exchange from any specific IP, then choose Only for the following source/destination IP Address or prefix, type in the desired IP in the space provided, and hit Next.
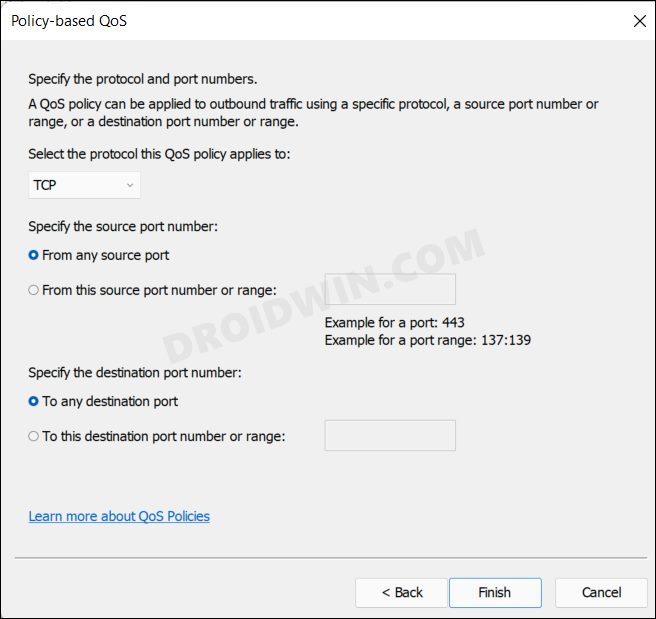
- Again, leave the default port settings as they are and hit Finish. [If you are on a shared network, then you might consider inputting the source and destination Port numbers].
- That’s it. The policy has now been created and is implemented right away. And with this, you have successfully limited the download data transfer speed on your Windows 11 PC.

How to Limit Upload Data Transfer Speed in Windows 11
- Enable the Group Policy Editor and then launch it as explained in STEPS 1 to 6 above.
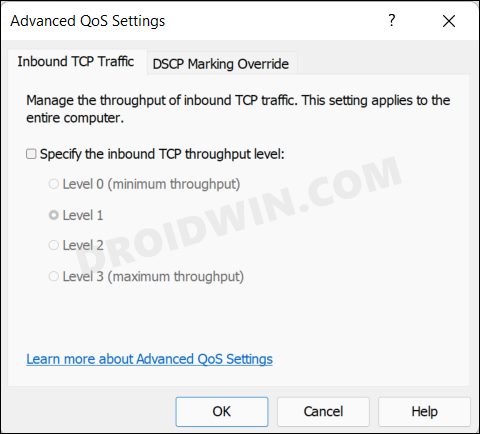
- Then right-click on Policy-based QoS from the left-hand side and select Advanced QoS Settings.
- Now, checkmark Specify the inbound TCP throughput level.
- Finally, select a level from 0 to 3 (refer to the below table for the values) and click OK to save the changes. [Source: Microsoft Documentation].

| Inbound Throughput Level | Maximum Transfer Rate |
| 0 | 64 KB |
| 1 | 256 KB |
| 2 | 1 MB |
| 3 | 16 MB |
How to Remove Upload/Download Data Transfer Speed Limit in Windows 11
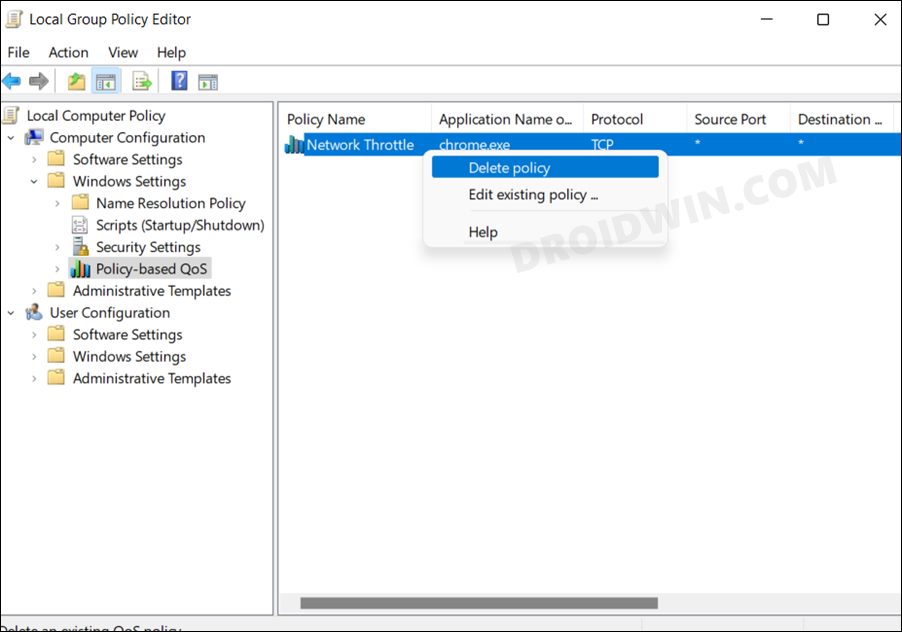
- To remove the download data transfer limit, right-click on the policy that you had created and select Delete Policy.
- To remove the upload data transfer limit, go to Advanced QoS Settings and uncheck Specify the inbound TCP throughput level.
That’s it. These were the steps to limit the upload and download data transfer speed on your Windows 11 PC. While you could also carry out these steps via a third-party app, it’s better to stick with the offering that is already baked into the system. On that note, we round off this guide. If you have any queries concerning the aforementioned steps, do let us know in the comments. We will get back to you with a solution at the earliest.


Palenholik Gutengadrovic
This does not work!