This guide will make you aware of various methods to fix the internet or WiFi not working issue on Windows 11. Along the same lines, this tutorial shall also help you fix the slow WiFi speed issue, Limited access, Unidentified Network, or No Internet Access errors. The latest iteration of Windows has bought in a plethora of new and noteworthy features. Right from UI changes to the plentitude of tweaks to the taskbar, there’s a lot to look forward to.
But in spite of all the goodies attached, it isn’t free from its fair share of issues. Among all the truckload of problems that you are likely to face, it’s the issues with the network that would be most troublesome to the end-users. Well, if you are also getting bugged with this issue, then fret not. Given hereby are various methods that shall help you to fix the internet or WiFi not working issue on your Windows 11 PC. So without any further ado, let’s get started.
Table of Contents
How to Fix Internet or WiFi Not Working in Windows 11
Do keep in mind that there isn’t any universal fix as such. You would have to try out each of the below-mentioned workarounds until one of them spells out success for you.
Fix 1: Restart Router and PC
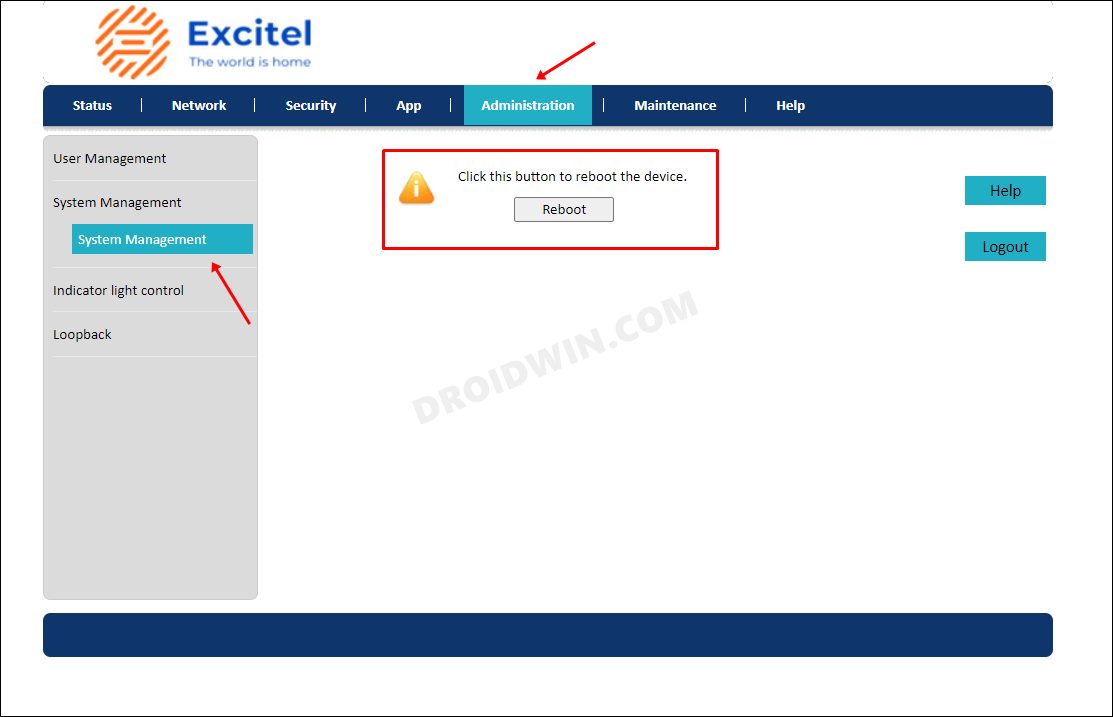
First and foremost, consider restarting your PC as well as the router. Talking about the latter, it is recommended that you unplug it from the socket, keep it in that state for a few seconds, and then plug it back in. Now turn it back on and then restart your PC. Check if you are able to establish a successful network connection or not. [NOTE: You could remotely restart your router as well].
Fix 2: Toggle WiFi and Airplane Mode
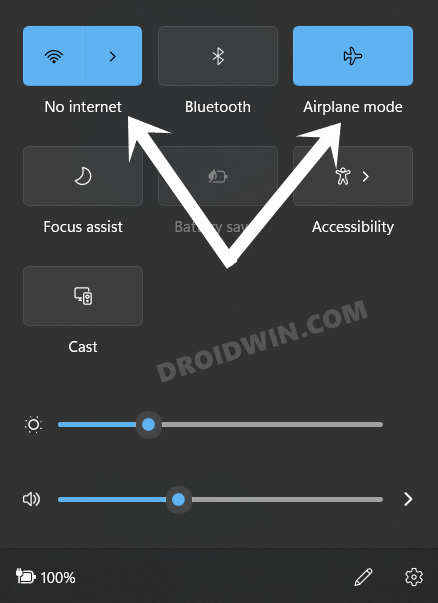
- To begin with, click on the WiFi icon present at the right-hand side of the Taskbar.
- Now click on the current WiFi to which you are connected. This shall turn off the WiFi.

- Once that happens, click on the Airplane Mode to turn it on. Wait for a few seconds and then disable the Airplane Mode.
- Now connect to your WiFi network and check if the internet not working issue on your Windows 11 PC has been fixed or not.
Fix 3: Update Network Adapter
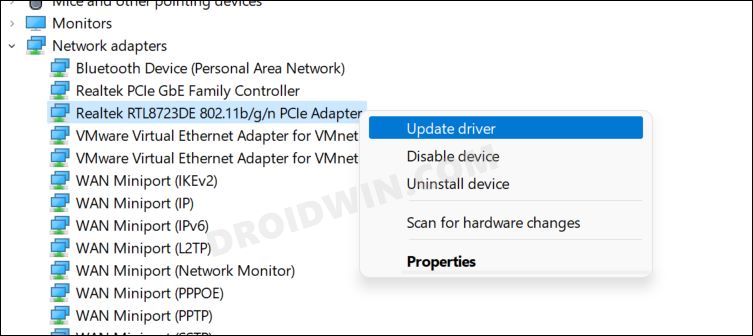
- Head over to the Start menu and search Device Manager.
- Open it and expand its Network Adapter section.
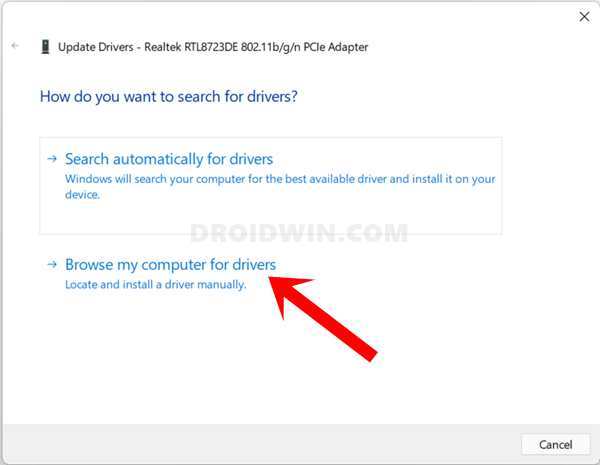
- Now right-click on your network drivers (usually Realtek) and select Update Drivers.
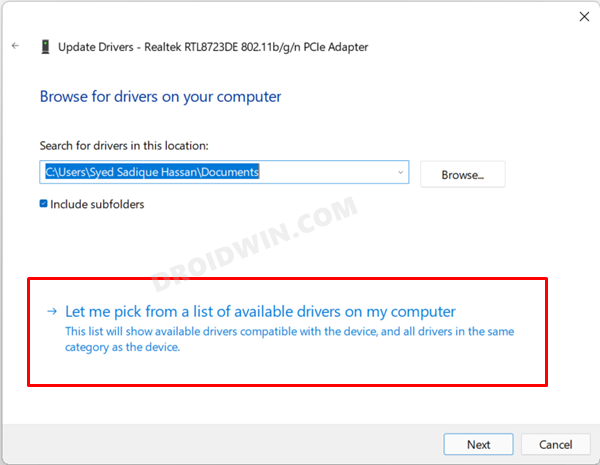
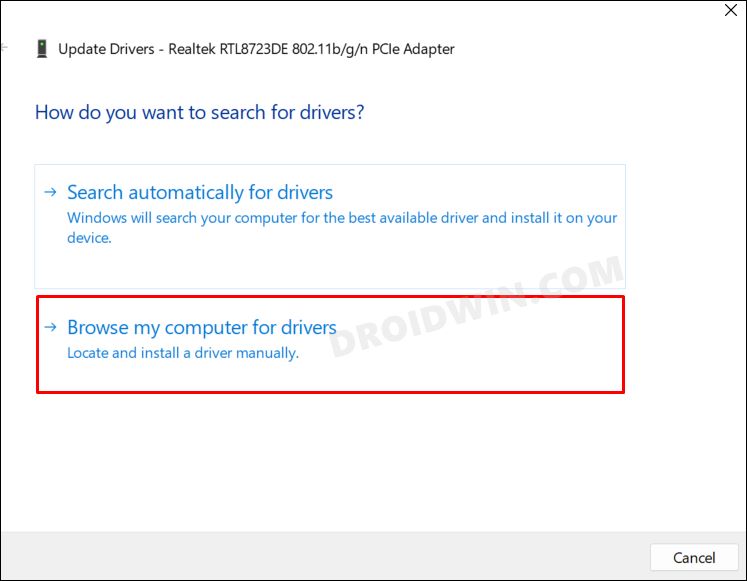
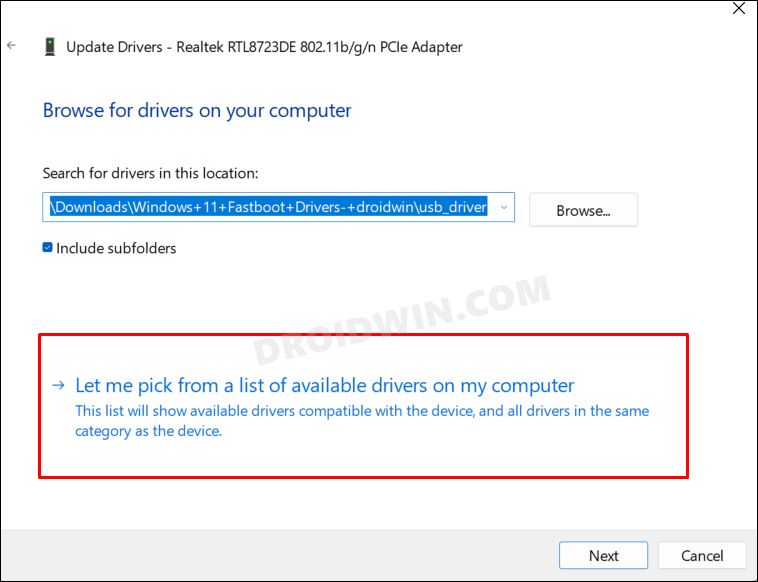
- Then click on Browse my computer for drivers.
- After that, click on Let me pick from a list of available drivers on my computer.
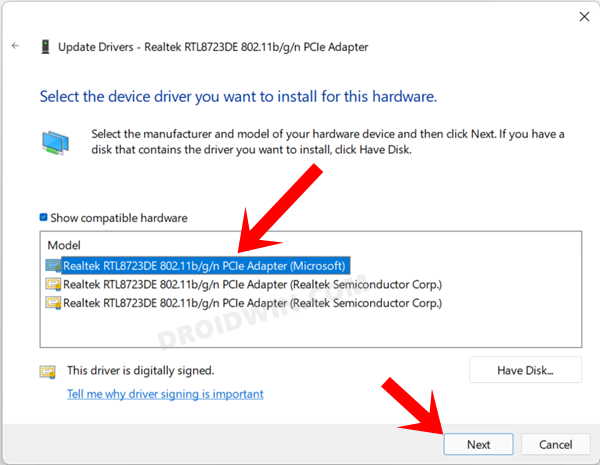
- Now select the Realtek drivers from the list and hit Install.
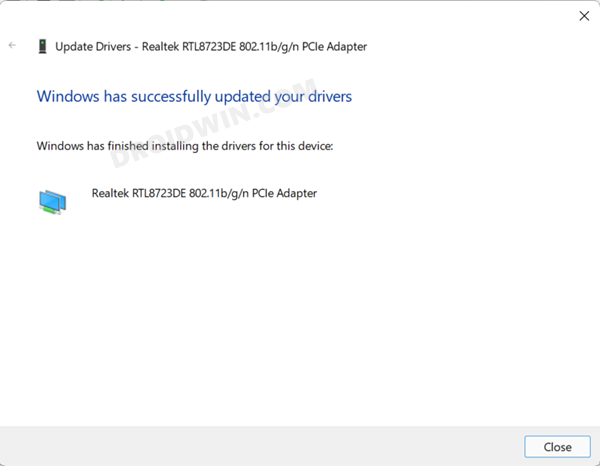
- Once the drivers have been updated, check whether the internet/WiFi not working issue on your Windows 11 PC has been fixed or not.
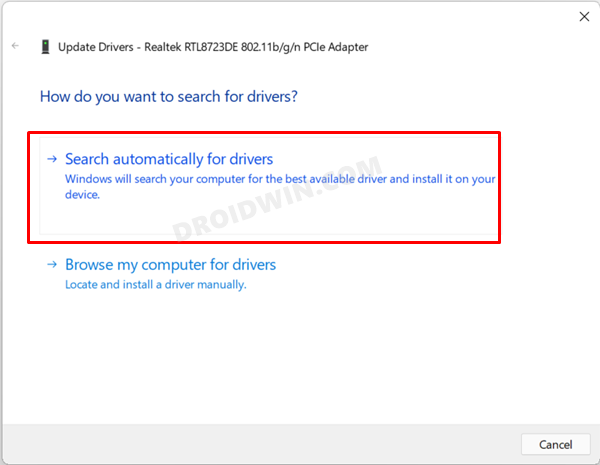
- If the issue is still persistent, then again go to Device Manager > Network Adapter > Update Drivers.
- This time, select Search automatically for drivers. You will now have to share your smartphone’s internet via Hotspot or USB Tethering.
- Windows will now use your device’s internet and search online for the latest available drivers.
- If found, it will automatically download and install it onto your PC. Once that is done, restart your PC and see if it fixes the internet/WiFi not working issue on your Windows 11 PC.

Fix 4: Boot to Safe Mode
In some instances, a third-party app might conflict with the normal data exchange process. The best way to verify and hence rectify this issue is to boot your PC to the Safe Mode. Doing so will disable all the third-party apps and give you the stock environment with just the system apps. If you are able to select multiple files in this mode, then the culprit is an app or software. Therefore, you should consider uninstalling the recently installed apps after which the issue first came to light. Here’s how:
- Bring up the Run dialog box via Windows+R shortcut keys.
- Then type in the below command and hit Enter to open the System Configuration menu
msconfig
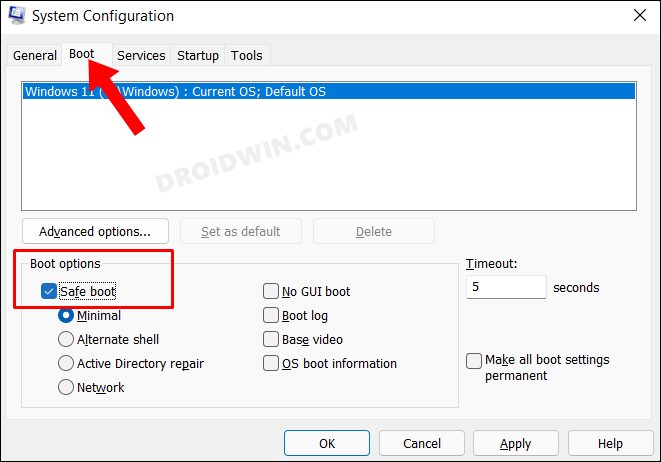
- Now go to its Boot tab and checkmark Safe Mode under Boot Options.
- Finally, click OK followed by Restart in the confirmation dialog box.
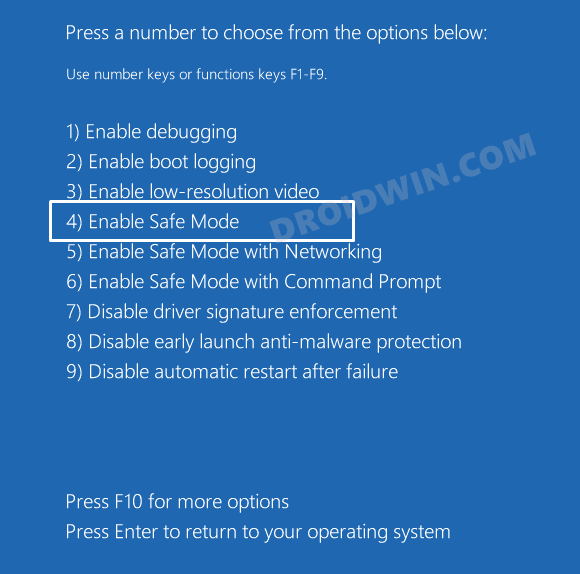
- Your PC will now boot to Windows Recovery Environment.
- Go to Troubleshoot > Advanced options > Startup Settings > Click Restart > Press 4 to boot to Safe Mode.
- Check if it fixes the internet/WiFi not working issue on your Windows 11 PC. If it does, then one of the third-party apps is indeed the culprit.
- So boot your PC to the normal mode and then uninstall the recently installed apps after which you started facing the network issue.
Fix 5: Perform a Clean Boot
A third-party service could also create a few blockages in the OS’s network-related features. Therefore, you should consider disabling all the non-Microsoft-related services and then test out the results. Here’s how it could be done-
- Head over to the Start Menu, search System Configuration, and open it.
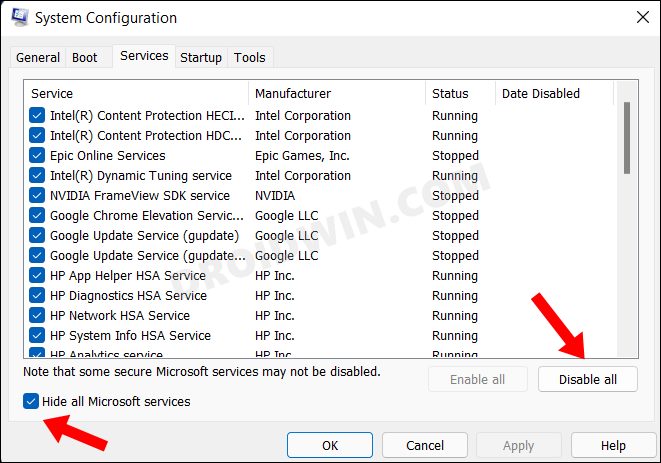
- Then go to the Services tab, checkmark Hide All Microsoft Services, and click on the Disable All button.
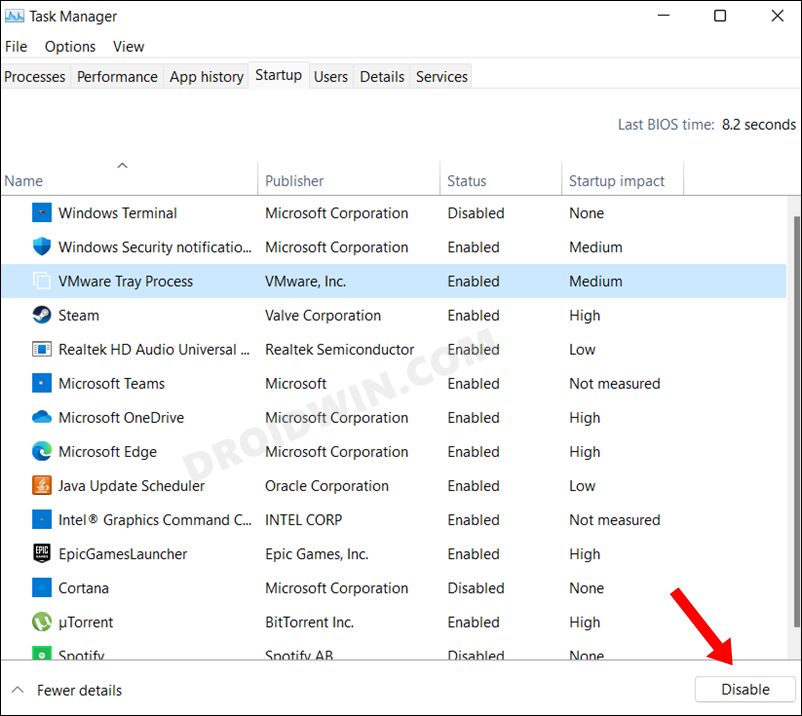
- Then go to the Startup tab and click on Open Task Manager.
- Now select a process from the list and click Disable. Do so for all the running services.
- Once done, restart your PC and then check if it fixes the internet/WiFi not working issue on your Windows 11 PC.

Fix 6: Disable and Re-Enable Network Adapter Drivers
If you are already using the latest network drivers, then you could consider giving it a fresh start. This could be done by disabling and then re-enabling it back on. Here’s what you need to do for the same:
- Right-click on the Windows icon and select Device Manager.
- Within that, go to the Network Adapter section.
- Right-click on your WiFi drivers and select Disable Device.
- Then wait for a few seconds, right-click on it, and select Enable device.

Once you have re-enabled it, consider restarting your PC. Once it boots up, verify if the internet/WiFi not working issue on your Windows 11 PC has been fixed or not.
Fix 7: Flush and Renew DNS in Windows 11
You could also flush the current Domain Name System and ask your PC to renew and use the newly generated ones. This comes in handy in case a lot of DNS cache has got accumulated over the due course of time or the DNS data gets corrupted.
- So head over to the Start menu, search CMD and launch Command Prompt as an admin.
- Now type in the below command to release the currently stored DNS:
ipconfig /release
- Next up, use the below command to reset the network IP Address:
netsh int ip reset
- After this, execute the below command to flush the current DNS:
ipconfig /flushdns
- Finally, renew the DNS via the following command:
ipconfig /renew
- Now restart your PC and verify if the internet/WiFi not working issue on your Windows 11 PC has been fixed or not.

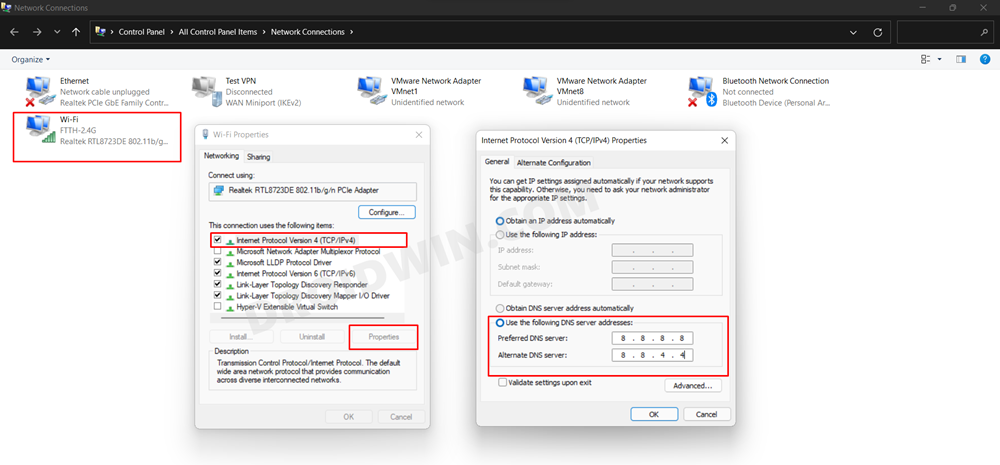
Fix 8: Use Google/Cloudflare DNS
Your Internet Service Provider would have automatically assigned a Domain Name Server to your system. However, that isn’t the only available DNS, you could also choose from third-party DNS such as the ones from Google and Cloudflare. Apart from providing a more secure data exchange platform, they are also more efficient in getting the job done. So let’s opt for either of these two DNS and then test ou the results.
- Bring up the Run dialog box via Windows+R shortcut keys.
- Then type in ncpa.cpl and hit Enter.
- Now right-click on your current network and select Properties.
- Select Internet Protocol Version 4 (TCP/IPv4) or IPv6 [depenign on your current network settings] and click Properties.
- Now select Use the following server DNS addresses and type in the below values [depending on your preference]:
IPv4 Google
Primary- 8.8.8.8
Alternate- 8.8.4.4

IPv6 Google
Primary- 2001:4860:4860::888
Alternate- 2001:4860:4860::8844

IPv4 Cloudflare
Primary- 1.1.1.1
Alternate- 1.0.0.1

IPv6 Cloudflare
Primary- 2606:4700:4700::1111
Alternate- 2606:4700:4700::1001
- Finally, click OK to save the changes and then restart your PC. Check if it fixes the internet/WiFi not working issue on your Windows 11 PC.
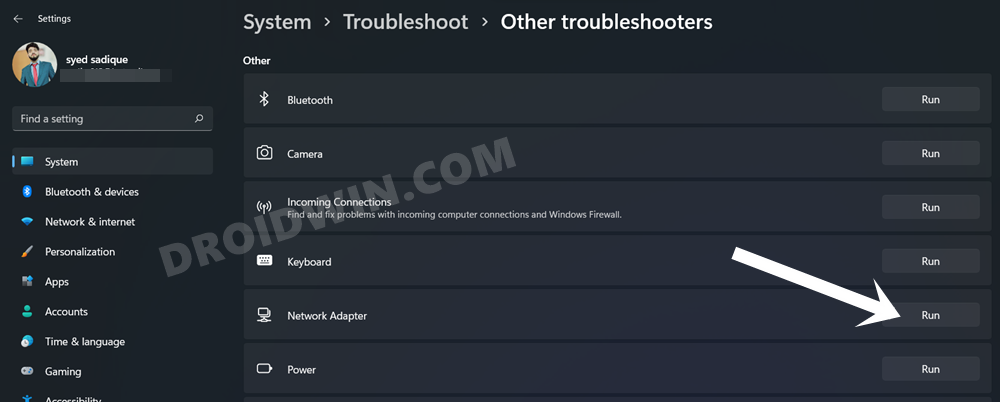
Fix 9: Use Network Troubleshooting
Windows comes built-in with various different troubleshooter apps, and one is specifically designed for the Network. It would not only help in finding the underlying issue but could well fix it as well. So let’s try and make full use of the same.
- To begin with, open the Settings menu via Windows+I shortcut keys.
- Within that, go to System from the left menu bar and scroll to the Troubleshooter section.
- Then go to the Other Troubleshooters section and click on Run next to Network Adapter.
- Windows will now search for all the network-related issues, and if found, will fix them as well.
- Once done, restart your PC and check if the internet/WiFi not working issue on your Windows 11 PC has been fixed or not.

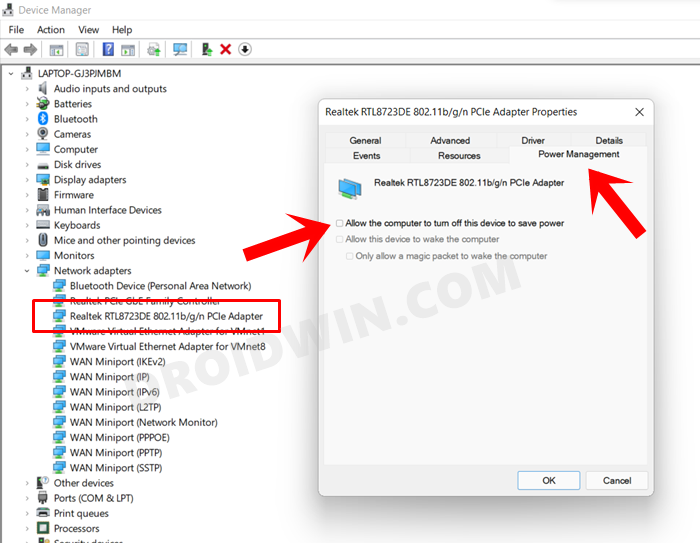
Fix 10: Change Network Adapter’s Power Management Settings
- Use the Windows+X shortcut and select Device Manager from the menu that appears.
- Now expand the Network Adapters section, right-click on your network adapter, and select Properties.
- Then go to the Power Management tab.
- Uncheck the box next to Allow the computer to turn off this device to save power.
- Once done, restart your PC and see if it fixes the internet/WiFi not working issue on your Windows 11 PC.
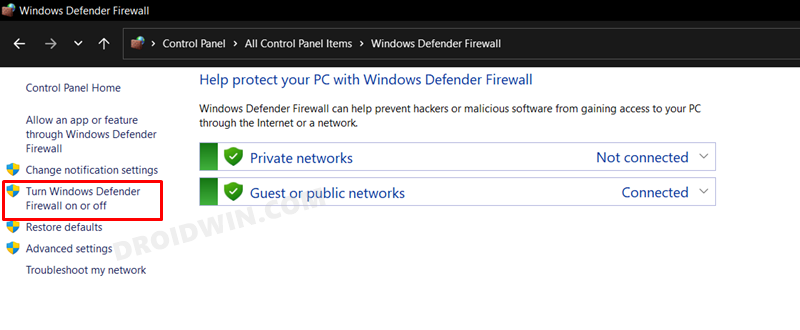
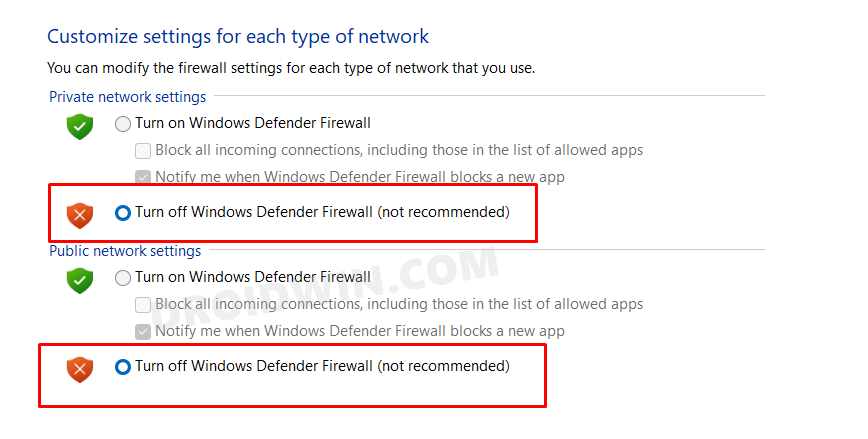
Fix 11: Disable Windows 11 Firewall
In some instances, the Windows Defender Firewall might act a little bit overprotective and might block trustworthy sites. So if you have full trust in the sites that you are about to browse, then you may consider disabling the Firewall during the course of your browsing. Here’s how it could be done:
- Head over to the Start menu and search Windows Defender Firewall.
- Then click on Turn Windows Defender Firewall On or Off from the left menu bar.
- Finally, select Turn off Windows Defender Firewall under both the Public and Private network sections.
- Check if you are now able to browse the web efficiently or not.
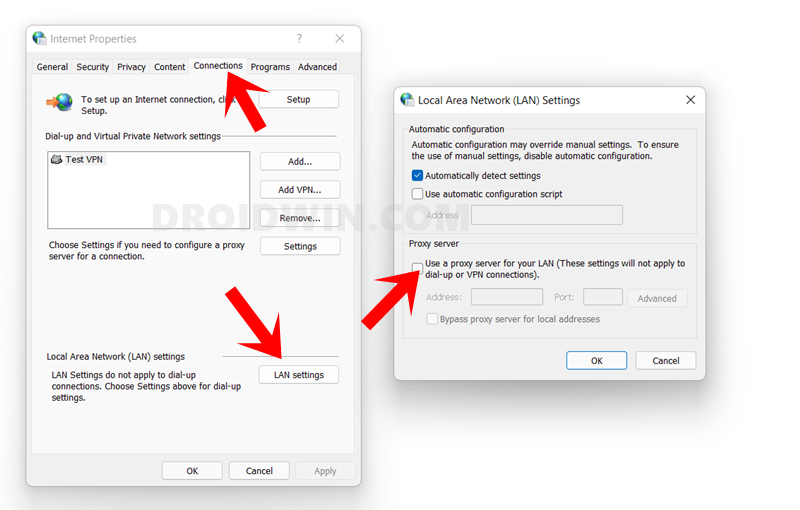
Fix 12: Disable Proxy Server
If you are using a Proxy server to bypass restrictions or access geo-restricted contents, then it could result in a few conflicts. Therefore, you may consider disabling the proxy server, which could be done as follows:
- Use the Windows+R shortcut keys to bring up the Run dialog box.
- Then type in inetcpl.cpl and hit Enter.
- Go to the Connections tab and click on the Lan Settings button.
- Finally, uncheck the Use a proxy server for your LAN option.
- Save it and restart your PC. Then check if it fixes the internet/WiFi not working issue on your Windows 11 PC.
FIX 13: Change Network Drivers
Your system will use the network drivers that the OEM has put in place. However, in some cases, the default driver might get corrupted, and even updating them might not be enough. In such cases, you could switch over to another network driver, albeit from the same manufacturer. Here’s how-
- Right-click on the Start Menu and select Device Manager.
- Then expand the Network Adapters section and note down the manufacturer name, including whether it is 802.11 b/g/n [for 2.4 Ghz] or 802.11 a/c [for 5Ghz].
- Now right-click on your adapter and select Update Driver.
- After that, select Browse my computer for driver.
- Next up, click on Let me pick from a list of available drivers on my computer.
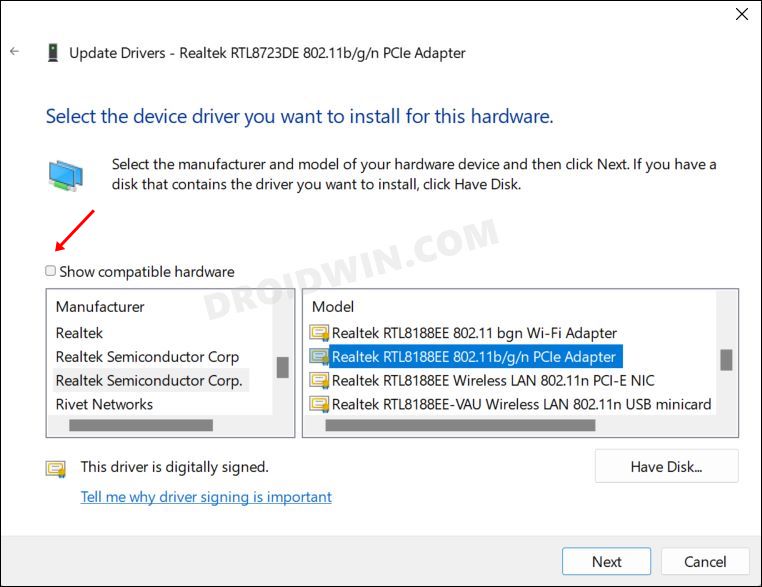
- Now uncheck Show compatible hardware.
- Then under the Manufacturer section, scroll and select the name that you had noted earlier.
- Then under the Model section, select a different version. Just make sure to select the same spectrum [802.11 b/g/n or 802.11 a/c].
- Now proceed with the on-screen instructions to complete the setup.
- Once done, refresh the network by enabling and then disabling Airplane Mode.
- Check if it fixes the internet/WiFi not working issue on your Windows 11 PC.
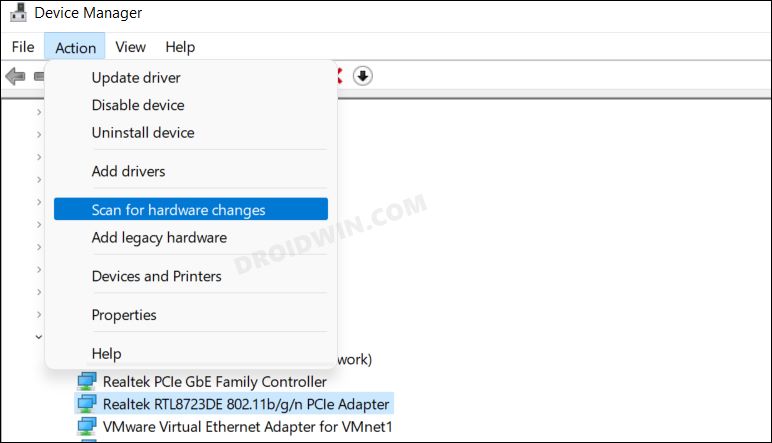
If it doesn’t work out, then right-click on the drivers and select Uninstall Device. After that, restart your PC and Windows shall reinstall the stock network drivers. If that doesn’t happen, then open Device Manager, go to the Action tab, and select Scan for hardware changes. Windows will now scan for missing drivers and would subsequently install them.
Fix 14: Reset Network
If none of the above tweaks spelled out success for you, then you might have to take the nuclear route. This involves resetting the network on your PC and could be carried out as follows:
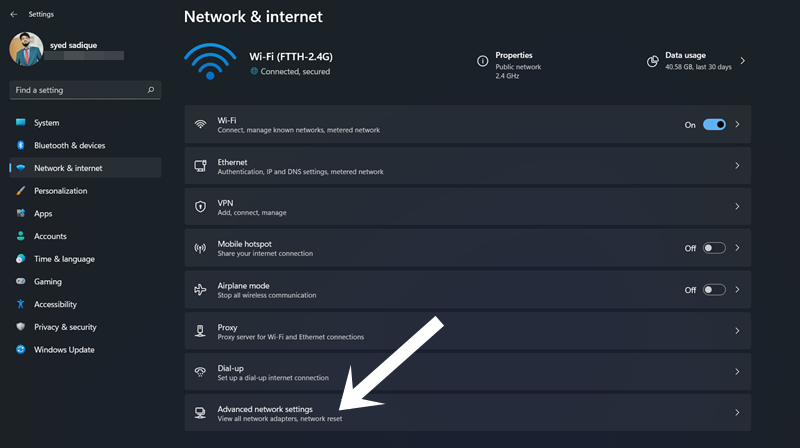
- Bring up the Settings menu via the Windows+I shortcut.
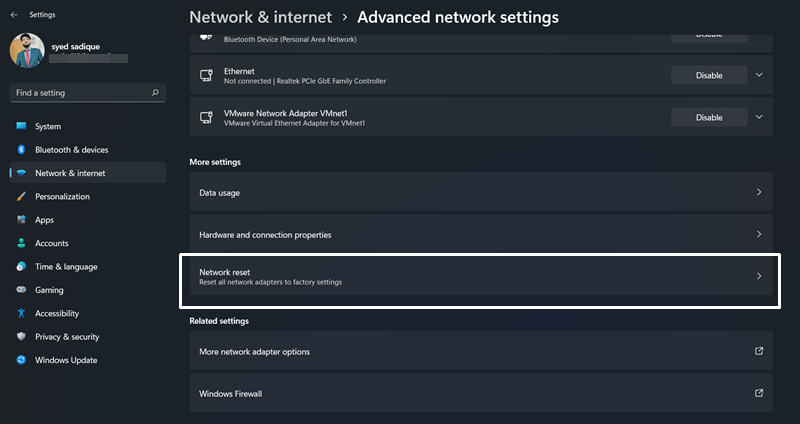
- Then go to the Network & Internet > Advanced network settings.
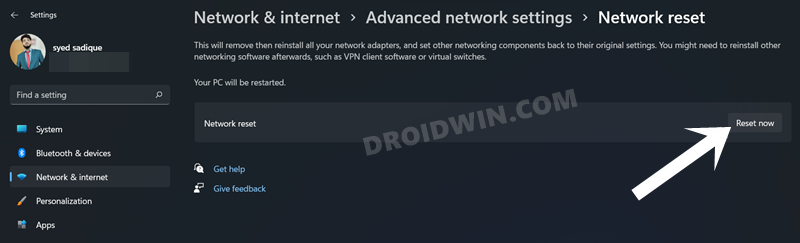
- Then go to the Network Reset section.
- Finally, click on the Reset Now button. Once the network has been reset, retry establishing the connection and you shouldn’t face any issues this time around.
So with this, we conclude the guide on how you could fix the internet/WiFi not working issue on your Windows 11 PC. We have shared eleven different fixes for the same. Do let us know in the comments which one worked out for you. Likewise, all queries are welcomed in the comments as well.


Joseph Thorneycroft
Finally an article that actually knew how to fix my issue after hours of trial and error. Ended up flushing and renewing DNS with CMD and it’s working perfectly now for a few days