In this guide, we will show you the steps to install the Paranoid Topaz ROM based on Android 13 onto your OnePlus 7/Pro/7T/Pro. The seventh iteration of the devices from OnePlus has reached the EOL and would no longer receive official updates. However, that isn’t the end of the journey, infact it’s far from that. These devices are among the most popular players in custom development and have already been blessed with a plethora of AOSP ROMs.
And now, there has been the addition of one of the most popular players in this domain. Paranoid Team has just released its latest Topaz ROM based on Android 13 for the OnePlus 7/Pro/7T/Pro. Moroever, the ROM is based on the OxygenOS 11 firmware, so this in itself translates to a major reason why tech enthusiasts are inclined towards this offering. So without any further delay, let’s make you aware of the installation steps right away.
Table of Contents
Prerequisites to Install Paranoid Topaz Android 13 on OnePlus 7/Pro/7T/Pro
The ROM could be installed via two different methods- Fastboot and Recovery [each having its own separate ROM] and we have listed both these methods below. Go through them once and then try out the one that is in sync with your requirement.
Moreover, both these methods will wipe off all the data from your device, so take a complete device backup. Droidwin and its members wouldn’t be held responsible in case of a thermonuclear war, your alarm doesn’t wake you up, or if anything happens to your device and data by performing the below steps.
Install Paranoid Topaz on OnePlus 7/Pro/7T/Pro via Fastboot Method
The below instructions are listed under separate sections for ease of understanding. Make sure to follow the same sequence as mentioned.
STEP 1: Install Android SDK
First and foremost, you will have to install the Android SDK Platform Tools on your PC. This is the official ADB and Fastboot binary provided by Google and is the only recommended one. So download it and then extract it to any convenient location on your PC. Doing so will give you the platform-tools folder, which will be used throughout this guide.

STEP 2: Enable USB Debugging and OEM Unlocking
Next up, you will have to enable USB Debugging and OEM Unlocking on your device. The former will make your device recognizable by the PC in ADB mode. This will then allow you to boot your device to Fastboot Mode. On the other hand, OEM Unlocking is required to carry out the bootloader unlocking process.

So head over to Settings > About Phone > Tap on Build Number 7 times > Go back to Settings > System > Advanced > Developer Options > Enable USB Debugging and OEM Unlocking.
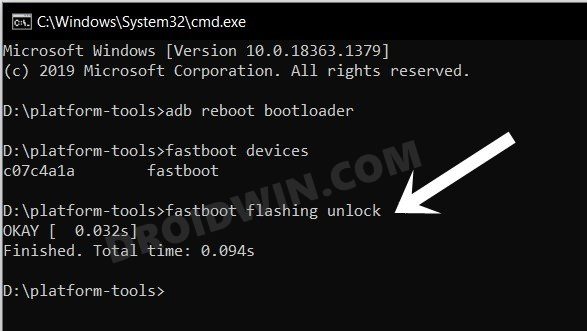
STEP 3: Unlock Bootloader
Next up, you will also have to unlock the device’s bootloader. Do keep in mind that doing so will wipe off all the data from your device and could nullify its warranty as well. So if that’s all well and good, then please refer to our detailed guide on How to Unlock Bootloader of OnePlus 7 series
STEP 4: Downgrade to Android 11 Firmware
It is recommended that your device should be on the Android 11 firmware before flashing Paranoid Topaz ROM. So refer to our guide on How to Downgrade OnePlus 7/7T/7T Pro Android 12 to Android 11 [3 Methods].
STEP 5: Download Paranoid Topaz Fastboot ROM
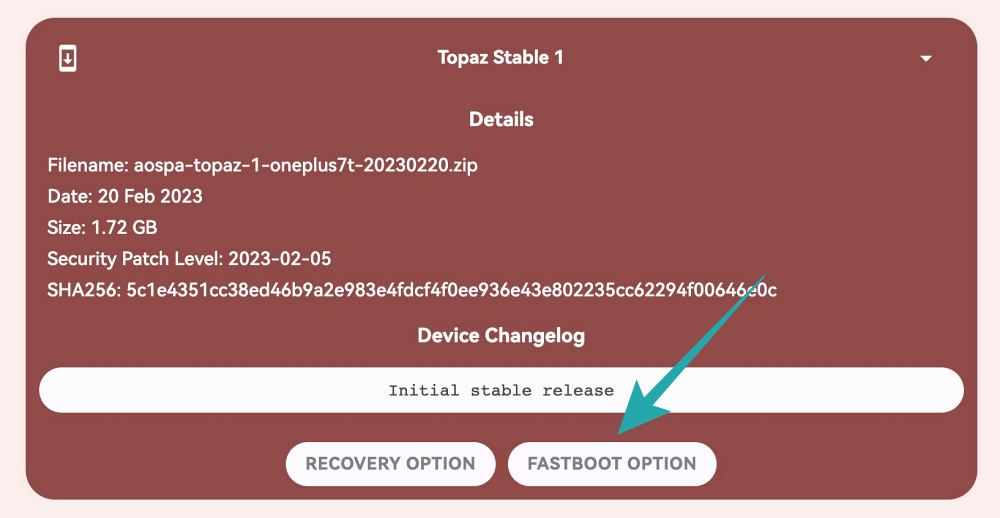
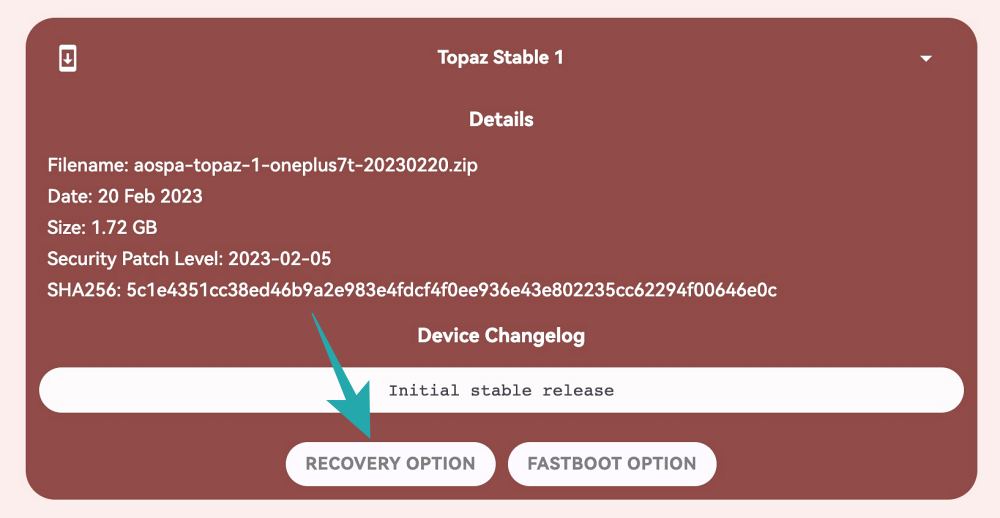
- Go to the Paranoid Topaz website and download the Fastboot ROM for your device.

- Once downloaded, transfer the ROM to the platform tools folder on your PC.
- Likewise, rename it to rom, so that the complete name becomes rom.zip.
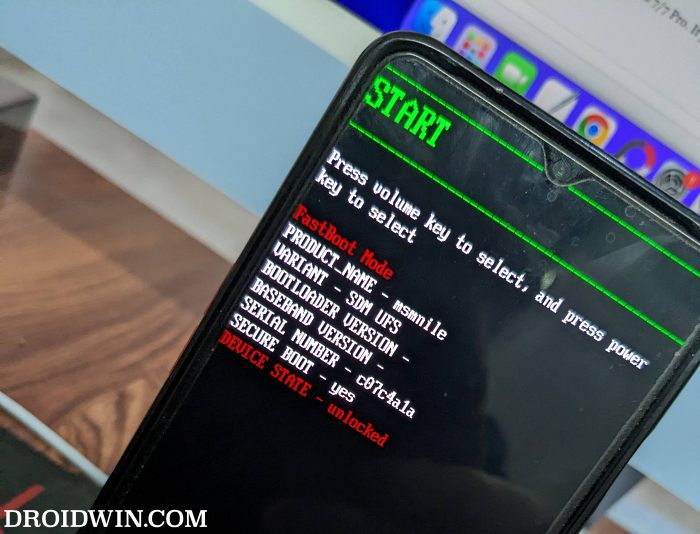
STEP 6: Boot to Fastboot Mode
- Connect your device to the PC via a USB cable. Make sure USB Debugging is enabled.
- Then head over to the platform-tools folder, type in CMD in the address bar, and hit Enter. This will launch the Command Prompt.
- After that, type in the following command in the CMD window to boot your device to Fastboot Mode
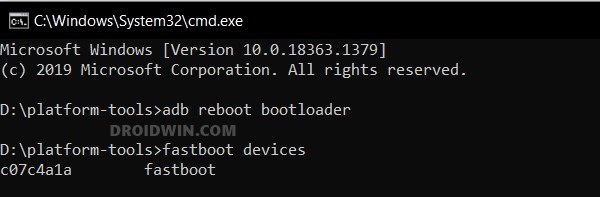
adb reboot bootloader
- To verify the Fastboot connection, type in the below command and you should get back the device ID.
fastboot devices
- If you are not getting any serial ID, then please install the Fastboot Drivers on your PC.

STEP 7: Install Paranoid Topaz via Fastboot Method
- Execute the below command to flash the Paranoid Topaz ROM onto your device:
fastboot update rom.zip
- Once the flashing is done, reboot your device to recovery via the below command:
fastboot reboot recovery
- From Recovery, go to Factory Data > Factory Data/Format Data > Format Data.
- Once done, tap on Reboot System Now. Your device will boot to the newly installed OS.
That’s it. These were the steps to install Paranoid Topaz on OnePlus 7/Pro/7T/Pro via Fastboot Method. Let’s now show you how the same could be carried out via Recovery Mode.
Install Paranoid Topaz on OnePlus 7/Pro/7T/Pro via Recovery Method
The below instructions are listed under separate sections for ease of understanding. Make sure to follow the same sequence as mentioned.
STEP 1: Install Android SDK
First and foremost, you will have to install the Android SDK Platform Tools on your PC. This is the official ADB and Fastboot binary provided by Google and is the only recommended one. So download it and then extract it to any convenient location on your PC. Doing so will give you the platform tools folder, which will be used throughout this guide.
STEP 2: Enable USB Debugging and OEM Unlocking
Next up, you will have to enable USB Debugging and OEM Unlocking on your device. The former will make your device recognizable by the PC in ADB mode. This will then allow you to boot your device to Fastboot Mode. On the other hand, OEM Unlocking is required to carry out the bootloader unlocking process.
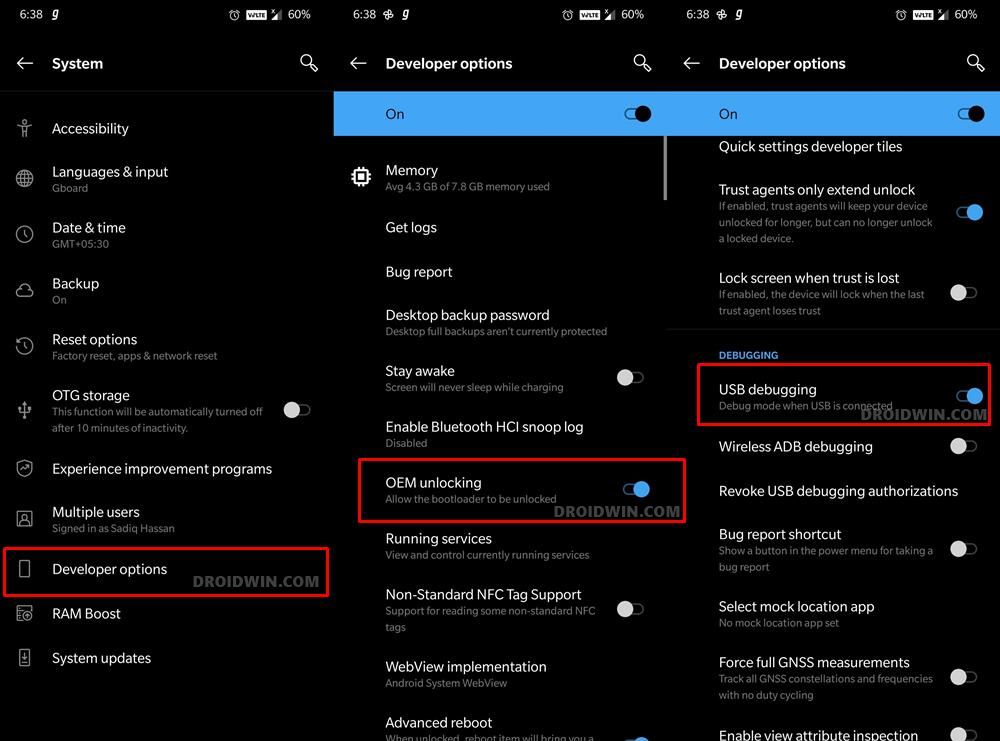
So head over to Settings > About Phone > Tap on Build Number 7 times > Go back to Settings > System > Advanced > Developer Options > Enable USB Debugging and OEM Unlocking.
STEP 3: Unlock Bootloader
Next up, you will also have to unlock the device’s bootloader. Do keep in mind that doing so will wipe off all the data from your device and could nullify its warranty as well. So if that’s all well and good, then please refer to our detailed guide on How to Unlock Bootloader of OnePlus 7 series

STEP 4: Downgrade to Android 11 Firmware
It is recommended that your device should be on the Android 11 firmware before flashing Paranoid Topaz ROM. So refer to our guide on How to Downgrade OnePlus 7/7T/7T Pro Android 12 to Android 11 [3 Methods].
STEP 5: Download Paranoid Topaz Recovery ROM
- Go to the Paranoid Topaz website and download the Recovery ROM for your device.
- Rename the downloaded ROM to rom.zip and transfer it to the platform tools folder.
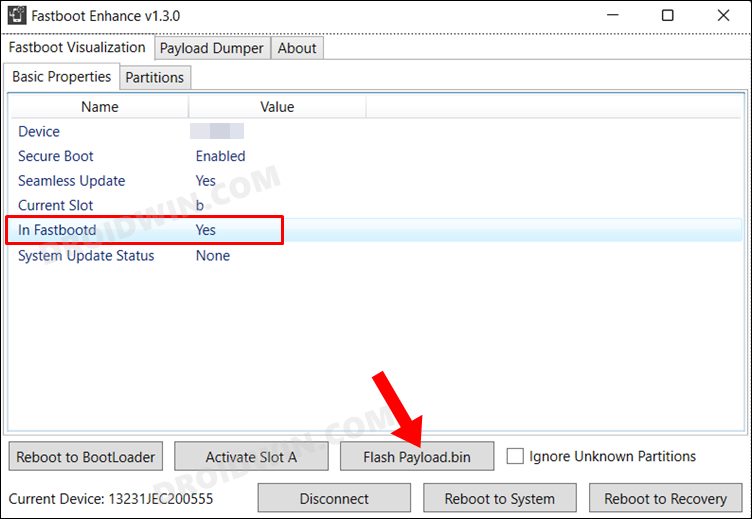
- Then extract the recovery.img file via Fastboot Enhance and sent it to the platform-tools folder as well.
STEP 6: Boot to Fastboot Mode
- Connect your device to the PC via a USB cable. Make sure USB Debugging is enabled.
- Then head over to the platform-tools folder, type in CMD in the address bar, and hit Enter. This will launch the Command Prompt.
- After that, type in the following command in the CMD window to boot your device to Fastboot Mode
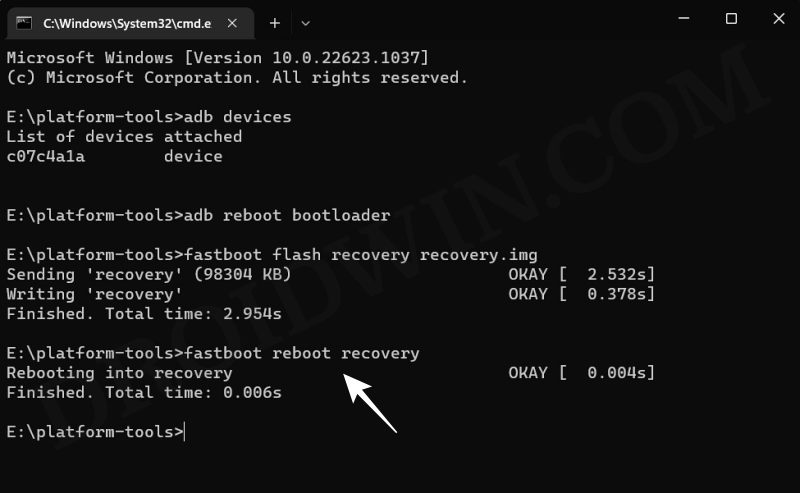
adb reboot bootloader
- To verify the Fastboot connection, type in the below command and you should get back the device ID.
fastboot devices
- If you are not getting any serial ID, then please install the Fastboot Drivers on your PC.

STEP 7: Flash Paranoid Topaz Recovery
- If you have OnePlus 7T/7T Pro, then execute the below command to flash recovery in the recovery partition
fastboot flash recovery recovery.img
- On the other hand, OnePlus 7/7 Pro should use the below command to flash the recovery in the boot partition:
fastboot flash boot recovery.img
- Now type in the below command to boot your device to the newly flashed Topaz Recovery:
fastboot reboot recovery
STEP 8: Install Paranoid Topaz on OnePlus 7/Pro/7T/Pro via Paranoid Recovery
- From the Paranoid Recovery, select Apply Update from ADB > ADB Sideload.
- Now type in the below command to sideload the ROM:
adb sideload rom.zip
- The flashing will now begin. Once done, go to Reboot and select Recovery. Your device will now reboot to the Topaz Recovery.
- So go to Factory Data > Factory Data/Format Data > Format Data.
- Once done, tap on Reboot System Now. Your device will boot to the newly installed OS.

That’s it. These were the two different methods to install Paranoid Topaz on OnePlus 7/Pro/7T/Pro. If you have any queries concerning the aforementioned steps, do let us know in the comments. We will get back to you with a solution.


