In this guide, we will show you various methods to install the OTA updates on your rooted OnePlus 12. The newest addition to the OnePlus family beholds a slew of intriguing goodies and a power-packed specs sheet. If we turn our attention towards custom development, ten even though it isn’t being actively supported, there are still a few tweaks that you could carry out, the primary among which is the ability to gain administrative privileges. Once you do so, you’ll be in a position to welcome abode tons of mods and tweaks.
However, this is just one side of the coin. Carrying out these tweaks brings in a few uninvited guests as well, including the failing of the Play Integrity Test. Likewise, you might no longer be able to install the updates the traditional way because the init_boot partition is already occupied by its Magisk-patched counterpart. But fret not! There exist numerous methods through which you can easily install the OTA updates on your rooted OnePlus 12. And in this guide, we will make you aware of all those methods. So without further ado, let’s get started.
Table of Contents
How to Install OTA Updates on Rooted OnePlus 12 [6 Methods]

Droidwin and its members wouldn’t be held responsible in case of a thermonuclear war, your alarm doesn’t wake you up, or if anything happens to your device and data by performing the below steps. While the process won’t wipe the data on your device, it is still recommended to take a backup beforehand. Moreover, before starting, make sure to disable all the modules installed on your device. Here’s how it could be done-
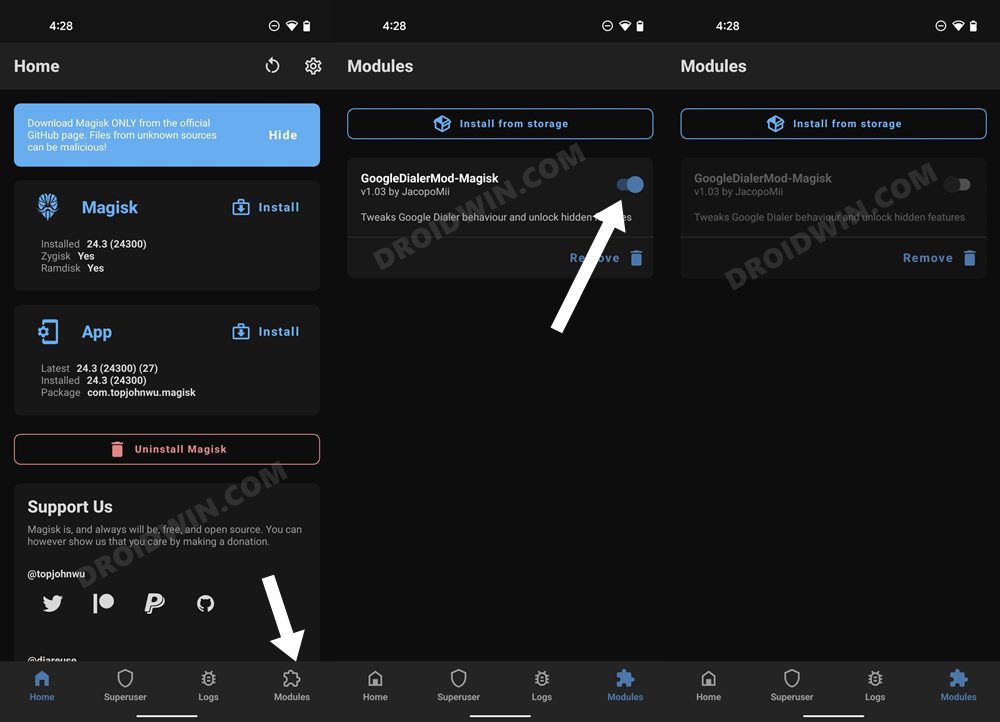
- Launch the Magisk app and go to the Modules section.
- Then disable the toggle next to each of the modules.
- Finally, restart the device for the changes to take place.

METHOD 1: With Full OTA Access
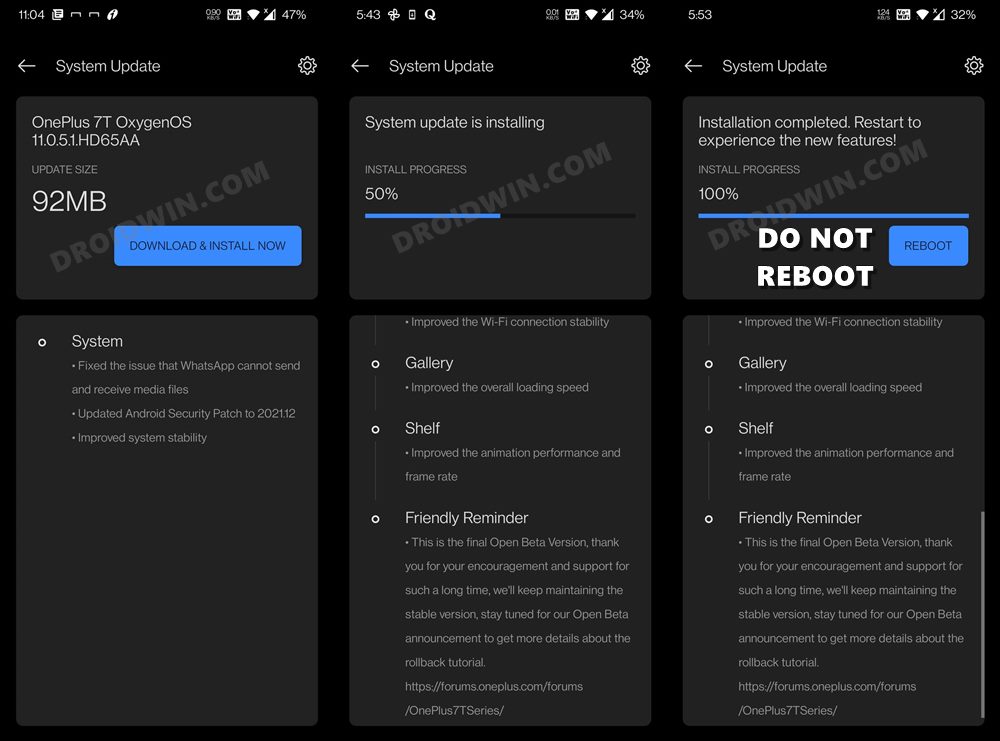
- To begin with, go to Settings > System > System Update
- Then download the OTA update that has arrived.
- Once downloaded, do not reboot your device.
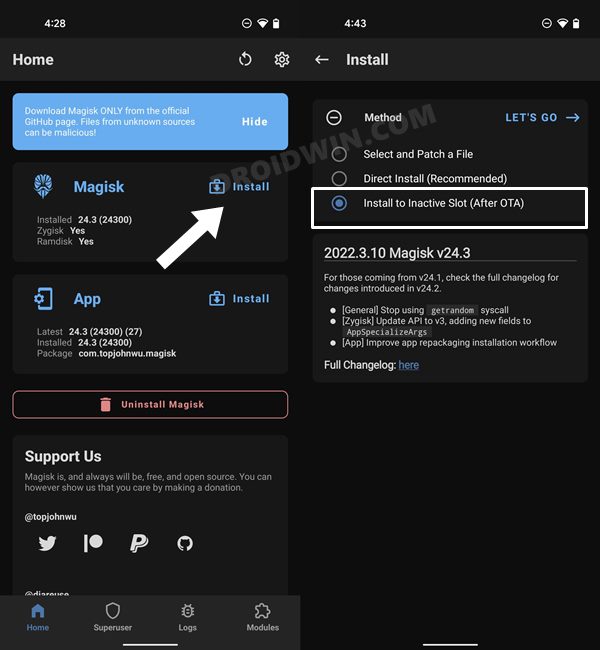
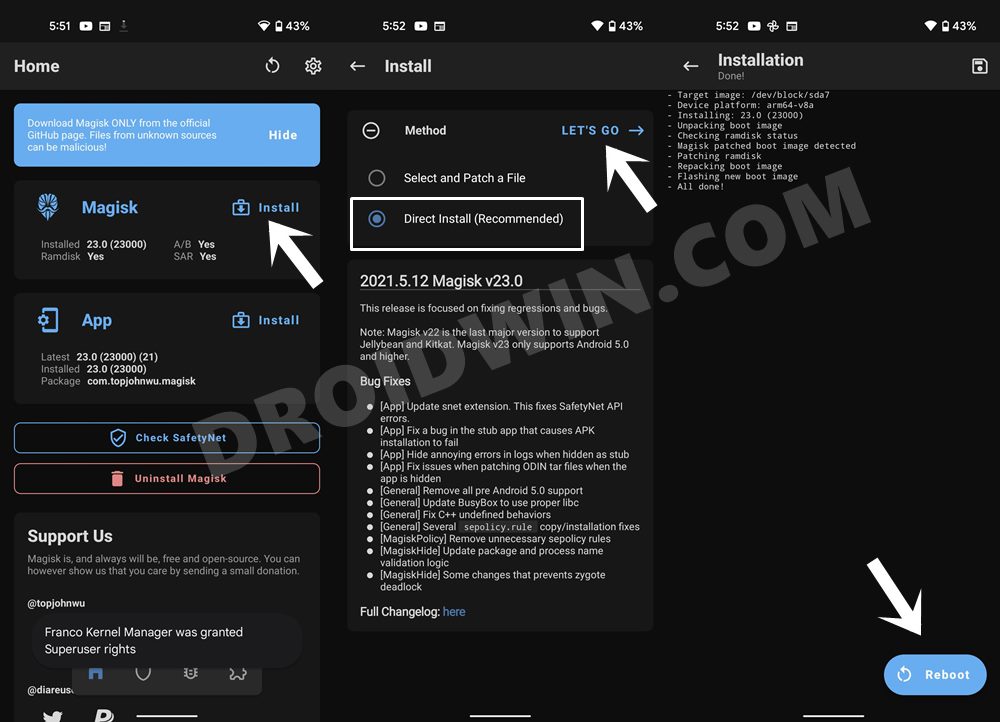
- Instead, launch the Magisk App and tap on Install next to Magisk.
- After that, select Install to Inactive Slot [After OTA].
- Then tap on Let’s Go and wait for the process to complete.
- Once done, hit the Reboot Now button. That’s it.
- Your rooted device will now boot to the newly updated OS.

METHOD 2: Using Updater APK
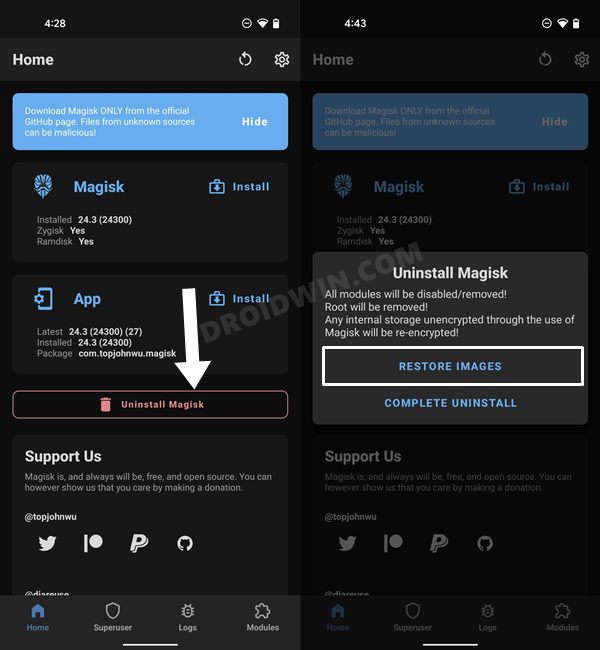
- Launch Magisk, tap on Uninstall Magisk, and select Restore Images.
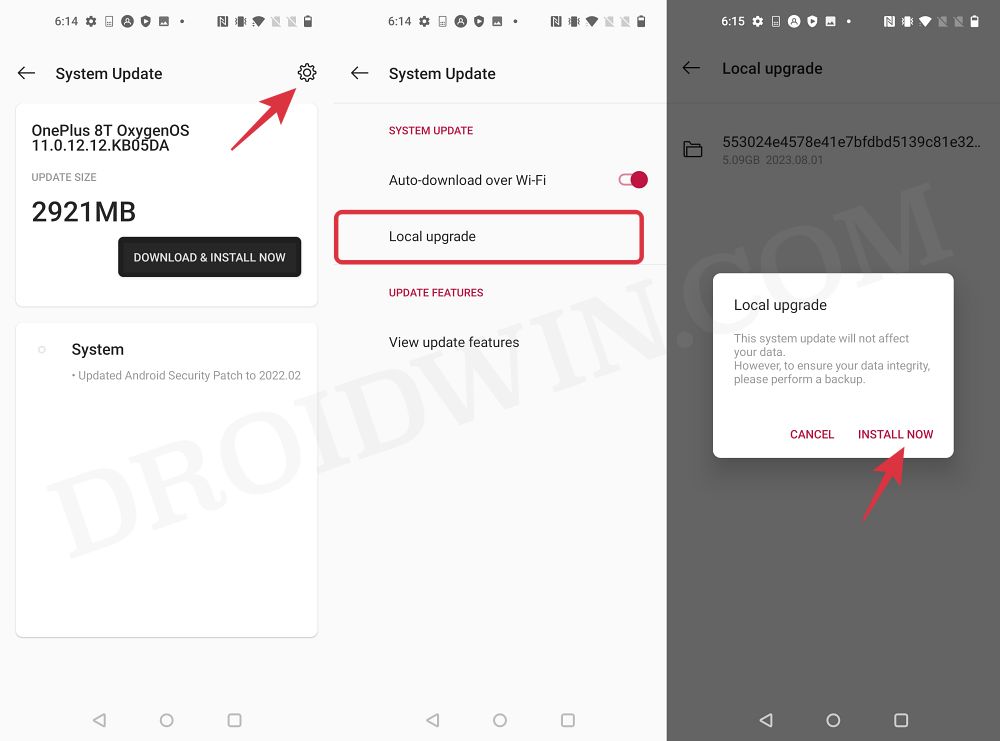
- Now download the latest OTA file via Oxygen Updater and place it in the device’s Internal Storage.
- Then install the OnePlus Local Update App on your device.
- Now install the downloaded OTA via the Local Update option in the upper right corner.
- Once installed, do not reboot your device. Instead, launch Magisk and select Install to Inactive Slot.
- Now reboot your device and it should boot to the rooted OS with new a update installed!

METHOD 3: With Incremental OTA Access
- Launch the Magisk app, tap on Uninstall Magisk, and choose Restore Images.
- Magisk will now restore the stock boot.img file that it had backed up during the rooting process.
- Once done, go to Settings > System > System Update and download the OTA update that has arrived.
- Once downloaded, do not reboot your device. Rather, launch the Magisk App.
- Then tap on Install next to Magisk. After that, select Install to Inactive Slot [After OTA].
- Finally, tap on Let’s Go and wait for the process to complete. Once done, hit Reboot Now.
- Your device will now boot to the newly updated OS, with the root being persevered.
METHOD 4: Via Full Firmware
- Download and install the Oxygen Updater app from the Play Store.
- Now launch it and download the full update via it.
- Then download and install the OxygenOS local update app.
- It will be installed as Software Update, open it and tap on the overflow icon.
- Then select Local Update, browse to the update.zip file, and extract it.
- Once the extraction is complete, do NOT click Install.
- Instead, launch Magisk and choose Install > Install to Inactive Slot.
- Do NOT reboot your device. Instead, go back to the Software Update app and choose Install.
- That’s it. Your OnePlus 11 will now reboot to the rooted OS.
METHOD 5: Via Restore Image
- Download the OTA update and then launch the Magisk app.
- Now select Uninstall Magisk and tap on Restore Images.
- Then go back to the OTA and tap on Install. Once done, do not reboot.
- Instead, go back to Magisk, select Install after it’s, and finally restart your device
METHOD 6: By Reinstalling Magisk
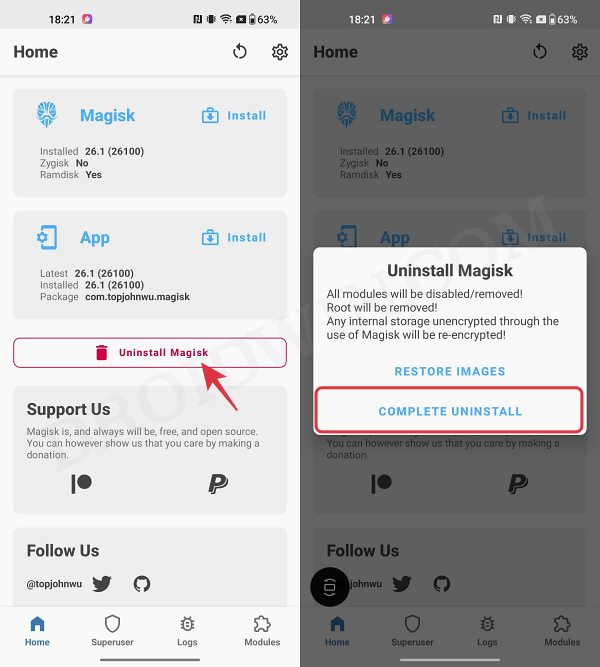
This is the lengthiest of all the methods as it will uninstall all your mods which you will have to manually reinstall it. However, this is the safest of all the approaches out there So if you are looking for a fail-safe approach, then this should be your go-to choice [you could take a screenshot of the Magisk Module and LSPosed Modules page so as to keep track of all the installed mods].
- Launch Magisk, tap on Uninstall Magisk, and select Complete Uninstall.
- Your device will now reboot to the non-rooted environment.
- Proceed ahead and install the OTA updates on your device.
- Once done, simply root your device once again via Magisk.
That’s it. These were the steps to install OTA updates on your rooted OnePlus 12. If you have any queries concerning the aforementioned steps, do let us know in the comments. We will get back to you with a solution at the earliest.


