In this guide, we will show you the steps to install various Custom ROMs on your iPlay 50 Mini/Pro/Max. Offering great value for money, these tablets are in high demand as of late. However, the specs sheet doesn’t tell the complete story. Once the users get hold of these devices, they are all voicing the same opinion- the underlying OS skin leaves a lot to be desired.
Not only is it bloated with unnecessary apps but it also lacks some key features. Then the fact that it is still stuck on Android 12 only makes the matter worse. And the icing on the cake? Well, these tablets aren’t even active in custom development. Well, this is where the role of Generic System Images comes in handy.
Since these tablets are Project Treble compatible, you could easily welcome abode tons of ROMs, including the likes of LineageOS, Pixel Experience, DerpFest, crDroid, and countless others. Moreover, since these are “generic” images, the flashing steps are near about same for these ROMs. So without any further ado, let’s make you aware of the steps to install various Custom/GSI ROMs on your iPlay 50 Mini/Pro/Max.
Table of Contents
How to Install Custom/GSI ROMs on iPlay 50 Mini/Pro/Max

Before starting, please take a backup of all the data on your device. Droidwin and its members wouldn’t be held responsible in case of a thermonuclear war, your alarm doesn’t wake you up, or if anything happens to your device and data by performing the below steps.
STEP 1: Install Android SDK

First and foremost, you will have to install the Android SDK Platform Tools on your PC. This is the official ADB and Fastboot binary provided by Google and is the only recommended one. So download it and then extract it to any convenient location on your PC. Doing so will give you the platform-tools folder, which will be used throughout this guide to install Custom ROMs on your iPlay 50 Mini/Pro/Max.
STEP 2: Enable USB Debugging and OEM Unlocking
Next up, you will also have to enable USB Debugging and OEM Unlocking on your device. The former will make your device recognizable by the PC in ADB mode. This will then allow you to boot your device to Fastboot Mode. On the other hand, OEM Unlocking is required to carry out the bootloader unlocking.
So head over to Settings > About Phone > Tap on Build Number 7 times > Go back to Settings > System > Advanced > Developer Options > Enable USB Debugging and OEM Unlocking.
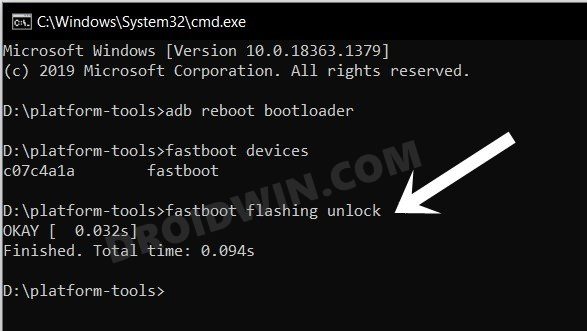
STEP 3: Unlock Bootloader
Next up, you will also have to unlock the device’s bootloader. Do keep in mind that doing so will wipe off all the data from your device and could nullify its warranty as well. So if that’s all well and good, then please refer to our detailed guide on How to Unlock Bootloader on iPlay 50 Mini/Pro/Max
STEP 4: Download LineageOS GSI ROM
- Grab hold of the GSI ROM for your device from the below link.
DOWNLOAD ANDROID 13 GSI ROMs: DOWNLOAD LINK
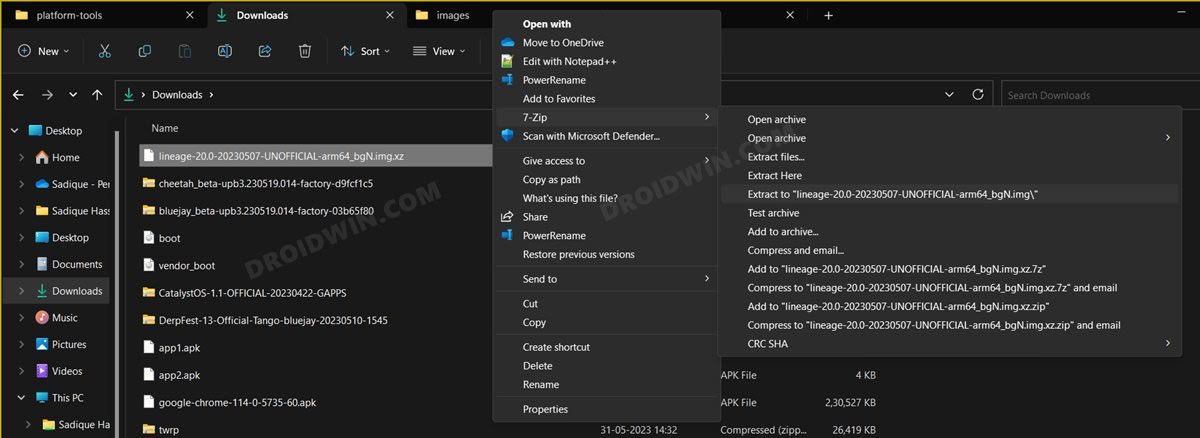
- Now extract it via 7-ZIP to the platform-tools folder on your PC.
- This will give you the system.img file, which will act as our GSI ROM.

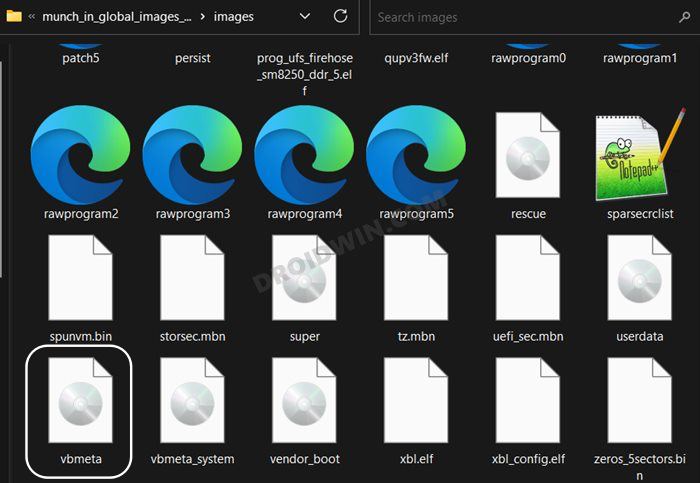
STEP 5: Extract vbmeta
- First off, download the stock firmware for your tablet.
- Then extract it and copy the vbmeta.img from there.
- Now transfer it to the platform-tools folder on your PC.
STEP 6: Boot Device to Fastboot Mode
- First off, connect your device to the PC via a USB cable. Make sure USB Debugging is enabled.
- Then head over to the platform-tools folder, type in CMD in the address bar, and hit Enter. This will launch the Command Prompt.

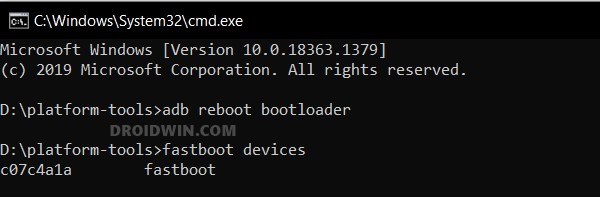
- Type in the following command in the CMD window to boot your device to Fastboot Mode
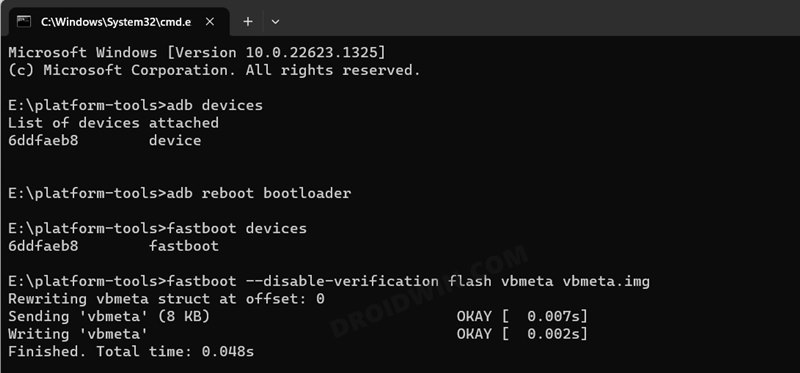
adb reboot bootloader
- To verify the Fastboot connection, type in the below command and you should get back the device ID.
fastboot devices
- If you are not getting any serial ID, then please install the Fastboot Drivers on your PC.
STEP 7: Disable Verity Check
Type in the below command to flash the vbmeta and hence disable the verification check of the vbmeta partition on your device
fastboot --disable-verification flash vbmeta vbmeta.img
If the aforementioned command didn’t work, then you could also try:
fastboot --disable-verity --disable-verification flash vbmeta vbmeta.img
STEP 8: Flash Android 13 GSI ROM on iPlay 50 Mini/Pro/Max
- First off, boot your tablet to FastbootD Mode via the below command
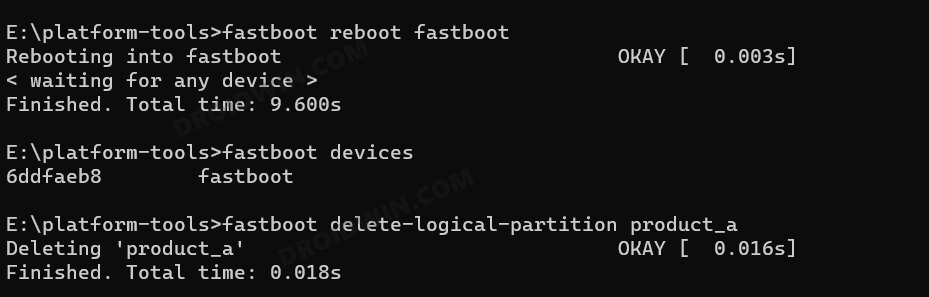
fastboot reboot fastboot
- Then delete the logical partition to free up some space on your device [See NOTE 1 & 2]
fastboot delete-logical-partition product_a
- Then delete the data present on the system partition via the below command:
fastboot erase system_a
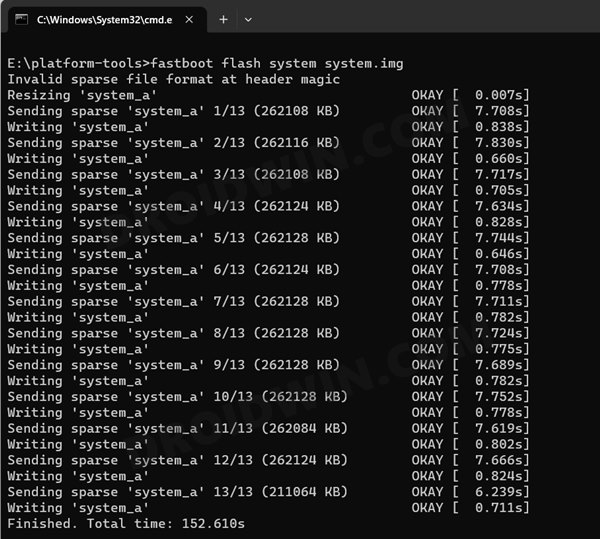
- You may now flash the GSI ROM via the below command [system.img is the name of the GSI ROM]
fastboot flash system_a system.img
- Once done, you’ll now have to do a format data, so use the below command
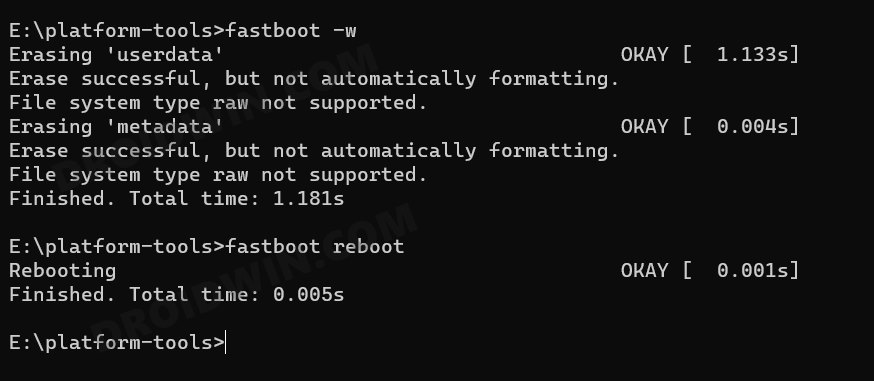
fastboot -w
- Finally, reboot your device to the newly installed OS via the below command [See NOTE 3]
fastboot reboot
That’s it. These were the steps to install the Custom/GSI ROMs on your iPlay 50 Mini/Pro/Max via Fastboot Commands. If you have any queries concerning the aforementioned steps, do let us know in the comments. We will get back to you with a solution at the earliest. And do check out the below-linked guides to fix numerous GSI-related bugs and issues.
- NOTE 1: Stay in Fastboot Mode and try flashing if FastbootD Mode is not working.
- NOTE 2: On some GSI ROMs, it is not compulsory to delete the logical partition, so if you get any error while deleting this partition, then simply skip it and move over to the next command.
- NOTE 3: If your device is stuck in a bootloop, then use the hardware keys to boot your device to Recovery. Then perform a factory reset from the recovery and your tablet will boot to the OS.
- Fix WiFi/Internet/Network not working in GSI ROM
- 5G, Bluetooth, 90Hz Display, DT2W not working in GSI ROM: How to Fix
- Fast Charging not working in GSI ROM: How to Fix
- Brightness Slider not working in GSI ROM: How to Fix
- Headphone Jack not working in GSI ROMs: How to Fix
- How to Resize System Partition to Install GSI ROM


Tunoa
Hey Mate,
Thanks for the guide. It seems to be the only one on the internet right now, so I appreciate the time you put in.
I am stuck in a boot loop and have tried factory reset without success.
The only info logs I can see is on boot I get –
Orange State:
OS not being Verified or Custom OS
And in the CMD –
PS …\Downloads\iPlayMiniRoms\Final> fastboot -w
wipe task partition not found: userdata
wipe task partition not found: cache
wipe task partition not found: metadata
I can reflash the official FW no worries. I just can’t install a Custom Rom.
Any ideas?
Cheers!
Toshio Yamamoto
he stock firmware for alldocube iplay50 mini is provided in .pac, how do you extract boot.img and vbmeta.img from it?