In this guide, we will show you the steps to resize the system partition so that you could install the GSI ROM. One of the biggest perks of having an open-source ecosystem like Android is the ability to flash customized firmware. Flashing a ROM changes the look and feel of the OS, adds tons of new features, and makes your device eligible to get the latest OS updates, even if your OEM doesn’t support it anymore. However, there are still a few devices out there that don’t have a decent set of custom ROMs.
For them, a Generic System Image is their savior. These GSIs are available for all the popular custom ROMs and it just requires you to flash the system.img file. However, it is proving to be easier said than done for some. A few users have voiced their concern that the size of the GSI ROM that they are planning to flash is much larger than what their system partition could accommodate. For example, in the case of Motorola Edge 20 Pro, its system partition is just around 1GB whereas the GSI is way more than that.
On the other hand, the product partition, with around 2.7GB in size isn’t even required by the GSI. So we deleted all the contents of the product partition and set its size to 0. As a result, the system partition could now make use of this free 2.7GB space when the GSI flashing is in progress. And in this guide, we will show you how to do just that. Given here are the steps to resize your device’s system partition so that you could install the preferred GSI ROM. Follow along.
Table of Contents
How to Resize System Partition to Install GSI ROM
The below process is extremely risky and might end up bricking your device if not done correctly. Moreover, as of now, this process has only been tried on a few Motorola devices. Your mileage may vary with other devices. Droidwin and its members wouldn’t be held responsible in case of a thermonuclear war, your alarm doesn’t wake you up, or if anything happens to your device and data by performing the below steps.
STEP 1: Install Android SDK

To begin with, install the Android SDK Platform Tools on your PC. This is the official ADB and Fastboot binary provided by Google and is the only recommended one. So download it and then extract it to any convenient location on your PC. Doing so will give you the platform-tools folder, which will be used throughout this guide.
STEP 2: Patch Boot.img via Magisk
You will also need to get the Magisk patched boot.img file for your device. If you just use the stock boot.img, then the kernel might not be able to boot to the OS due to verity check fails. So in that case, you will then have to patch and flash the vbmeta (or vbmeta_system) to disable the verity checks. On the other hand, that isn’t required if you would simply flash the Magisk patched boot.img file. So let’s take this approach.
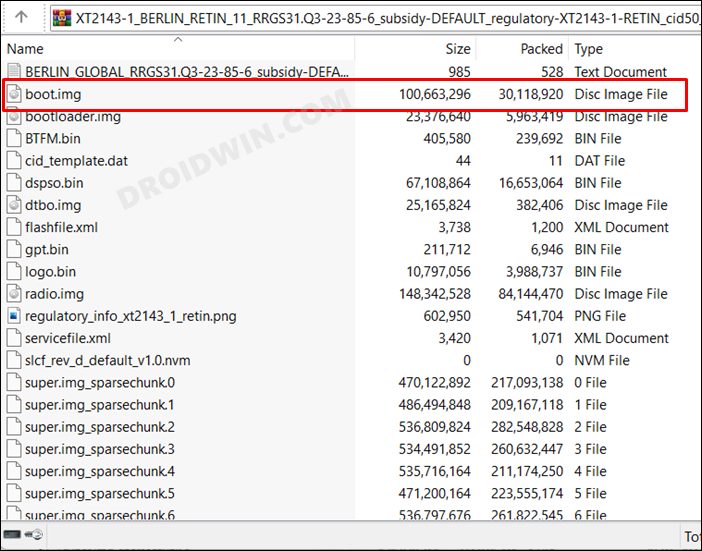
- Download the stock firmware, extract it and get the stock boot.img file.

- After that, install the Magisk App on your device.
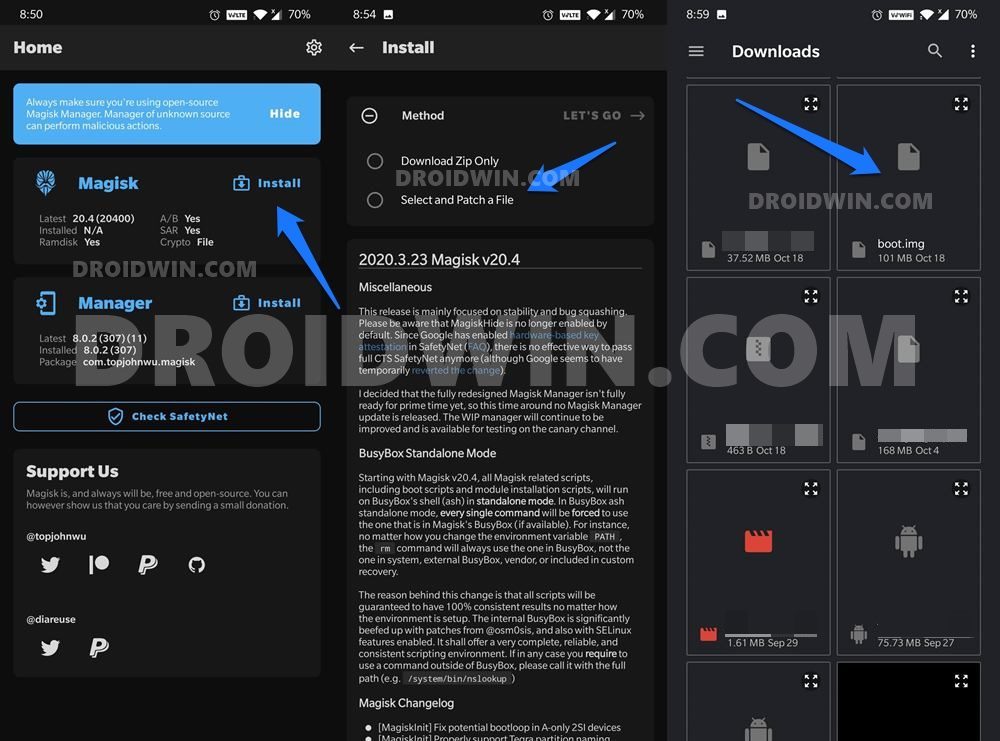
- Then tap on the Install button situated next to Magisk.
- From the Method section, choose Select and Patch a file.
- Browse to the extracted boot.img file and select it.
- Then tap on the Let’s Go option situated at the top right.
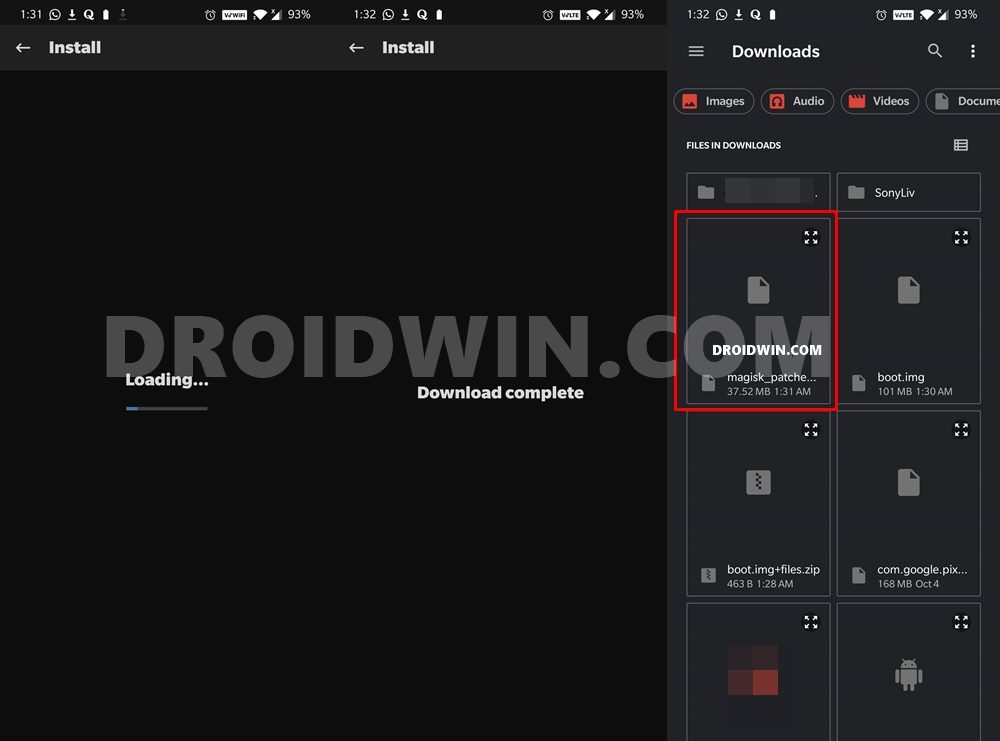
- Magisk will now load the boot.img file and will patch it accordingly.
- Once that is done, you would get the Download Complete message.
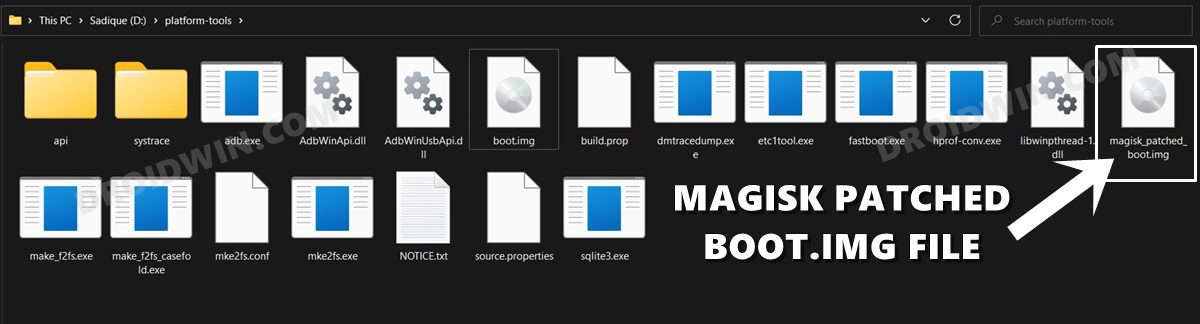
- The patched boot image file will be saved in Internal Storage > Downloads. Rename it to magisk_patched_boot.img.
STEP 3: Enable USB Debugging and OEM Unlocking
Next up, you will have to enable USB Debugging and OEM Unlocking on your device. The former will make your device recognizable by the PC in ADB mode. This will then allow you to boot your device to Fastboot Mode. On the other hand, OEM Unlocking is required to carry out the bootloader unlocking process.
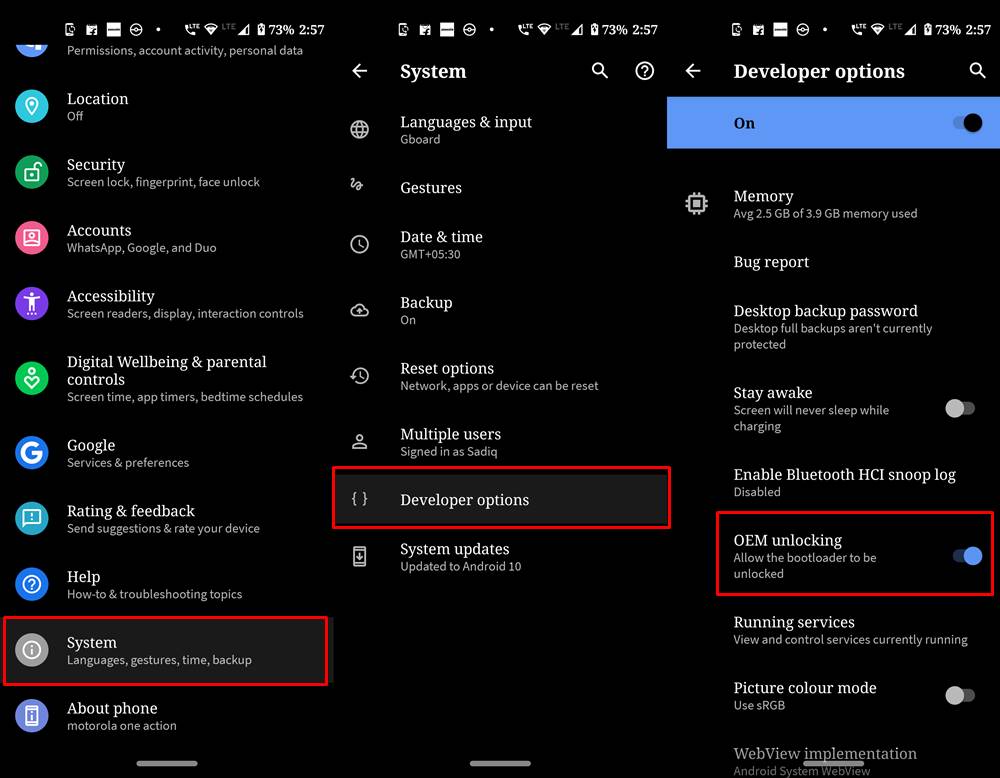
So head over to Settings > About Phone > Software Information > Tap on Build Number Number 7 times > Go back to Settings > System > Developer Options > Enable USB Debugging and OEM Unlocking.
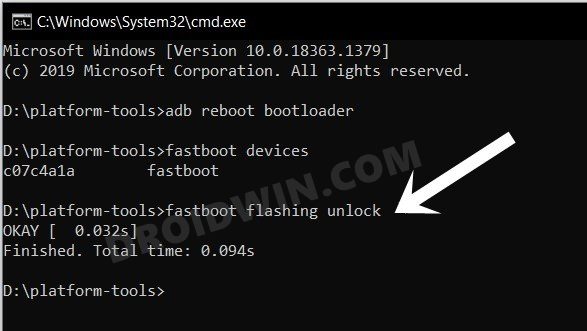
STEP 4: Unlock Bootloader
Next up, you will also have to unlock the device’s bootloader. Do keep in mind that doing so will wipe off all the data from your device and could nullify its warranty as well. So if that’s all well and good, then please refer to our detailed guide on How to Unlock Bootloader on any Android Device.
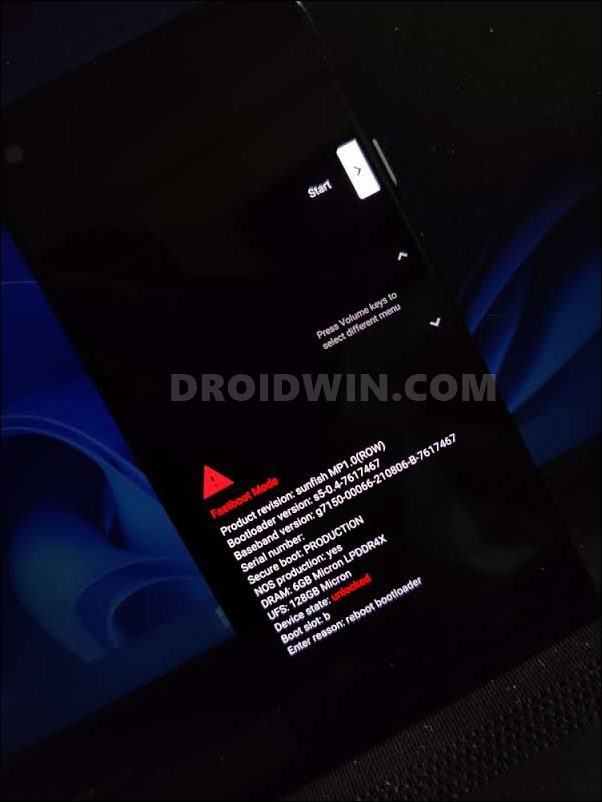
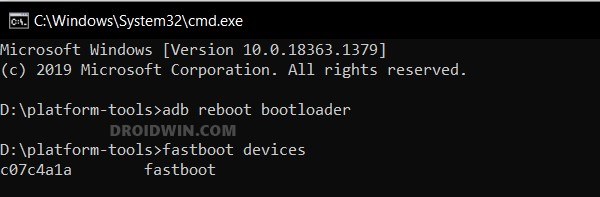
STEP 5: Boot to Fastboot Mode
- Connect your device to the PC via USB cable. Make sure USB Debugging is enabled.
- Then head over to the platform-tools folder, type in CMD in the address bar, and hit Enter. This will launch the Command Prompt.
- After that, type in the following command in the CMD window to boot your device to Fastboot Mode
adb reboot bootloader
- To verify the Fastboot connection, type in the below command and you should get back the device ID.
fastboot devices

STEP 6: Flash Patched Boot.img File
- To begin with, transfer the magisk_patched_boot.img file to the platform-tools folder on your PC.
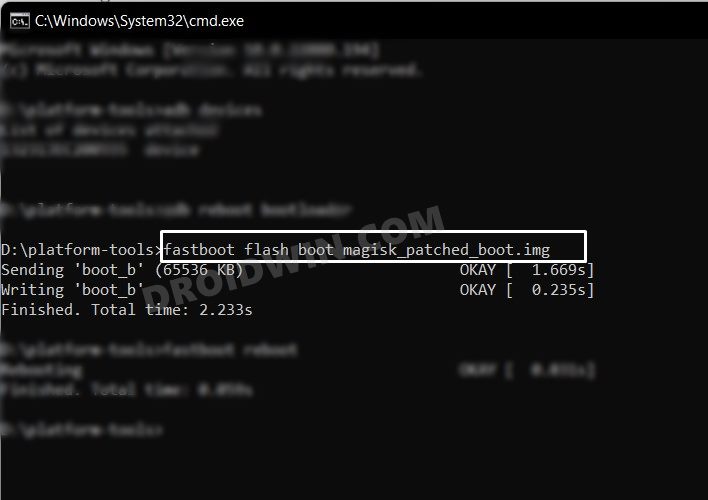
- Then head over to the platform-tools folder address bar, type in CMD, and hit Enter.
- This will launch Command Prompt. Execute the below command to flash the Magisk Patched Boot file:
fastboot flash boot magisk_patched_boot.img
STEP 7: Resize System Partition
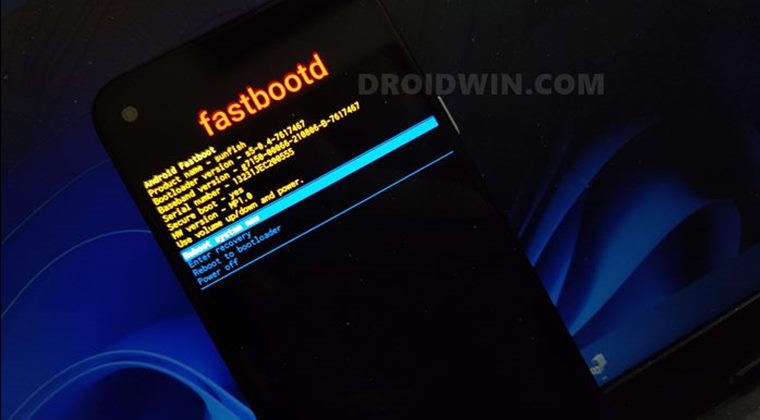
- As of now, your device is booted to Fastboot Mode. So execute the below command to boot it to FastbootD
fastboot reboot fastboot
- Then execute the below command to delete the data on the product partition-
fastboot erase product
- After that, type in the below command to set the size of the product partition to 0
fastboot resize-logical-partition product_a 0x0
- To verify if the partition size has become 0, execute the below command
fastboot getvar all
- If one of the lines shows the below code, then the process is a success.
(bootloader) partition-size:product_a:0x0
STEP 8: Flash GSI ROM
Now that we are done with resizing the system partition, we could flash the GSI ROM without any issues. Here are the generic instructions to install a GSI on Android-
- To begin with, download the GSI ROM of your choice and send it to the platform-tools folder.
- Then open CMD inside the platform-tools folder and then type in the below command
fastboot erase system
- This will erase the data in the system partition. Once done, execute the below command to flash the GSI ROM
fastboot flash system gsi.img
- After that, execute the below two commands to format your device [it will wipe all the data].
fastboot erase userdata
fastboot erase metadata
- Finally, type in the below command to boot your device to the newly installed OS
fastboot reboot
That’s it. These were the steps to resize the system partition so as to install the GSI ROM. If you have any queries concerning the aforementioned steps, do let us know in the comments. We will get back to you with a solution at the earliest.


Franclin
Hello!
My tablet *Discover Note 4 plus* shows a ROM capacity of 64GB but will notify insufficient storage for new files when storage equals 48.0/64GB free space. This gives me a total maximum of 10.8GB of user data instead of about 58GB.
Wanna know if the phone’s manufacturer printed a fake ROM capacity information in the phone’s memory or whether the ROM storage capacity may be extended to its originally mentioned 64GB storage.
I’m pleading on your behalf as you help me through with this problem.
Thanks in advanced!
Yours faithful
Franclin
Hello!
My tablet *Discover Note 4 plus* shows a ROM capacity of 64GB but will notify insufficient storage for new files when storage equals 48.0/64GB free space. This gives me a total maximum of 10.8GB of user data instead of about 58GB.
Wanna know if the phone’s manufacturer printed a fake ROM capacity information in the phone’s memory or whether the ROM storage capacity may be extended to its originally mentioned 64GB storage.
I’m pleading on your behalf as you help me through with this problem.
Thanks in advanced!
Yours faithful follower
Trishank Upadhyay
I install dsu loader it’s shows restart and discard then I clicked restart and it’s directly back on my original rom and in notification it’s still show that dsu dailog restart and discard