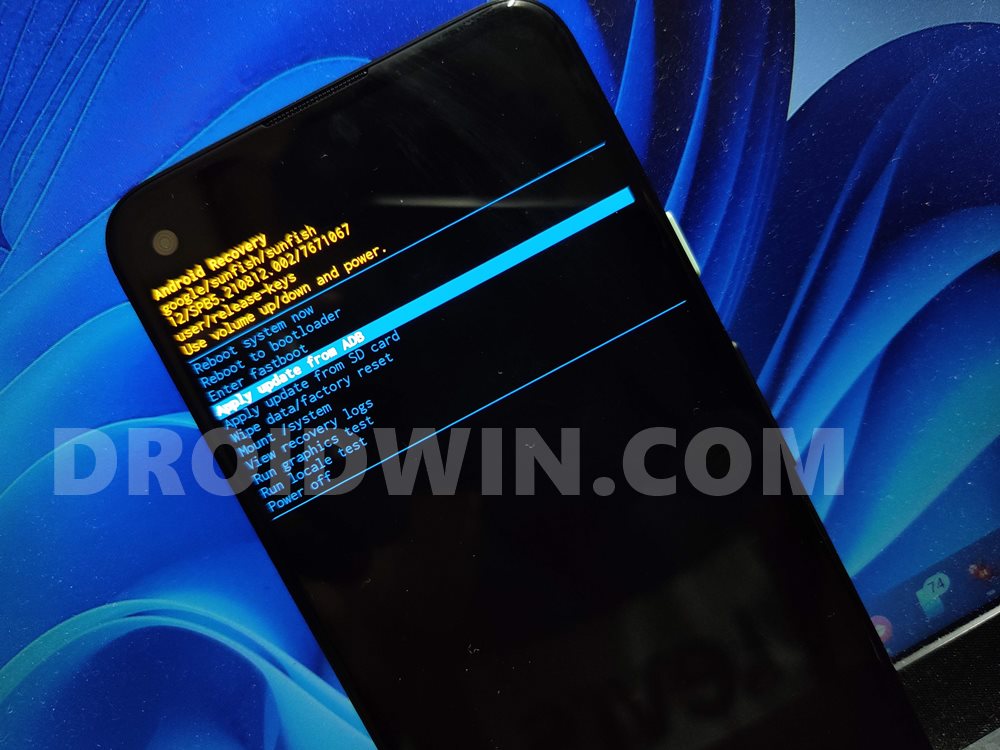
In this guide, we will show you the steps to install the Android ADB Drivers on your Windows 11 PC. ADB Commands are among the most important tool that a tech enthusiast could have in their arsenal. It beholds a slew of important functionalities, such as booting the device to stock recovery, flashing the stock firmware via ADB Sideload, and carrying out administrative level tasks via adb shell.
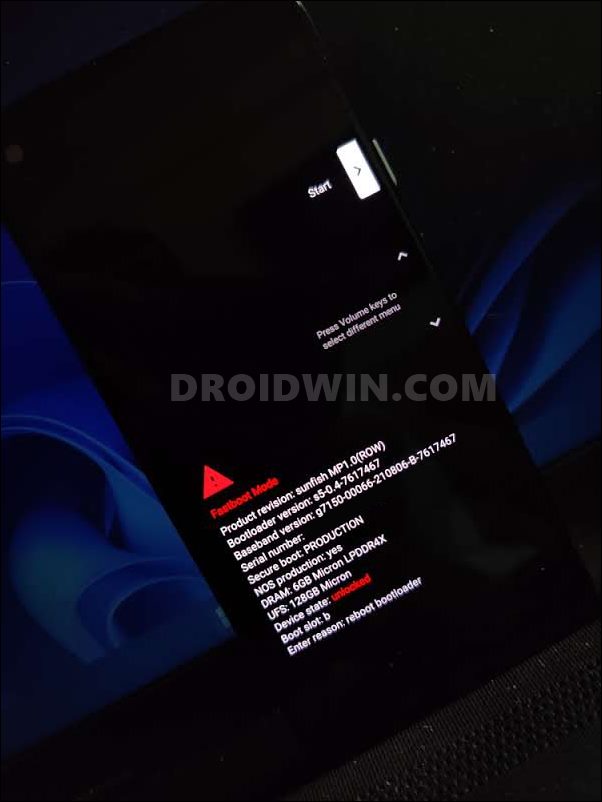
Apart from that, you could also use the ADB command to boot your device to Fastboot- which would then open the floodgates to plethora of customizations. In this regard, to establish a successful ADB connection between your device and PC, enabling USB Debugging and using the Android SDK Platform Tools are the two of the most important prerequisites.
And in most cases, they are sufficient for executing the ADB commands. However, in some instances, your PC would still be unable to recognize your device. This is where the need to install the Android ADB Drivers on your Windows 11 PC would arise. So without further ado, let’s get started with the installation steps.
Table of Contents
How to Install Android ADB Drivers in Windows 11
- First off, download and extract Android SDK Platform Tools on your PC.

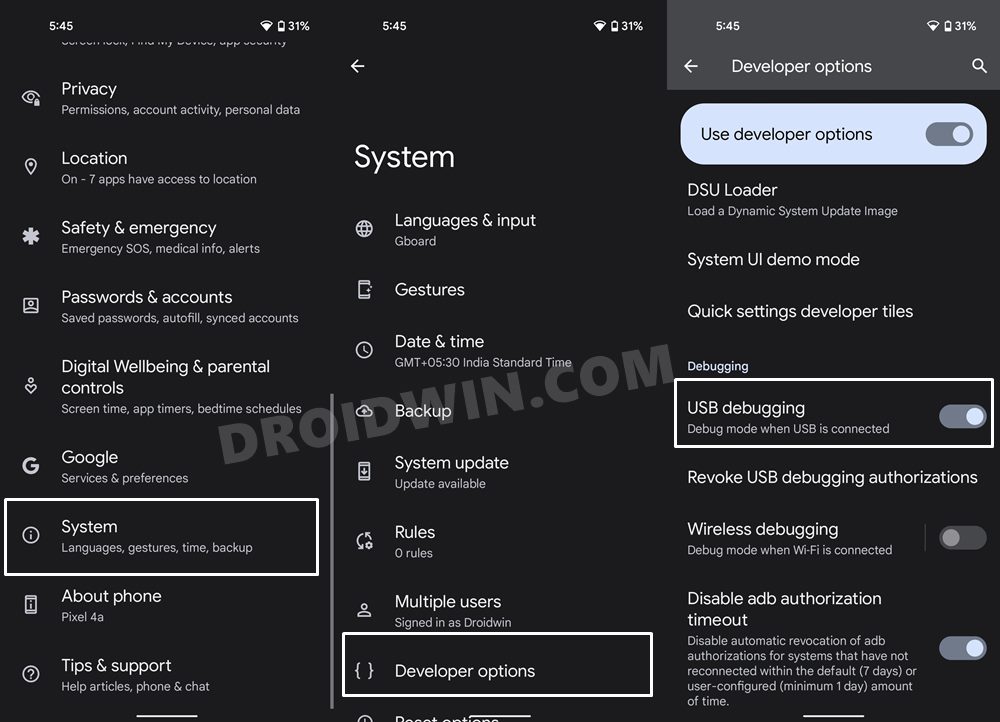
- Enable USB Debugging on your device and connect it to PC via USB cable.

- Then download and extract Google USB Drivers to any location on your PC.

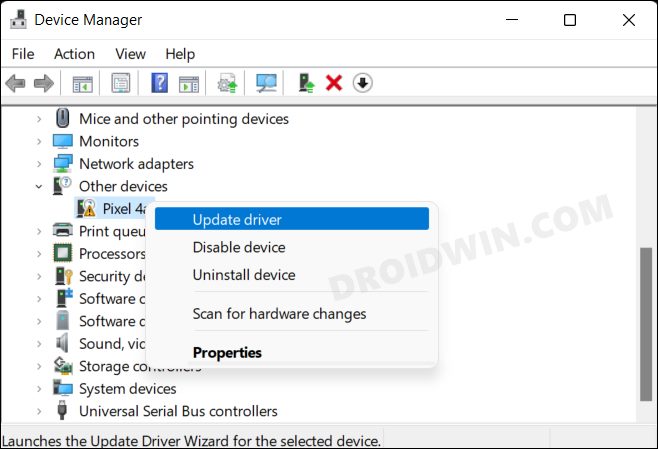
- After that, press Windows+X and select Device Manager. Then expand the Other Devices section.
- Your device will be listed with an exclamation mark. Right-click on it and select Update Drivers.

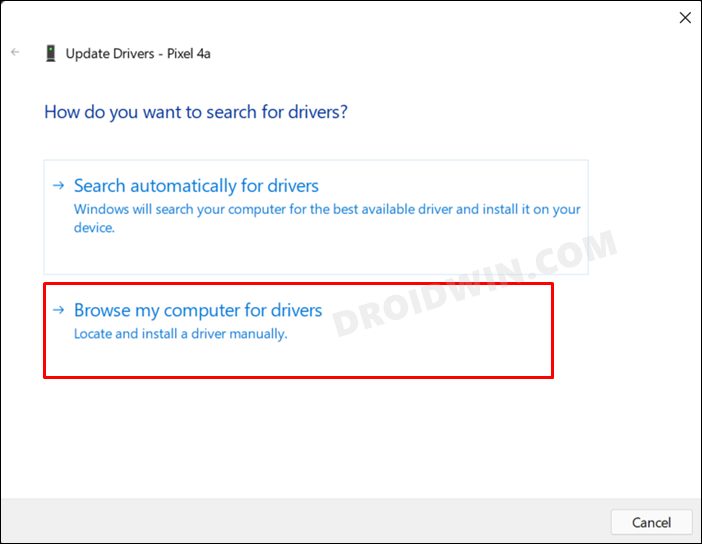
- After that, select Browse my computer for drivers.

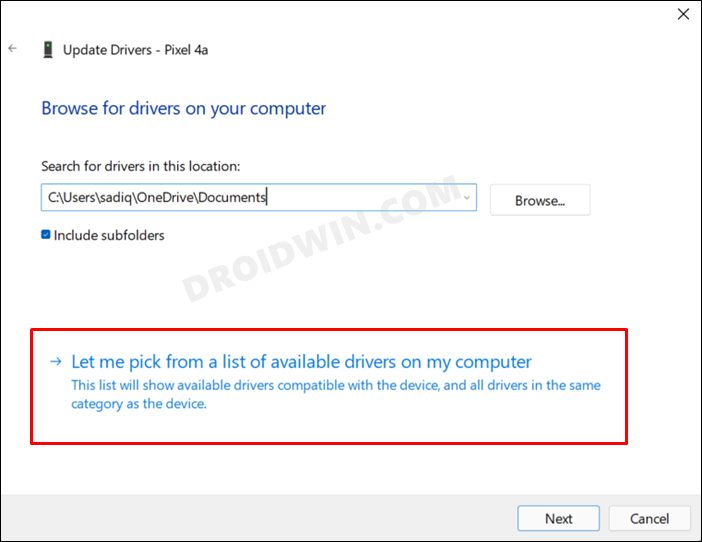
- Then select Let me pick from a list of available drivers.

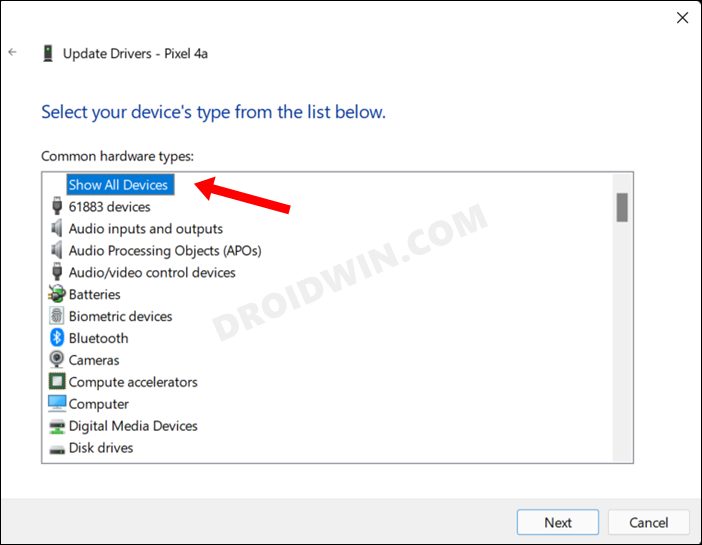
- Then select Show All Devices and click Next.

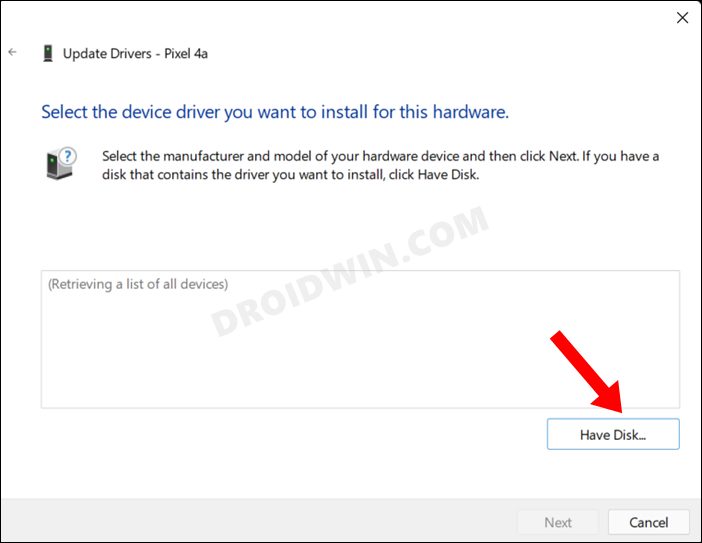
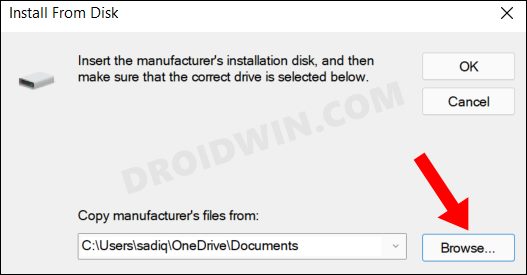
- Now click on the Have Disk button.

- After that, click on the Browse button.

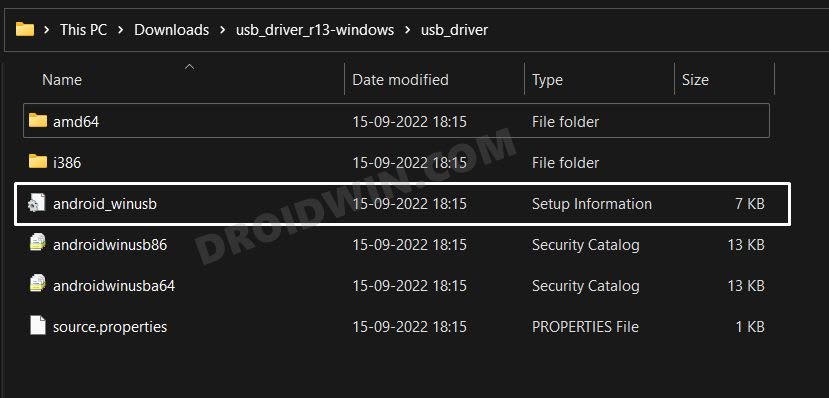
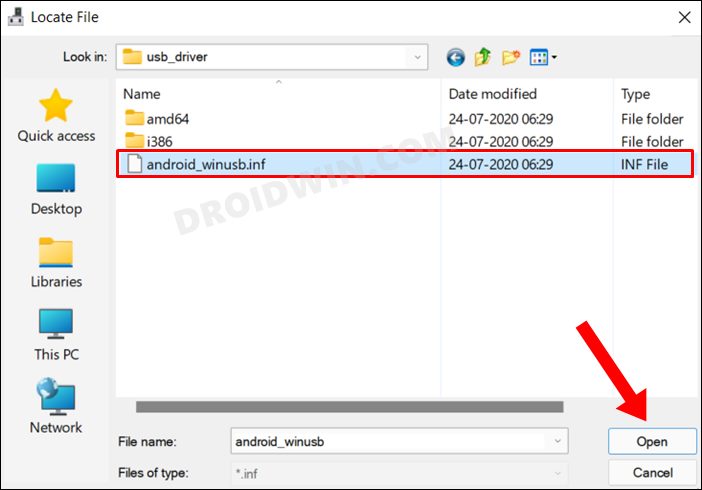
- Then navigate to the folder where you have extracted the Google USB Drivers, select the android_winusb.inf file, and click Open.

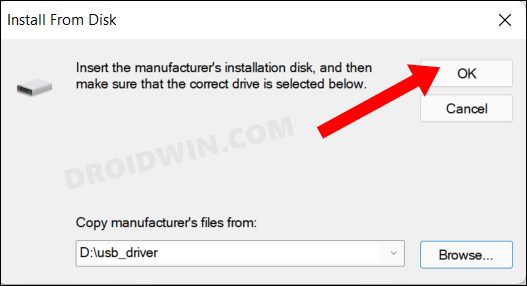
- After that, click OK to load these drivers.

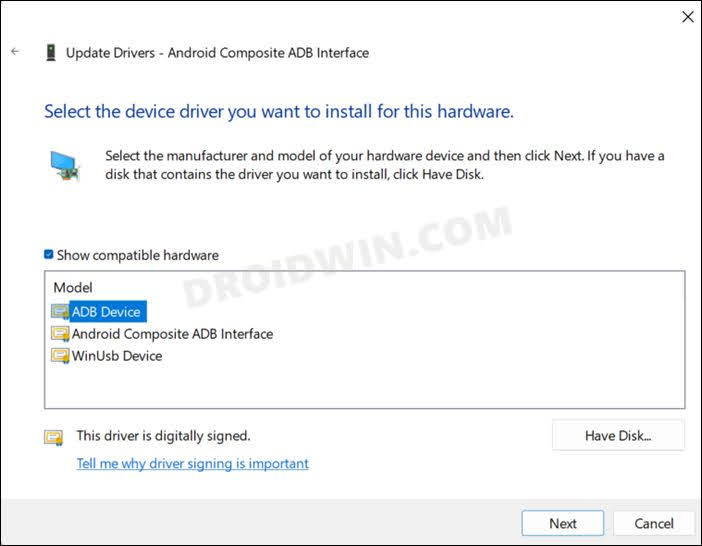
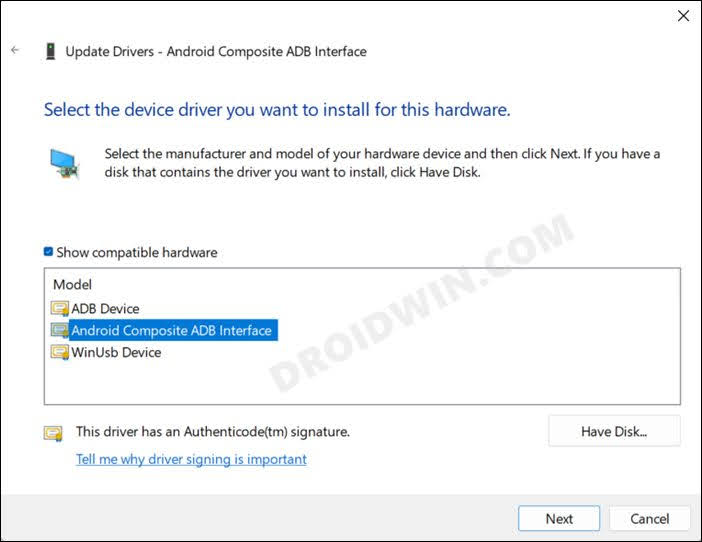
- Windows will now bring up a list of drivers. Select Android Composite ADB Interface and click Next.

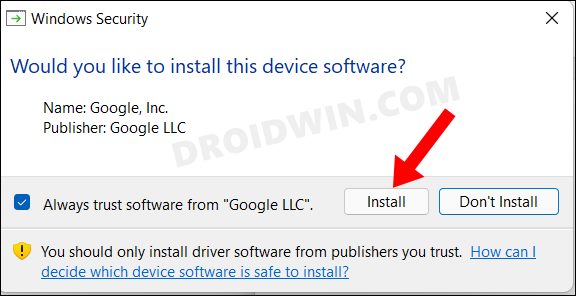
- If you get a prompt, then click Install.

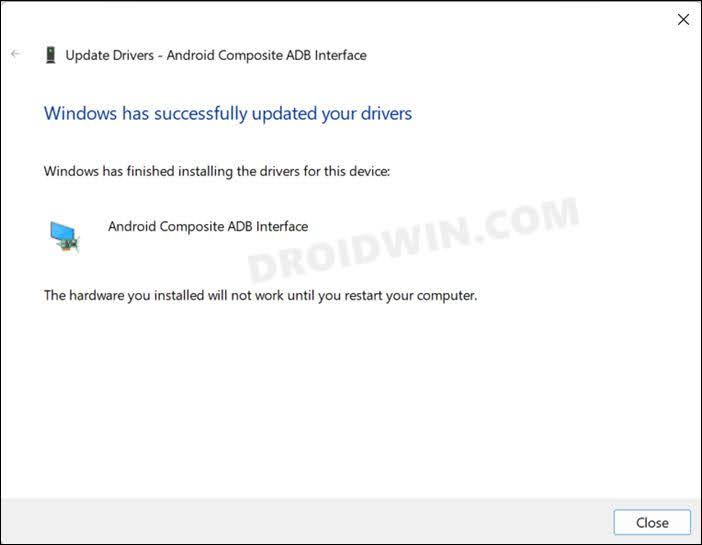
- The Android Composite ADB Interface drivers will now be installed and you shall be notified of the same.

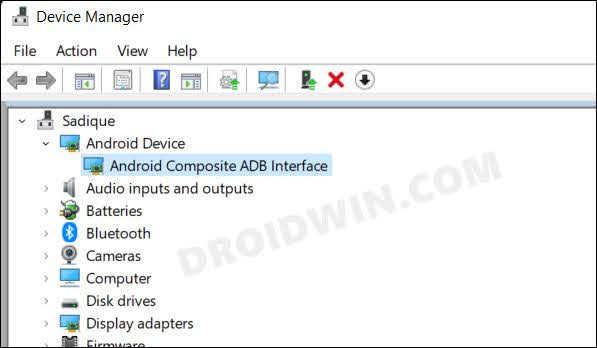
- Once the installation is complete, your device will automatically from the Other Device section over to Android Device.

- Moreover, your device will be named Android Composite ADB Interface. [Read Next: How to Install Fastboot Drivers in Windows 11].
- Finally, it is compulsory that you add the ADB to your System Environmental Variables Path as well.
Video Guide to Install ADB Drivers in Windows 11
How to Verify ADB Connection
Now that we are done installing the Android ADB Drivers on your Windows 11 PC, let’s verify if the ADB connection has been successfully established or not. Follow along.
- Enable USB Debugging on your device and connect it to the PC via a USB cable.
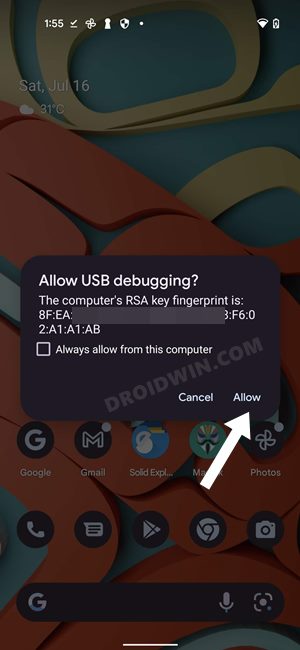
- You would also get a prompt on your device, tap Allow. This will authorize USB Debugging.

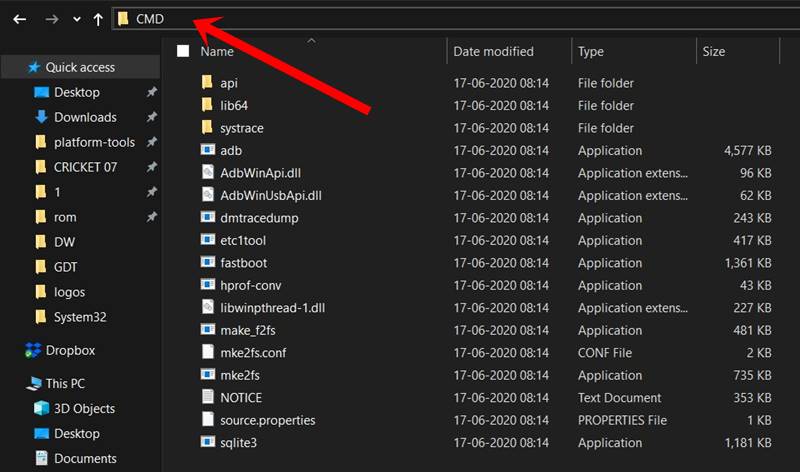
- Then go to the platform-tools folder, type in CMD in its address bar, and hit Enter.

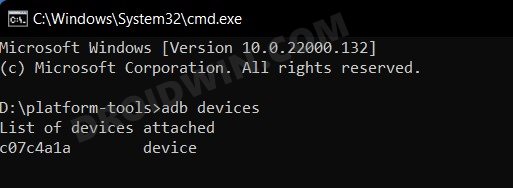
- This will launch Command Prompt. So execute the below command in this CMD window:
adb devices

- If it lists out your device serial number, then the ADB Connection has been successfully established.
That’s it. These were the steps to install the Android ADB Drivers on your Windows 11 PC. If you have any queries concerning the aforementioned steps, do let us know in the comments. We will get back to you with a solution at the earliest.
- How to Install Fastboot Drivers in Windows 11
- How to Install Google’s Android Bootloader Interface Drivers
- Fix Waiting for Device Error in ADB or Fastboot Commands
- How to Check and Install Missing Drivers in Windows 11
Fix: Cannot Install ADB Drivers on Windows 11
If you are still unable to install the ADB Drivers on your Windows 11 PC<. then try out the below-listed workarounds and one of them would definitely rectify this issue.
FIX 1: Use USB 2.0 Port
First off, it is recommended that you use the official USB cable that came with your device. Moreover, you should use the USB 2.0 port on your PC and not the USB 3.0 Port.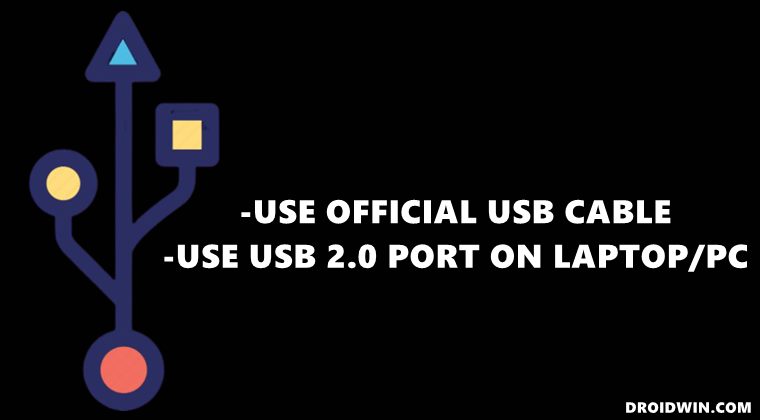
FIX 2: Use USB Type C to Type A
Next up, consider using a USB Type C to Type A cable instead of a Type C to Type C cable.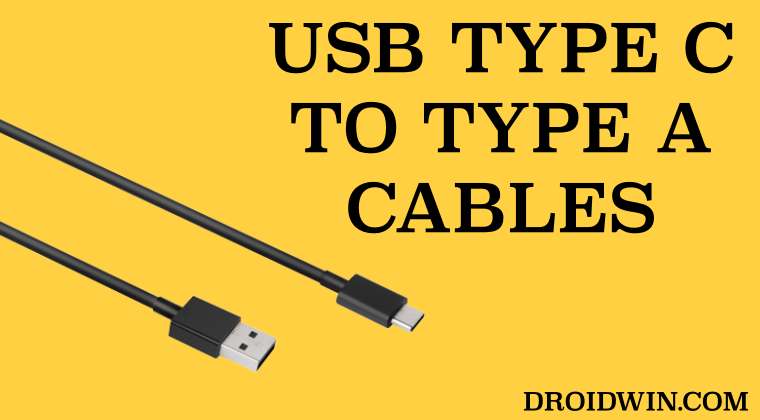
FIX 3: install ADB “Device” Drivers
Previously, we had installed the Android Composite ADB Interface drivers. If that’s not working in your case, then you could try installing the ADB Drivers instead. To do so, carry out STEPS 1 to 13 as listed above, then select ADB Device [instead of Android Composite ADB Interface] and click Next > Install. Once done, re-verify the ADB connection as explained above.
