In this guide, we will show you the steps to check and install the missing drivers on your Windows 11 PC. Drivers are small software programs that help your PC in identifying the connected device. The latter in turn will then be able to effectively carry out its normal functionalities. Be it your mouse, headphones, keyboard, or smartphone, each of the devices comes with an associated driver.
In this regard, some newer devices would automatically install their drivers as soon as you connect them to your PC for the first time usage. However, a major chunk of the devices requires you to manually install these drivers. And in this guide, we will help you with just that. Given here are the detailed steps to check and install the missing drivers on your Windows 11 PC. Follow along.
- How to Try Black Screen of Death on your Windows 11 PC!
- How to Open Windows 11 Widgets Articles via Chrome
- Get Back the Windows 10 Start Menu on Windows 11
Table of Contents
How to Check and Install Missing Drivers in Windows 11
We will be focusing on both the installation methods: manual and automatic. You may refer to the one that meets your requirements. Furthermore, we will first show you the steps to check for the missing drivers on your Windows 11 PC. If you already know the drivers that are missing then you may skip this step and move over to STEP 2.
Check for Missing Drivers in Windows 11
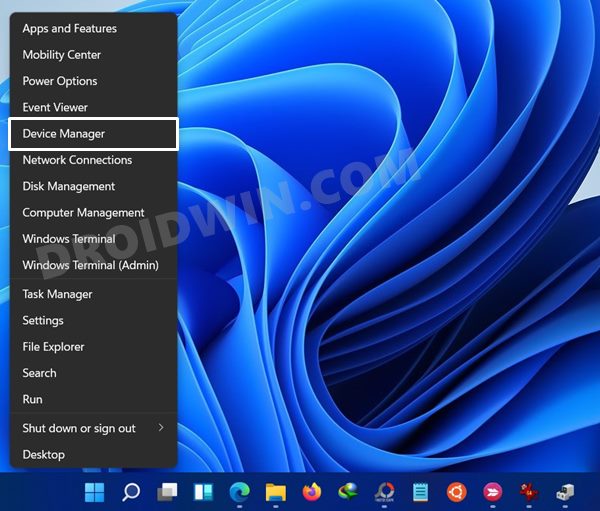
- To begin with, right-click on the Windows icon situated at the taskbar and select Device Manager.
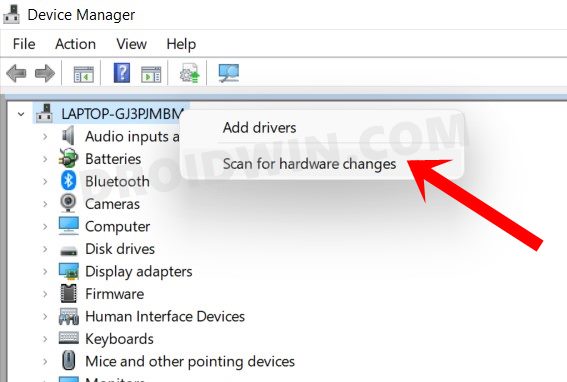
- Now select your laptop name situated at the top, right-click on it and select Scan for hardware changes.

- Windows will now perform a system search and shall let you know the all drivers that are missing.
- Once you have got hold of the same, it’s time to install that driver onto your Windows 11 PC. Follow along.
How to Install Drivers In Windows 11
There are two different methods through which you could install the drivers onto your PC: manual and automatic. First off, we will list out the steps for the automatic one. This is the preferred method for driver installation as Windows will automatically search for the latest drivers and install them right away.
However, if it is unable to search online for the drivers, then you may proceed with the manual method. So on that note, let’s proceed with the guide to check and install the missing drivers on your Windows 11 PC.
- How to Send or Move the Taskbar Icons to the Left in Windows 11
- How to Change Taskbar Size in Windows 11
- Fix: This PC can’t run Windows 11 | The PC must support TPM 2.0
Install Drivers in Windows 11 via Automatic Method
- Use the Windows+X shortcut keys and select Device Manager from the Windows Context menu that appears.

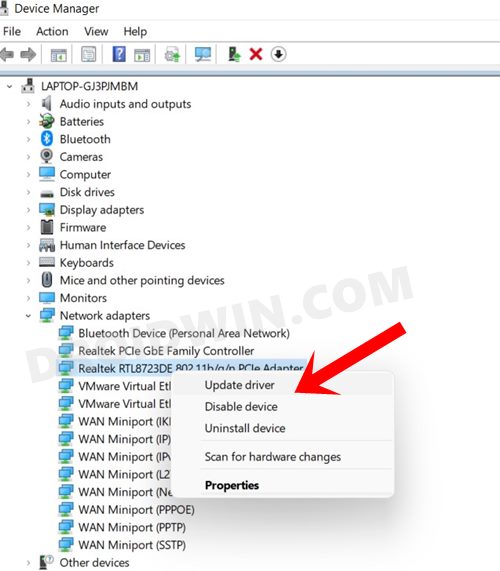
- Now head over to the section whose drivers you need to update, and click on it to further expand it.
- Right-click on that device and select Update Drivers.

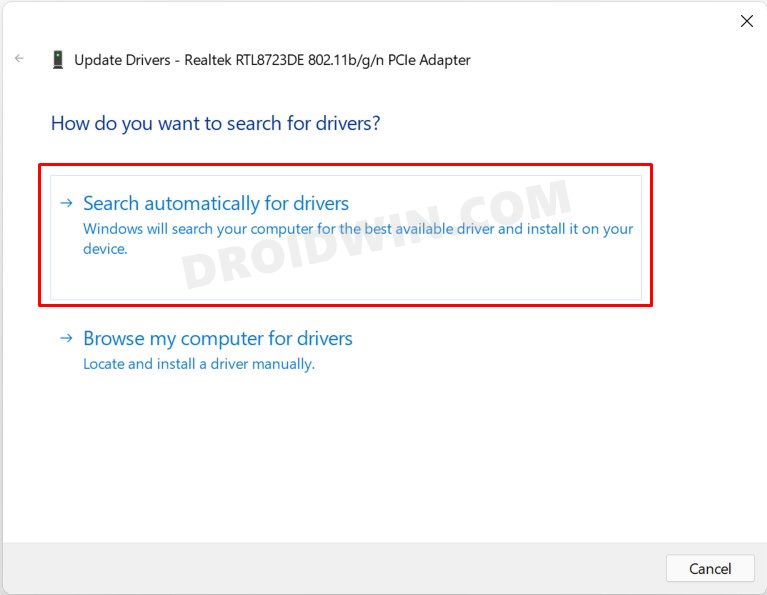
- Now click on Search automatically for drivers.

- Windows will search online for the latest available drivers and would install it right away.
- Once done, restart your PC for the effect to change place.
That’s it. These were the steps for the automatic driver installation on your Windows 11 PC. Let’s now turn our attention towards the manual method.
Manually Install Drivers on Windows 11
- Head over to the Start menu and search Device Manager.
- Within that, go to the device section whose driver you need to update.
- Then right-click on it and select Update Drivers.
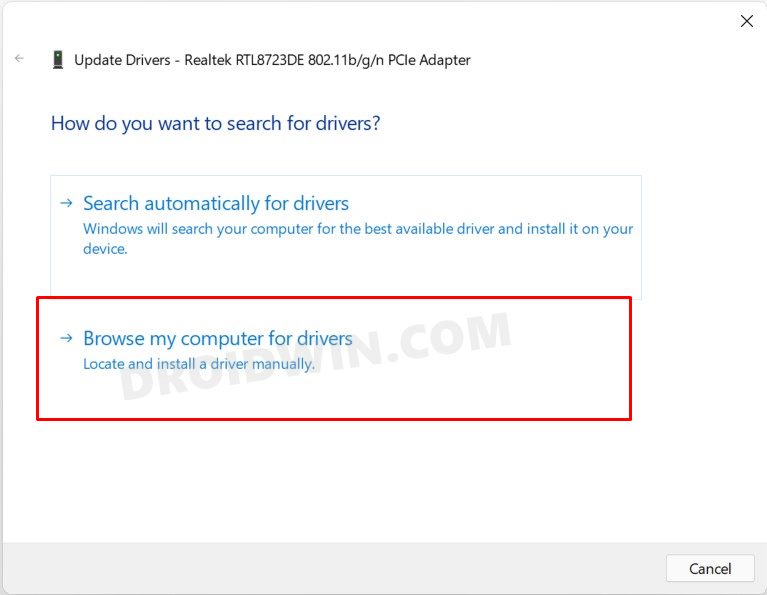
- Now click on Browse my computer for driver.

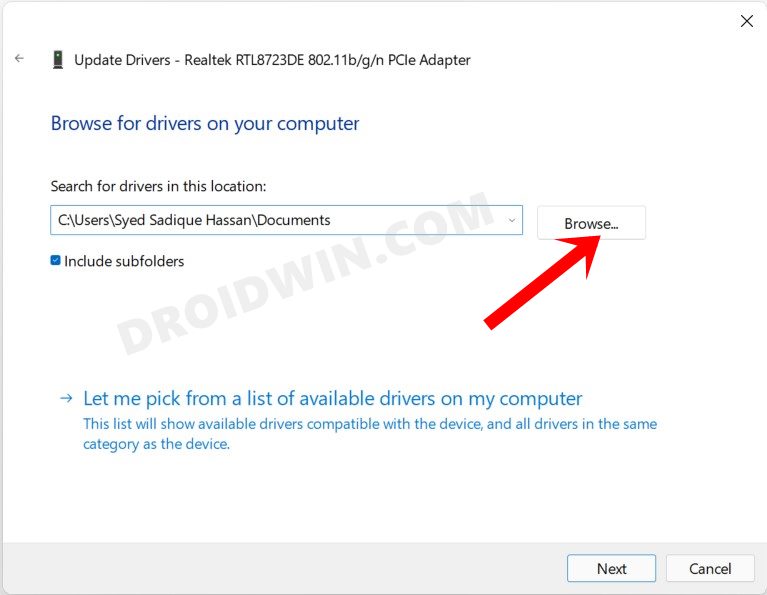
- Click on the Browse button, navigate to the downloaded driver file and select it.

- Windows will now install these drivers and would notify you of the same once the installation is done.
- Finally, restart your PC to complete the process.
That’s it. These were the steps to check and install the missing drivers on your Windows 11 PC.
- How to Replace PowerShell with Command Prompt in Windows 11
- 10 Methods to Open Command Prompt (CMD) in Windows 11
- How to Install Windows 11 on any PC using Virtual Machine
Install Available Preloaded Drivers on Windows 11
If you wish to install the drivers of non-external devices that are already baked into your PC (such as Network or Display Drivers) then there’s another way of installing those drivers. Let’s check it out:
- First off, open Device Manager on your PC.
- Then go to the section whose driver you need to install. As an example, let’s install the Display Drivers.
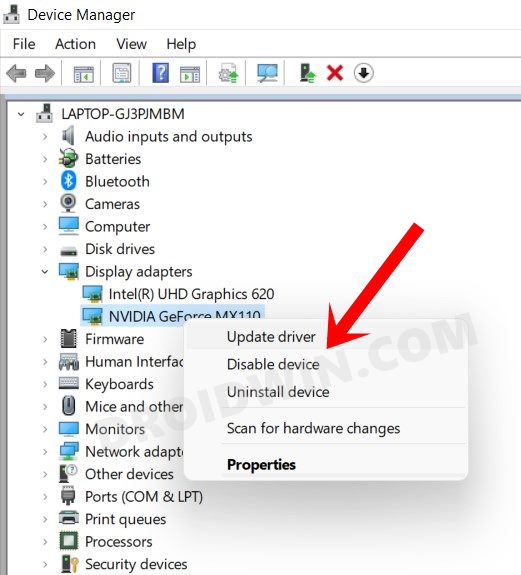
- So expand the Display Adapter section, right-click on the graphics drivers, and select Update Drivers.

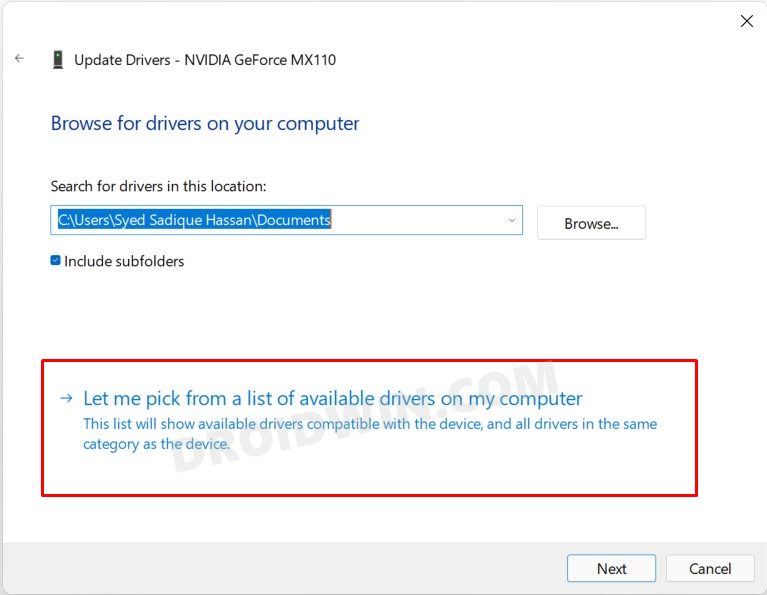
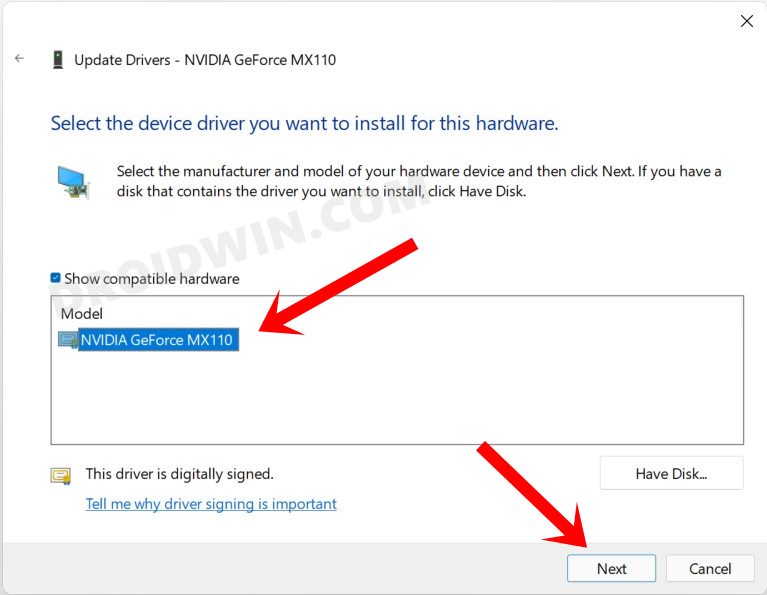
- Then select Browse my computer for driver and click on Let me pick from a list of available drivers on my computer.

- Windows will now ist out all the available drivers. Select the one that corresponds to your device and click Next.

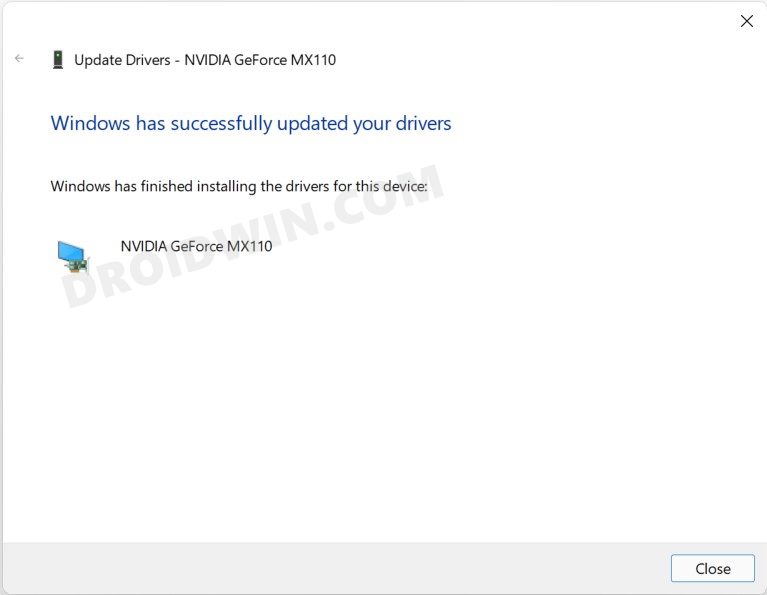
- The installation will now begin and once done, restart your PC. That’s it, the process stands complete.

So with this, we round off the guide on how to check and install the missing drivers on your Windows 11 PC. We have shared three different installation methods and listed out the steps to perform a check for missing drivers as well. If you have any queries, do let us know in the comments section. We will get back to you with a solution at the earliest.
