In this guide, we will show you two different methods to flash one custom ROM over another on your OnePlus device. The devices from the Chinese OEM are among the most active players in custom development, well at least till the ninth iteration. They are blessed with tons of custom ROMs, each having its own set of USPs. While some [like the LineageOS] offer a clean stock usage experience without any GApps, others [such as the crDroid] offer tons of goodies.
Then we also have the likes of Pixel Experience which gives you a carbon copy of the stock Pixel UI. All in all, the users are ultimately spoiled for choices and are having to deal with the problem of plenty [not that we are complaining though!]. The best way of dealing with this “issue” is to simply give them all a try- however, that is easier said than done.
Not only is the process tedious but it could also prove to be complicated, especially when dealing with A/B partitions. Therefore, in this guide, we will show you two different methods through which you can easily flash one custom ROM over another, or in other words, go from one Custom ROM to another on your OnePlus device. So without further ado, let’s get started.
Table of Contents
How to Flash One Custom ROM Over Another [2 Methods]

First and foremost, do keep in mind that you cannot save your data while moving from one custom ROM to another- a data wipe/factory reset is absolutely necessary. So please take a backup of all the data on your device before proceeding ahead. Droidwin and its members wouldn’t be held responsible in case of a thermonuclear war, your alarm doesn’t wake you up, or if anything happens to your device and data by performing the below steps.
METHOD 1: Using Fastboot ROM
This is the shorter and easier of the two and is usually the recommended one. But you could only use this method if your device can at least boot to the Fastboot Mode. If it is currently in a bricked state, then this approach will not work, and you’ll have to try out the next method.
- First off, download the Fastboot ROM corresponding to your device from below.
OnePlus 8T [Android 11]
OnePlus 9R [Android 11]
OnePlus 9 Pro [Android 13]
OnePlus 9 [Android 11]
OnePlus 10 Pro [Android 13]
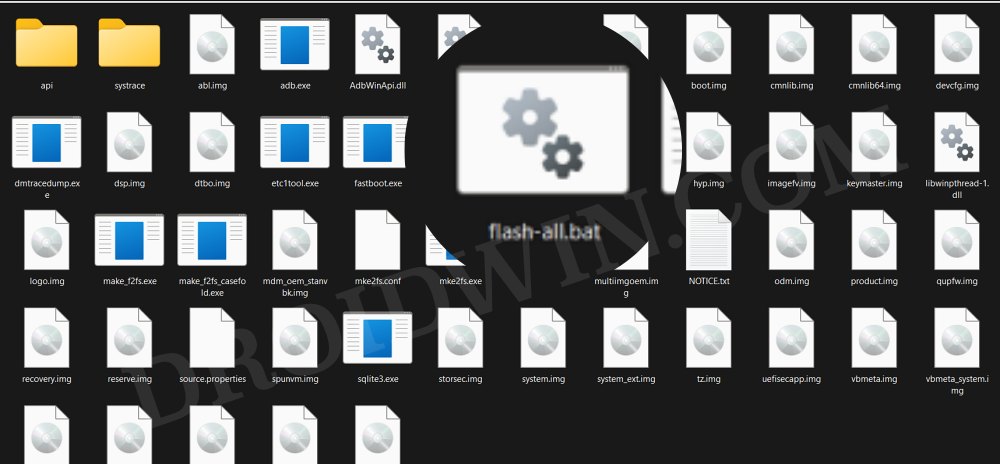
- Then flash the Fastboot ROM onto your device via its flash-all.bat file. If your device has Android 13 Fastboot ROM, then directly jump over to step 8 after flashing. On the other hand, if your device has Android 11 Fastboot ROM, then you’ll have to proceed with the below steps as well.

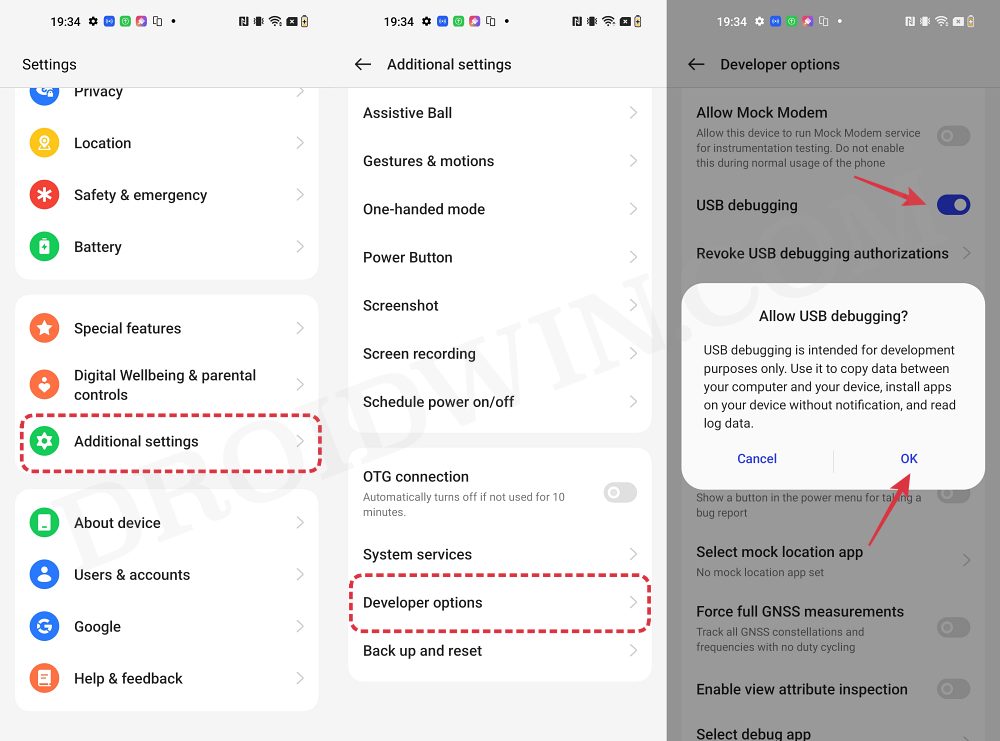
- Do not connect to the Internet as of now. Instead, enable Developer Options, go there, and disable Automatic System Updates.
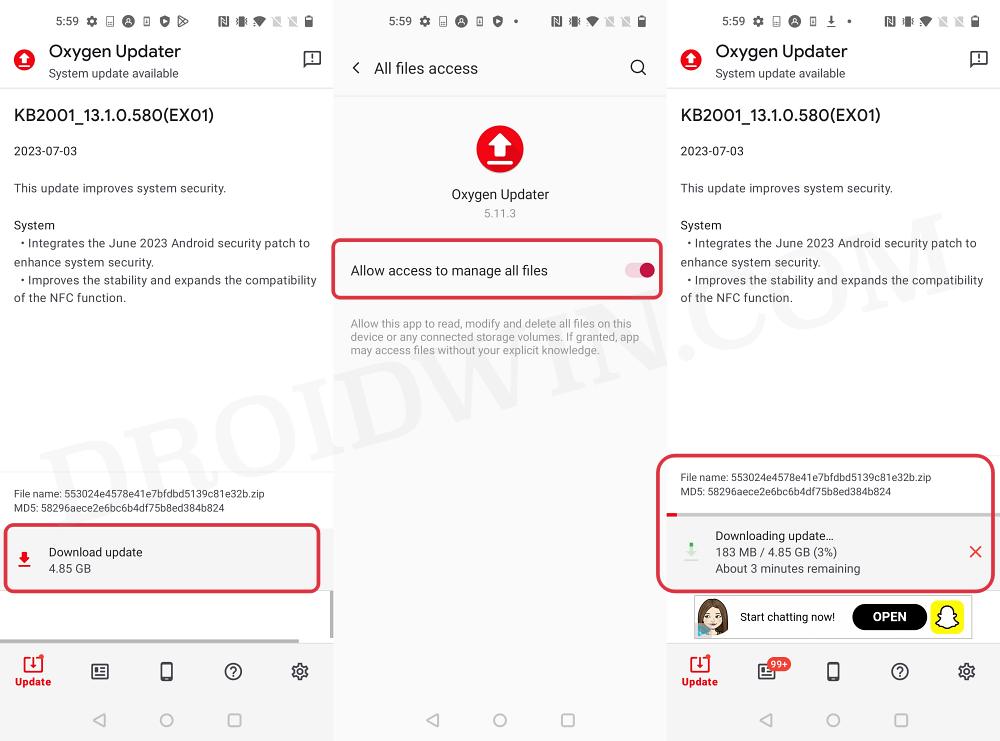
- You may now turn on the internet. Then download and install the Oxygen Updater app.
- Then launch it and download the latest OxygenOS 13 firmware. NOTE: If your device has already received the “stable” Android 14 update, then Oxygen Updater will end up showing that update itself, instead of the Android 13 update. So in such cases, this process will not work. In other words, you could only use the Oxygen Updater App method till the time the Android 14 update is in the beta stage. In that case, you should try out the third method.
- Now go to Settings > System Updates > Local Upgrade and select the downloaded firmware file.
- The installation will now start. Once done, restart your device. It will reboot to the latest firmware.
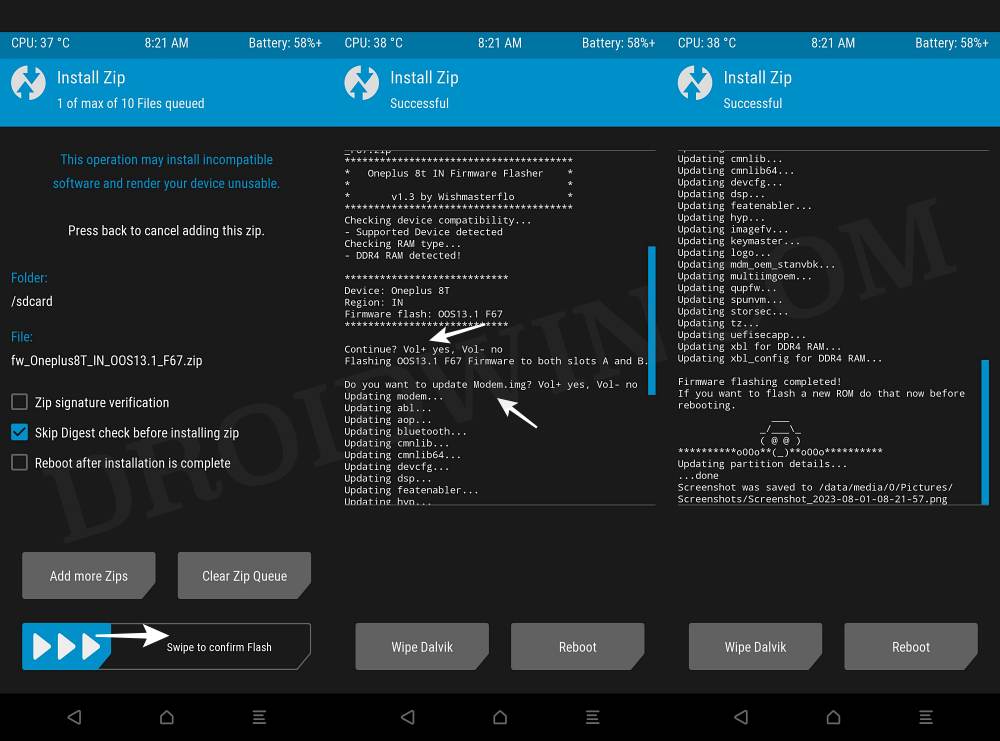
- Now flash the latest firmware across both slots via the Firmware Flasher Tool.
- That’s it. You may now flash the desired custom ROM onto your device.
METHOD 2: Via MSM Download Tool
This is the lengthier of the two methods but does come with the added benefit that it will work under all scenarios- whether your device is soft-bricked, bootloop, or even hard-bricked. So with that in mind, let’s get started.
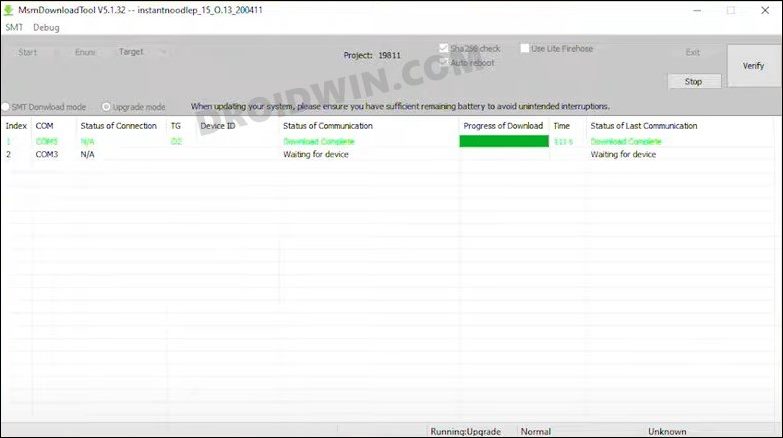
- To begin with, flash the OxygenOS 11 firmware via the MSM Download Tool.
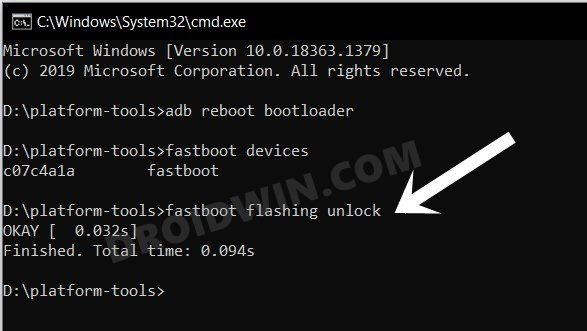
- Since MSM relocks the bootloader, you’ll now have to unlock the bootloader.
- Once done, download and install the Oxygen Updater app.
- Then launch it and download the latest OxygenOS firmware.
- Now go to Settings > System Updates > Local Upgrade and select the downloaded firmware file.
- The installation will now start. Once done, restart your device. It will reboot to the latest firmware.
- Once done, flash the firmware across both the slots. For that, use the Firmware Flasher Tool.
- That’s it. You may now flash the desired custom ROM onto your device.
METHOD 3: Using Fastboot ROM and Local Install
- Flash the OxygenOS 11 firmware either via Fastboot ROM or the MSM Tool method explained above.
- Then download the OxygenOS 13 firmware for your device from a trusted third-party site of your choice.
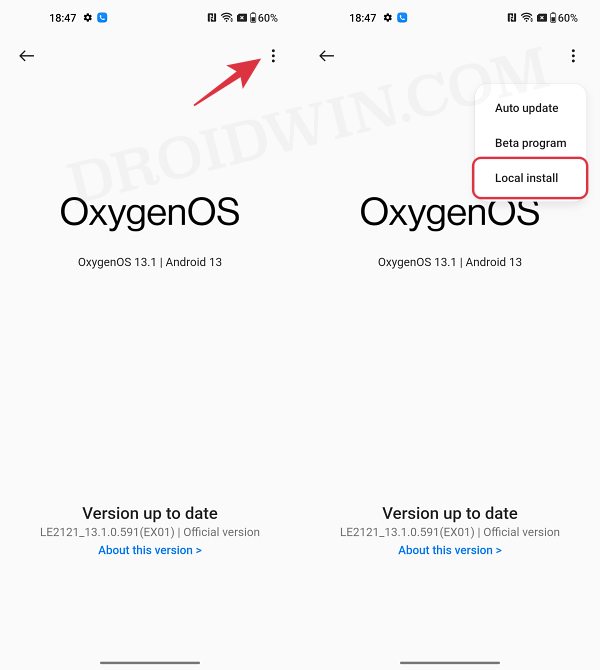
- Now go to Settings -> About device -> Version -> Click Build number 7 times.
- This will enable Developer Options. Now go back to Go back Settings -> About device.
- Now tap on Up to date > Click the top right button and select Local Install.
- [If Local Install is missing/greyed out or not working, then check out this guide+video].
- Then select the OxygenOS 13 firmware and select Extract > Upgrade.
- Now wait for the process to be completed. Once done, hit Restart.
- Your device will now boot to OxygenOS 13 and you may now flash the desired ROM.

So these were the steps to flash one custom ROM over another or move from one ROM to another on your OnePlus device. If you have any queries concerning the aforementioned steps, do let us know in the comments. We will get back to you with a solution at the earliest.