In this guide, we will show you the steps to edit an existing app execution alias or create a new one in Windows 11. There are countless different methods through which you could launch an app on your Windows 11 PC. If you believe that opening it via its EXE file is too mainstream, then you always have an option to launch it via Run, CMD, and Windows PowerShell. And in such cases, their aliases come in handy.
Rather than typing in the entire app name you just need to enter their shorter alternate name, thereby saving your time and effort. However, in some instances, an app’s alias might still be long or complicated enough and you might need to trim it. Likewise, in some instances, two instances of an app might have the same aliases. For example, recently the Paint app was updated on my PC, however, its older version was installed as well.
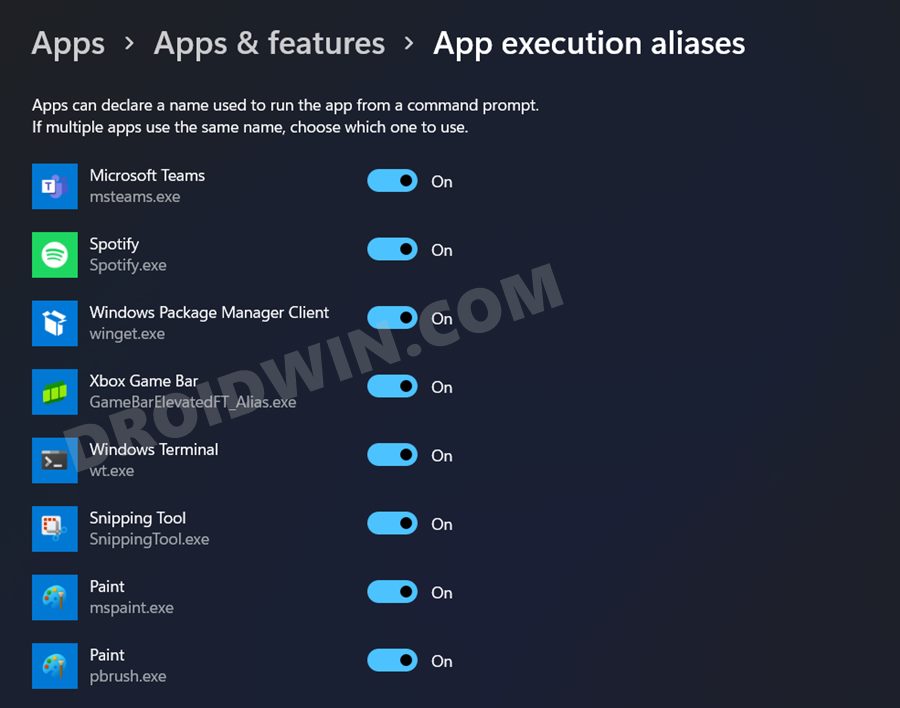
So I was having two apps with the same aliases (mspaint.exe) and hence there was a need to change the alias of one of those apps. Another thing that I noticed was that Windows only created aliases for a few specific apps and not for all the apps installed on my PC. So if there is an app with which you frequently interact and Windows hasn’t created its alias, then you might want to manually create it. Keeping all these points in mind, let’s get started with the steps to edit an existing app execution alias or create a new one on your Windows 11 PC.
Table of Contents
How to Edit an Existing App Execution Alias in Windows 11

This process could only be carried out via PowerShell and hence you could only use the alias in the Powershell window, and not in CMD or Run (you could create a new alias via Registry and then access it via CMD/Run/Powershell, as explained in the next section). So if that’s well and good, then let’s get started with the steps.
- Head over to the Start Menu, search Powershell, and launch it as an administrator.
- Then execute the below command. Replace NewAliasName and PathToApp.exe accordingly.
Set-Alias -Name NewAliasName -Value PathToApp.exe
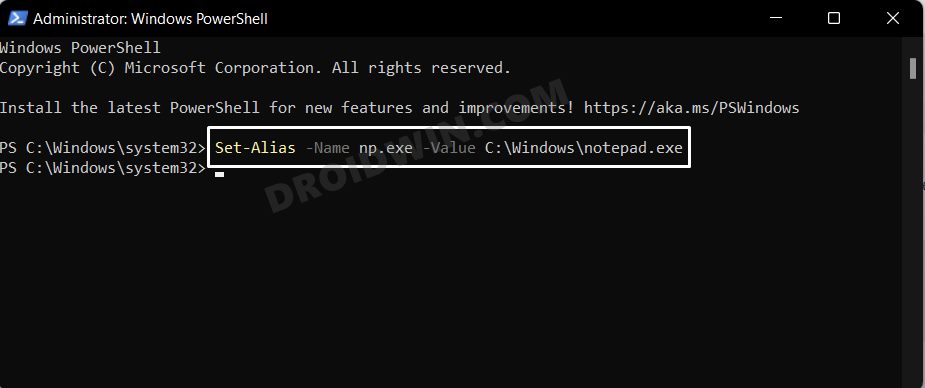
- For example, let’s edit the alias for the Notepad app and change it to np.exe. Moreover, its installation directory is: C:\Windows\notepad.exe. So inputting these values and the above command will transform to:
Set-Alias -Name np.exe -Value C:\Windows\notepad.exe

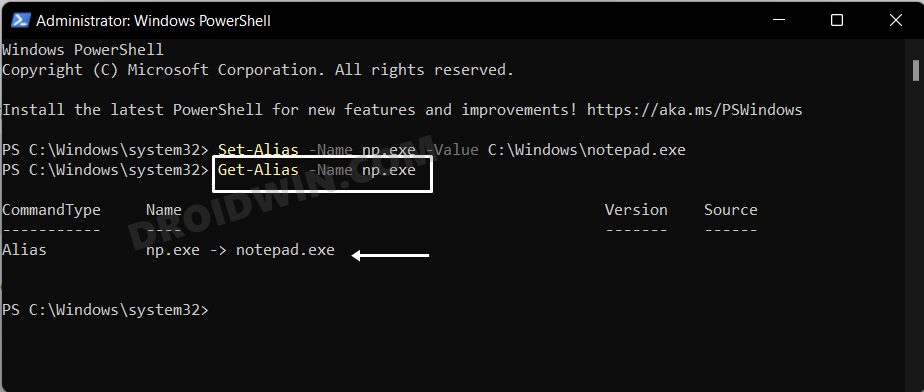
- You may use the below command to verify if the edit is successful or not, make sure to replace NewAliasName accordingly
Get-Alias -Name NewAliasName
- For example, in our case, the new NewAliasName is np.exe, so the above command will transform to:
Get-Alias -Name np.exe
- That’s it. These were the steps to edit an existing app execution alias in Windows 11 using Powershell.
How to Create a New App Execution Alias in Windows 11
Using a Registry Editor tweak, you could create an alias for any app installed on your PC. Likewise, this alias could be accessed via all the three available options- Run, CMD, and PowerShell. Just remember to take a backup of the registry files before starting, to be on the safer side.
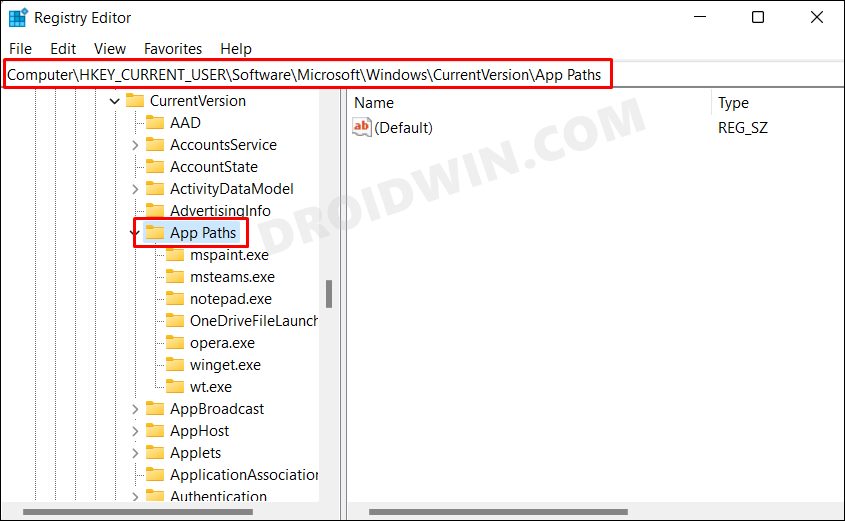
- Head over to the Start menu, search Registry Editor, and open it.
- Then copy-paste the below location in the address bar and hit Enter:
Computer\HKEY_CURRENT_USER\Software\Microsoft\Windows\CurrentVersion\App Paths
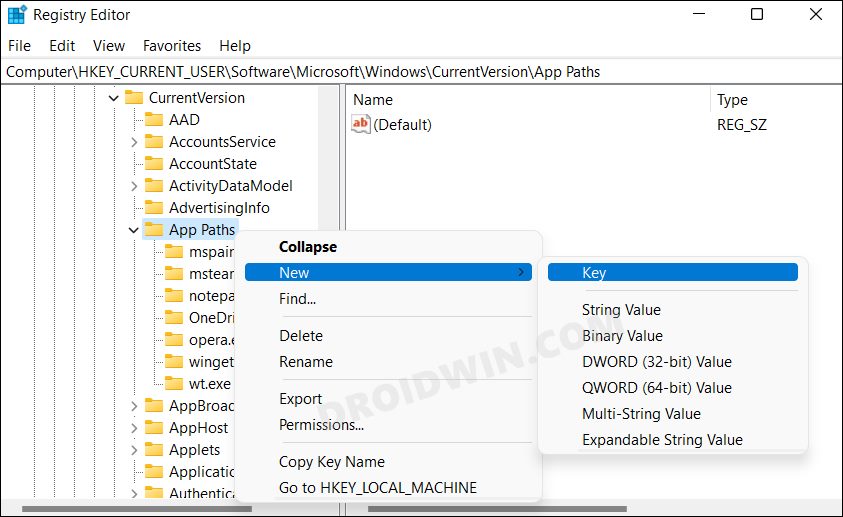
- Now right-click on the App Paths folder and select New > Key.
- Give it the desired alias name and attach .exe in the end (I am assigning the alias npp.exe for Notepad++).
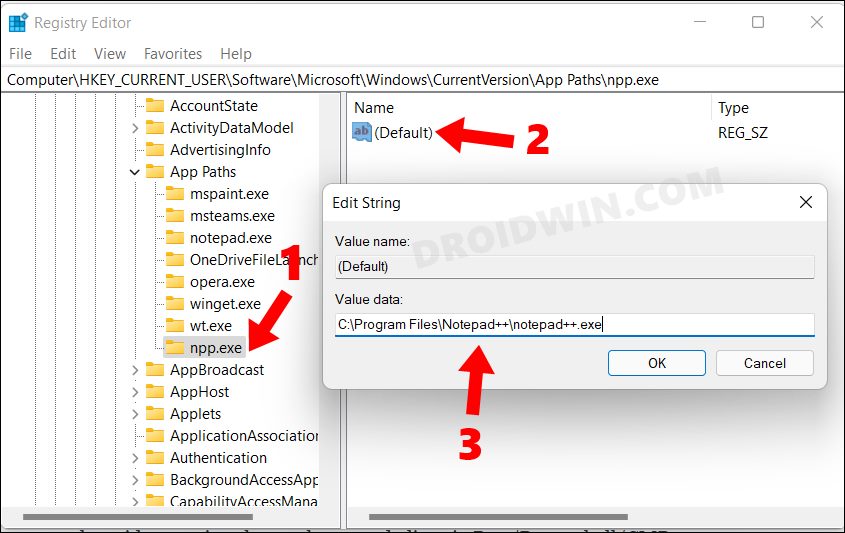
- Then select that alias folder (npp.exe in my case) and double click on the Default file from the right-hand side.
- Now type in the complete file location including its EXE in the Value Data field. For example:
C:\Program Files\Notepad++\notepad++.exe
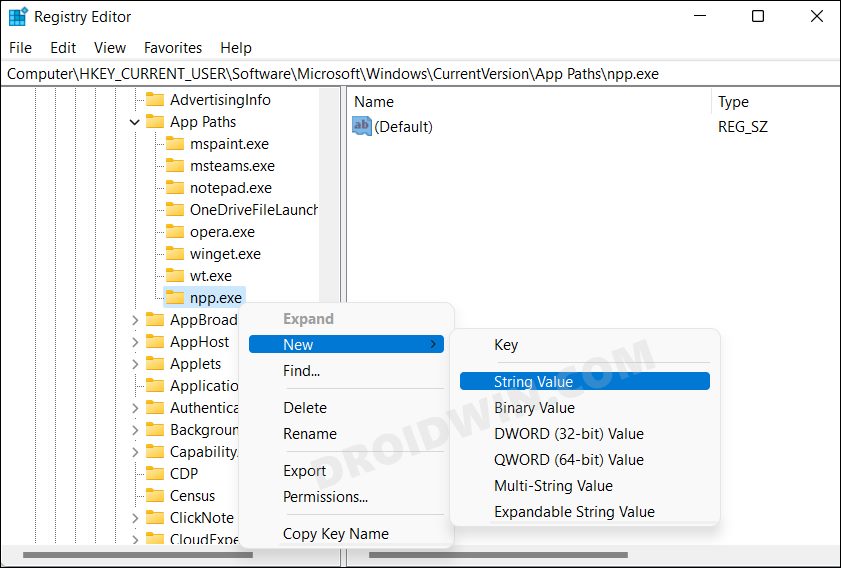
- After that, right-click on the alias key that you had earlier created (in STEP 3) and select New > String Value.
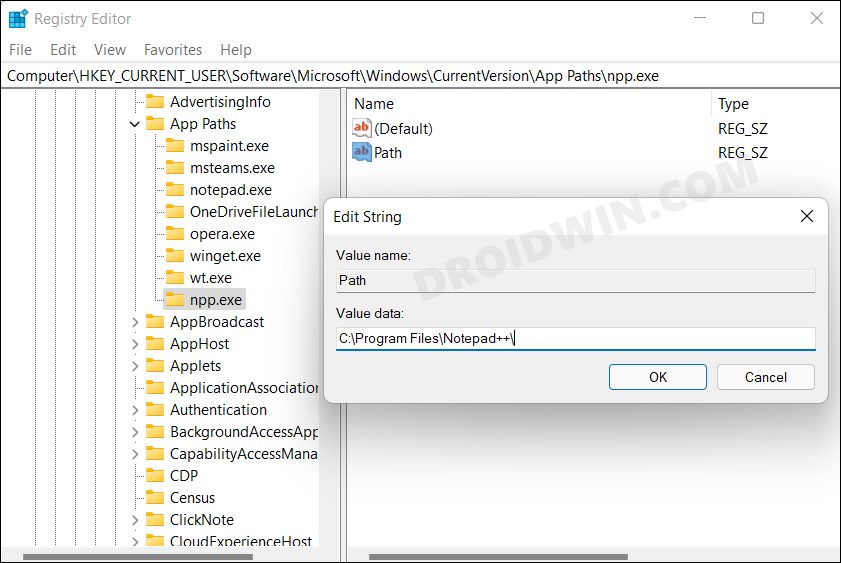
- Name it Path. Then double click to open it and type in the app’s location (without the EXE) in the Value Data field. For example:
C:\Program Files\Notepad++\
- That’s it. You could now access the said app using the newly created alias via Run/Powershell/CMD. For example, in our case, typing in npp.exe in Run will launch the Notepad++ app.
How to Delete or Disable an Alias in Windows 11
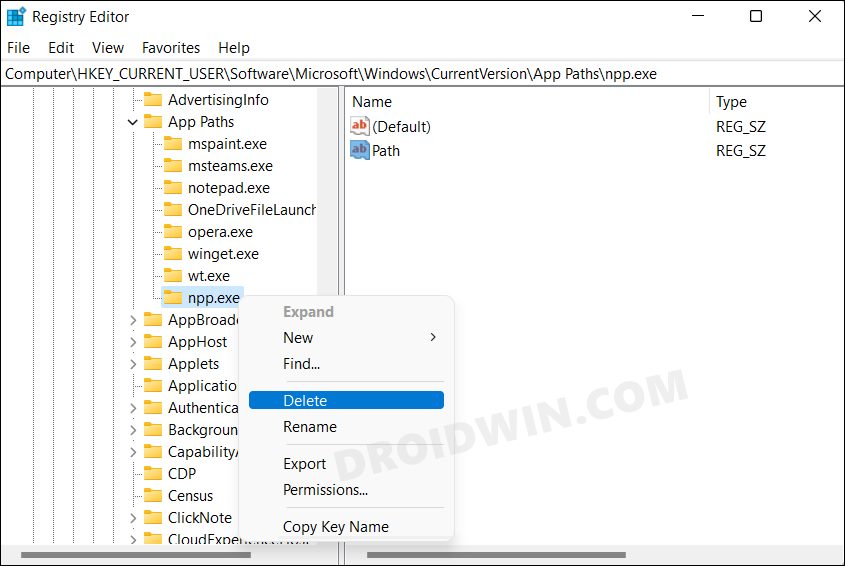
If you have created a new alias via registry, then just delete the key that you had created in the App Paths directory (it was npp.exe in our case), and the alias stands deleted.
On the other hand, if you wish to disable an alias, then go to Settings (Windows+I) > Apps > Apps and Features > More Settings > App execution aliases and disable the toggle next to the app whose alias you wish to disable.
So with this, we round off the guide on how you could edit an existing app execution alias or create a new one in Windows 11. Likewise, we have also listed the steps to disable and delete them. If you have any queries concerning the aforementioned steps, do let us know in the comments. We will get back to you with a solution at the earliest.


