In this guide, we will show you three different methods to disable Hardware Acceleration on your Windows 11 PC. Whenever you run an app or software, its processes and services are handled by the CPU itself. However, if you are running a graphics-intensive task, such as using a rendering program or playing high-end games, then the CPU might shift some of its workloads to the GPU, Video Card, and other hardware devices. As a result, your CPU will now be able to focus on the efficient running of the core system processes.
All this would then translate to a smooth user experience. However, this functionality has also been known to conflict with the proper running of a few backend system services, such as dxgmms2.sys. You might also get an error message in such cases, which is usually along the lines of SYSTEM_THREAD_EXCEPTION_NOT_HANDLED or DRIVER_IRQL_NOT_LESS_OR_EQUAL. So in all these scenarios, the best bet is to disable Hardware Acceleration on your Windows 11 PC. And in this guide, we will show you how to do just that. Follow along.
Table of Contents
How to Disable Hardware Acceleration in Windows 11 [3 Methods]

While there exist three different methods through which you could do this job. The first one is via Display Settings whereas the other two are via Registry Editor. You should try out that method that you had initially used to enable Hardware Acceleration on your Windows 11 PC. So on that note, let’s get started.
Method 1: Via Display Settings
- Bring up the Settings menu via Windows+I shortcut keys.
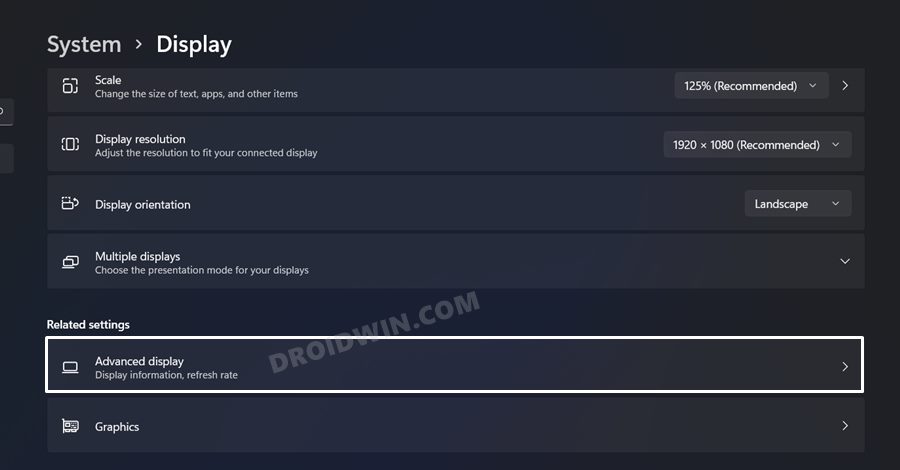
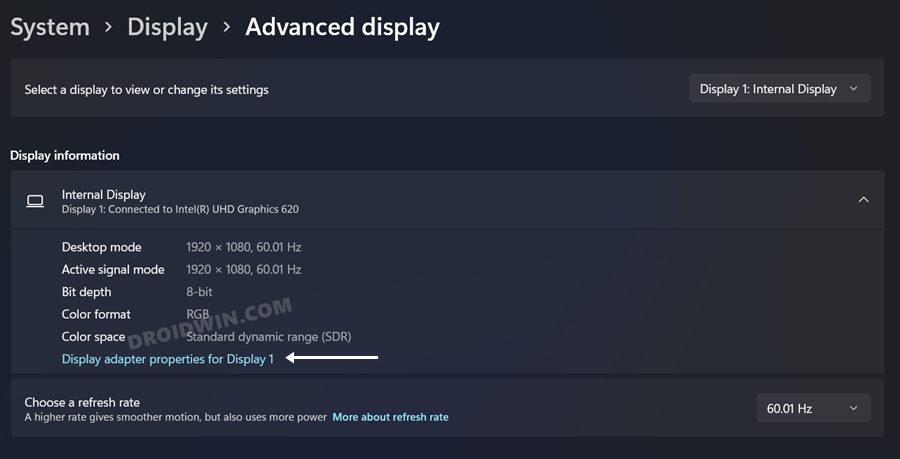
- Then go to System > Display > Advanced Display.

- After that, click on Display adapter properties for display 1.
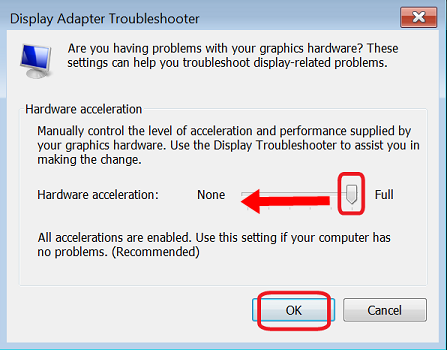
- The Graphics Properties dialog box will now open, go to its Troubleshoot tab.
- Now click on Change Settings and go to the Display Adapter Troubleshooter bar.
- Finally, slide the toggle to the extreme left and this will disable the Hardware Acceleration on your Windows 11 PC.
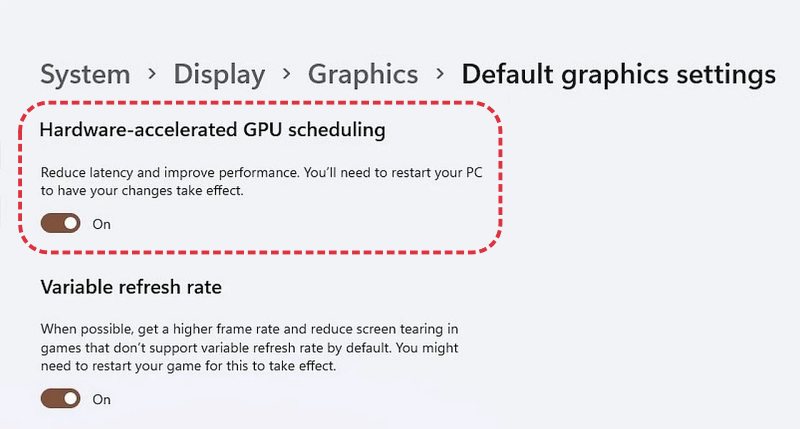
- Once that is done, head over to System > Display > Graphics > Default Graphics Settings.
- Now disable the toggle next to Hardware Accelerated GPU Scheduling.
Method 2: Via Registry Editor
Before trying out the below steps, it is recommended to take a registry backup beforehand. Once done, you may then proceed with the instructions:
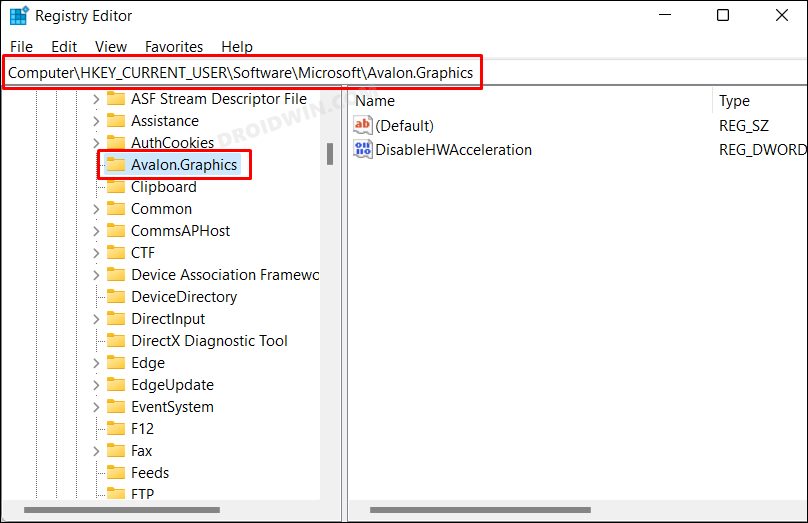
- Launch Registry Editor and copy-paste the below location in its address bar:
Computer\HKEY_CURRENT_USER\Software\Microsoft\Avalon.Graphics
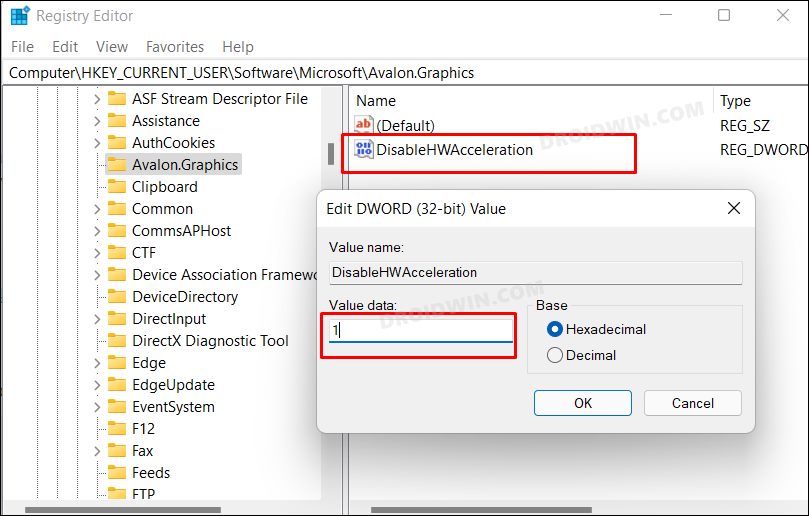
- Then go to the right-hand side and double click on DisableHWAcceleration to open it.
- Now input 1 in its Value Data field and hit OK to save it. That’s it.
- This will disable Hardware Acceleration on your Windows 11 PC.
Method 3: Via Registry Editor
As before, it is recommended to take a registry backup beforehand. Once done, you may then proceed with the below steps:
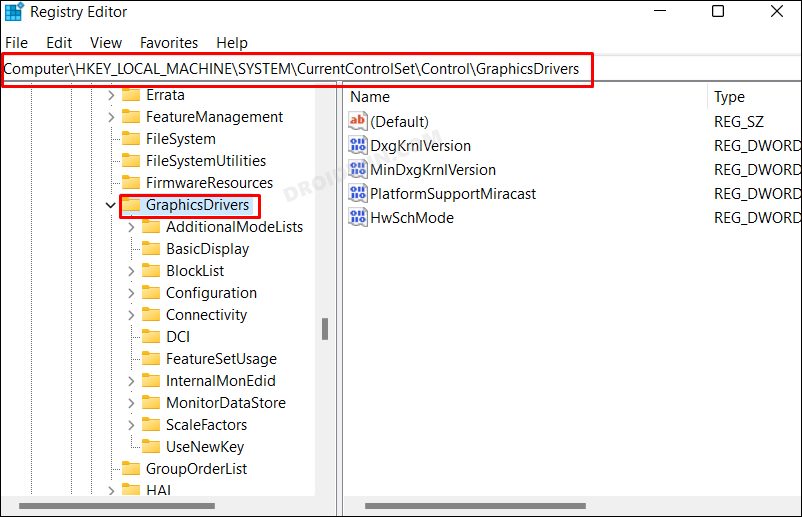
- Launch Registry Editor and copy-paste the below location in its address bar:
Computer\HKEY_LOCAL_MACHINE\SYSTEM\CurrentControlSet\Control\GraphicsDrivers
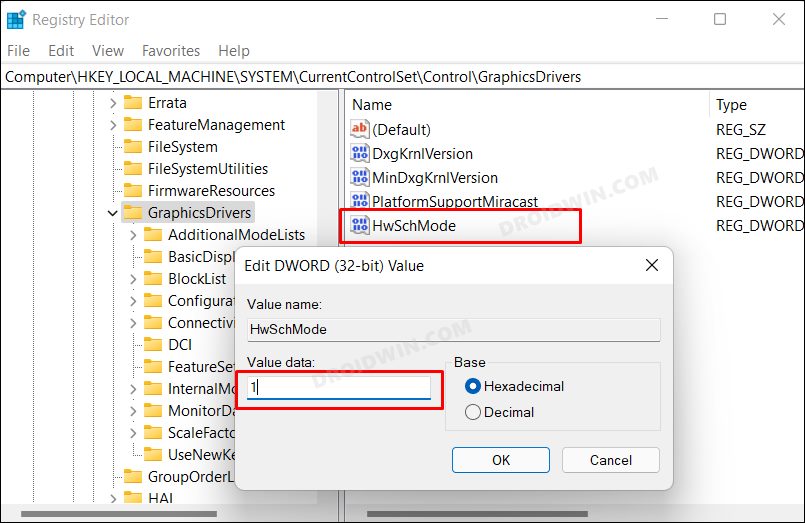
- Now go to the right-hand side and double click on the HwSchMode file to open it.
- Type in 1 in the Value Data field and hit OK to save it. That’s it.
- It will now disable Hardware Acceleration on your Windows 11 PC.
So these were the three different methods to disable Hardware Acceleration in Windows 11. If you have any queries concerning the aforementioned steps, do let us know in the comments. We will get back to you with a solution at the earliest.


