In this guide, we will show you numerous methods to improve gaming performance on your Windows 11 PC. The latest iteration of the OS has bought in quite a UI change. Be it for the Start Menu, Taskbar, Settings Menu, or the app icons, each of them has been blessed with a major redesign. Moreover, these plethoras of interface tweaks haven’t made the OS feel bloated and slow, but even then we occasionally see a few performance issues with high and even medium specs games.
Be it for the black screen, frame drops, video stuttering, or frequent UI crashes, there have been instances of popular (and not so popular) games getting bugged with these issues. Fortunately, there do exist a few tweaks from the software side that you could implement on your PC right away which might help you gain a few extra mileage in the performance domain. So without further ado, let’s check out these methods to improve gaming performance on your Windows 11 PC.
Table of Contents
How to Improve Gaming Performance in Windows 11

Do note that there’s no universal fix as such. You will have to try out each of the below-mentioned workarounds and see which one works best in your favor. So with that in mind, let’s get started.
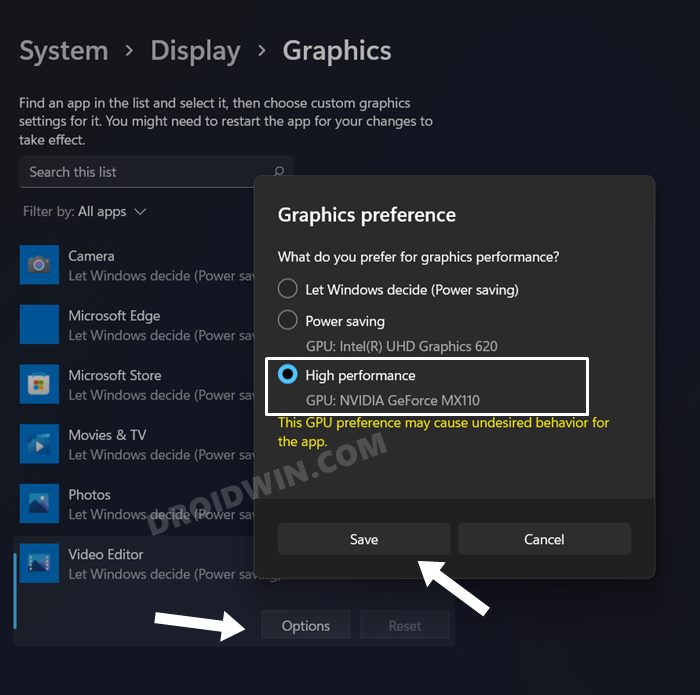
Use Dedicated GPU
Instead of the integrated GPU, you should consider allocating the dedicated graphics card for carrying out graphics-intensive tasks. Here’s how it could be done:
- Bring up the Settings menu via Windows+I shortcut keys.
- Then go to Display > Graphics section.

- Select your game from the list and click Options.
- Now select High Performance and your PC will assign the dedicated GPU to that game.
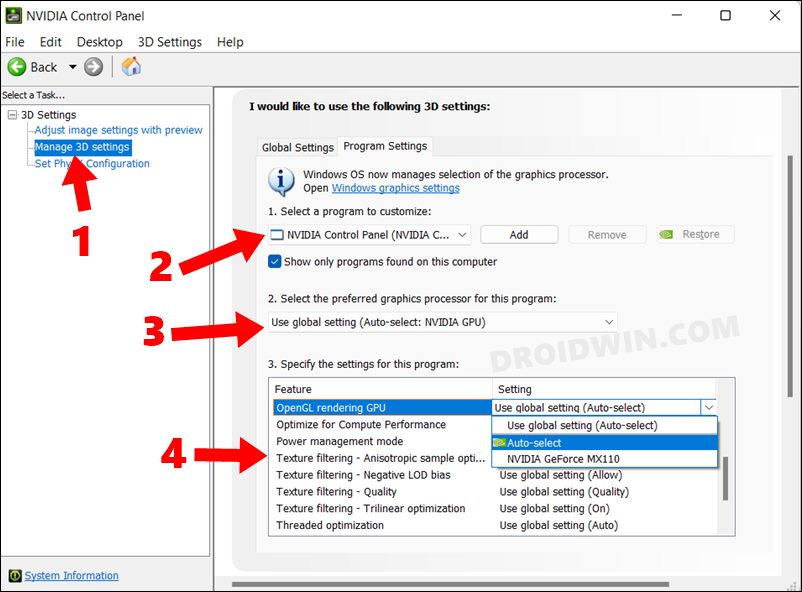
Tweak Settings via Nvidia Control Panel
Making some tweaks to the Nvidia Control Panel might also go a great length in improving the gaming performance on your Windows 11 PC. But do note that there’s no universal setting as such that could be applied across all the games. Rather, you will have to try to enable/disable settings (such as AntiAliasing, GPU rendering, Virtual Sync, etc) on an individual basis and then test out the results. Here’s how:
- To begin with, launch Nvidia Control Panel from the Start Menu.
- Then expand 3D settings from the left menu bar and select Manage 3D settings.
- After that, select the desired game from the right-hand side and click Add.
- Next up, under the preferred graphics processor, select High Performance.
- Now tweak the settings as per the requirement and check out the results.
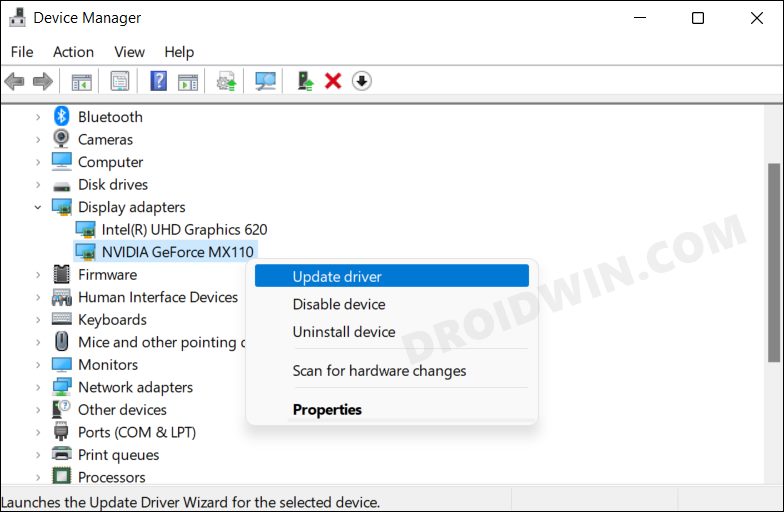
Update Graphics Drivers
Using old or outdated graphics drivers is known to cause a few performance issues. Therefore, you should consider updating these drivers to the latest build, using the instructions given below:
- Use the Windows+X shortcut and select Device Manager from the menu that appears.
- Then expand Display Adapter, right-click on your graphics drivers, and select Update Drivers.
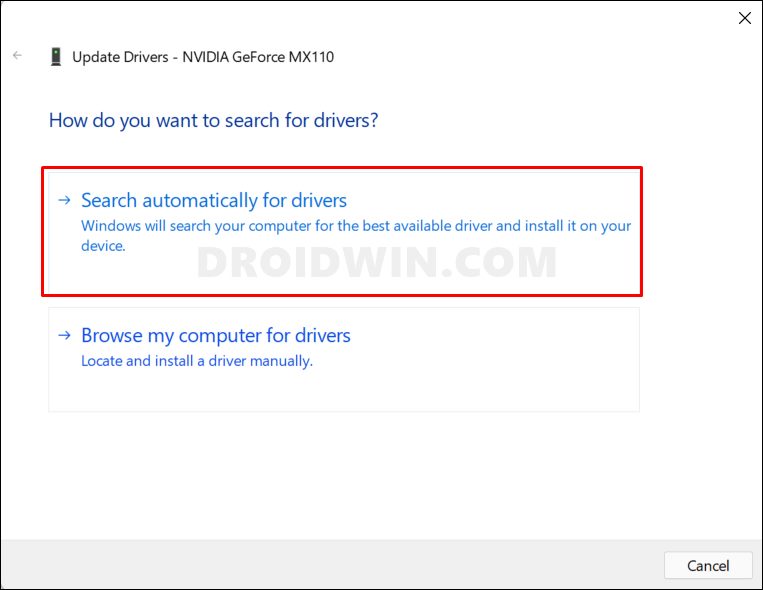
- After that, click on Search automatically for graphics drivers.
- Windows will now search online for the driver and will subsequently download and install them.
- Once done, restart your PC for the changes to take place and then test out the results.
Disable Application Overlay
If you are concurrently using an app/service such as Discord/Nvidia GeForce Experience app/Windows Gamebar, along with the game, then you might have enabled the app’s overlay settings as well. There’s no doubt that it goes a great towards ease of user experience as you wouldn’t have to minimize the game to access that app.
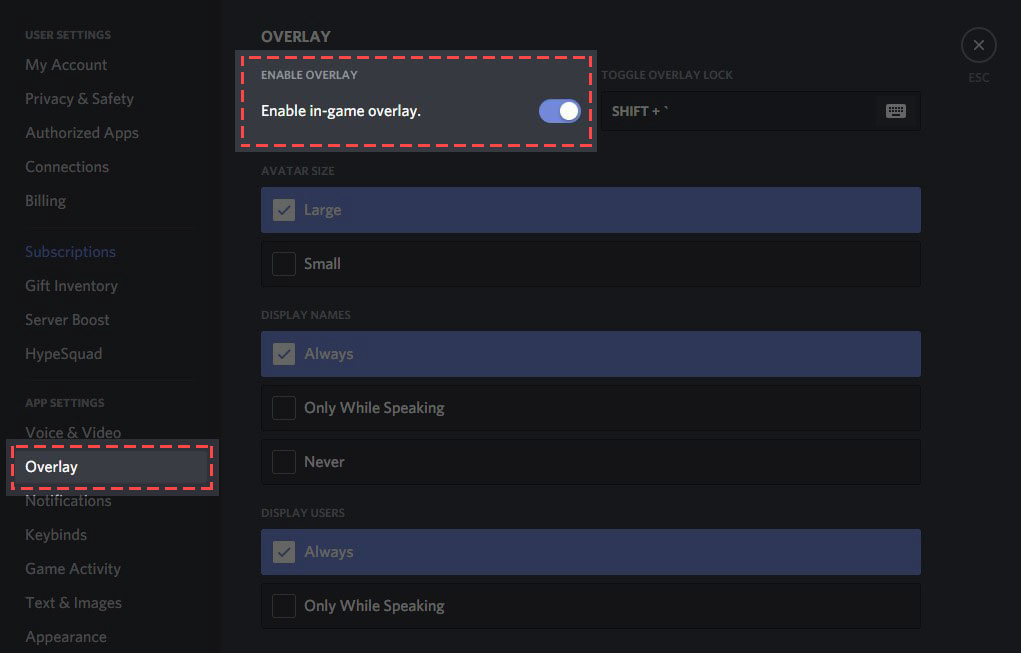
But on the flip side, this has been known to cause a few frame drops as well. So you should consider disabling this option for the concerned app and then check if it does any good when it comes to improving the gaming performance on your Windows 11 PC.
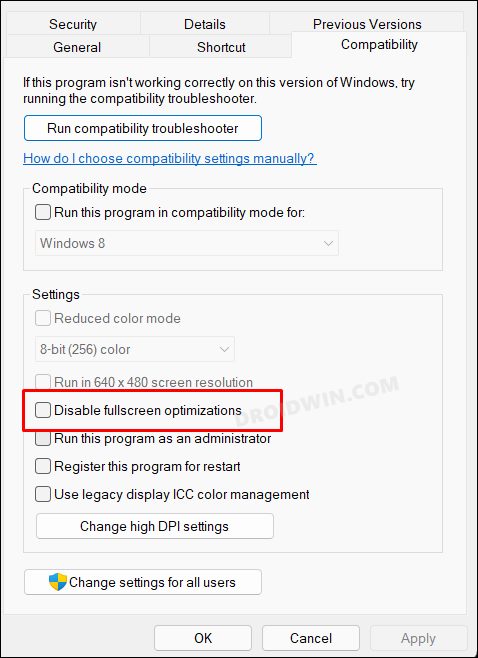
Disable Full-Screen Optimizations
Windows automatically enables full-screen optimizations in order to give you a more fluid, rich, and immersive gaming experience. However, some users have reported that for them, this feature did more harm than good. Truth be told, the proportion of such users aren’t on the higher ride, but again, there’s no harm in trying it out either. So on that note, let’s give it a trial and then check out the results.
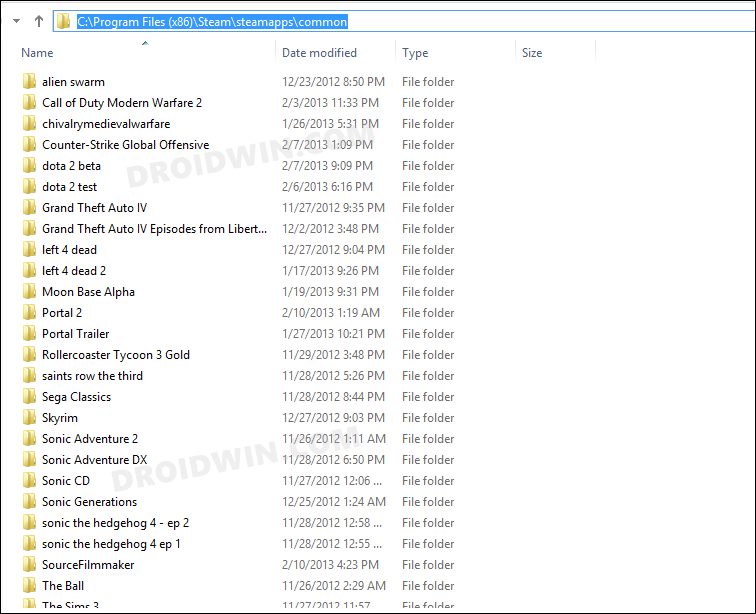
- Bring up the File Explorer via Windows+E shortcut keys.
- Then head over to the below location:
C:\Program Files (x86)\Steam\steamapps\common
- Within that, go to the game folder of your choice.
- Then right-click on its EXE file and select Properties.
- After that, go to the Compatibility tab and uncheck ‘Enable Fullscreen Optimization’.
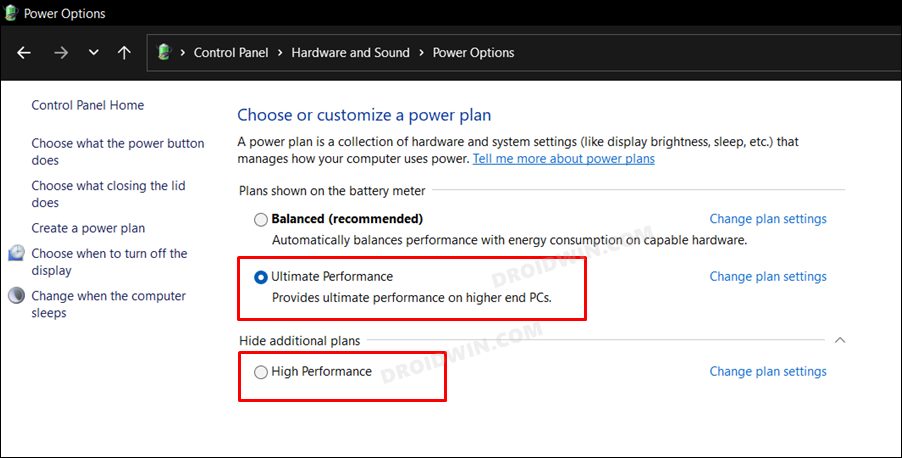
Enable High or Ultimate Performance Power Plan
By default, your PC is set to a Balanced power plan which maintains a file equilibrium between performance and battery conservation. However, for resource-intensive tasks, this might not be the best mode and you should instead opt for either a High or Ultimate Plan.
While these modes will definitely improve the gaming performance on your Windows 11 PC, but they would also lead to a considerably larger percentage of battery drain. So if that’s well and good, then do check out our guide on How to Enable High and Ultimate Performance Power Plan in Windows 11. Or you may also refer to the below shorter instructions:
- Head over to the Start Menu and launch Command Prompt as an administrator:
- Then execute the below command if you wish to add the High Performance plan to your PC:
powercfg -duplicatescheme 8c5e7fda-e8bf-4a96-9a85-a6e23a8c635c
- On the other hand, execute the below command to add the Ultimate Performance plan:
powercfg -duplicatescheme e9a42b02-d5df-448d-aa00-03f14749eb61
- Now launch Control Panel and go to Hardware and Sound > Power Option.
- You should now see the newly created plan there (or under the Show additional plans section).
- Select the plan of your choice and it will be implemented right away.

Update DirectX
Microsoft’s DirectX for Windows platform is designed to enhance multimedia experiences, such as 3D gaming, graphics, network gaming, and audio. Likewise, it also gets blessed with updates at regular intervals which leads to performance enhancements and fixing of underlying bugs.
Moreover, it is also a major cog in the wheel when we talk about improving the gaming performance on your Windows 11 PC. Therefore, it is recommended to have the latest version of DirectX installed on your PC. To do so, download the latest version of DirectX from the Microsoft site. Then launch it and proceed with the on-screen instructions to update it to the latest build.
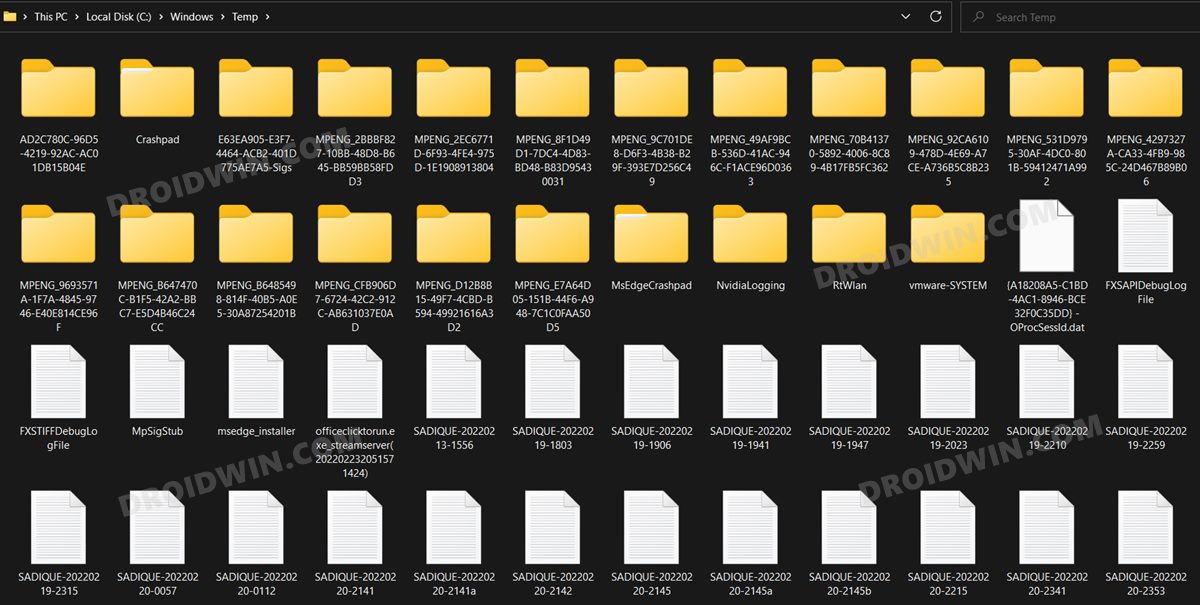
Delete Temporary Files
Temporary stored cached files will slow down the system which in turn will have negative consequences on the installed games and software as well. Therefore, you should consider deleting these data at regular intervals, and now could be just the right time to do so.
- Bring up the Run dialog box via Windows+R shortcut keys.
- Then type in the below command and hit Enter to open the ‘Temporary’ folder:
temp
- Now use the Ctrl+A shortcut to select all the files and hit the Delete key to send them to the bin.
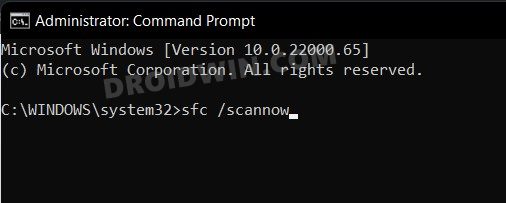
Use SFC and DISM Commands
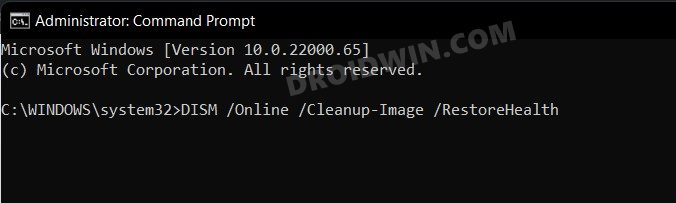
System File Checker and Deployment Image Servicing and Management are two command-line utility tools that scan for the corrupt Windows files and then replace them with their working counterpart. The major difference between the two is whereas the SFC replaces the corrupt files with the working ones from the cached directory on your PC, DISM does so by downloading the working files from the online Microsoft servers. And as of now, we would be making use of both these tools to fix the underlying issue. Follow along
- To begin with, head over to the Start Menu, search Command Prompt, and launch it as an administrator.
- Then copy-paste the below command to open the SFC Tool:
sfc /scannow
- Once the SFC Scanning is complete, it’s time to use the DISM Tool. So copy-paste the below command:
DISM /Online /Cleanup-Image /RestoreHealth
- Once DISM finishes the scanning, it is recommended to reboot your PC. Once it boots up, check whether it leads to any improvement in the gaming performance on your Windows 11 PC.
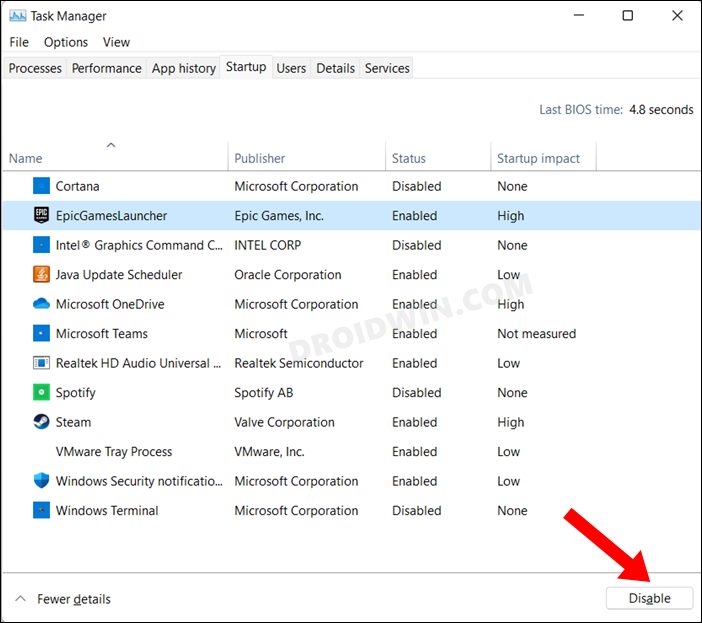
Disable Startup Apps
While the Startup apps are the most culprits when it comes to slowing down the boot-up time of the OS, its effect could linger well beyond that time frame. So it’s better to have most of these apps disabled and only keep the ones enabled that are of paramount importance for the system. Here’s how it could be done:
- Bring up the Task Manager via Ctrl+Shift+Esc shortcut keys.
- Then go to the Startup tab, select a third-party app and click Disable.
- Do so for all apps belonging to this domain and then check out the results.
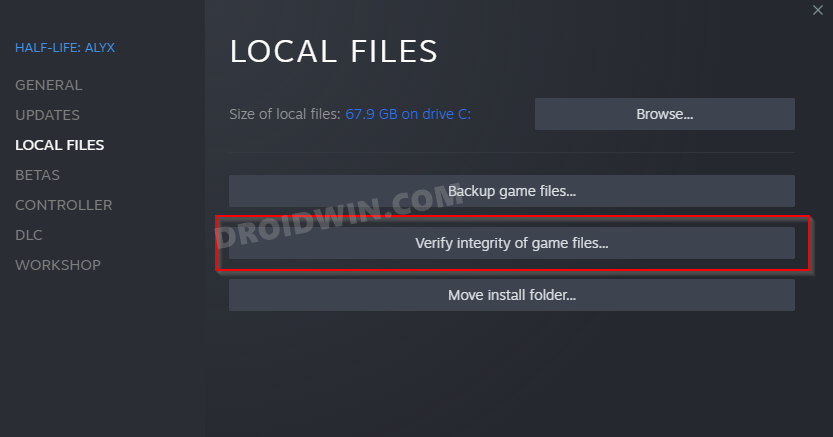
Verify Integrity of Game Files
Even if a few KBs of the game file weren’t able to successfully download due to a temporary network blip or if one of the game files had been corrupted, then its repercussions would be felt by the app as a whole. If you have downloaded that game via Steam, then there’s a handy way to verify and hence rectify this issue. Here’s how:
- Launch Steam and go to the Library section.
- Then right-click on the desired game and select Properties.
- After that, go to the Local Files tab and click on Verify Integrity of Game Files.
- Wait for the process to complete and then check out the results.
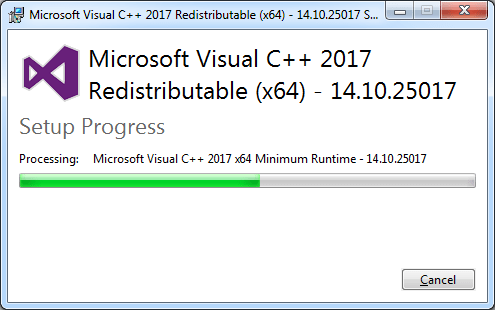
Update Microsoft Visual C++ Runtime
Many games and applications (especially the ones that use the Windows API, DirectX, and . NET) require redistributable Visual C++ runtime library packages to function correctly. So you should double-check that your PC has the latest version of this app installed.
- For that, download the latest version of Microsoft Visual C++ Runtime.
- Then launch the setup file and proceed with the on-screen instructions to complete the update process.
- Once done, verify if there’s any noticeable improvement in the gaming performance on your Windows 11 PC.
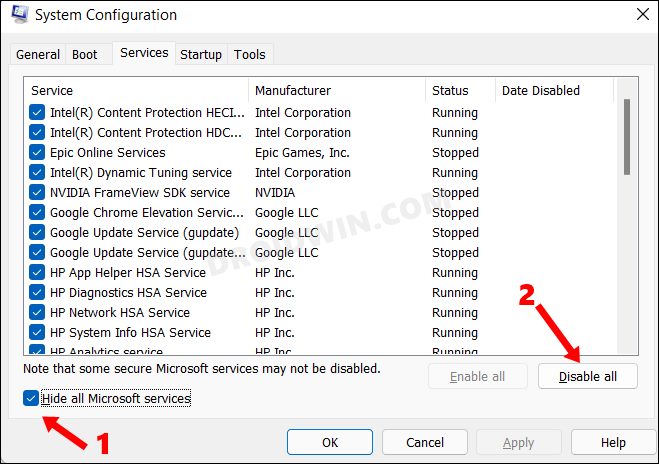
Disable Third-Party Services
Various third-party services have been known to conflict with the proper functioning of the games and applications. To check if that is the case this time around as well or not, let’s turn off all the non-Microsoft services and then test out the results. Here’s how it could be done
- Being up the Run dialog box via Windows+R shortcut keys.
- Then type in the below command and hit Enter to open System Configuration
msconfig
- After that, go to the Services tab and checkmark Hide all Microsoft services.
- Then click on the Disable All button and it will disable all the non-Microsoft services.
Check Pending Game Update
Developers release updates to their games at regular intervals. While these updates might not always bring in new features, but they do end up patching underlying bugs and likewise, also improve the overall performance.
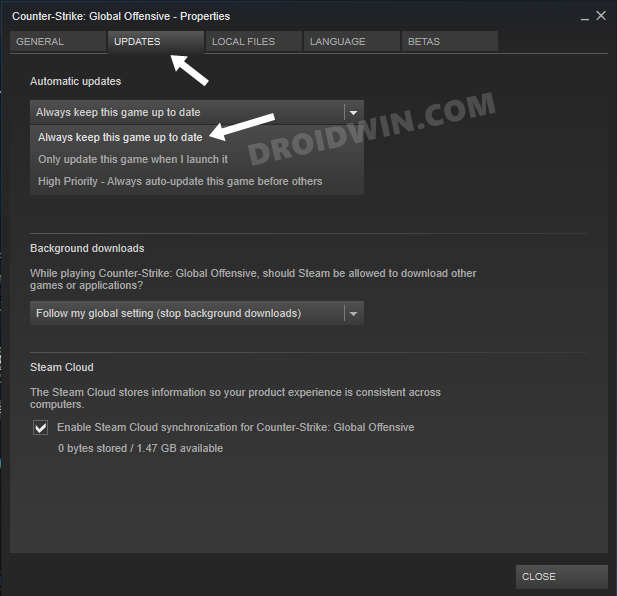
So head over to the digital distribution service of your choice (Steam, Epic Launcher, etc) and then check for the updates corresponding to your game. If it is available, then download and install it right away and then check out the results.
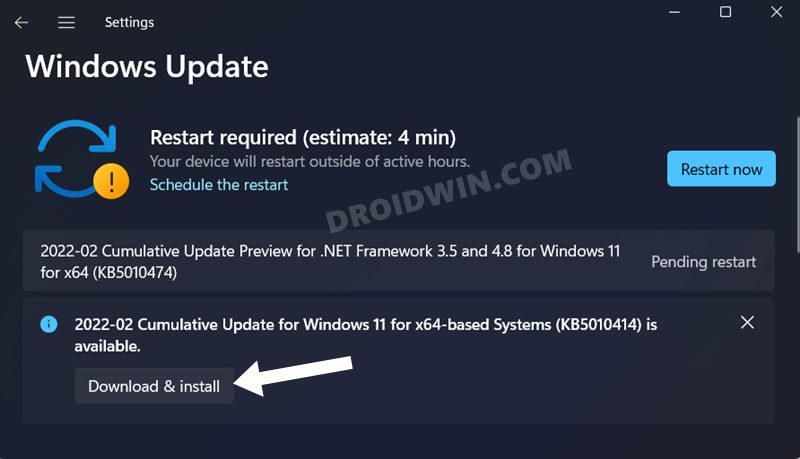
Install Windows Updates
Last but not the least, you should make sure to be on the latest OS build. The update cycle will vary, depending on the channel that you belong to (Insider Preview/ Beta/Stable) but as and when you get hold of the same, make sure to download and install them right away. Here’s how:
- Bring up the Settings menu via Windows+I shortcut keys.
- Then select Windows Update from the left menu bar.
- If there is a pending update, then download it onto your PC.
- Once installed, reboot your PC for the changes to take place.
So these were the numerous methods to improve the gaming performance on your Windows 11 PC. We have listed over 15 different methods. Do let us know which one spelled out success for you. Likewise, all your queries are welcomed in the comments section below.


