In this guide, we will show you the steps to convert any Android app to a system app. The open-source nature of the Android ecosystem beholds a slew of nifty opportunities up its sleeves. From flashing custom ROMs to installing a custom recovery like TWRP, the possibilities stand endless. Along the same lines, you could gain administrative privileges by rooting your device via Magisk. Once you do so, you will be in a position to try out a plethora of mods, such as Magisk Modules, Xposed Framework, and Substratum Themes, among others.
Likewise, you could also flash a custom kernel and overclock the device’s CPU. Another pretty nifty yet underrated feature is the ability to convert any Android app to a system app. Doing so will give that app complete control over your device and would also allow it to function without any restrictions. This in turn will make it possible for you to extract maximum potential out of that app. So if you are interested in carrying out this conversion, then let’s get started with the instructions.
Table of Contents
How to Convert any Android App to System App
We have listed two different methods to carry out the said task. You may refer to the one that is in sync with your requirement. Droidwin and its members wouldn’t be held responsible in case of a thermonuclear war, your alarm doesn’t wake you up, or if anything happens to your device and data by performing the below steps.
Method 1: Via Systemizer Module
- To begin with, root your device via Magisk.
- Then download the App Systemizer module on your device.
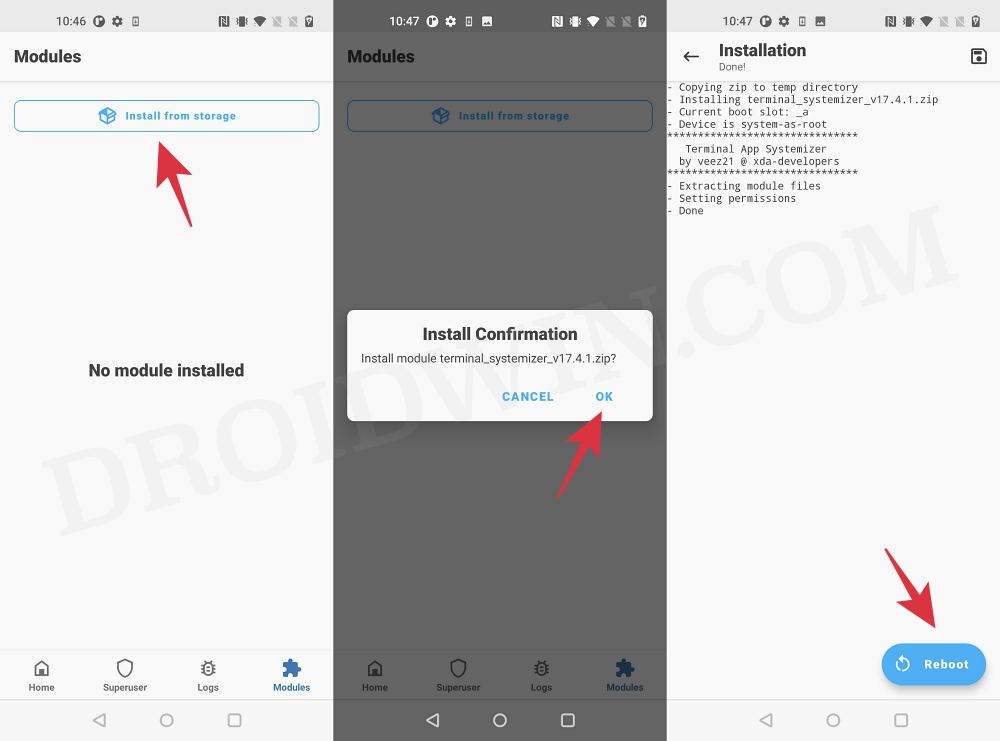
- Now launch Magisk, go to modules, and tap on Install from Storage.

- Then select the module and wait for it to be flashed. Once done, hit Reboot.
- Now download and install Termux from the Play Store.
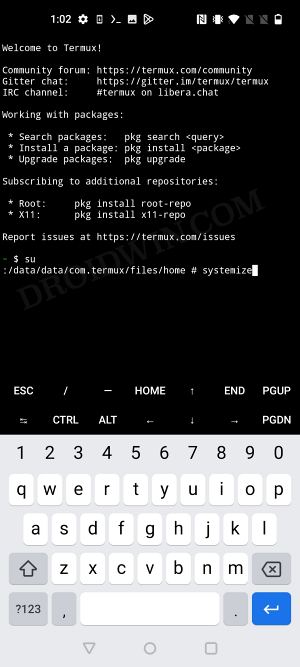
- Then launch it and type in su. You’ll get a SuperUser request, tap Grant.
- Then type in the below command to launch the module:
systemize
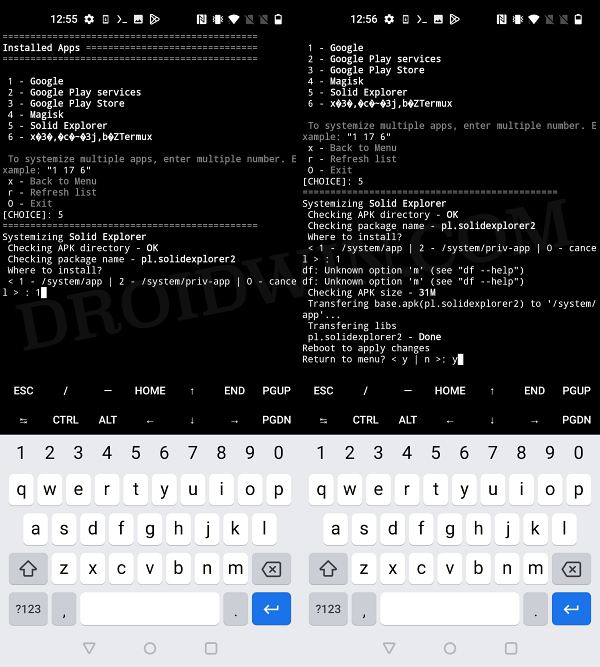
- After that, type in 1 [Systemize Installed Apps] and hit Enter
- It will bring up a list of all installed apps.
- Type in the number corresponding to the app of your choice.
- Under the location to be installed, select 1 [/system/app] and hit Enter.
- Then type in Y to go back to the main menu and finally restart your device.
- Once your device boots up, the said app will now be a system app.

Method 2: Manually Convert Android App to System App
- To begin with, you will need to have the TWRP Recovery installed. This is required to mount the system directory and hence access the system/app directory. So refer to our guide: How to Install TWRP Recovery on Android
- Next up, download and install a File Explorer app that supports root [such as Solid Explorer File Manager].
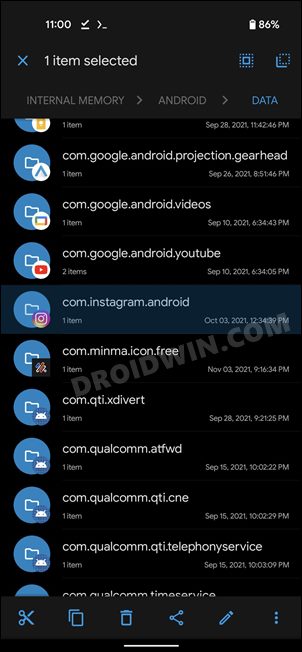
- Then head over to the android/data directory and copy the desired app’s data folder. Now paste it onto the Internal Storage.
- Likewise, rename it and remove all the spaces and punctuation marks [best is to have a one-word name].
- Once that is done, uninstall that app from your device.
- Now boot your device to the TWRP Recovery via the below command or refer to this guide:
adb reboot recovery
- Then go to Mount, select the System partition and perform a right swipe to Mount it.
- You will now have to transfer the app data folder to the system directory. For that, you may either use TWRP or boot to the OS and then use the File Explorer.
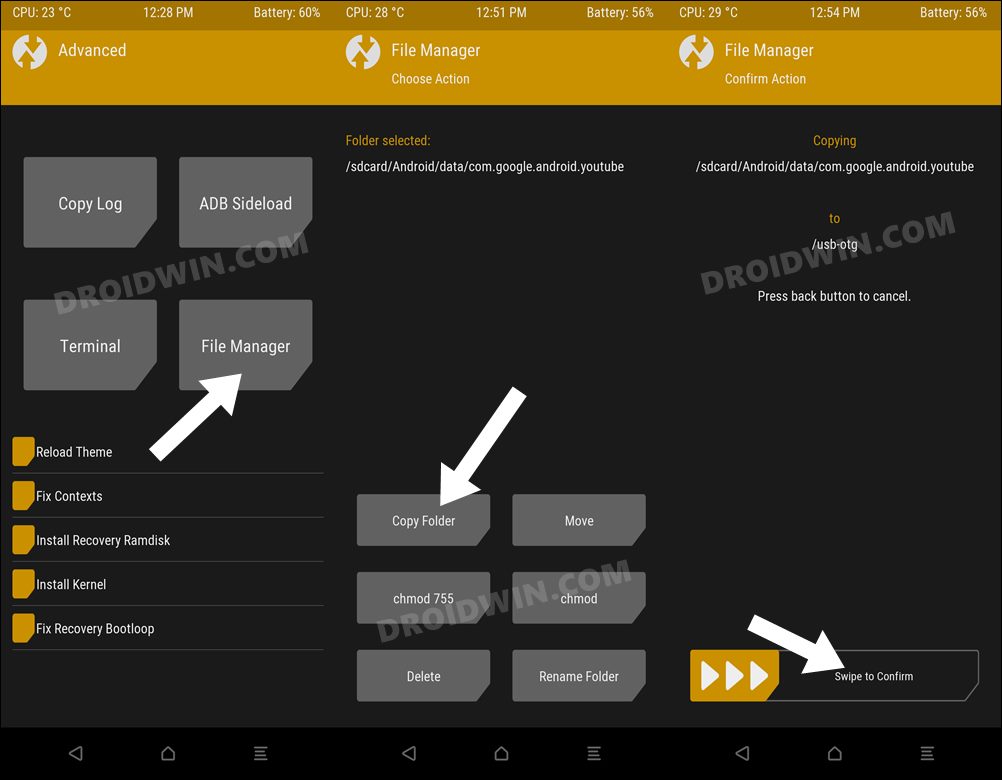
- If you are planning to use TWRP, then go to Advanced > File Manager. Then navigate to the desired app data folder and tap on Copy Folder.
- After that, head over to the system/app directory and paste the folder there. That’s it. The app has now been converted to a system app.
- You may now reboot your device back to OS via Reboot > System.
- On the other hand, if you are planning to do so with the File Explorer method, then open the desired File Explorer, copy that app data folder, and paste it into the system/app directory.
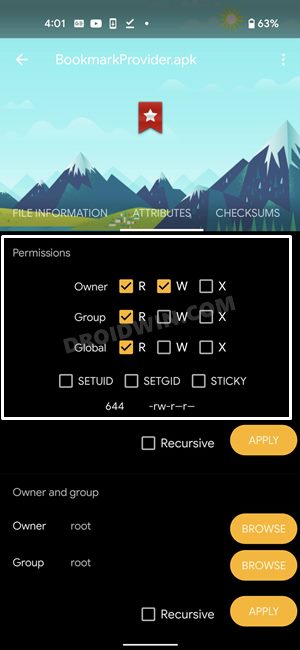
- Then give it the 755 permission, in other words: Owner: RW | Group: R | Global: R
- Finally, hit the Apply button to save the changes. That’s it, the process stands complete.


These were the steps to convert any Android app to a system app. If you have any queries concerning the aforementioned steps, do let us know in the comments. We will get back to you with a solution at the earliest.
How to Verify if App has been Converted to System App
To check if the user app has been converted to the system app, let’s just carry out a simple step. Simply head over to that app’s App Info page and you would no longer see the Uninstall option, rather it would have been replaced with the Disable button. This signifies that the app has been successfully converted to a System app.
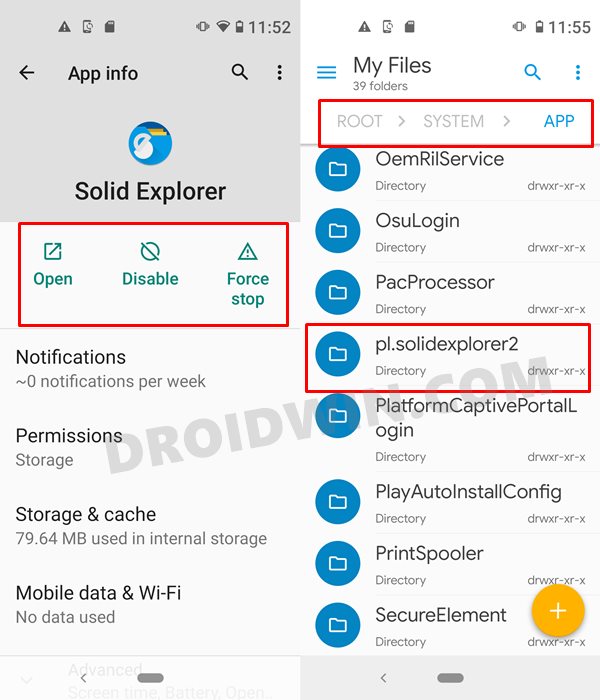
To perform a slightly more technical test, you may use a File Explorer app and browse to the location where the app has been installed (in our case, that will be /system/app). There you should find a folder by the name of that app’s package name, which in my case is pl.solidexplorer2 for the Solid Explorer File Manager app.


sed
Fine but good for professionals.
I wish for a complete program.