In this guide, we will show you the steps to change the system product name on your Windows 11 PC. The latest iteration of the OS beholds a slew of customization features. From changing themes to tweaking various OS components, there are a plethora of things to try out. However, there is still one important thing missing- you cannot easily change the system name. By default, your PC manufacturer will assign the name of your laptop (or motherboard in some instances) as the product name.
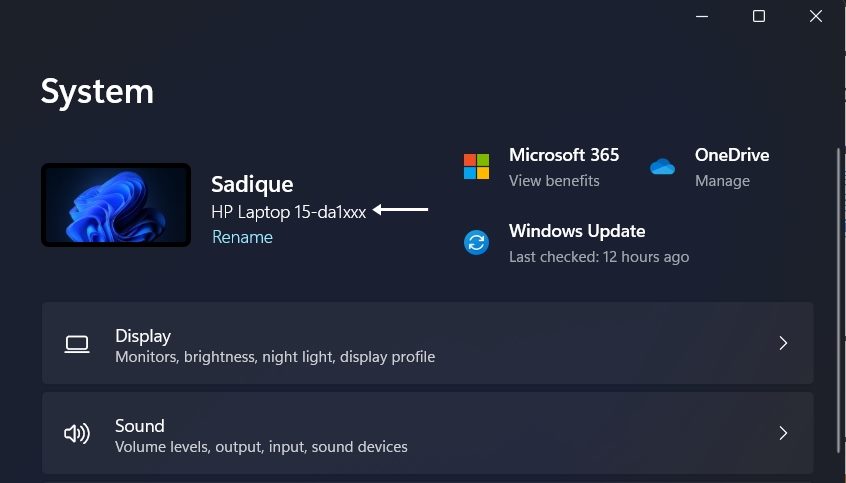
And this is something that might not be in sync with everyone’s requirements. What is even more infuriating is the fact that some OEMs like HP even tend to hide some letters of the laptop’s name. So displaying the information that no asked for in the first place and even then only showing half-baked details, well, there ought to be a better way out. And turns out there is. There exists a nifty method through which you could change the system product name on your Windows 11 PC. And in this guide, we will show you how to do just that. Follow along.
How to Change System Product Name in Windows 11
To carry out this task, we will be tweaking a certain registry value. So it is recommended to take a backup of your registry before proceeding ahead. Once that is done, you may then start off with the below instructions.
- Open Registry Editor, copy-paste the below location in its address bar, and hit Enter:
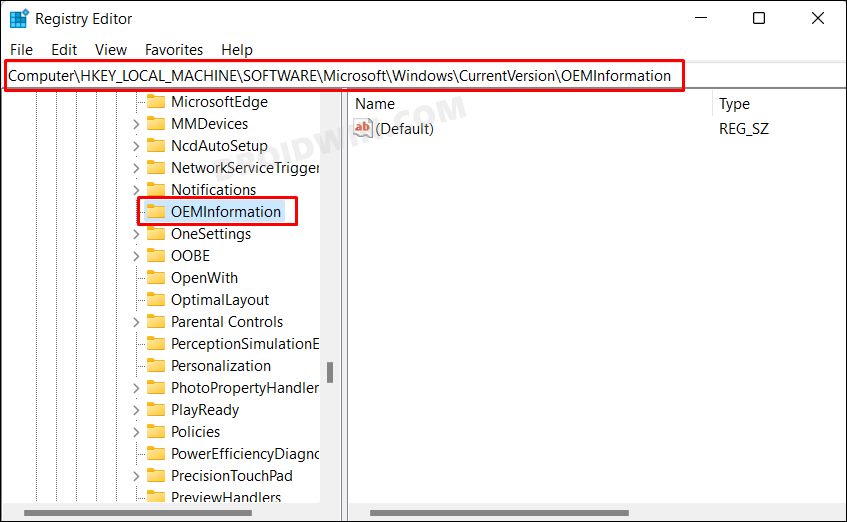
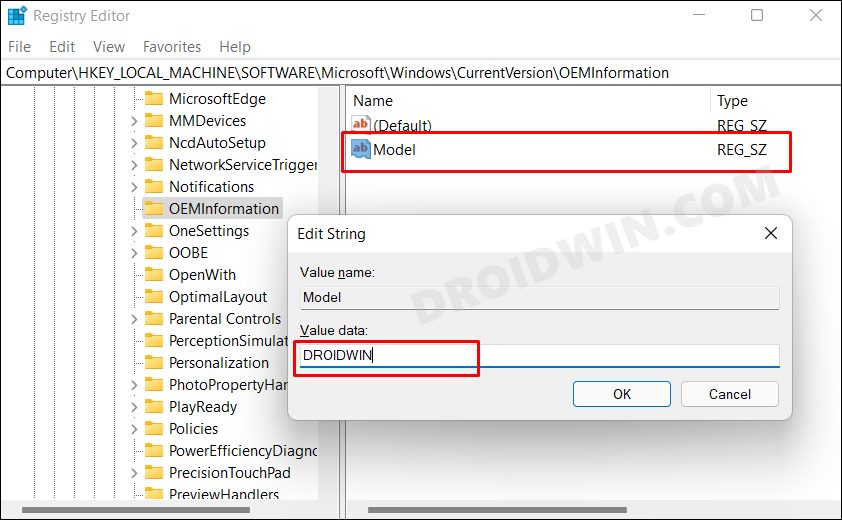
HKEY_LOCAL_MACHINE\SOFTWARE\Microsoft\Windows\CurrentVersion\OEMInformation

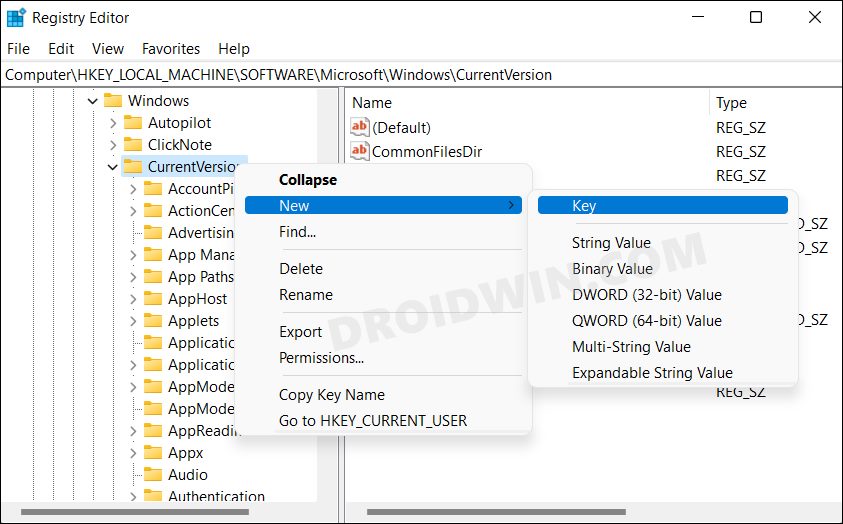
- [If the OEMInformation is missing, then right-click on the CurrentVersion file, select New > Key. Name it OEMInformation].
- Then right-click on OEMInformation and select New > String. Name it Model.
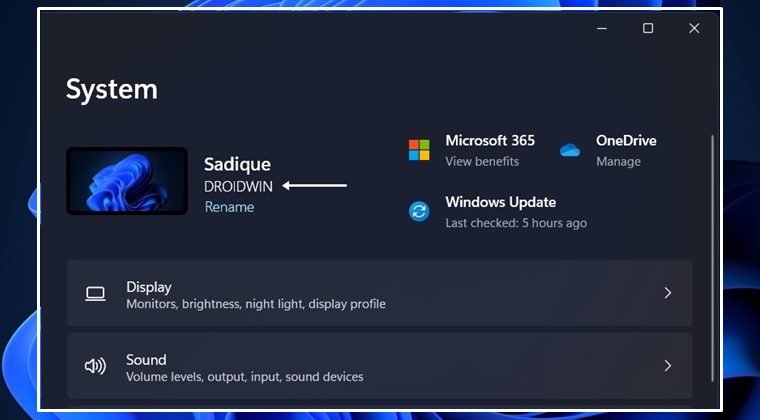
- Double-click to open the Model file and then type in the desired system name of your choice. That’s it.
- Now open the Settings menu via Windows+I shortcut keys and you should see the newly assigned system name.
So with this, we round off the guide on how you could change the system product name on your Windows 11 PC. It is indeed quite surprising to see that we have to take such a long route when it comes to changing the system name. When there already exists a one-click solution to rename the PC name (in the Settings menu), there should have been a similar solution towards this as well.
However, that is not the case and the aforementioned registry editor tweak is the only way out. So on that note, we round off this guide. If you have any queries concerning the aforementioned steps, do let us know in the comments. We will get back to you with a solution at the earliest.


