In this guide, we will show you the steps to enable the new App Picker dialog box on your Windows 11 PC. While it has been months since the stable rollout of the eleventh iteration of the OS, the Redmond giant is still bringing in UI enhancement and graphical tweaks to its various apps. Recently, it was the redesigned Task Manager and Alt-Tab switcher that managed to catch the attention of the masses. Apart from that. the addition of stickers also did raise a few eyebrows.
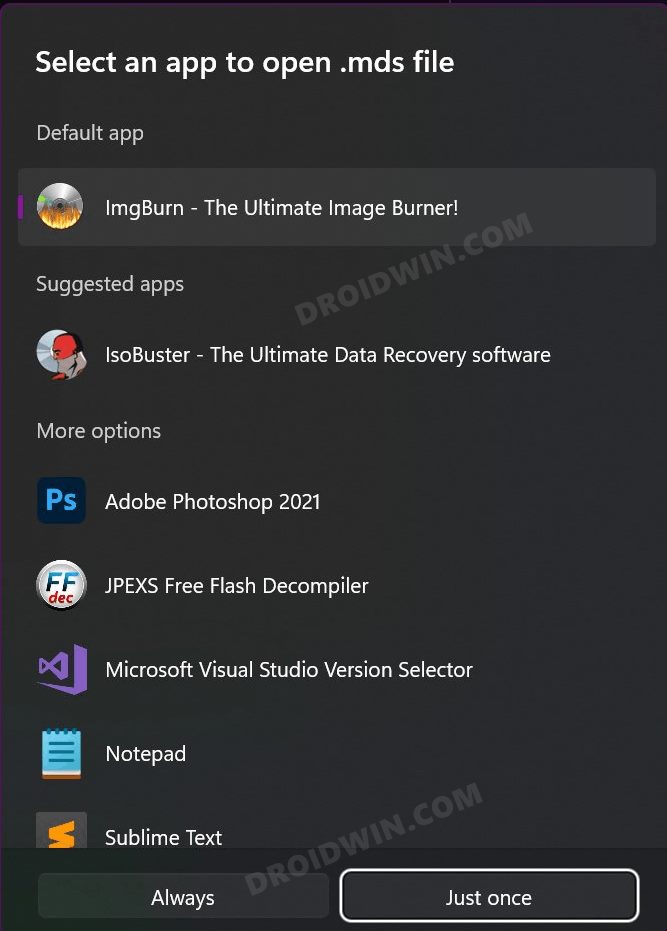
However, there was another nifty addition that slightly went under the radar. With the Windows 11 build 22563, you now get a completely revamped App Picker menu. Flaunting a Fluent Design, and the support for Dark Theme, this menu now also beholds different menu sets. Up until this point, you get two options: OK and Always use this app to open <extension> files. The first option would open the said file via the selected application just for one-time usage whereas the latter option would make the selected app the default one to handle that file type.
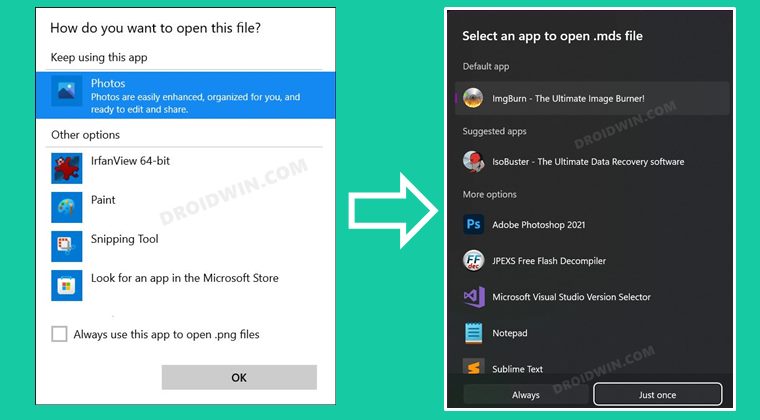
In the revamped app picker, all this has been made more clear. The OK button is now replaced with Just Once whereas the Always use this app option has been substituted with the Always button (sounds familiar, Android users?). But as mentioned before, it is still in the developer preview phase and you cannot enable this by simply turning on any toggle. However, there exists a nifty workaround through which you could enable the new App Picker dialog box in Windows 11. And in this guide, we will show you how to do just that. Follow along.
How to Enable the New App Picker in Windows 11
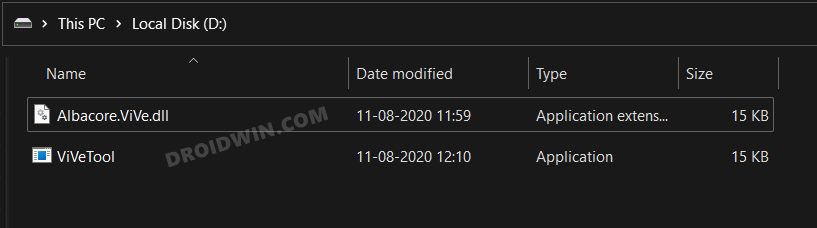
- To begin with, download ViveTool from GitHub and extract it to any convenient location on your PC.

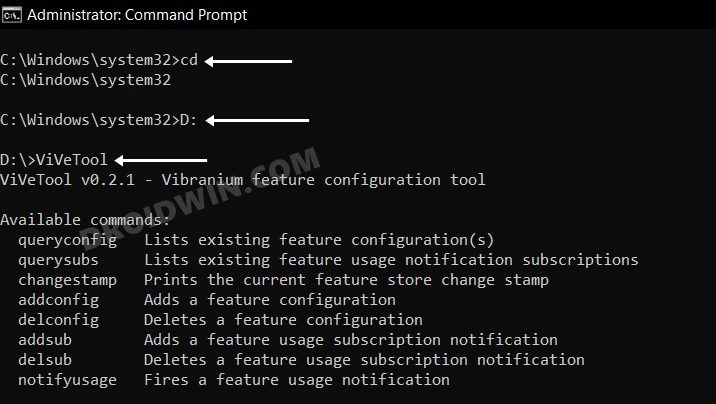
- Now go to the Start menu and launch CMD as an administrator.
- Next up, change its directory to the same folder where you have extracted ViveTool. You may use the cd command for the same.
- For example, if the tool is extracted in D:\ViveTool, then the command will be as follows: [I have simplified and broken it into three separate commands, you could also combine them into a single one]:
cd
D:
ViveTool
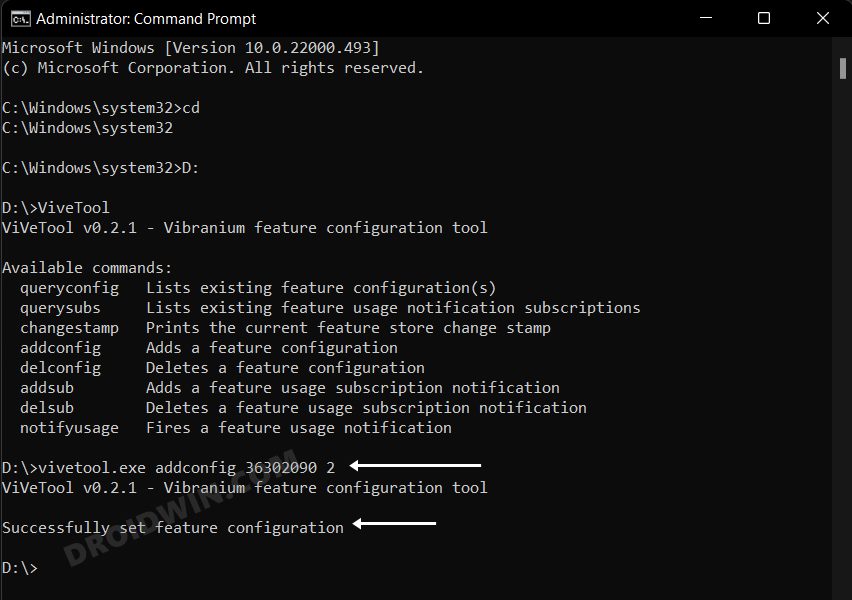
- After that, execute the below command to enable the new App Picker in Windows 11:
vivetool.exe addconfig 36302090 2
- You will get the Successfully set feature configuration message. That’s it. Now just restart your PC for the changes to be implemented.
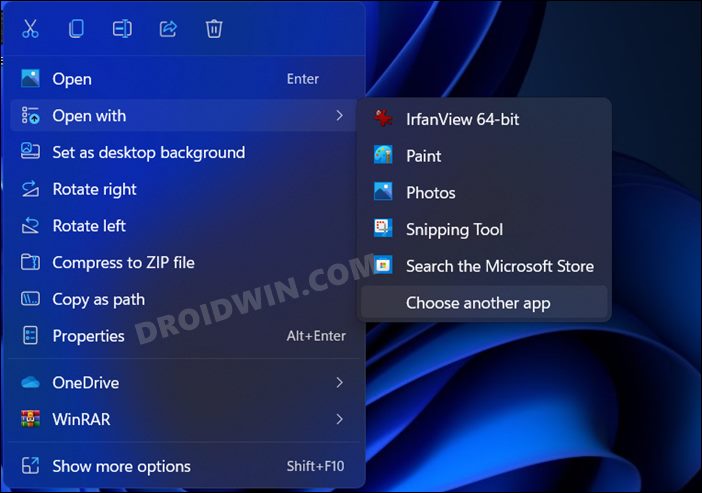
- To test it out, right-click on any file, select Open With > Show More Options and you should be greeted with the new File Picker.
How to Revert to the Old File Picker UI
Since the new File Picker is still in the testing phase, you might witness a crash and freeze when using it. In such an instance, the best bet is to revert to the stock file picker UI. Here’s how it could be done:
- To begin with, launch CMD as an administrator.
- Then change its directory to the folder where you have extracted ViveTool.
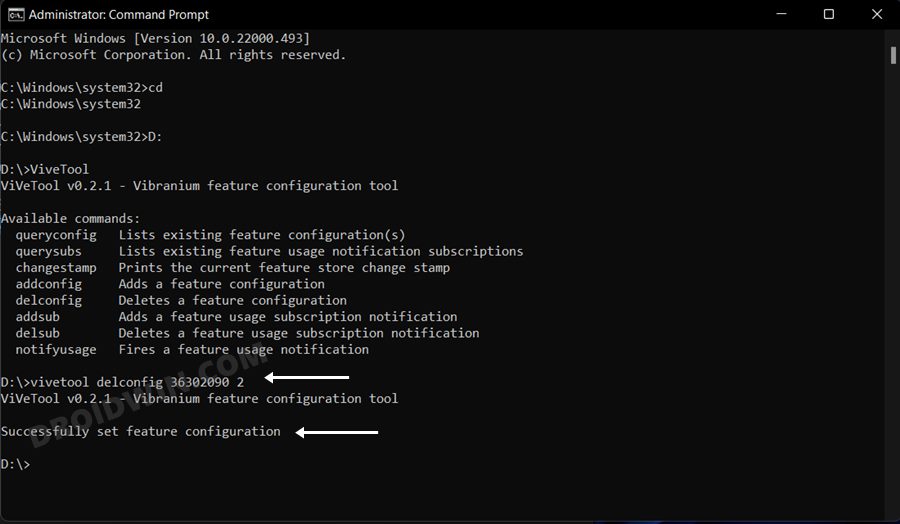
- After that, execute the below command to revert to the old File Picker UI:
vivetool delconfig 36302090 2
- Finally, restart your PC and the process stands complete.
So these were the steps to enable the new App Picker in Windows 11. Likewise, we have also listed the steps to revert it to its default state. As of now, it hasn’t been unconfirmed whether this feature will be incorporated into the stable build as well, though there’s no reason why it shouldn’t. Anyways, until there is an official confirmation about the same, the aforementioned tool is your best bet. Moroever, we would love to hear your views on this new UI change. Do share your opinions with us in the comments section below.


