In this guide, we will show you a nifty method through which you could assign a copilot key to your Windows 11 keyboard. The Redmond giant recently surprised everyone with the announcement that will now be adding a dedicated Copilot key to the PCs being released in the not-so-distant future. For the unaware, Copilot is Microsoft’s answer to Chat GPT and Google Bard, though it still has a long way to go before it can catch up with either of the two entities.
Only time will tell whether its AI assistant will prove to be a success or end up suffering the same fate as Cortana, but as of now, let’s stay on the optimistic end of the fence. Moreover, even if users wish to have this functionality, they aren’t going to upgrade their PC just to have a dedicated AI key on their keyboard. Instead, a much better approach will be to assign a copilot key to your Windows 11 keyboard. And in this guide, we will show you how to do just that. Follow along,
How to Assign a Copilot Key on Windows 11 Keyboard

To get this job done, we will be using PowerTools- the open-source application from Microsoft. While the tool does have the option to assign a single key as a shortcut, however, you cannot assign it to launch an app. But, we managed to find a nifty workaround for that as well. Since by default the Copilot could be launched via the Windows+C shortcut, so we could assign a key to this Windows+C shortcut.
Then when you press that key, it will trigger the Windows+C shortcut and this in turn will launch the Copilot. Sounds impressive, right? So without further ado, let’s put it to the test right away. [NOTE: If Copilot isn’t yet available in your country, then pressing the Copilot shortcut key will instead launch Windows Search].
- First off, download and install PowerToys from Microsoft Store or GitHub.
- Then launch PowerToys, select General, and enable the toggle ‘Run at startup’.
- Now click on ‘Restart PowerToys as administrator’. The app will now restart.
- So go to ‘General’ and enable the toggle next to ‘Always run as administrator’.
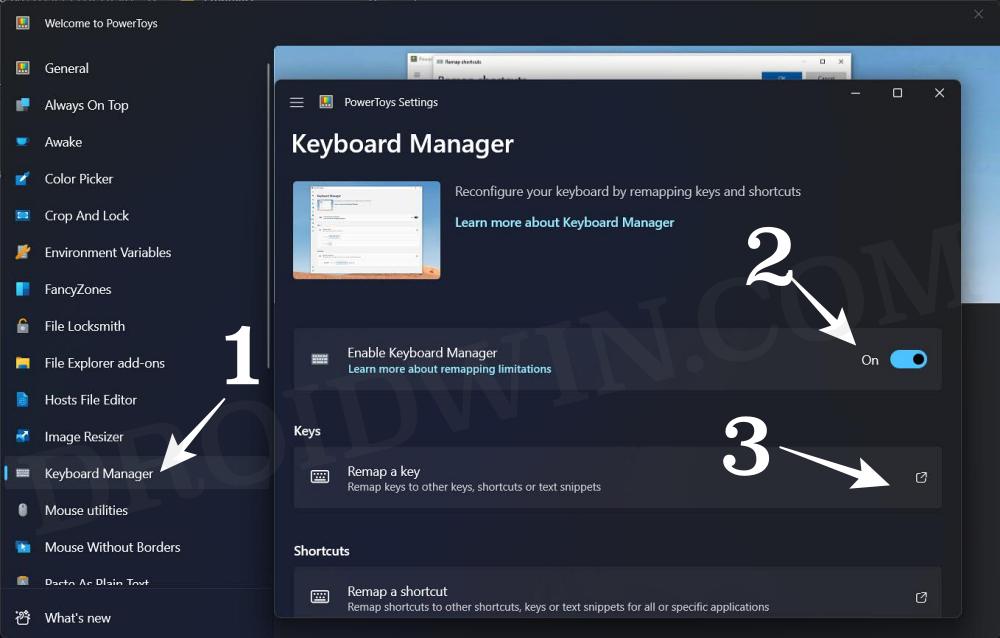
- Now go to Keyboard Manager, turn on ‘Enable Keyboard Manager’, and click on Remap a key.

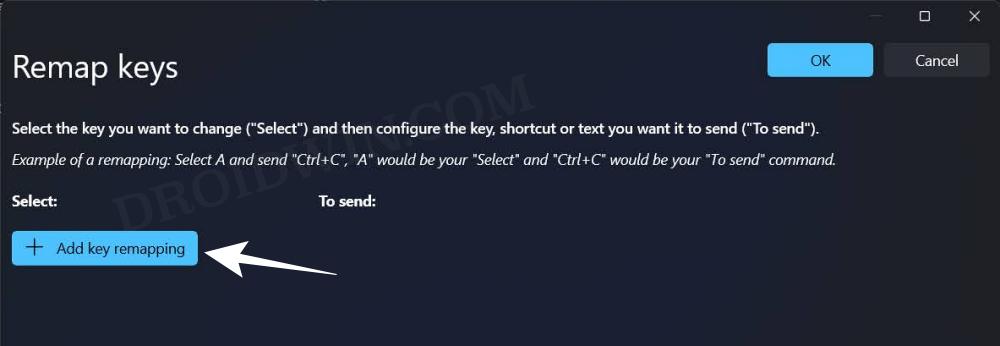
- Then click on ‘+ Add key remapping’.
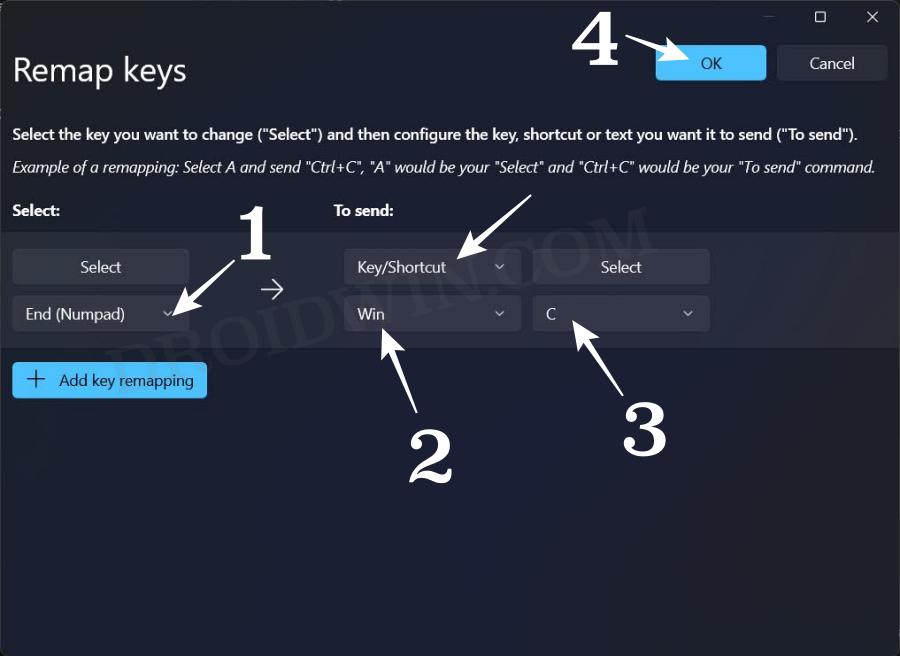
- In the ‘Select’ column, select the key you want to use for launching Copilot [we have chosen the End key].
- Next up, in the ‘To send’ column, select ‘Key/Shortcut’.
- Then select the Win key under the second ‘To send’ column.
- Now choose C from the drop-down next to the second drop-down menu.
- Finally, hit OK at the top right > Continue Anyway in the pop-up to save the changes.
- Now when you press the assigned key, it will invoke the Windows+C shortcut, and this in turn will launch Copilot.
That’s it. These were the steps to assign a copilot key to your Windows 11 keyboard. If you have any queries concerning the aforementioned steps, do let us know in the comments. We will get back to you with a solution at the earliest.


