In this guide, we will show you the steps to add the DNS Quick Setting tile on your Android device. While the Internet Service Provider would automatically assign a Domain Name Server, however in some instances you might want to make a switch to a custom one. For example, if privacy is your major concern, then you could opt for Cloudflare, or if you are looking for a tried and tested one, then the offering from Google would be enough to checkmark your requirement.
Likewise, if you are looking for an ad-free browsing experience, then DNS Adguard could be your go-to choice. In this regard, you could add and remove the DNS from Settings > Network and Internet > Private DNS. However, if you interact with these DNS on a regular manner, then a much better approach will be to add its Quick Setting tile on your Android device so that you could easily enable/disable it with just a single tap. And in this guide, we will show you how to do just that. Follow along.
How to Add DNS Quick Setting Tile on Android
- First off, download and install Private DNS Quick Tile on your device.
- Then go to Settings > About Phone > Tap on Build Number 7 times.
- Now go to System > Developer Options > Enable USB Debugging.

- After that, connect your device to the PC via a USB cable.
- Then download and extract Android SDK Platform Tools on your PC.
- Now go to the platform-tools folder address bar, type in CMD, and hit Enter.
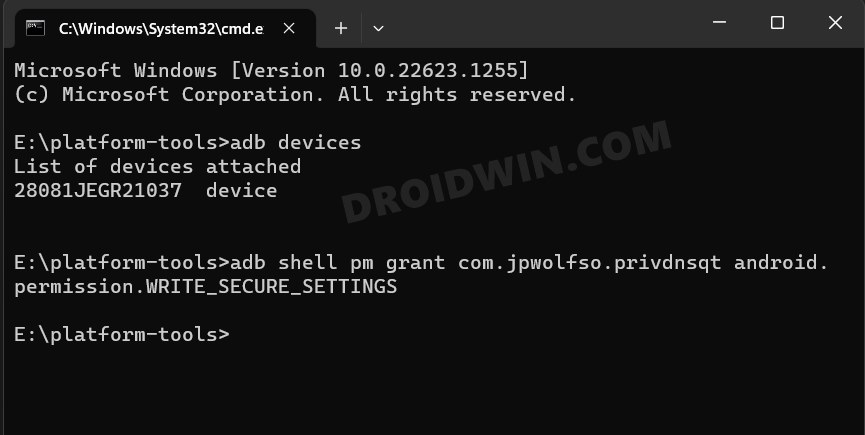
- Then execute the below command to verify the Debugging connection
adb devices
- Finally, execute the below command to give WRITE Permissions to the app:
adb shell pm grant com.jpwolfso.privdnsqt android.permission.WRITE_SECURE_SETTINGS
- You might now get a prompt on your device, tap Allow/OK.
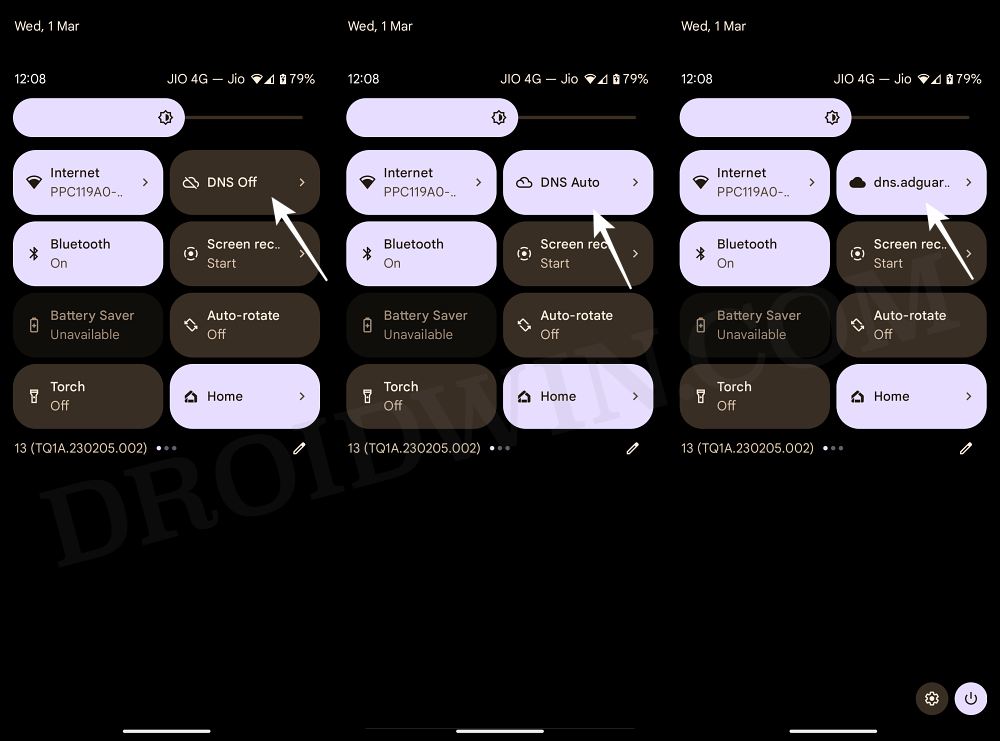
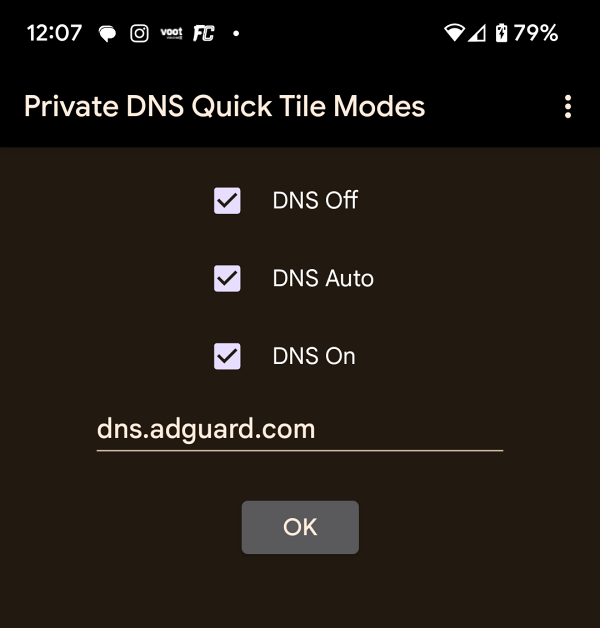
- Now launch the Private DNS Quick Tile and checkmark the options that you want as Quick Tiles.
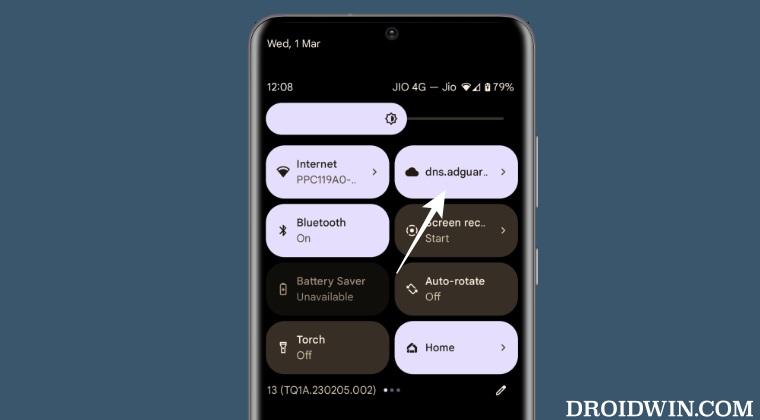
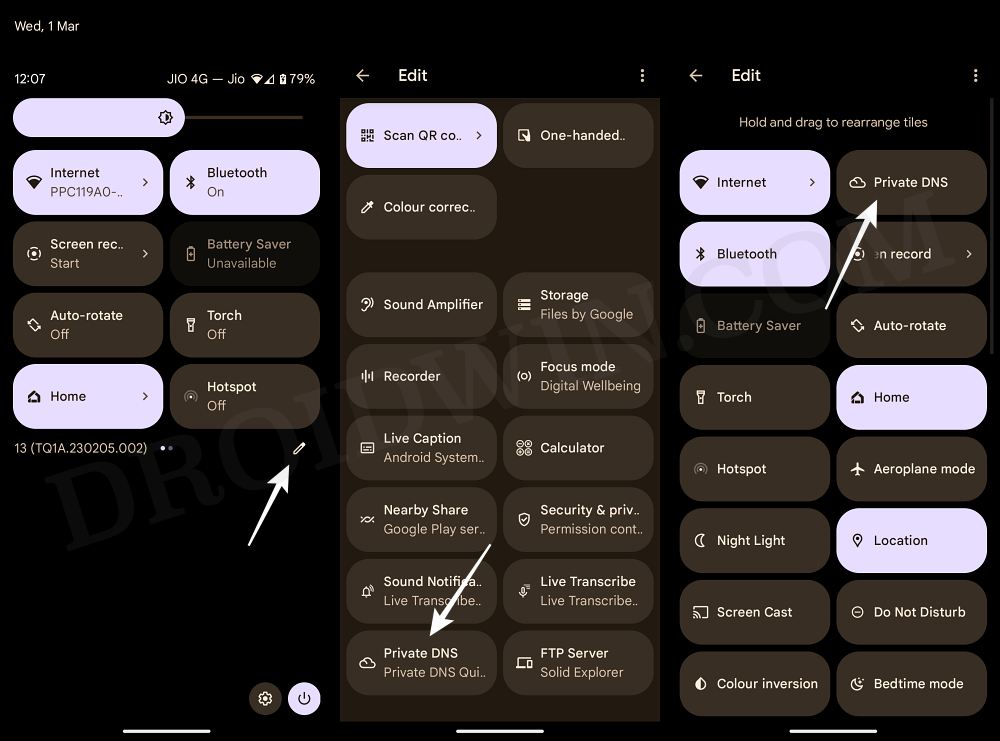
- Once done, bring up the Quick Settings panel, tap on the edit icon, and scroll to the bottom.
- You should see the Private DNS tile, drag and drop to the top and then hit the back button to save it.
- That’s it. You may now interact with the DNS directly via these tiles themselves.
So these were the steps to add the DNS Quick Setting tile on your Android device. If you have any queries concerning the aforementioned steps, do let us know in the comments. We will get back to you with a solution at the earliest.


