In this guide, we will show you the steps to bring back the WiFi toggle in Quick Settings on Android 12/13. The twelfth iteration of Android has bought in a plethora of new and intriguing features. Among them, the new Material You theming style has become the talk of the town. The complete redesign of the UI has been welcomed on quite a positive note.
However, there are a few changes that might not be appreciated in the same manner. One among them is the changes to the WiFi Quick Settings toggle. Up until now, (till Android 11), you could easily enable/disable the WiFi by simply tapping on its icon from the Quick Settings. And if you wished to access the WiFi Settings menu, then you just need to perform a long press on it.
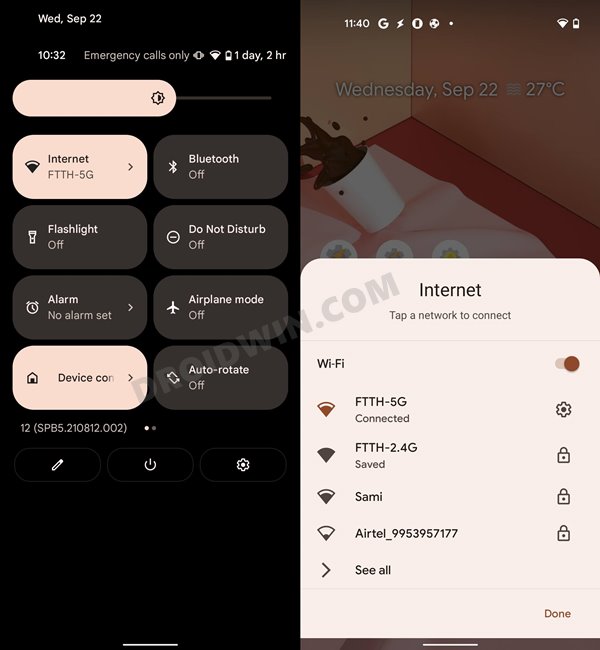
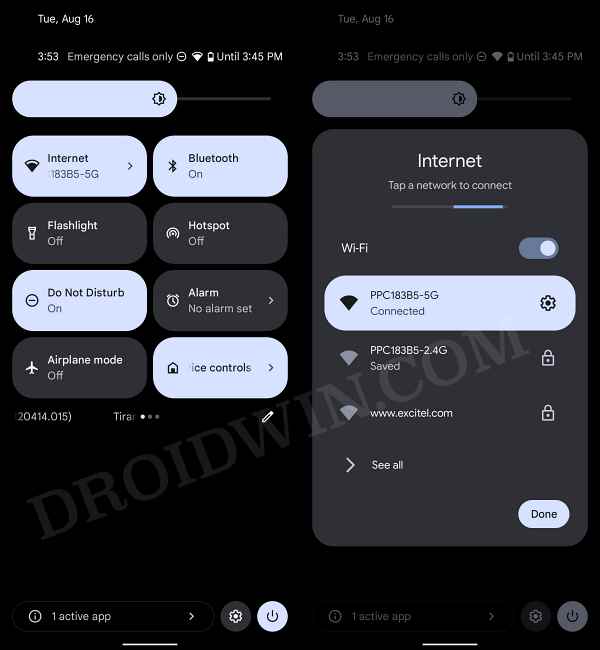
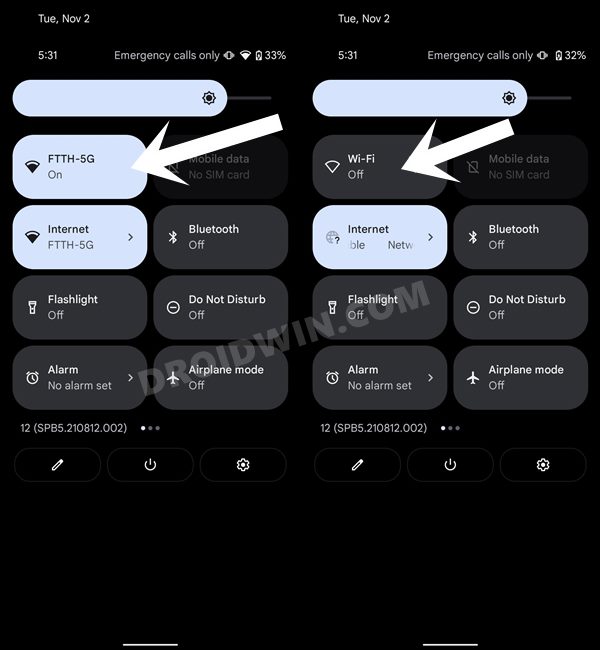
However, with Android 12, Google has removed the ability to directly turn on/off WiFi from the Quick Settings toggle. Instead of that, you will now get a new minimized WiFi menu from where you could disable/enable WiFi or switch networks. So what’s wrong with that? Well, two things. First off, you will now have to perform an additional step to enable or disable WiFi in Android 12/13.
Secondly, since we could already access the WiFi settings menu by long pressing on its icon, why was there a need to add another WiFi settings menu, albeit in a condensed form? No doubt these issues have infuriated quite a few users and rightly so. Fortunately, there does exist a method through which you could revert this change. And this guide shall show you how to do just that. Given hereby are the instructions to bring back the WiFi toggle in Quick Settings on Android 12/13.
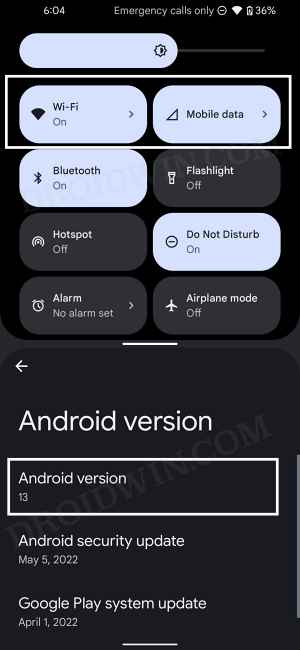
Table of Contents
Bring Back the WiFi toggle in Quick Settings on Android 12/13
There’s currently a cat and mouse game going on with Google regarding this tweak. One on hand, the developers manage to find out a new workaround but are then patched by Google in the subsequent weeks. So there is no universal fix that stays active forever. At the time of writing, the first method is working perfectly with Android 12 and 13. So you. should start off with that one and if that doesn’t work out, then move over to the subsequent workarounds.
Method 1: Using ADB and Wireless Debugging [Non-Root]
- To begin with, download and install the Shizuku app from Play Store.
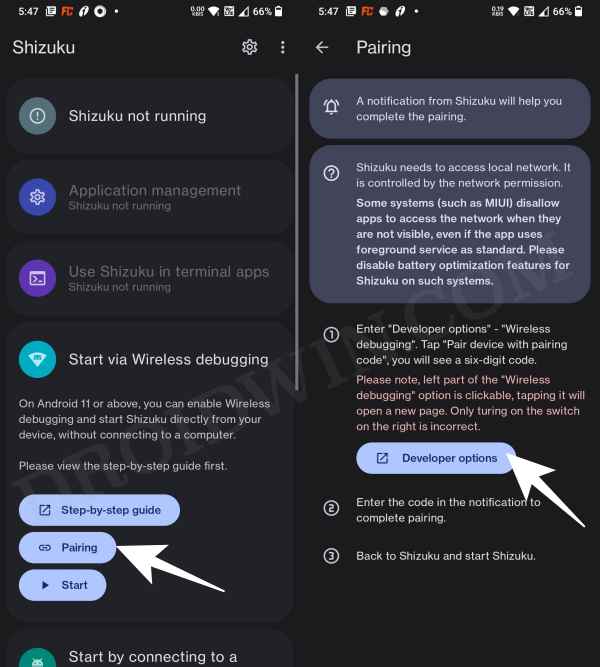
- Then launch it and tap on Pairing > Developer options.

- Now enable the toggle next to Wireless Debugging.
- Then checkmark Always allow on this network and hit Allow.
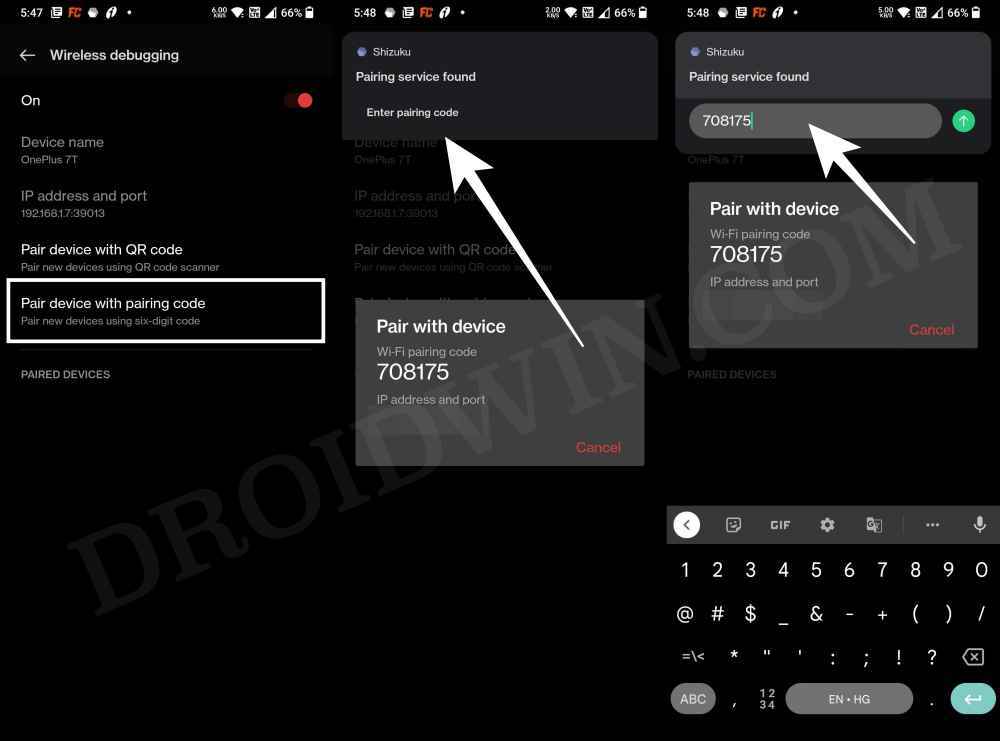
- Now go back to the app and tap on Pair device with pairing code.
- You will now get a six-digit code as well as a prompt from Shizuku to type in that code.
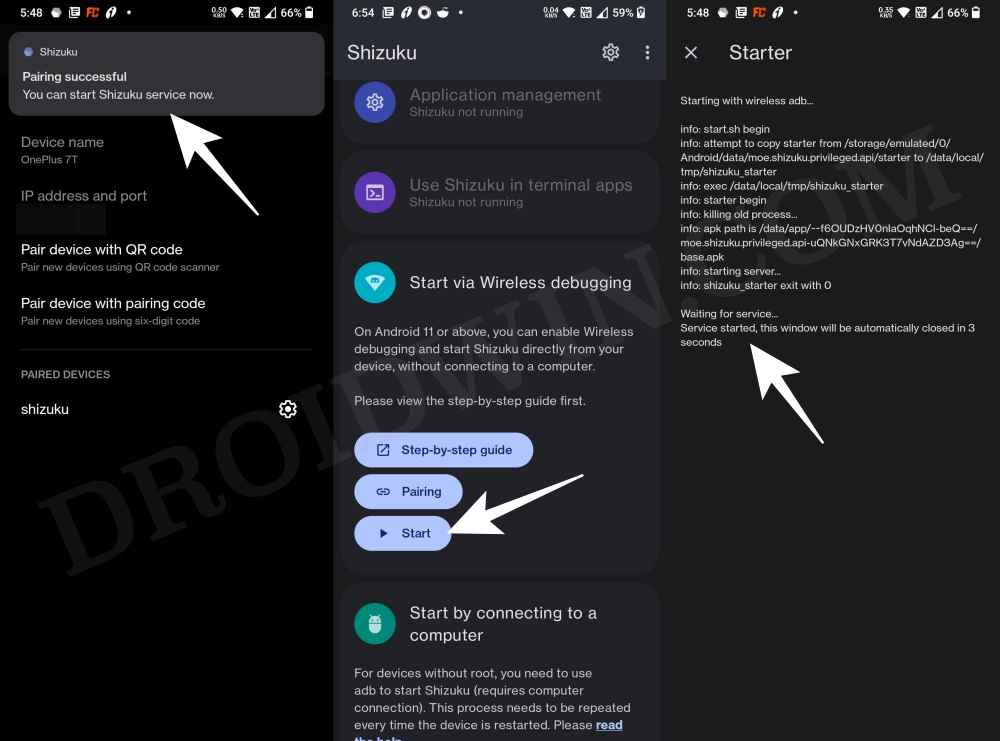
- So type in the code in that prompt and hit Enter. You should now get the Paring Successful message.
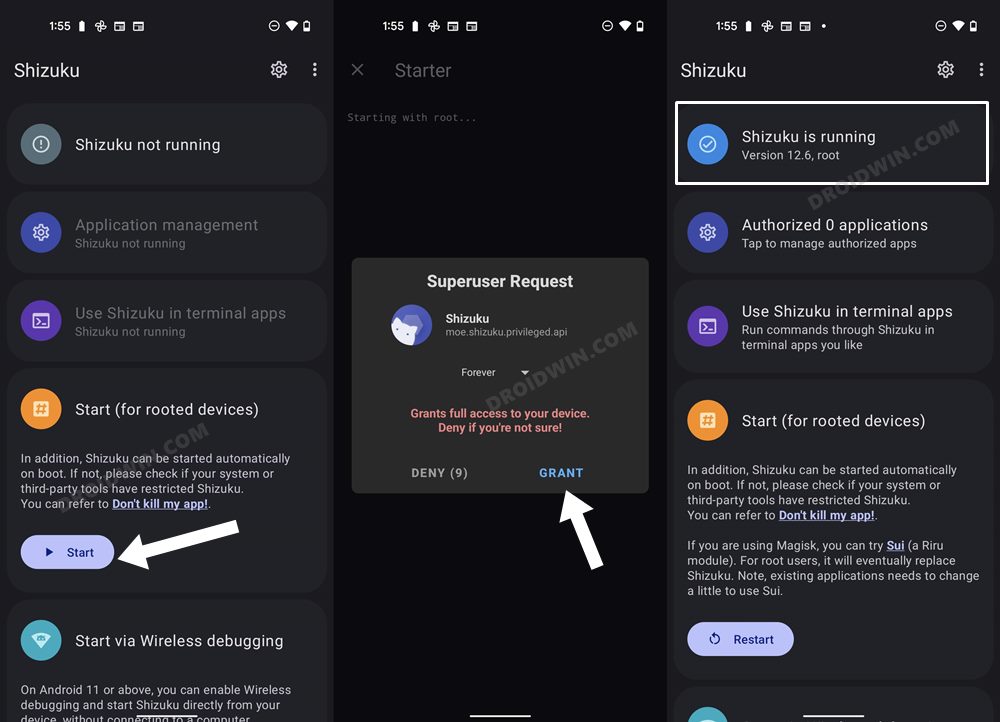
- Now go back to the app’s home screen and tap Start. It will now start the service and will notify you of the same.
- To verify, make sure you are getting the “Shizuku is running” message on its home page.
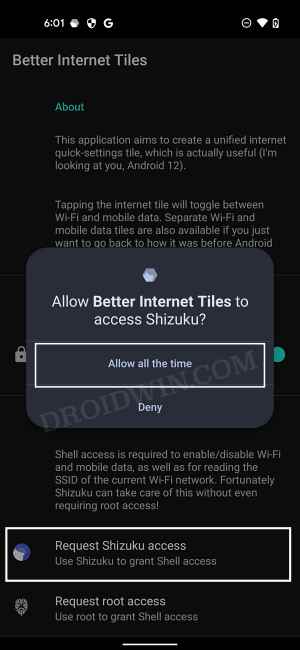
- Now download and install the Better Internet Tiles app from Play Store.
- Then launch it and tap on Request Shizuku access. You will now get a prompt, tap Allow.
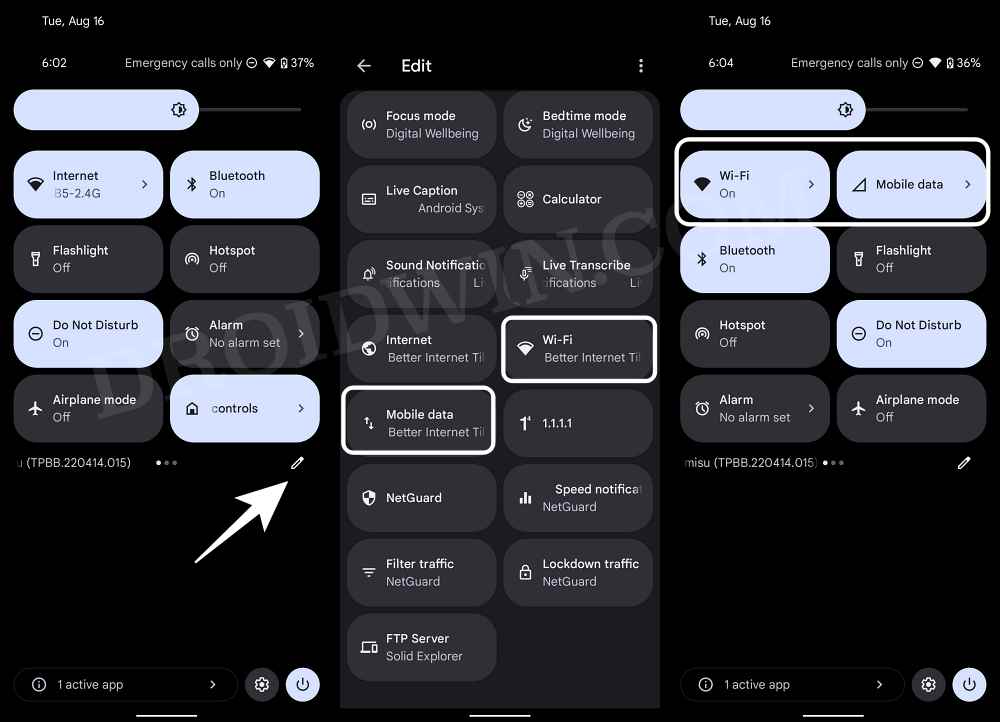
- After that, bring up the Quick Settings panel and click on the Edit [pencil] button.
- Now scroll down and drag the WiFi and Mobile Data toggles to the top. That’s it.

This was the first method to bring back the WiFi toggle in Quick Settings on Android 12/13. If you have a rooted device, then you don’t even need to deal with wireless USB Debugging. Just launch Shizuku and tap on Start under ‘Start for rooted devices’. You will then get a Magisk prompt, tap Allow. You may then start off with STEP 10 from above.
Method 2: Via ADB Command [Non-Root]
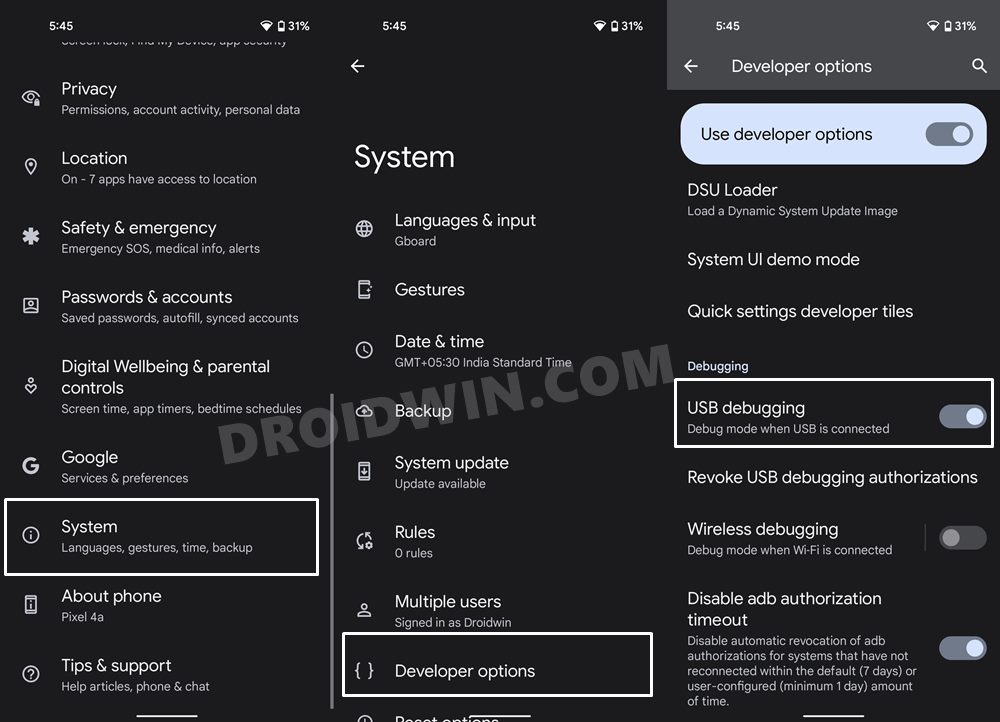
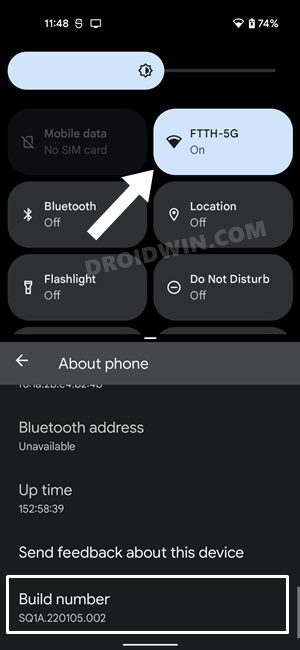
- To begin with, enable USB Debugging on your device. To do so, go to Settings > About Phone > Tap on Build Number 7 Times > Go back to Settings > System > Developer Options > Enable USB Debugging.
- After that, connect your device to the PC via the USB Cable.
- Then download the Android SDK Platform Tools and extract it to any convenient location on your PC. [This is the official ADB Binary files provided by Google].
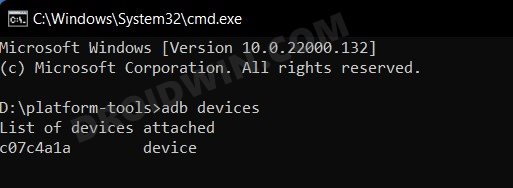
- Upon extraction, you should get the platform-tools folder. So go to that folder, type in CMD in its address bar, and hit Enter. This shall launch the Command Prompt.
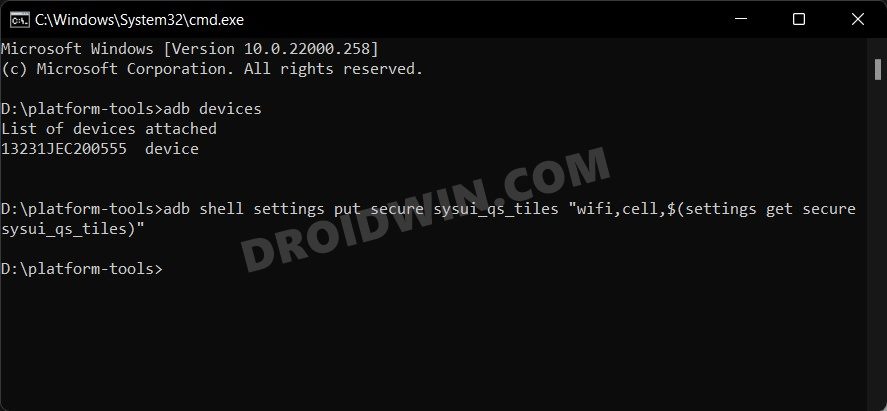
- Now execute the below command to verify the ADB Connection. If you get your device ID in alphanumeric strings, then the connection is successfully established and you may proceed ahead.
- Now copy-paste the below command in the CMD window and hit Enter [when you copy-paste the command, the double quotes might be replaced with the number 34, so please edit 34 and replace it with “].
adb shell settings put secure sysui_qs_tiles “wifi,cell,$(settings get secure sysui_qs_tiles)”
- That’s it. You should now see the WiFi toggle in Quick Settings on your Android 12/13 device. It should be the name of your WiFi network (FTTH-5G in my case).


Method 3: Using ADB Commands [Non-Root]
- To begin with, enable USB Debugging on your device. To do so, go to Settings > About Phone > Tap on Build Number 7 Times > Go back to Settings > System > Developer Options > Enable USB Debugging.
- After that, connect your device to the PC via the USB Cable.
- Then download the Android SDK Platform Tools and extract it to any convenient location on your PC. [This is the official ADB Binary files provided by Google].
- Upon extraction, you should get the platform-tools folder. So go to that folder, type in CMD in its address bar, and hit Enter. This shall launch the Command Prompt.
- Now execute the below command to verify the ADB Connection. If you get your device ID in alphanumeric strings, then the connection is successfully established and you may proceed ahead.
- After that, open the shell environment by executing the below command:
adb shell
- You will now get a prompt on your device, tap Allow.
- Now copy-paste the below command in the CMD window and hit Enter [when you copy-paste the command, the double quotes might be replaced with the number 34, so please edit 34 and replace it with “].
settings put global settings_provider_model false
settings put secure sysui_qs_tiles “wifi,cell,$(settings get secure sysui_qs_tiles)”
- That’s it. You should now see the WiFi toggle in Quick Settings on your Android 12/13 device.


Method 4: Via Tasker [Non-Root]
- To begin with, download and install the Tasker App: Official Site (Trial Version for 7 Days | Free) | Play Store (Full Version | Paid).
- After that, download and install the AutoNotification from Play Store (Free).
- Then download the Tasker Settings module from GitHub that shall help you bring back the Wi-Fi Toggle on your Android 12/13 device.
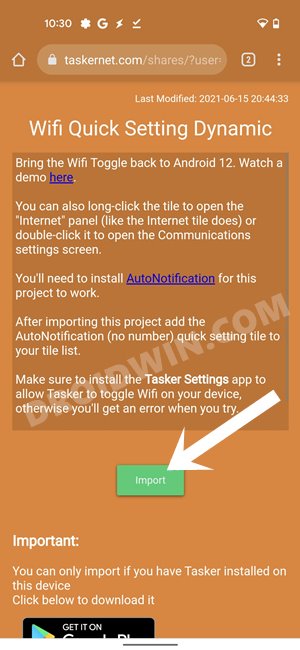
- Once all three apps have been installed, head over to the Tasker Project page and tap on the Import button.
- Then tap Yes in the Import Data dialog box followed by Yes in the Import dialog box.
- Tasker will now ask for permission to run the task, tap Yes.
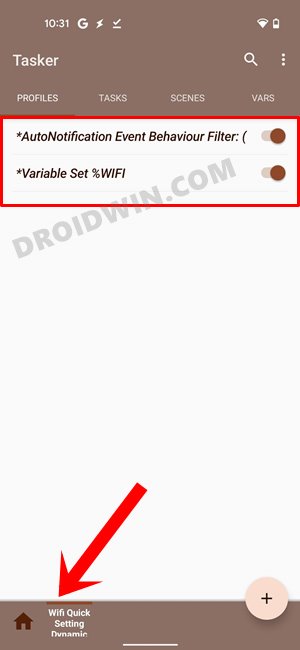
- Now launch the Tasker app and go to the WiFi Quick Setting Dynamic page from the bottom menu bar. Verify that the toggles next to both the profiles are enabled.
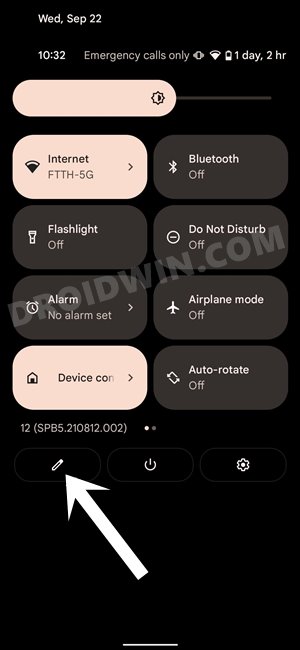
- If that’s well and good, then bring up the Quick Settings toggle and tap on the Edit icon.
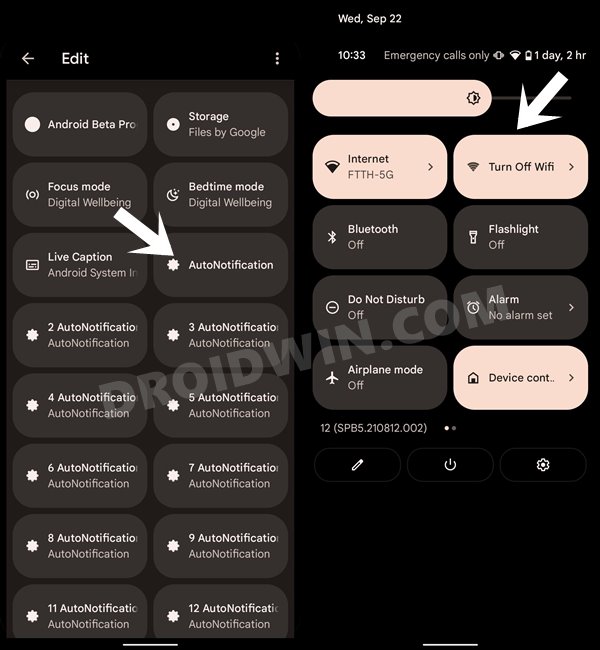
- Now drag the AutoNotification toggle all the way to the top. (You will notice quite a few AutoNotification toggles, make sure to drag the one that doesn’t have a number in its name). Once that is done, just hit the Back button.
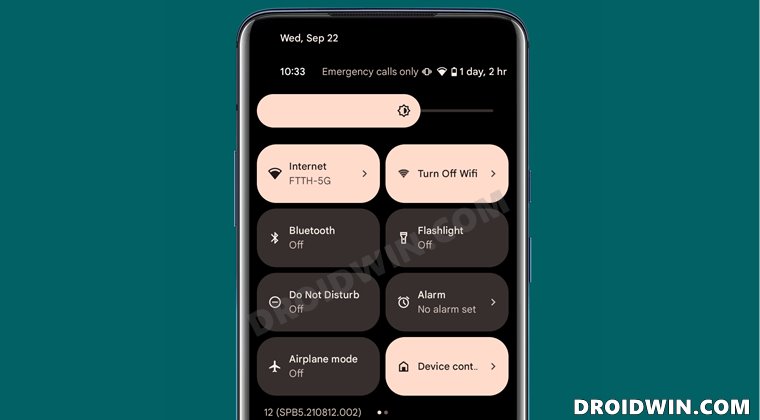
- You should now see the Turn off WiFi toggle in the Quick Setting toggle, using which you could now easily turn on/off WiFi with just a single tap.

Method 5: Via ADB Commands [Root]
Well, Google seems to have got hold of the first method and hence has patched it in the November build of the latest iteration of Android. It has been removed via the implementation of this code change. So as of now, the only way out is to root the device, inject a setting as a feature flag and then use it to bring back the WiFi toggle in Quick Settings on Android 12/13. Here’s how [Credits: XDA Senior Member raimondas-rimkus]:
- First and foremost, you will need to root your device. You may read the below guides for reference:
- Once that is done, enable USB Debugging on your device and connect it to the PC via USB cable.
- Then download the Android SDK Platform Tools and extract it to your PC.
- Now head over to this extracted platform-tools folder, type in CMD in its address bar, and hit Enter. This shall launch the Command Prompt window.
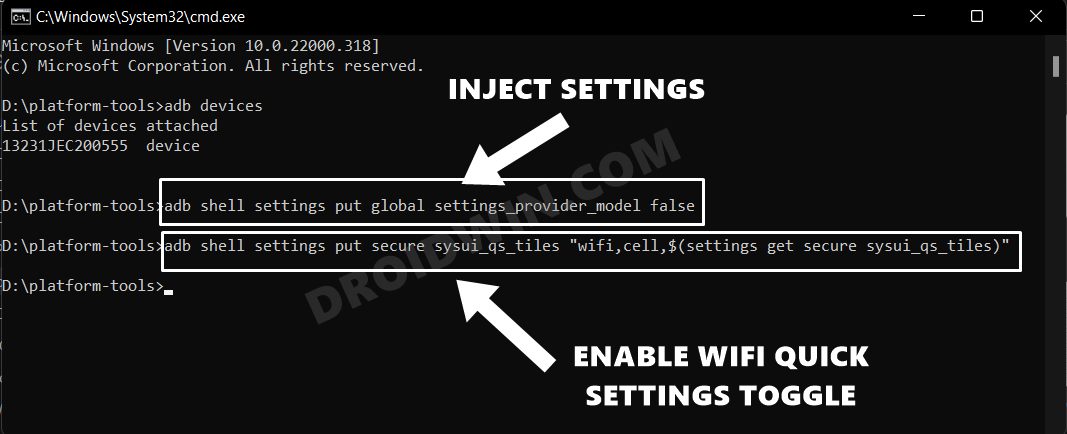
- Type in the below command to inject the required settings onto your device
adb shell settings put global settings_provider_model false
- Once that is done, you may now execute the same command that we used in the first method to enable the WiFi toggle in Quick Settings on Android 12:
adb shell settings put secure sysui_qs_tiles “wifi,cell,$(settings get secure sysui_qs_tiles)”
Concluding Remarks
So with this, we round off the guide on how you could bring back the WiFi toggle in Quick Settings on Android 12/13. It’s never a great move from the search engine giants to force an unnecessary change to its offering. Rather, they should have given this option to the user as to how they wish to treat the WiFi setting.
Anyways, this is how things stand as of now, and the aforementioned tweak is the best (and perhaps the only) way out. And as before, the OS’s open-source nature once again comes to our rescue! What are your views on the same? do let us know in the comment section below. Likewise, all your queries are welcomed in the comments.


kumback
Hello,
Method 1 works for android 13.
But method 2 and 3 works only for android 12.
Has anyone got success for android 13 with method 2 or 3?
ZP
None of the method works for Android 13 – Pixel 4 unrooted
Sadique Hassan
Hai Mate, I have just tried the first method [Shizuku] and it perfectly works on my Pixel 4A Android 13 [unrooted]. Could you let me know were there any errors that you got, was Shizuku successfully set up, and did the better Internet Tiles bring up the Shizuku permission prompt?
Jim
Method 1, with new commands, is not working on my Pixel 4a (5g). While the shell commands will make the “Mobile Data” toggle appear, it doesn’t do anything, and the WiFi toggle still works as it did in vanilla Android 12 (you have to press it once to access the mobile and wifi toggles).
Is there a way to reverse the Method 1 with new commands?
Mark
I have the December 2021 update, I just got the method in this article to work (link redacted by admin)
Sadique Hassan
Thanks Mark for the tip. Confirmed that it is indeed working and have added to this guide as well.
WoofGrrrr
Method 1 worked for me on my Pixel 4a (5G). Yay! Thank you!
Rudolf
This is the only solution, which works for me after december update and does not require root.
https://play.google.com/store/apps/details?id=sk.marekscholtz.wifi_tile
Tom
I used Method 1 to create a wifi toggle on my Pixel 4a. I then removed the toggle, and now, with wifi on and mobile data off, the Internet toggle icon initially shows a mobile data icon, and then after a 15 second delay a wifi Icon. (My other Pixel 4a, unmodified, works as expected with an immediate wifi icon displayed after the quick setting shade is pulled down.) So this change introduced buggy behavior that I would like to fix, if possible, without having to reflash the Android 12 stock ROM. Do you have an ADB command to reverse the change created by the ADB command in Method 1? May I respectfully suggest that whenever you post ADB command(s) to tweak the OS behavior, you always post the ADB command(s) to reverse the change, just in case a bug is created? (BTW, both phones are running Build number SQ1A.211205.008) FYI, the reason I’m wanting to avoid a reflash is that I have an eSIM installed. A reflash would nullify the eSIM, forcing me to buy another eSIM. (Luckily, my eSIM provider would carry my eSIM data balance to my new eSIM, but most eSIM providers apparently won’t do that.) Thanks!
Rudolf
This app works as expected:
https://play.google.com/store/apps/details?id=sk.marekscholtz.wifi_tile
slow
adb method will not work if you get the november system update.
Sadique Hassan
Hi mate, thanks for bringing this to our knowledge. The thing is you will now have to inject another setting before trying out that ADB Command (but it would require root). All this has been explained under Method 3, do check it out.
Yeshaya
No dice with method 1. I guess I’ll try tasker later. Pixel 4a. Thanks for the guide!
Sadique Hassan
Thanks for the appreciation Yeshaya 🙂
Patrick Ryan
I drive Lyft, Uber, and Door Dash for a living. I use a WiFi hot spot in my car so I’m not chewing through my mobile data. Sometimes that WiFi hot spot isn’t getting the signal I need, so I find myself toggling my WiFi on and off somewhat regularly. Google making this change has taken that from a very simple process to something is quite annoying.
I’m going to try this later fix later today! Thanks for sharing it!
Sadique Hassan
Hi Patrick, I have updated the guide with ADB Commands [Method 1], do try that one first.
ibrahim
Hello, tryied method 1 with the ADB command and it did not work on my Pixel 4a
Sadique Hassan
Hi Ibrahim, thanks for letting us know. The thing is you will now have to inject another setting before trying out that ADB Command (but it would require root). All this has been explained under Method 3, do check it out.