In this guide, we will show you the steps to add the NFC Quick Setting tile on your Android device. For many, the stock OS experience that Pixel device beholds is literally the best in the class. Being able to checkmark most of the preresuites without bloating the UI/UX, one couldn’t have asked for more. With that said, there are a few minor shortcomings, which wouldn’t make a difference in day and night but their addition would still have been welcomed by all.
In the past, we have already discussed a few such functionalities, such as the need to hit the checkmark icon after entering the correct PIN and the location of the Clear All button in the Recent apps screen. And now you could add another entry to this list. The inability to quickly enable/disable the NFC feature is really quite an infuriating piece of the missing jigsaw. As of now, you could go to Settings > Connected Devices > Connection Preferences > enable Use NFC.
However, this would call for quite a lot of unnecessary effort. The next approach that you could take is to add the Wallet quick setting toggle but that would require you to launch the Wallet every time you want to interact with NFC. Fortunately, there does exist a nifty workaround using which you could add the NFC Quick Setting tile on your Android device. And in this guide, we will show you how to do just that. So without further ado, let’s get started.
How to Add NFC Quick Setting Tile on Android
- To begin with, download and install the NFC Quicksettings Tile [Credits: XDA Senior Member rmrbpt].
- After that, go to Settings > Apps > See All Apps and select Bloquear.
- Now tap on the overflow icon and select Allow Restricted Settings.
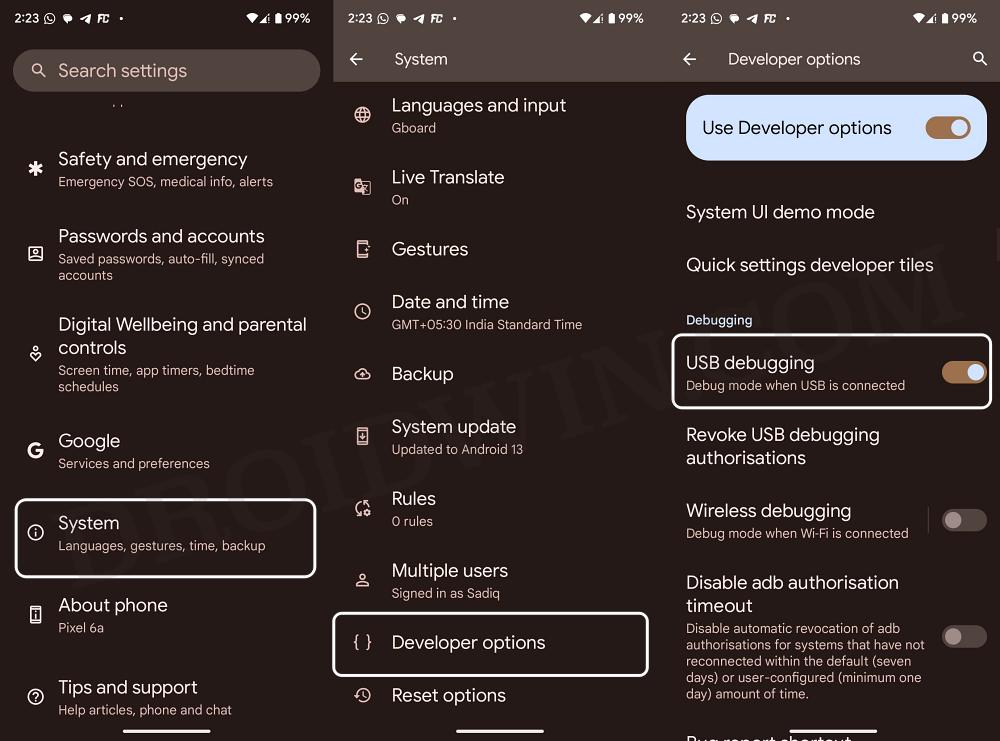
- Once done, go to Settings > System and tap on Build Number 7 times.
- Then go to System > Developer Options and enable USB Debugging.

- Once that is done, connect your device to your PC using a USB cable.
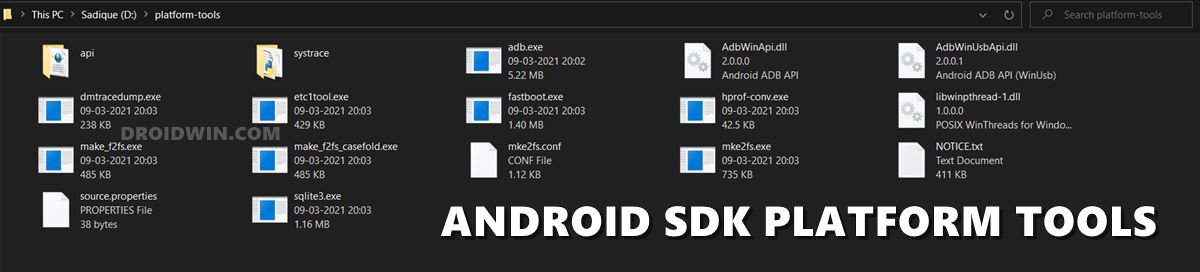
- Next up, download and extract Android SDK Platform Tools on your PC.
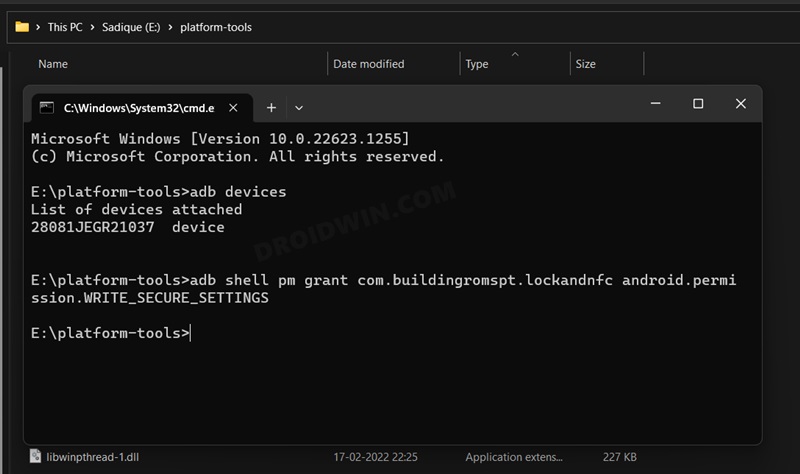
- Now go to the platform-tools folder and open Command Prompt inside it.
- Then execute the below command. You might get a prompt, tap on Allow.
adb shell pm grant com.buildingromspt.lockandnfc android.permission.WRITE_SECURE_SETTINGS
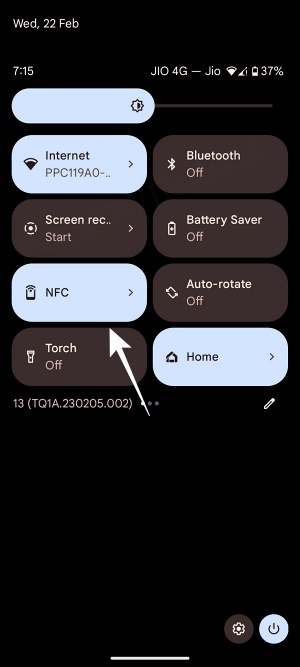
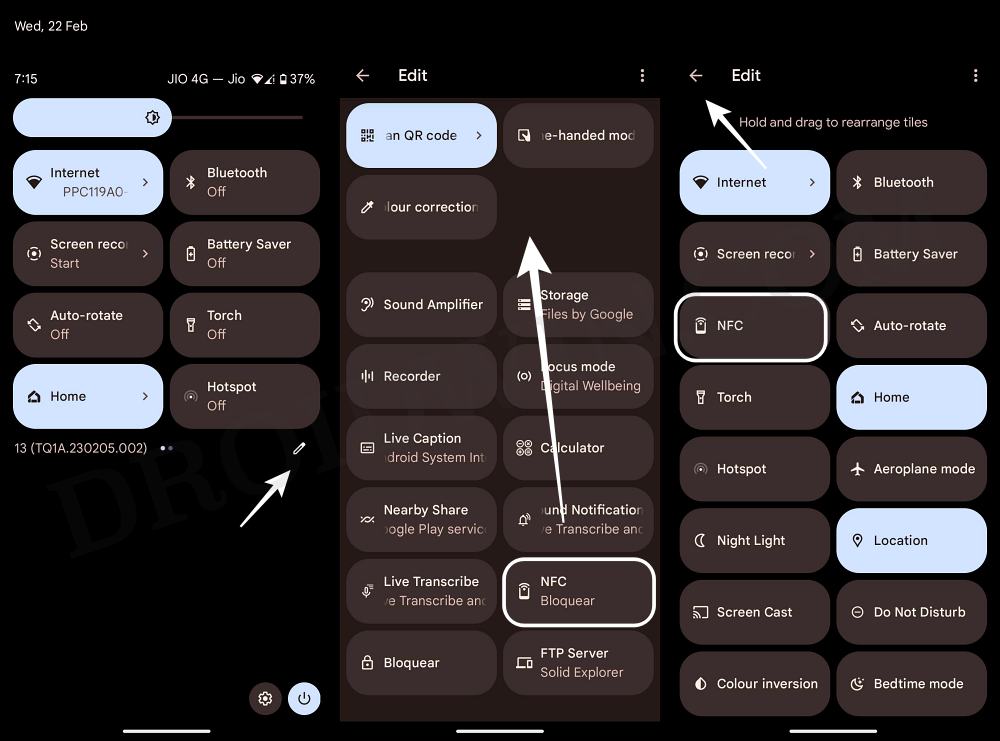
- Now, bring up the Quick Settings and tap on Edit [pencil icon].
- Scroll down and you should see the NFC toggle, drag and drop it to the top.
- Finally, hit the back button at the top left and the toggle will be saved there.
That’s it. These were the steps to In this guide, we will show you the steps to add the NFC Quick Setting tile on your Android device. If you have any queries concerning the aforementioned steps, do let us know in the comments. We will get back to you with a solution at the earliest.


