In this guide, we will show you various methods to fix the ‘This Device Isn’t Play Protect Certified’ error on your Android device. The certification test from Google performs a scan for all the harmful apps installed on your device and if it finds any, it will advise you to uninstall that app right away. Likewise, if you are planning to sideload a non-trusted APK, then it might come into action and prevent it from installing on your device.
You might also get this error if you are using an Android device that hasn’t been officially supported by Google, in other words, the Silicon Valley giant hasn’t given the necessary permission to have the Google Mobile Services in its underlying Android-based OS. In a nutshell, having the ‘This Device Isn’t Play Protect Certified’ error could prove to be a risky bet and therefore it needs to be addressed at the earliest. And in this guide, we will show you how to do just that. Follow along
Table of Contents
Fix Play Store ‘This Device Isn’t Play Protect Certified’ Error
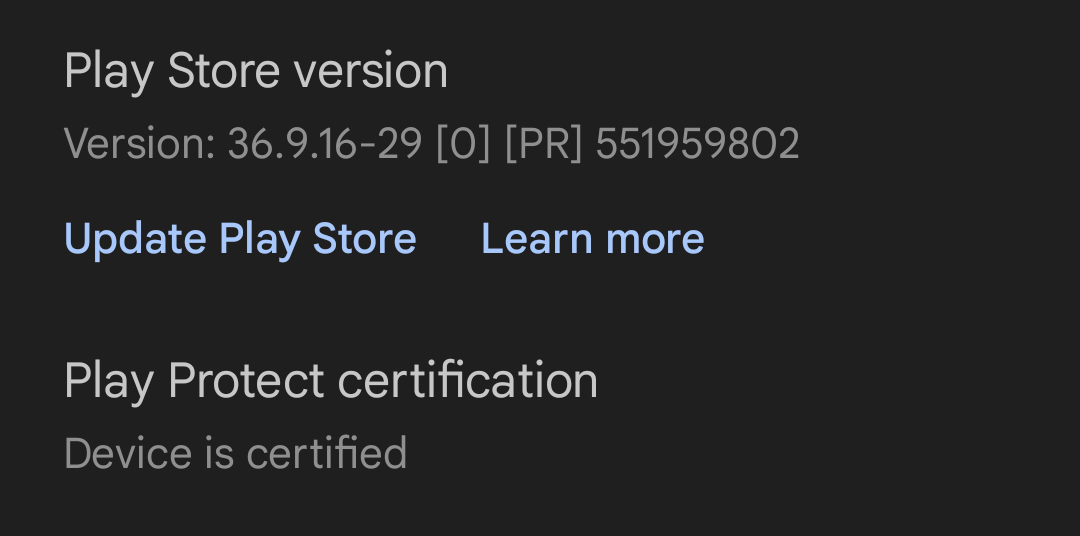
It is recommended that you try out each of the below-mentioned workarounds and then see which one spells out success. So with that in mind, let’s get started.
FIX 1: Delete Play Store and Play Service Data
Your first course of action should be to delete the data of Google Play Store and Play Service, using the instructions given below, and then check out the results. Here’s how it could be done:
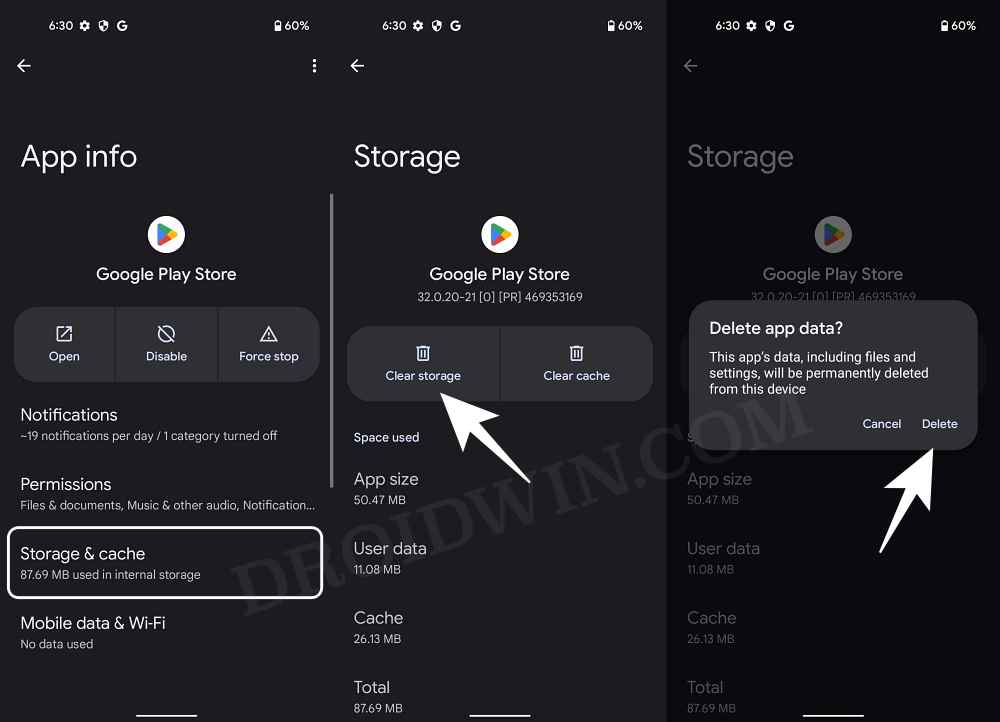
- Head over to Settings > Apps > All Apps > Google Play Store.
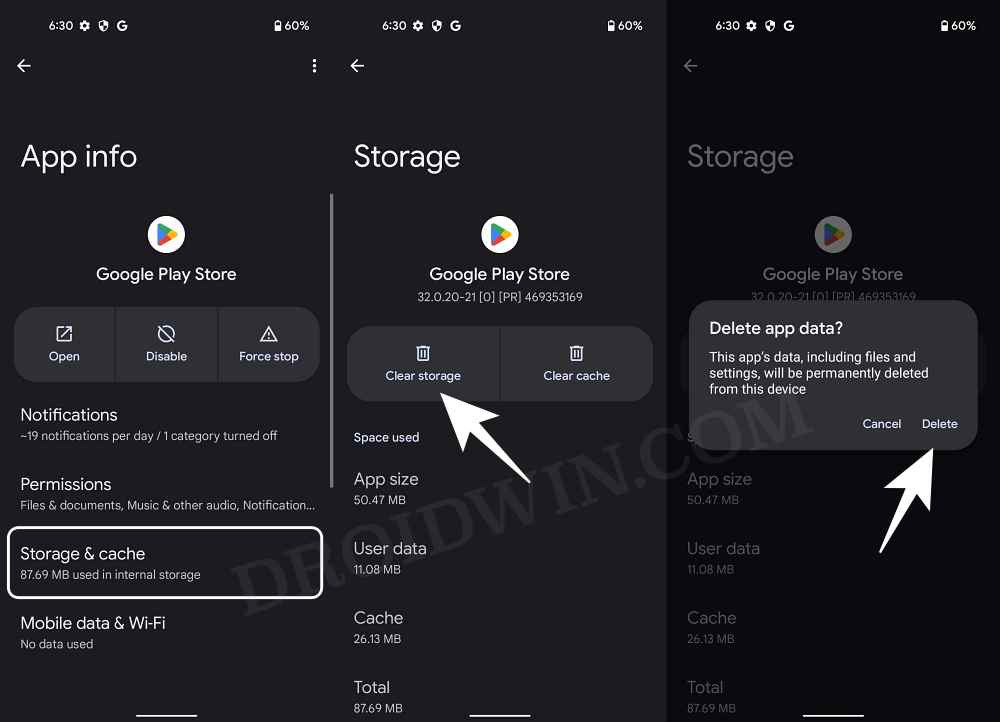
- Then go to Storage and Cache and tap on Clear Storage > Delete.

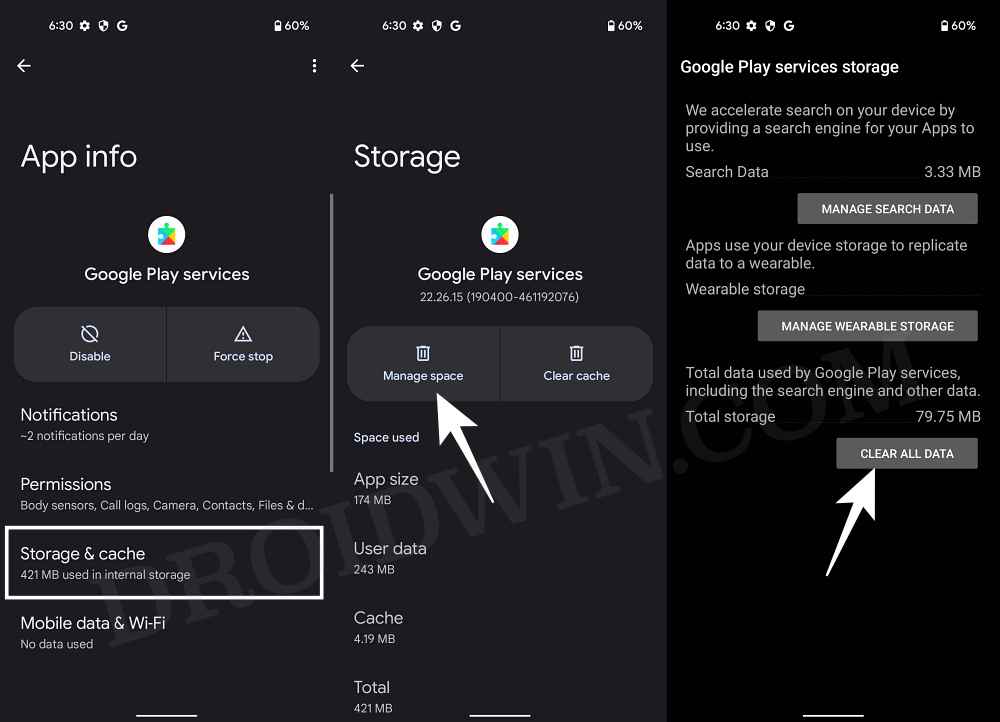
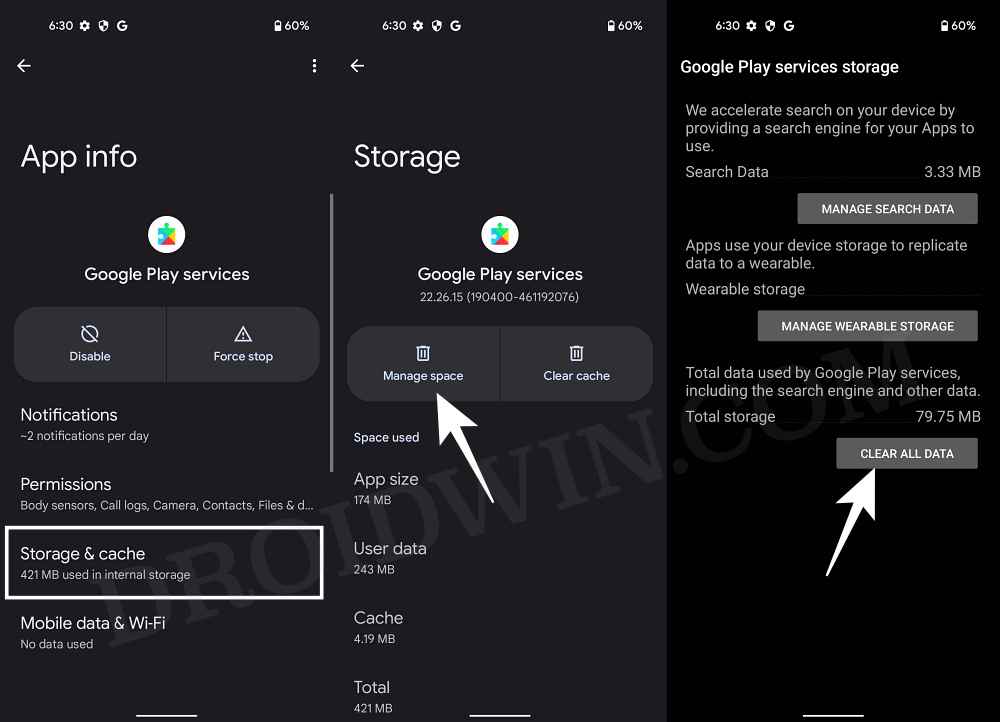
- Now delete the data of Google Play Service and restart your device.

- Check if it fixes the ‘This Device Isn’t Play Protect Certified’ error.
FIX 2: Set up a Screen Lock
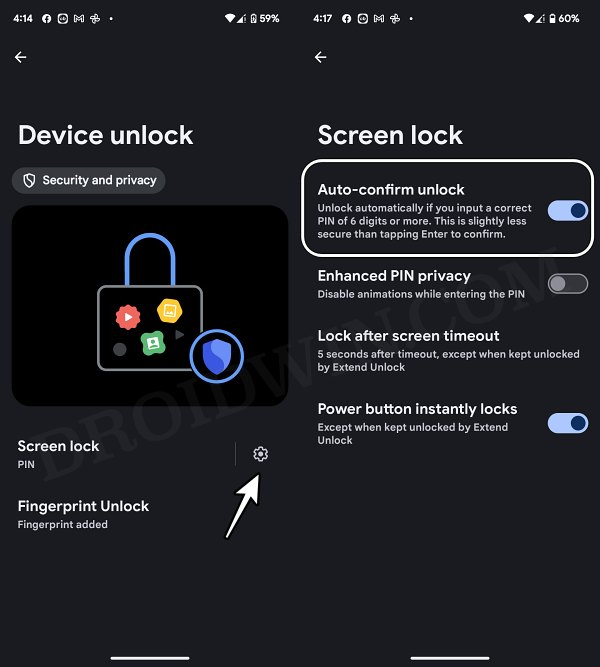
Some users have reported that they were able to rectify this issue simply by setting up a screen lock on their devices. So do give it a try and check if it works in your case:
- Head over to Settings > Security and Privacy > Device Unlock.
- Then go to Screen Lock and set a lock of your choice.
- Check if it fixes the ‘This Device Isn’t Play Protect Certified’ error.

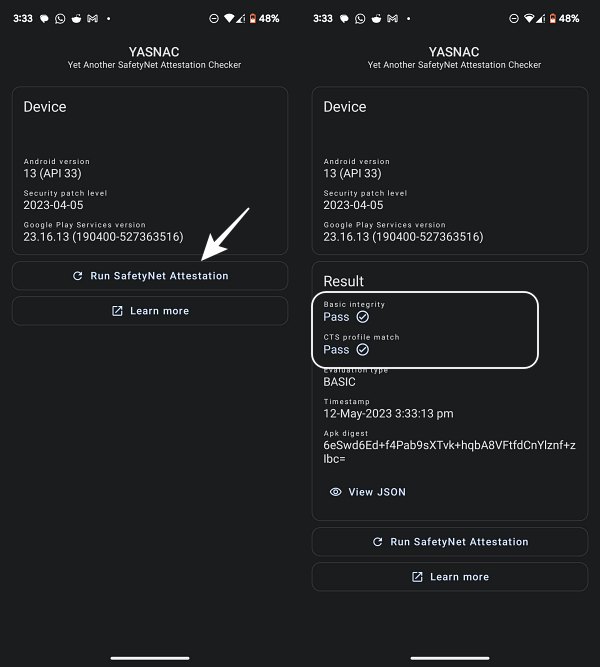
FIX 3: Pass SafeyNet on Rooted Device
If you are using a rooted device, then you should make sure that your device is passing the SafetyNet Test. If that is not the case, then please refer to our guide and get this job done right away: How to Pass SafetyNet on Rooted Android.
FIX 4: Flash Play Integrity Fix Module
If the aforementioned method didn’t work out, then you should consider flashing the Play Integrity Fix module, as instructed below [it will automatically remove the SafetyNet Fix Module, if you had flashed it in FIX 3].
- Download the Play Integrity Fix Module onto your device.
- Then launch Magisk, go to Modules, and flash the module.
- Once done, restart your device and check out the results.
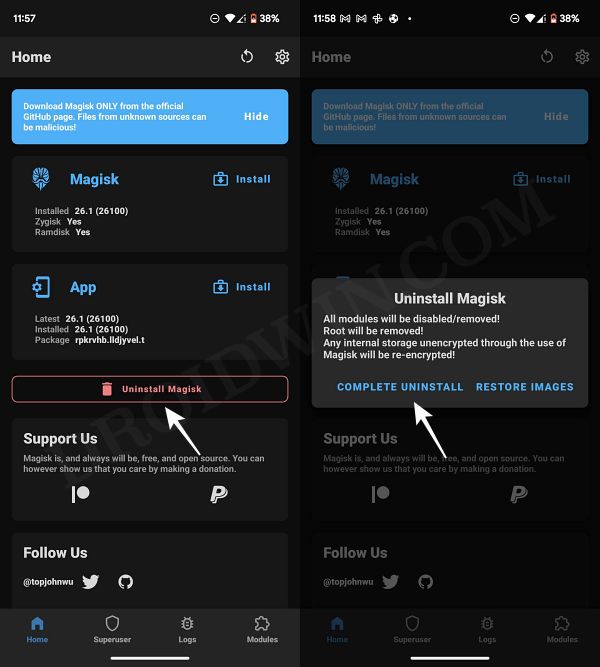
FIX 5: Unroot Device
If none of the above methods worked for you [and you are on stock firmware], then your last course of action should be to unroot your device and relock its bootloader. To do so, you should check out our guide on How to Relock the Bootloader on any Android Device.
FIX 6: This Device Isn’t Play Protect Certified in Custom ROMs
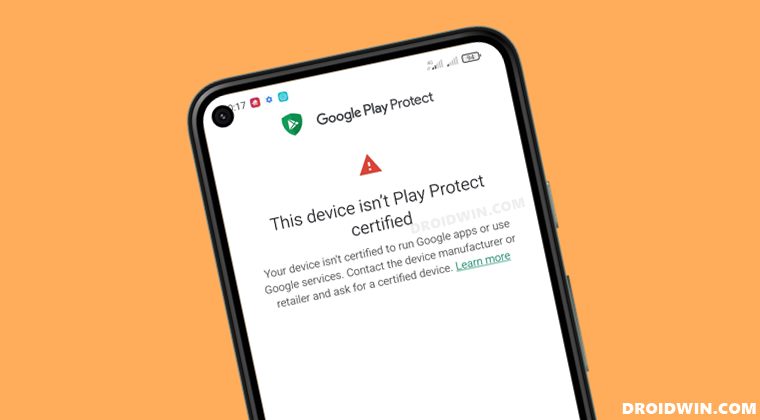
This guide will show you the steps to fix the “This Device Isn’t Play Protect Certified” error when using a custom ROM. One of the biggest perks of using an open-source OS is the truckload of goodies that it brings in with itself. In this regard, the ability to flash customized firmware has always been the preferred tweak for the tech enthusiast. In this regard, before making their ROM public, the developers register it with Google.

This is a must if the ROM comes built-in with GApps, such as Pixel Experience. In cases, the ROM does come with GApps [LineageOS], the developers don’t take any chance and still register their ROMs. As a result, your device will be certified and you will be easily able to use the Google Apps, Services, and Frameworks without any issues.
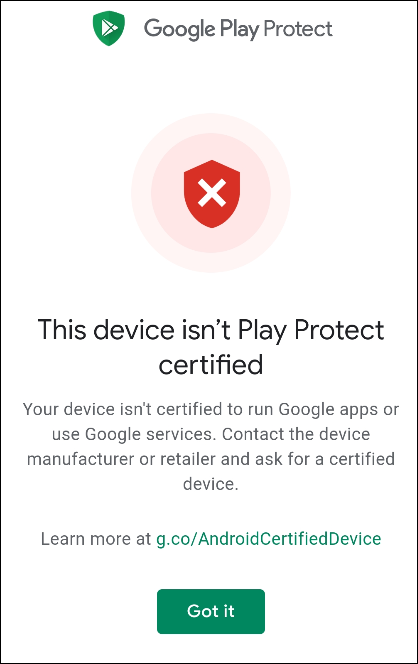
Moreover, your device will be more secure now as the Play Store will continuously scan for harmful apps and notify you if it finds a malicious app installed. However, there have been a few instances wherein the developers don’t certify their ROM and as a result, the users are the ultimate sufferers. If you are also in the same boat, then fret not as this guide will show you the steps to fix the “This Device Isn’t Play Protect Certified” error when using a custom ROM.
STEP 1: Install Android SDK
 First and foremost, you will have to install the Android SDK Platform Tools on your PC. This is the official ADB and Fastboot binary provided by Google and is the only recommended one. So download it and then extract it to any convenient location on your PC. Doing so will give you the platform-tools folder, which will be used throughout this guide.
STEP 2: Enable USB Debugging
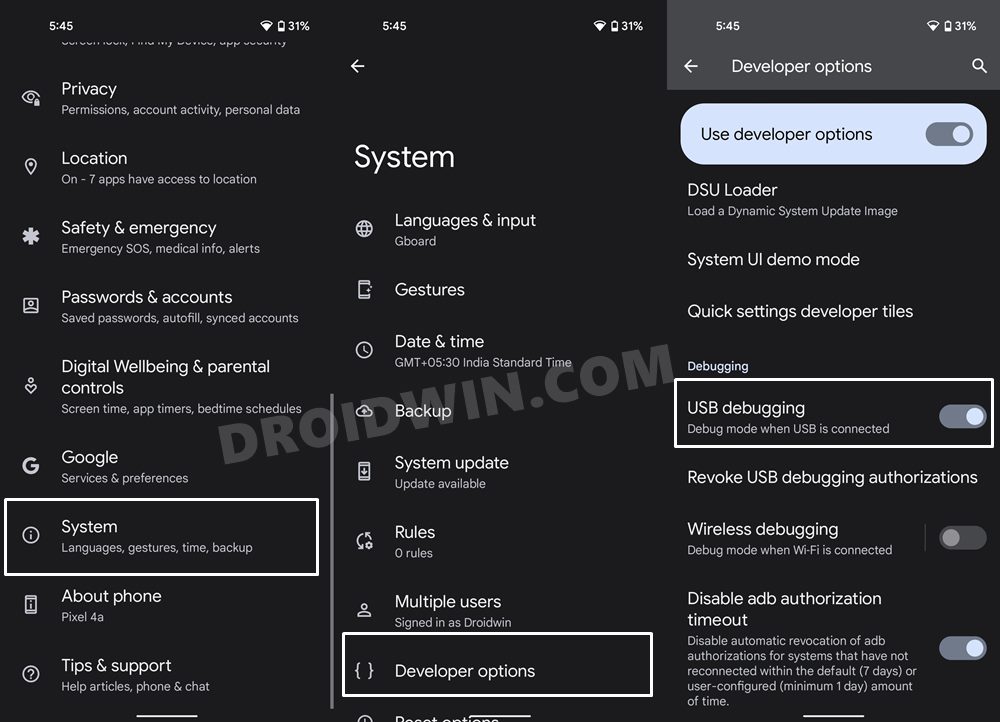
Next up, you will have to enable USB Debugging so that your device is recognizable by the PC in ADB mode. This will then allow you to execute the desired adb shell commands. So head over to Settings > About Phone > Tap on Build Number 7 times > Go back to Settings > System > Advanced > Developer Options > Enable USB Debugging.
STEP 3A: Find Device ID via Third-Party App [No Root]
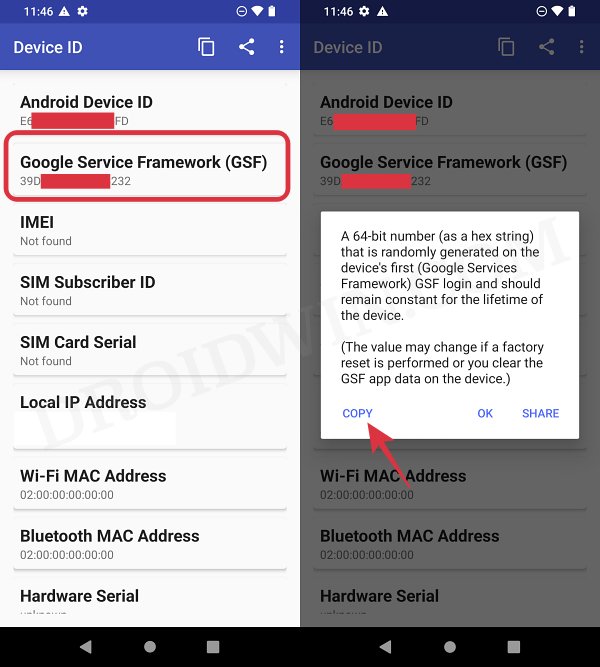
- Download and install the Device ID app from Play Store.
- Then long-press the value under Google Service Framework.
- Finally, select Copy from the subsequent dialog box.

STEP 3B: Find Android Device ID via ADB [Root]
- To begin with, root your device via Magisk.

- Connect your device to the PC via USB cable. Make sure USB Debugging is enabled.
- Then head over to the platform-tools folder, type in CMD in the address bar, and hit Enter. This will launch the Command Prompt.

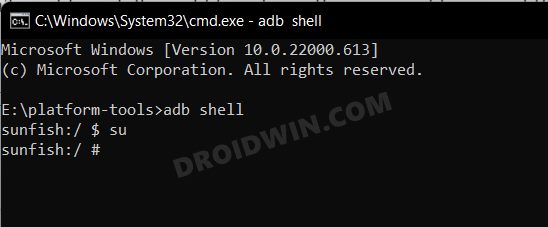
- After that, type in the below command to open the shell environment
adb shell
- Now type in the below command to open the root permissions.
su

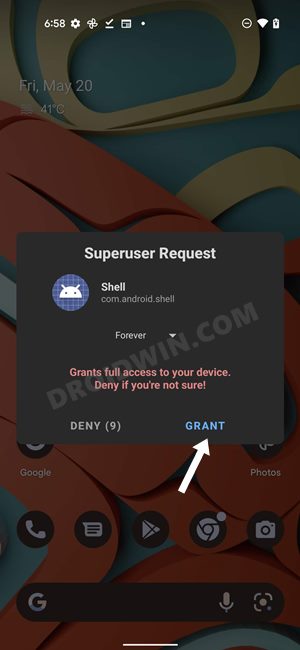
- You will get a Magisk prompt on your device, tap Grant.

- Now type in the below command to get the device’s ID
sqlite3 /data/data/com.google.android.gsf/databases/gservices.db 'select * from main where name = "android_id";'
STEP 4: Register the Custom ROM
- Head over to Google’s Device Registration page and sign in via your account.
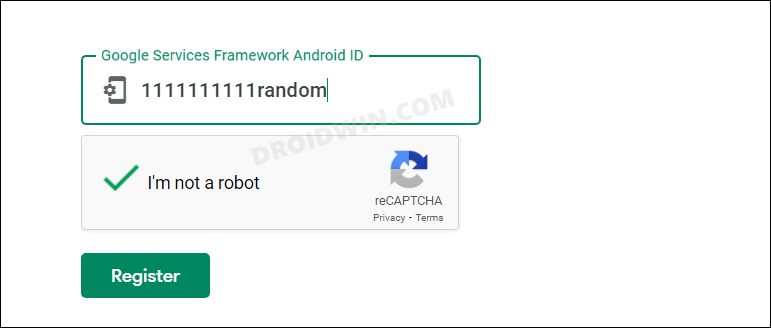
- Then type in the device ID under ‘Google Service Framework Android ID’.

- Now verify the captcha and click Register. You’ll subsequently get a prompt: Device Registered.
- Then go to Settings > Apps > All Apps > Google Play Service > Storage and Cache > Manage Space > Clear All Data.

- After that, delete the data of the Google Play Store as well. Once done, restart your device.

- Now wait for around 15-30 minutes and your device will then be registered.
So these were the various methods to fix the “This Device Isn’t Play Protect Certified” error. If you have any queries concerning the aforementioned steps, do let us know in the comments. We will get back to you with a solution at the earliest.



tariq
Hi sir . in my oneplus 6 same problem device is not certified. problem to download some apps on play store. I tried to register the custom rom and it register successfully but problem is still on please help me I don’t want to root my device..