In this guide, we will show you the steps to relock the bootloader on your Android device. The first step to the gateway of custom development involves unlocking the bootloader. Once you do so, you will be in a position to welcome abode a plethora of mods and tweaks onto your device. On the flip side though, it does have its fair share of issues as well.
For starters, you might not be able to install official OTA updates via the native way. Likewise, if you end up rooting the device, then the SafetyNet will get tripped which will result in the inability to use banking and payment apps. And installing OTA in a rooted ecosystem is quite a tough job in itself.

Truth be told, there are ways to bypass and rectify all these issues, but it’s usually a game of cat and mouse- the developers find a loophole and manage to gain an upper hand only for Google to patch it in the subsequent update. Moreover, with the lack of TWRP support, creating a Nandroid Backup has become next to impossible, thereby further making life difficult for the tech enthusiast.
And if you are carrying out these tweaks on your primary device, then a significant portion of your time will be spent on fixing these issues. So if these problems are way too much to deal with, then your best course of action would be to relock the bootloader on your Android device. And in this guide, we will show you how to do just that. Follow along.
Table of Contents
How to Relock the Bootloader on any Android Device
This process will wipe off all the data on your device, so please take a backup of all the data beforehand. Droidwin and its members wouldn’t be held responsible in case of a thermonuclear war, your alarm doesn’t wake you up, or if anything happens to your device and data by performing the below steps.
NOTE: The instructions are only applicable across those devices that don’t use any tool but simply use the Fastboot Commands to unlock the bootloader in the first place. So if you own a Xiaomi/Poco/Redmi device, then do check out our other guide instead: How to Relock Bootloader on Xiaomi Devices.
STEP 1: Remove Root and Mods
First off, you will have to remove all the rooted apps [such as LSPosed, LSPatch, and Magisk Modules] and subsequently unroot your device as well. Here’s how all of this could be carried out.
- First off, uninstall all the rooted mod apps by going to their App Info page and selecting Uninstall > OK.
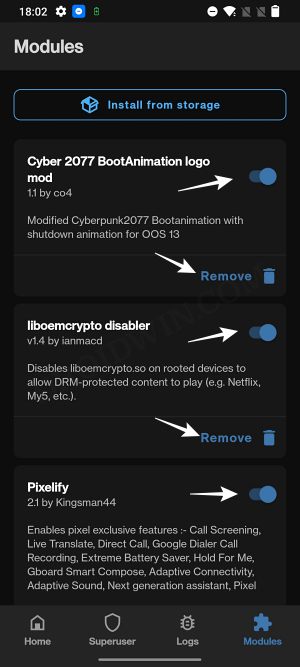
- Then launch Magisk, go to its Modules section, and disable all the modules.

- Once that is done, tap on Remove next to each module as well.
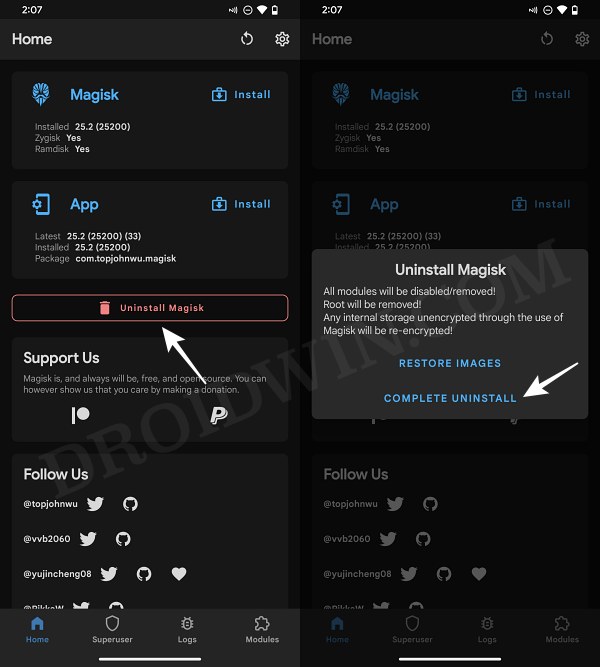
- Now, tap on Uninstall Magisk > Complete Uninstall.

- Your device will undergo a restart and it will be unrooted.
STEP 2: Flash Stock Firmware
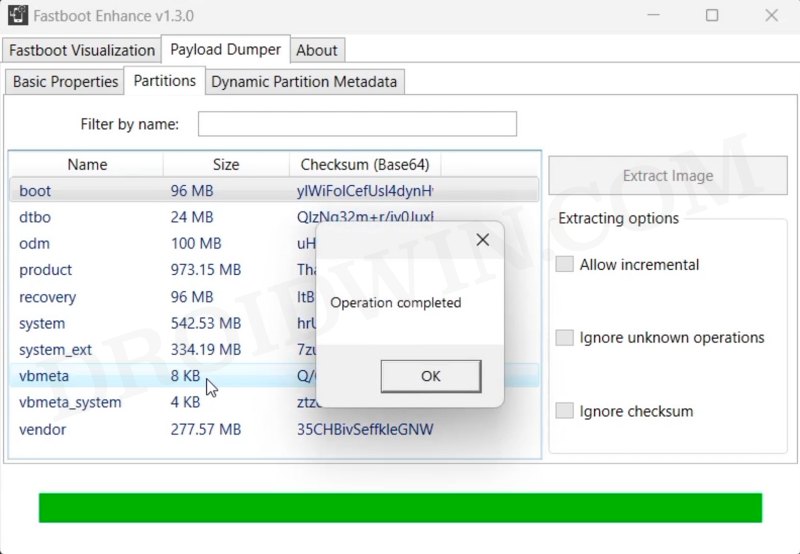
Before relocking the bootloader on your Android device, you will also have to revert to the stock ecosystem, in other words, go from a custom ROM back to stock [this will reset your device]. The process to do so depends on the device you own. For example, in the case of OnePlus, you could use the MSM Download Tool, Fastboot Enhance Tool, or the Fastboot ROM. For Pixel, you could use the Fastboot script or the Android Flash Tool. Likewise, the Mi Flash Tool could come in handy for Xiaomi devices. So carry out this process and revert to the stock firmware right away.
STEP 3: Verify Root Removal
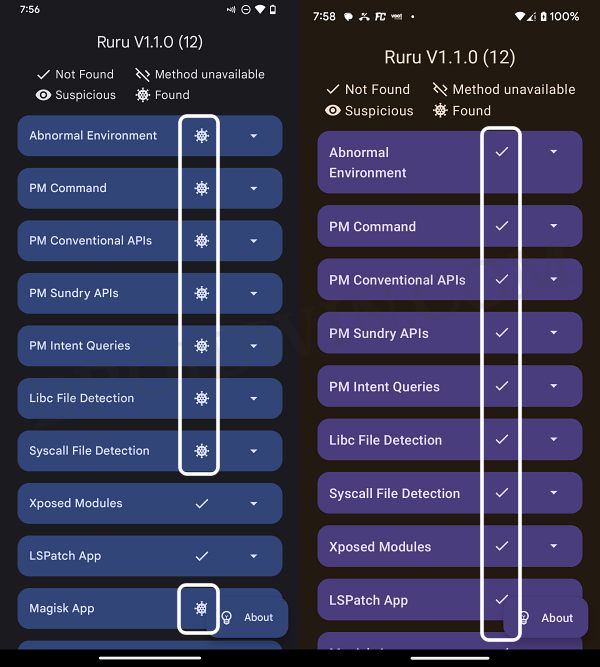
- Just to re-verify that all mods have been removed, install Ruru from GitHub.
- Then launch it and make sure there are no “Found” or “Suspicious” files present.
- If there are any, then remove all of them from your device and re-check the result.

STEP 4: Install Android SDK

Next up, you will have to install the Android SDK Platform Tools on your PC. This is the official ADB and Fastboot binary provided by Google and is the only recommended one. So download it and then extract it to any convenient location on your PC. Doing so will give you the platform tools folder, which will be used in this guide.
STEP 5: Enable USB Debugging
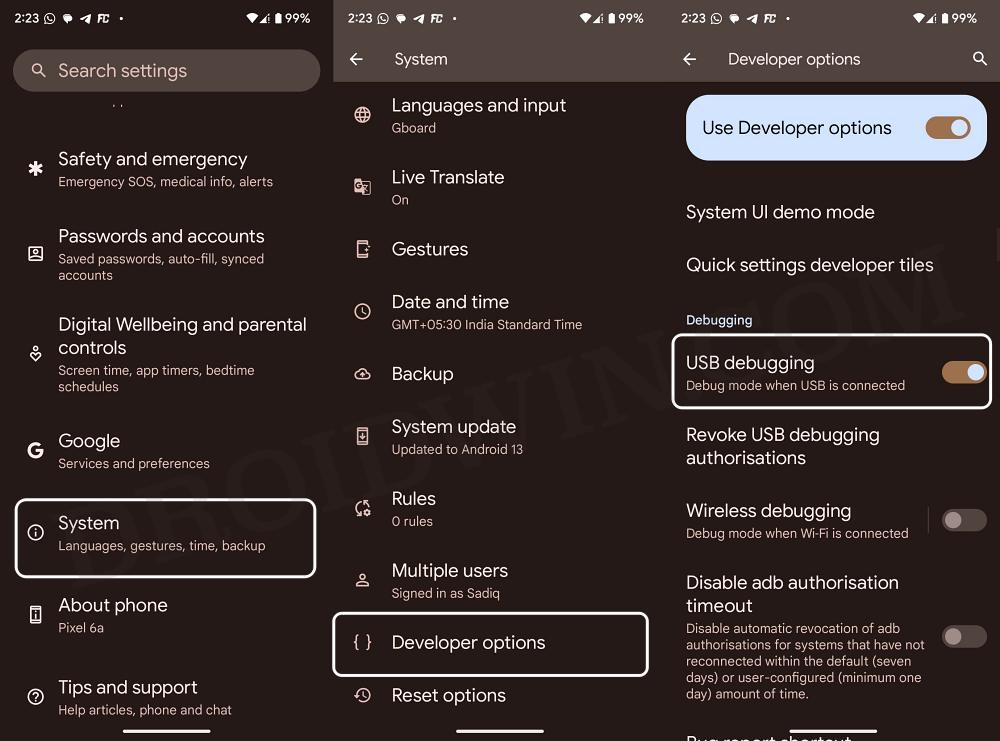
You will also have to enable USB Debugging on your device so as to make it recognizable by the PC in ADB mode. This will then allow you to boot your device to Fastboot Mode. So head over to Settings > About Phone > Tap on Build Number 7 times > Go back to Settings > System > Developer Options > Enable USB Debugging.
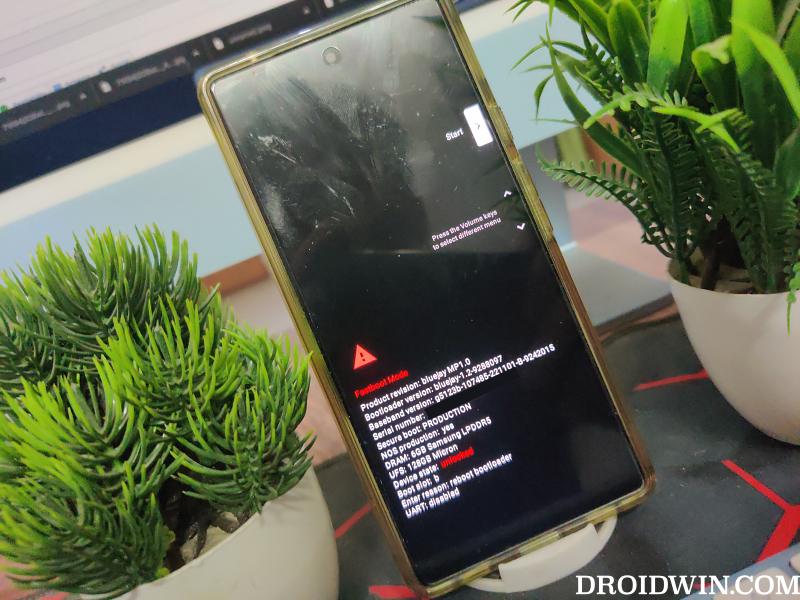
STEP 6: Boot Device to Fastboot Mode
- Now connect your device to the PC via USB cable. Make sure USB Debugging is enabled.
- Then head over to the platform-tools folder, type in CMD in the address bar, and hit Enter. This will launch the Command Prompt.

- Type in the following command in the CMD window to boot your device to Fastboot Mode
adb reboot bootloader

- To verify the Fastboot connection, type in the below command and you should get back the device ID, as shown in the image.
fastboot devices

- If you are not getting any ID, then install the Fastboot Drivers on your PC.
STEP 7: Relock Bootloader on Android
- Now execute the below command to relock the bootloader
fastboot flashing lock
- You’ll now get a prompt on your device. So use the Volume keys to select Relock the Bootloader and press the Power key to confirm.
- If you don’t get any prompt, then use the below command to get the job done:
fastboot oem lock
- Your device will undergo a reset and the bootloader will be locked. It will then either boot to the OS or Fastboot Mode.
- If it boots to the Fastboot Mode, then execute the below command to boot to the OS:
fastboot reboot
- Your device will now boot to the OS, having a locked bootloader, non-rooted, and with the stock firmware.
That’s it. These were the steps to relock the bootloader on your Android device. If you have any queries concerning the aforementioned steps, do let us know in the comments. We will get back to you with a solution at the earliest.


Andres Diaz
Thank you very much!
It helped me a lot.
Dark
After relocking can we claim warrenty of nothing phone 1 .
They will not know that the device was unlocked? Is there any way they can find out