In this guide, we will show you the steps to fix the Baldur’s Gate 3 Act 3 lagging issues after installing Patch 4. The third iteration in this role-playing game beholds a slew of intriguing challenges and some nifty quests up its sleeves, Along the same lines, the developers tend to roll out patches at frequent intervals that add some goodies, apart from ironing out underlying bugs. However, the latest patch seems to have done more harm than good.
Numerous users have reported that Baldur’s Gate 3 Act 3 is constantly lagging, freezing, and crashing right after installing Patch 4. As a result of which, the game has become literally unplayable. Moreover, the bug seems to have impacted both the PC as well as the console versions [especially PS5]. With that said, there does exist a nifty workaround that should help you rectify this issue. So without further ado, let’s check it out.
Table of Contents
Baldur’s Gate 3 Act 3 Lagging on Patch 4

In order to get this job done, you just need to delete the duplicate data from a database which causes the game to start lagging. So with that in mind, let’s get started.
STEP 1: Set Up Script Extender Console
- First off, download the Script Extender Launcher from GitHub.
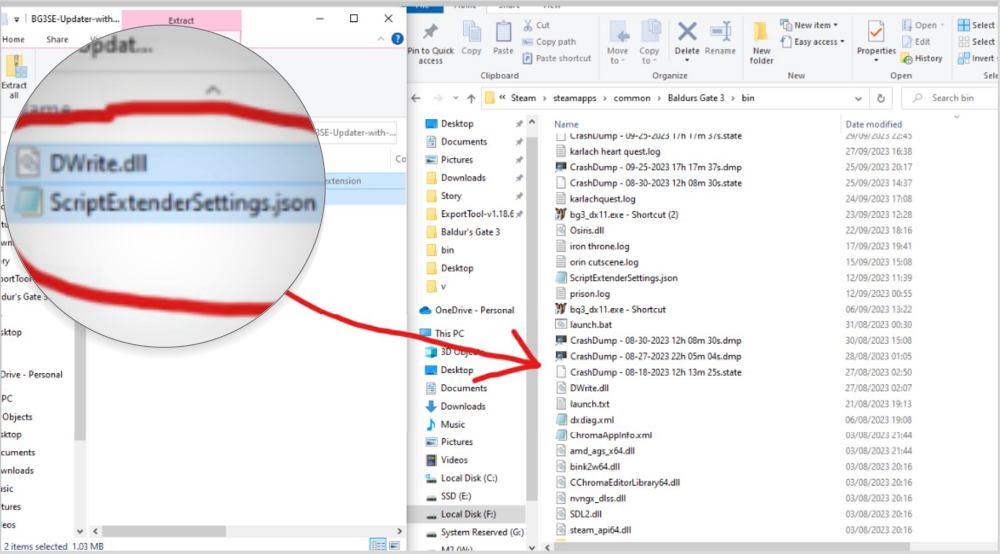
- Then extract the DWrite.dll to the Baldurs Gate 3\bin directory.
C:\Program Files (x86)\Steam\steamapps\common\Baldurs Gate 3\bin
- Now open Steam, go to Library, right-click on Baldur’s Gate 3, and select Properties.

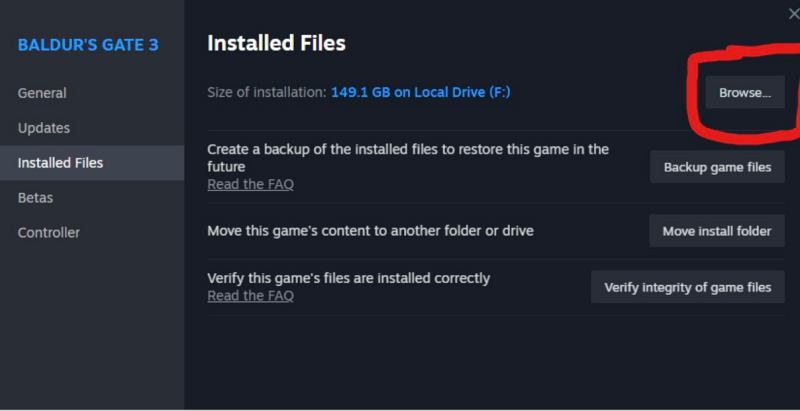
- Then select Installed Files from the left and click on Browse. You will be taken to the game directory.
- Go to its Bin folder and transfer the DWrite.dll and ScriptExtenderSettings.json files to that folder.

- If you already have DWrite.dll (from any installed mods), then only transfer ScriptExtenderSettings.json
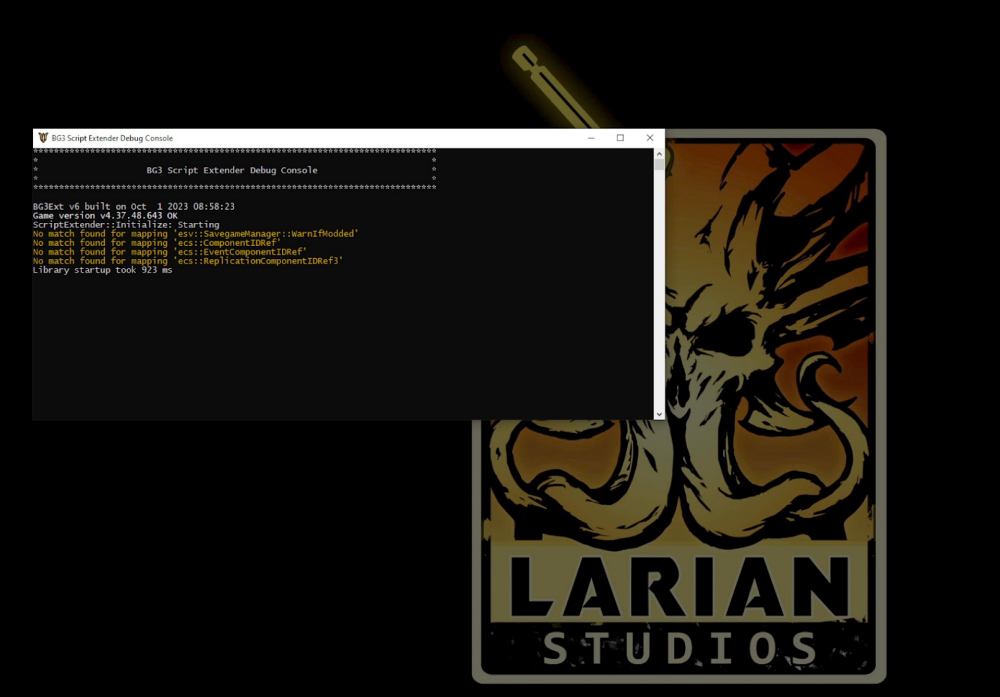
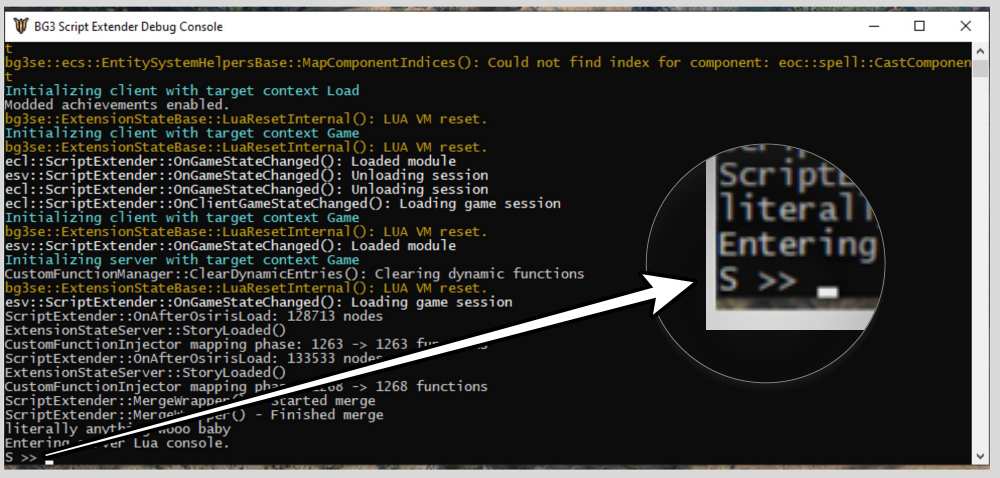
- Now start the game and the console should open in a separate window. Once done, load your save game.

- Then go back to the console, and type any random letter or number, and hit Enter. It should say “entering server Lua console”.
- If you see the “S >>” at the bottom, then the setup is complete and you are ready to use the console.

STEP 2: Use Commands
- Now copy-paste the below command in the console and hit Enter:
- _D(Osi.DB_InternScene_AllowDisturbanceForScene:Get(nil,nil))
- You should see a bunch of light blue text.
- Again, make sure that the console says S>> at the end [as before]
- Now type in –[[ and press enter. The console should say S–>> at the end.
- Then copy-paste the below command:
Table = {} for g,v in ipairs(Osi.DB_InternScene_AllowDisturbanceForScene:Get(nil,nil)) do table.insert(Table,v[2]) end from = 1 up_to = 200 for k = 1,204,1 do for i = #Table,1,-1 do for j=from,up_to,1 doOsi.DB_InternScene_AllowDisturbanceForScene:Delete(j,Table[i]) end end print("Loop " .. k .. " done.") print ("from: " .. from .. " up to: " .. up_to) from = from +200 up_to = up_to + 200 end print("All done") - Once done, type in ]]– and hit Enter. Wait for a few seconds until you see the All Done message.
- Finally, repeat the command in step 2 [_D(Osi.DB], and if it just shows “[ ]”, then the lag issue is fixed.
- However, if you see any incorrect value, then you’ll have to re-execute the aforementioned commands.
That’s it. These were the steps to fix the Baldur’s Gate 3 Act 3 lagging issues after installing Patch 4. As far as the official stance on this matter is concerned, the developers are aware of this issue, but they haven’t given out any ETA for the rollout of a fix. As and when that happens, we will update this guide accordingly. In the meantime, the aforementioned workarounds are your best bet. [Screenshots and Trick Credits: Redittor No_Earth7779].
Fix Baldur’s Gate 3 Patch 4 Facial Hair Texture Issue
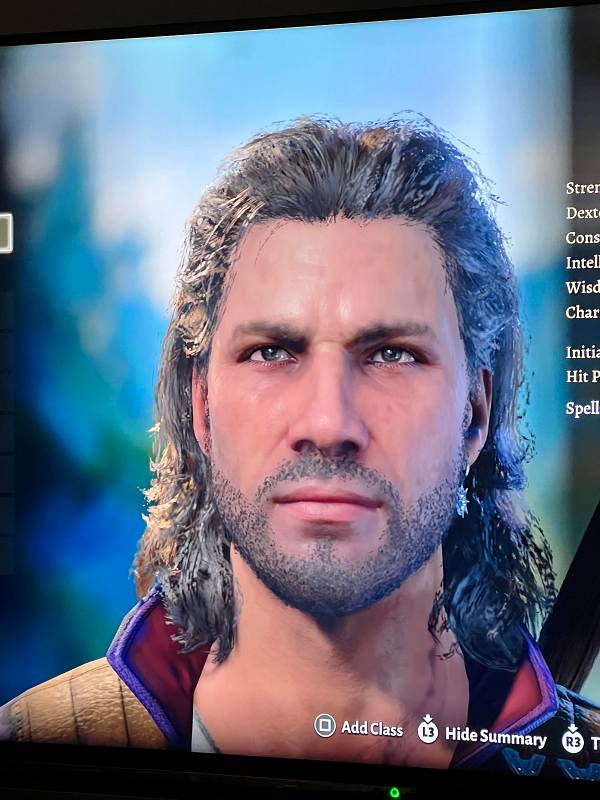
Many users have also voiced their concern that Beards, mustaches, and other facial hair are reportedly grainy with irregular patches. As far as the plausible culprit for the same is concerned, many are attributing it to the unsupported mods with the fourth iteration of the patch. So one obvious fix will be to remove those mods, however, that wouldn’t be in sync with many users’ requirements. So keeping that aside, here are a few other workarounds worthy of your attention:
- Force Anisotropic Filtering to “x16”,
- Enable Negative LOD Bias to “Allow”,
- Set Texture filtering quality to “Quality” in the Nvidia/AMD Control Panel


James
Where do you get the ScriptExtenderSettings.json file? it wasn’t included with the zipfile.