In this guide, we will show you the steps to enable or disable the network adapters on your Windows 11 PC. Also known as Network Interface Card (NIC), it is a hardware component that usually comes pre-installed on your PC. Its role stands simple yet an extremely crucial one- to allow your computer to transmit and receive data over a local network. But in some instances, you might need to disable one of these adapters.
For example, if you don’t use the Ethernet cable, then you could consider disabling the Ethernet adapter. Along the same lines, if you have installed a Virtual Machine, then your PC might get populated with a few adapters. Not only do they tend to clutter the network interface menu, but they could result in unnecessary battery loss as well.
Likewise, Android geeks could also make use of this technique to change their device’s software region and unlock the bootloader of an unsupported region’s device. Well, there could be quite a few reasons why one would want to enable or disable the network adapters on your Windows 11 PC. So without any further ado, let’s check out how this could be achieved.
- How to Replace PowerShell with Command Prompt in Windows 11
- 10 Methods to Open Command Prompt (CMD) in Windows 11
- How to Find My Windows 11 Product Key or License Key
Table of Contents
How to Enable or Disable Network Adapter in Windows 11
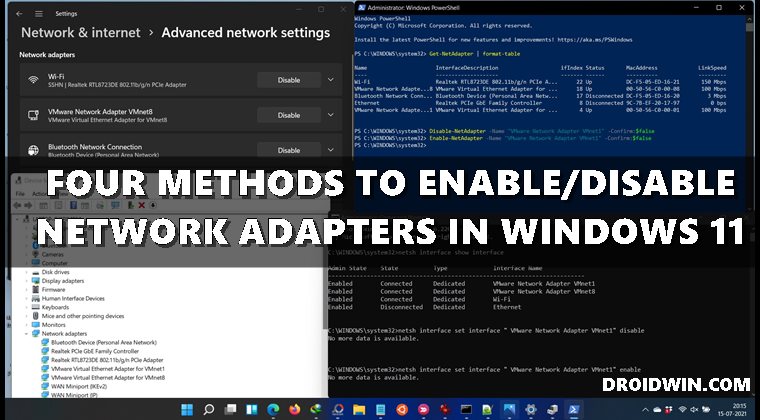
Given hereby are four different methods to carry out the said task. You may refer to the one that meets your requirements.
Disable/Enable Network Adapter in Windows 11 From Settings Menu
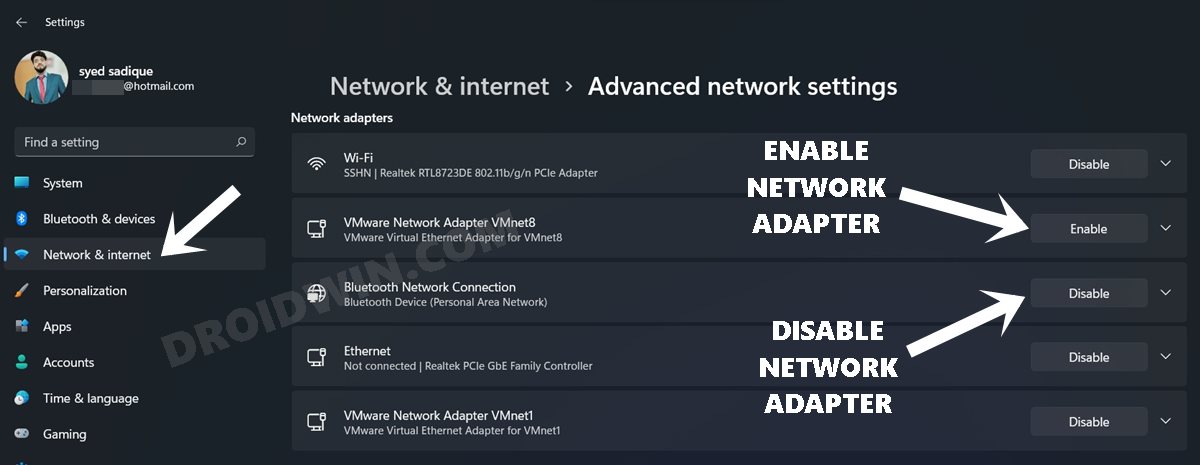
- Use the Windows+I shortcut keys to bring up the Settings menu.
- Within that, go to Network and Internet from the left menu bar.
- Then go to Advanced Network Settings situated at the end of the page.
- It will bring up the list of all the Network Adapters, click on Enable/Disable next to the desired one.
These were the steps to enable or disable the network adapters on Windows 11 via the Settings menu.
Disable/Enable Network Adapter in Windows 11 Via Device Manager
- Use the Windows+X shortcut keys and select Device Manager from the menu that appears.
- Within that, scroll to the Network Adapter section and click on it to further expand it.
- Now right-click on the adapter of your choice and select Disable Device to disable that driver.

- On the other hand, to enable it back on, right-click on it and select Enable.
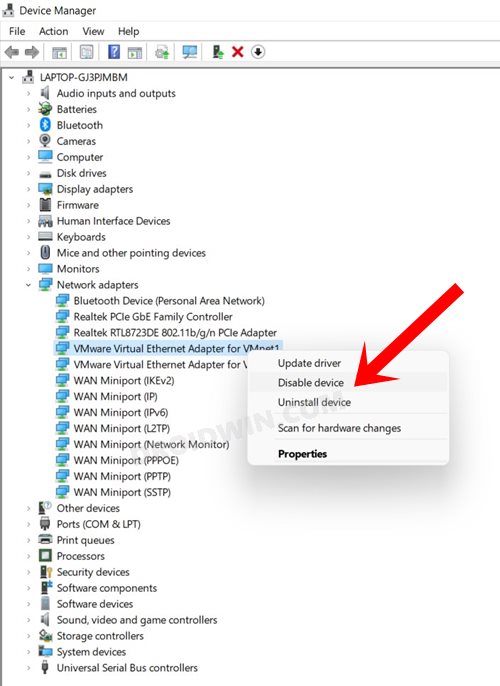

That’s it. These were the steps to enable or disable network adapters via Device Manager in Windows 11.
Disable/Enable Network Adapter in Windows 11 From Command Prompt
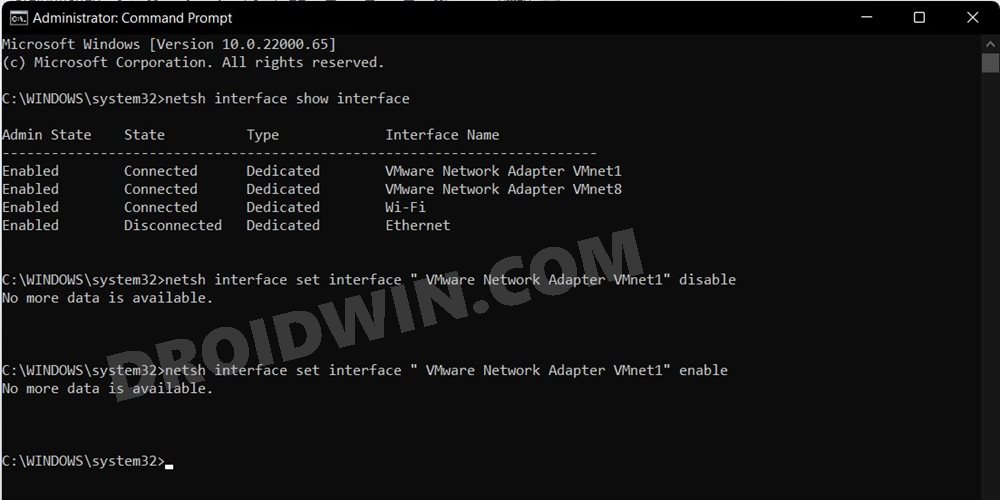
- Head over to the Start Menu and search CMD. Then launch the Command Prompt as an admin.
- Now type in the below command to bring a list of the network adapters present on your computer:
netsh interface show interface
- Pick up the adapter name from the above result and input in the below command to disable that adapter:
netsh interface set interface "ADAPTER NAME" disable
- Moving on, when you need to re-enable the adapter, type in the below command:
netsh interface set interface "ADAPTER NAME" enable
Note: Only use double quotes if there’s a space between the adapter name. For example, Wi-Fi is a single word and would be written without any quotes, whereas VMware Network Adapter VMnet8 would be put in double quotes. Anyways, this is how you could enable or disable network adapters via Command Prompt in Windows 11.
Disable/Enable Network Adapter in Windows 11 Via PowerShell

- Head over to the Start Menu, search PowerShell, and launch Windows PowerShell as an administrator.
- Now type in the below command to get a list of all the adapters on your PC:
Get-NetAdapter | format-table
- Pick up the desired adapter name from the above result and input it into the below command to disable that adapter:
Disable-NetAdapter -Name "ADAPTER NAME" -Confirm:$false
- To enable the adapter, you should use the below command:
Enable-NetAdapter -Name "ADAPTER NAME" -Confirm:$false
Note: As before, only put the adapter name under double quotes if there are spaces between its name. Anyways, this is how you could enable or disable network adapters via PowerShell in Windows 11.
So with this, we round off the guide on how you could enable or disable network adapters on your Windows 11 PC. We have shared four different methods for the same. Do let us know in case you have any queries concerning the aforementioned instructions. We will get back to you with a solution at the earliest.