In this guide, we will show you the steps to get back the Windows 10 Start Menu on Windows 11. With the release of the eleventh iteration of the OS, the plethora of UI changes across the entire system soon become the talking point. And most of these user interface tweaks were welcome with open hands. Along the same lines, changes to the Taskbar also managed to grab the attention of the masses.
Right since the inception of Windows till its 10th build, the taskbar icon always occupied the left-most position. However, things have drastically changed this time around with all the icons now placed at the center of the taskbar. Apart from their position, the entire taskbar interface has been massively revamped.
It has now been segregated into two different horizontal sections, the upper half belonging to the Pinned Apps whereas the Recommendations are placed in the lower half. However, not everyone seems to be a fan of these changes and wants to stick to the basics. If you also echo this thought and wish to get back the Windows 10 Start Menu on your Windows 11 PC, then this guide is here to help you out.
- How to Change Taskbar Size in Windows 11
- How to Replace PowerShell with Command Prompt in Windows 11
- 10 Methods to Open Command Prompt (CMD) in Windows 11
Table of Contents
How to Get Back the Windows 10 Start Menu on Windows 11
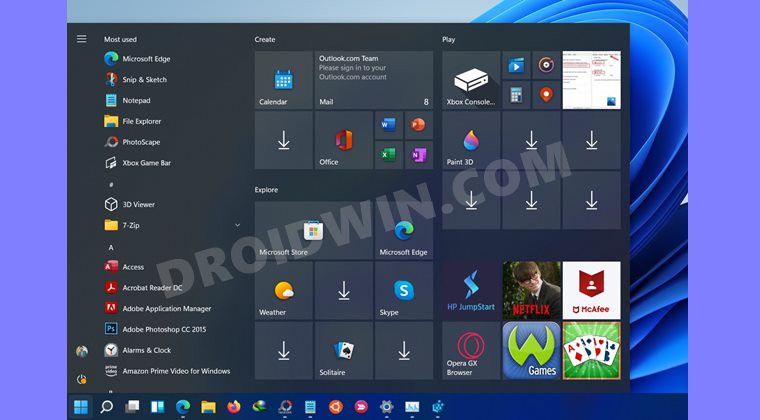
This guide will be segregated into two different sections. In the first one, we will show you the steps to revert the Start Menu to the Windows 10 UI. Then in the second one, we will show you how to transfer all the taskbar icons to the left of your screen, as was the case with Windows 10. So without any further ado, let’s get started.
STEP 1: Bring the Windows 10 Start Menu to Windows 11
- To begin with, bring up the Run dialog box via Windows+R shortcut keys.
- Then type in regedit in Run and hit Enter. This shall launch the Registry Editor.
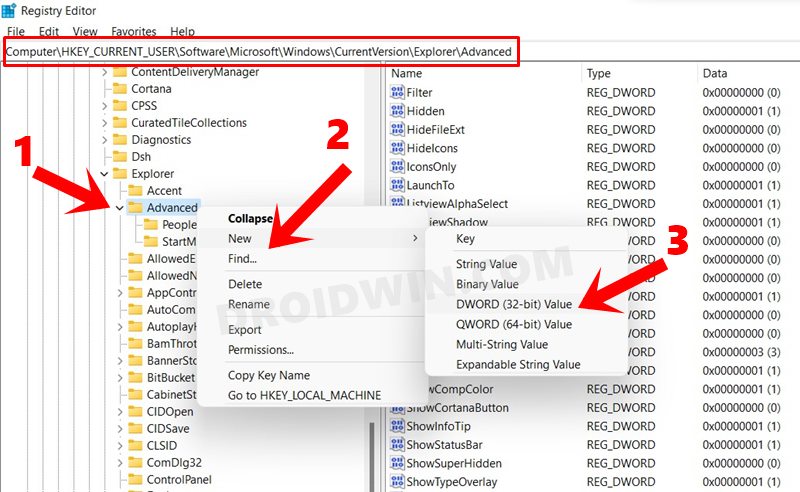
- Now go to the below location in the Registry Editor (you may also copy paste this location in the address bar):
Computer\HKEY_CURRENT_USER\Software\Microsoft\Windows\CurrentVersion\Explorer\Advanced
- Right click on an empty location on the right hand side, select New, and then select DWord (32-bit) Value.

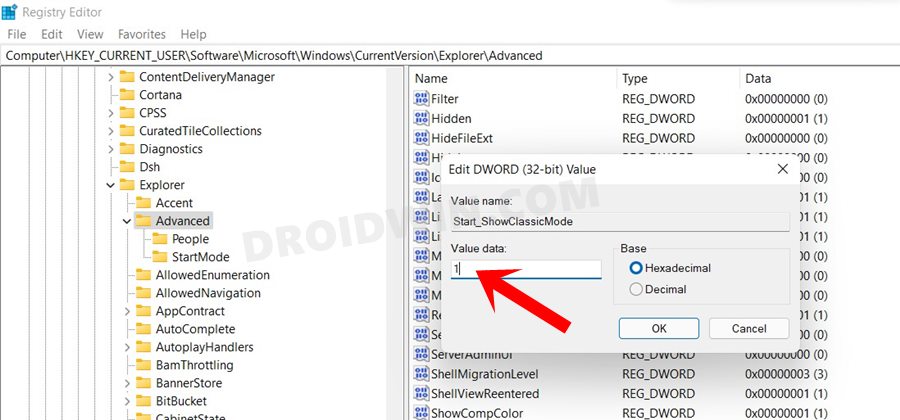
- Give it the name Start_ShowClassicMode and hit Enter.
- Now double click on it, type in 1 in the Value Data field and click OK.

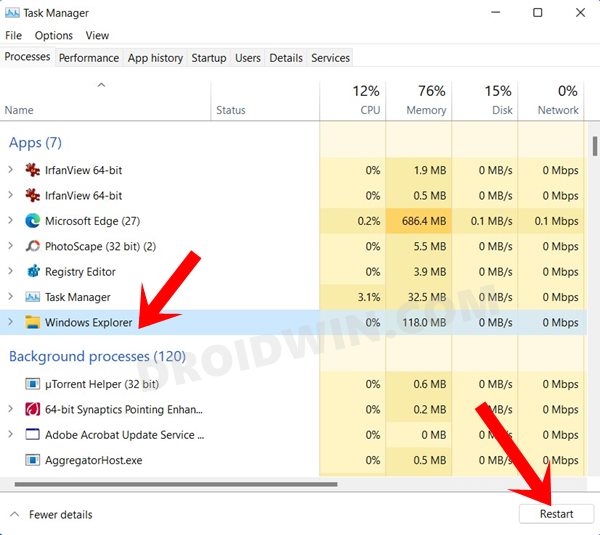
- Bring the Task Manager via Ctrl+Shift+Esc shortcut keys, select Windows Explorer and hit Restart.

If you can’t find Windows Explorer under Apps section, then check it out under the Background Processes section. That’s it. Once the Windows Explorer restarts, you would get back the Windows 10 Start menu on your Windows 11 PC.
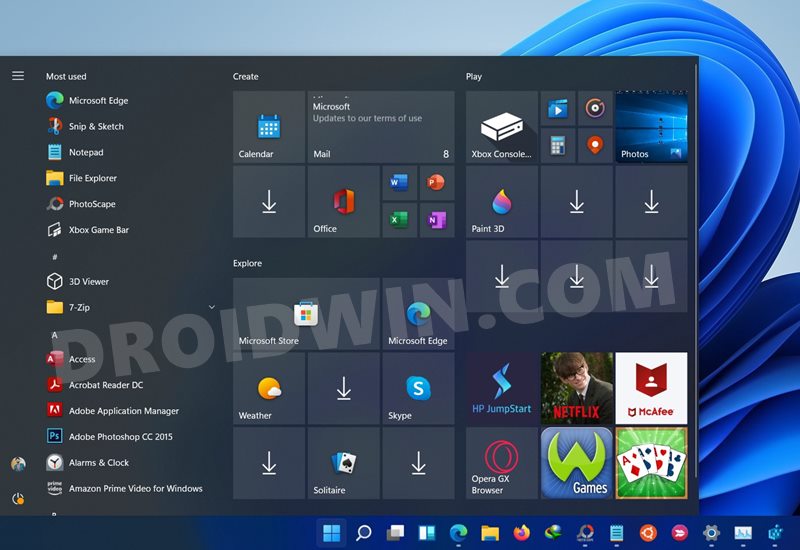
STEP 2: Send Taskbar Icons to the Left in Windows 11
![]()
While you would have got the old Start Menu it might still look a little bit odd, and that’s because the Taskbar icons are still in the center. So let’s move it to the left. For that, please refer to our detailed guide: How to Send or Move the Taskbar Icons to the Left in Windows 11 [Shorter instructions: Go to Taskbar Settings > Taskbar Behavior > Left Align].
FAQ: How to Revert to Default Windows 11 Start Menu
If you want to go back to the default Windows 11 Start menu, then change the Start_ShowClassicMode Value data to 0. However, if you never plan on getting the Windows 10 Start menu, then you may delete this file as well. Then restart Windows Explorer for the changes to take place. Likewise, go to Taskbar Settings > Taskbar Behavior > Center Align to send the icons back to the center of the Taskbar.
So with this, we round off the guide on how to get back the Windows 10 Start menu on your Windows 11 PC. If you have any queries, do let us know in the comments section. We will get back to you with a solution at the earliest.


TasJam
Hi
Start_ShowClassicMode, and other registry hacks are not working any more on Windows 11.
Any other ways to get the Win 10 start menu back, other than using 3rd party apps?