In this guide, we will show you the steps to create and restore a Nandroid Backup via TWRP. Stepping into the custom development opens the floodgates to a plethora of tweaks and customizations. However, this is just one ide of the coin. Carrying out these tweaks could result in some unforeseen circumstances and there’s every chance of things going south.
In most cases, your device might end up in a softbrick or bootloop state, whereas in rare cases, it might even go into a bricked state. But you could rectify most of these issues simply by flashing the stock firmware via Fastboot [and fixing unbrick via the OEM dedicated tool such as the MSM Download Tool for OnePlus]. However, if the data on a particular partition gets corrupted, then things might get a little worrisome.
And if those partitions are EFS or Persist, then you are in for trouble. This is because the former holds details with regards to IMEI whereas the latter holds the fingerprint sensor data. If the former is corrupted, you might have to say goodbye to the IMEI number on your device and if there’s an issue with the latter, then the fingerprint will no longer work on your device and you might even have to go to the extent of changing the sensor hardware.
So to avoid all these from happening, your best bet is to take a Nandroid Backup via TWRP Recovery and keep it at a safer place [such as PC or cloud] and obviously not on your device. With that in mind, let’s make you aware of the steps to get this job done right away. Moreover, at the end of this guide, we will also be sharing various emthdos to fix the issue of Nandroid Backup not working, so do check it out as well if you’re facing any issues in using this feature.
Table of Contents
What is Nandroid Backup
NANDroid Backup (or more popularly known as Nandroid Backup) is a digital backup of all the data stored in the device’s NAND (flash) memory. But that went way too much technical. Let’s keep that jargon aside. In simpler terms. a Nandroid Backup is a complete backup of your entire Internal Storage. These include everything, from important system files and data to minuscule files like wallpapers and ringtones.
Why Create a Nandroid Backup
One of the best assets of the Android OS is its open-source nature. Owning to it, there are endless possibilities available to tweak your device’s software. Rooting your device, installing a custom recovery, Magisk Modules, LSPosed Framework, etc all these functions are available right at your fingertips. But as Murphy’s law has clearly stated- “Anything that can go wrong will go wrong“. And quite frankly there is no escaping this statement.
There is always a chance of some issues arising out of rooting your device, flashing a mod, etc, especially if you are new to this. So it is always recommended to have a Nandroid Backup of your Android device- right after installing a Custom Recovery like TWRP. Never do the mistake of flashing a custom ROM, rooting your device via Magisk or modifying the boot images and then creating a Nandroid backup. It altogether destroys the sole purpose of this backup.
With that said, head over to the next section for the instructions to create and restore a Nandroid Backup via TWRP. But before that, make sure to go through the below “Prerequisites” points.
Prerequisites
- Any custom recovery could only be installed once the device’s bootloader is unlocked. Head over to this section to know how to Unlock the Bootloader of any Android Device.
- Next, a custom recovery is required. Without a second thought, go for TWRP Recovery. Download the official version from the TWRP website. If no official version exists, download an unofficial one- but only from XDA.
Setting up the Custom Recovery
Before starting the guide on how to create and restore a Nandroid Backup via TWRP, you need to install a custom recovery like TWRP. I have already created a detailed step-by-step guide for downloading and installing the said recovery. However, if you have a little bit of knowledge on all these, then you may instead refer to the “short guide” below:
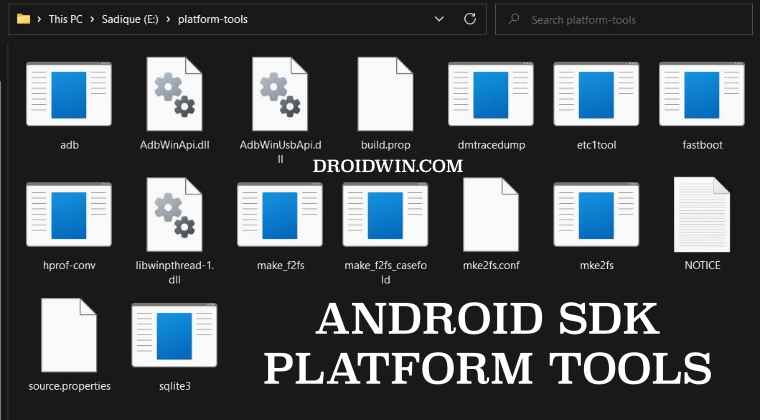
- To begin with, download and extract the ADB and Fastboot Platform Tools on your PC.

- Then download the TWRP Recovery, rename it twrp, and place it inside the platform-tools folder.
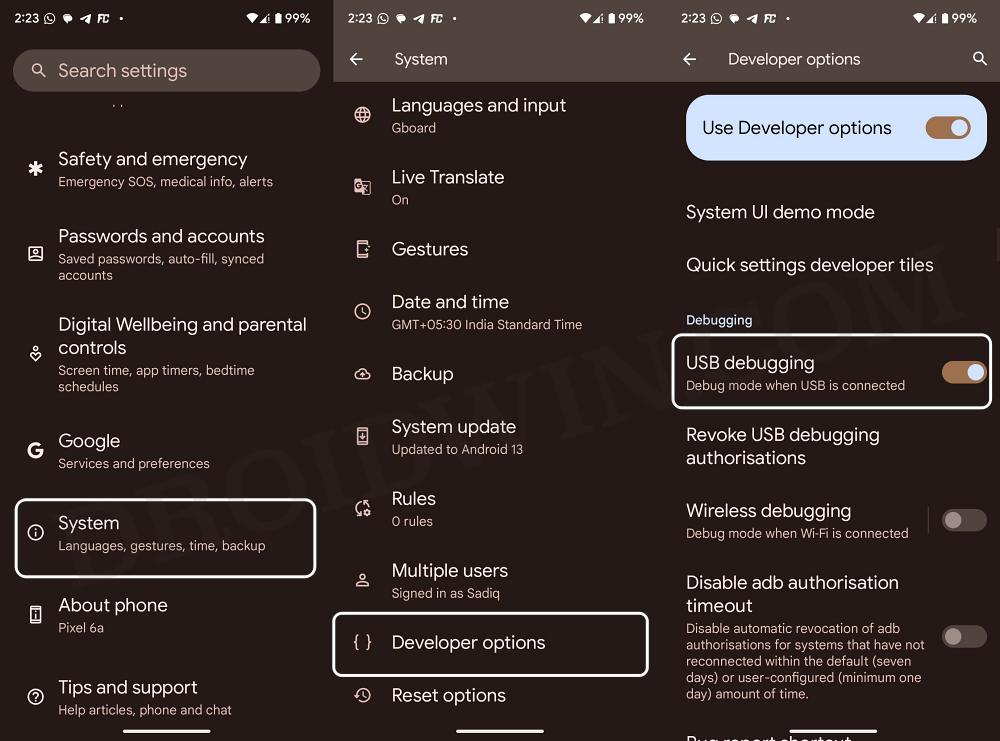
- Then go to Settings > About Phone > Tap on Build Number 7 times. This will enable Developer Options.
- Go to Settings > System > Developer Options and enable USB Debugging. Now connect your device to PC via USB.
- Now type in CMD in the platform-tools folder address bar and hit Enter. This will launch the Command Prompt.
- Then type in the below command to boot your device to Fastboot Mode:
adb reboot bootloader
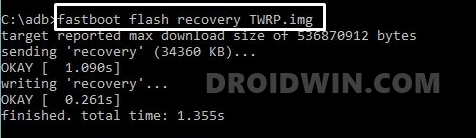
- Now if your device has a recovery partition, then use the below command to flash it:
fastboot flash recovery twrp.img
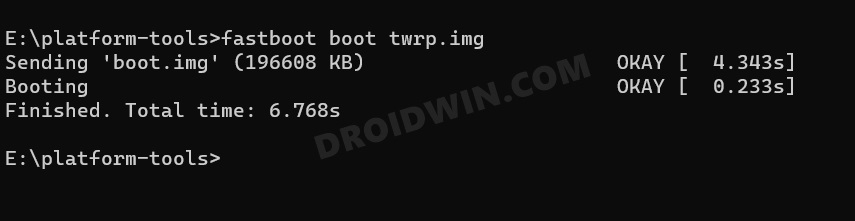
- But if your device doesn’t have a recovery partition, then use the below command to temporary boot to it:
fastboot boot twrp.img
- Now flash the TWRP ZIP, or go to Advanced > Install Reocvery Ramdisk, or Advanced > Flash Current TWRP.
- Once flashed, go to Reboot and select Recovery. Your device will reboot to TWRP Recovery.
Creating a Nandroid backup via TWRP
In order to start the guide on how to create and restore a Nandroid backup via TWRP, you need to boot your device to TWRP Recovery. Either Google for the hardware key combination, or use the universal method below:
- Connect your device to PC. Make sure USB Debugging is turned on.
- Open PowerShell window in the same way as mentioned above.
- Type the below code to boot your device to TWRP Recovery:
adb reboot recovery
Now let us begin with the process:
- Under TWRP, tap on “Backup”.
- You will be presented with the list of partitions to backup. At least choose the following, if not all:
- Boot
- System
- Data
- Modem
- EFS
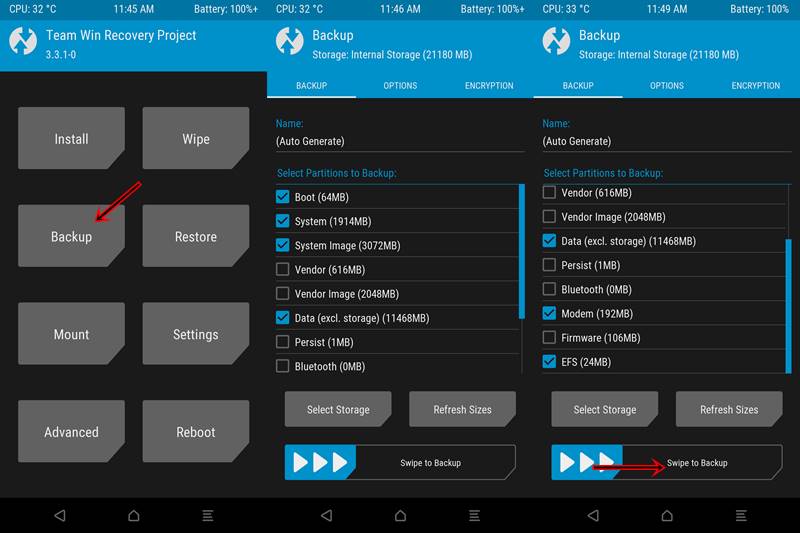
- Right swipe on the “Swipe to Backup”. Depending upon the backup size and the files you chose TO BACKUP, the process might take some seconds to around 10 minutes. That’s it. You have successfully created a Nandroid Backup for your Android device.
- Also note that hardly anyone over the internet suggests you have a backup of Modem and EFS, but trust me these are the most important backups to have. Modem stores the device’s signals- Wi-Fi, calling, radio, etc, whereas EFS stores the all-important IMEI number.
Always make sure to transfer this backup to an external source like a Pen Drive, PC or even in the Cloud.
If ever you brick your device big time, then rather than downloading a heavy stock firmware, just restore the Nandroid backup and you are good to go. Follow the steps mentioned in the next section for the same.
How to Restore a Nandroid Backup via TWRP Recovery
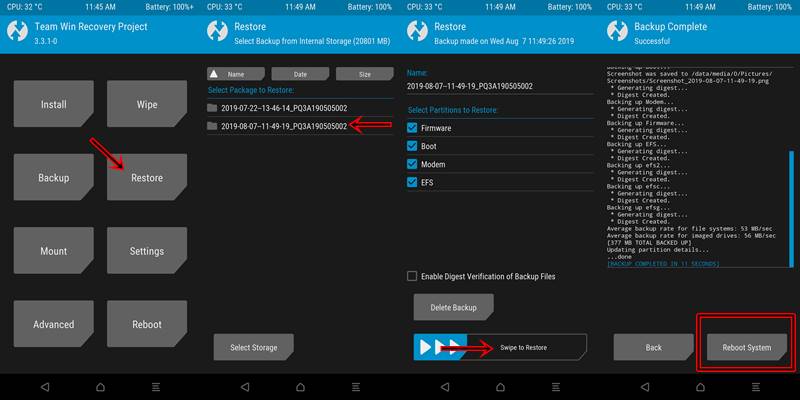
- Reboot your device to the TWRP Recovery.
- Tap on “Restore”. Select the backup folder. If there is more than one folder, look at its date and choose accordingly.
- Now you would be presented with all the backup up the partition. If for some reason you don’t want to restore a particular backup, untick it.
- Perform a right swipe on the “Swipe to Restore” button. It would take quite a while before the process is over.
- Now you may reboot your device. Go to “Reboot” and tap “System”.
With that, we come to the end of the guide on how to Create and Restore a Nandroid backup via TWRP Recovery. If you have any queries concerning the aforementioned steps, do let us know in the comments. We will get back to you with a solution at the earliest.


govin
Hi Sadique,
A follow up to my previous post
I understand after restore via Nandroid backup, the TWRP custom recovery wont get replaced by stock recovery.
How to get back the stock recovery
govin
hi.
According to TWRP official site,the system image & vendor image is a more perfect backup than system & vendor though it takes up much more space.And when restore it will not break the dm verify thats is in Android version 6.0 & above
2,If I do Nandroid backup on a device with stock Rom & stock Recovery,is it fine if i back up the bigger sized system image & vendor image or just the smaller sized system & vendor is sufficient enough?
3..Do i need to back up recovery also?
4,If i wish to revert to the previous state by performing restore via Nandroid backup,then fastboot the flashable image of stock Rom,will the device stay rooted & capable of getting OTA updates?
Seun Adedayo
Good day sir
Thanks for everything you are doing for us here.
I have small issues with my on how to decrypt my internal storage on TWRP.
My phone is A only partition so and is an mtk phone
I used the method of ext 2 and ex4 but I have problem when rebooting my recovery.
There is a that is confusing me
That says are installing twrp if is not installed?
Please could you do the video tutorial of what you have explained for more understanding.
Thank you