In this guide, we will show you various methods to fix the issue of the Print Preview screen being too large which in turn tends to hide the Print button in Ventura. The latest macOS build brings a slew of noteworthy features to the fore. On the flip. side though, it has taken some questionable decisions [such as the removal of network location] and issues with the second display are bugging users to this date.
And now, there has been another entry to this list, which is mostly from the UI/UX point of view. In Ventura, the Print Preview window has been enlarged to such a degree that it ends up hiding the Print button or pushes it beyond the Dock. To make matter worse, you cannot even move this print window or maximize/minimize it.
This is resulting in a great deal of inconvenience [and infuriation] to the users as they are unable to take a printout of their documents. If you are also in the same boat, then this guide will make you aware of some nifty workarounds that should help you mitigate this issue. So without further ado, let’s check them out.
Table of Contents
Fix Ventura Print Preview too large/Print Button hidden
It is recommended that you try out each of the below-mentioned workarounds and then see which one spells out success for you. So with that in mind, let’s get started.
FIX 1: Hide Expanded Menus
First off, if there are any menus that you have expanded, then collapse them right away. This is because the expanded menus tend to take additional space and hence push the Print button beyond the dock.
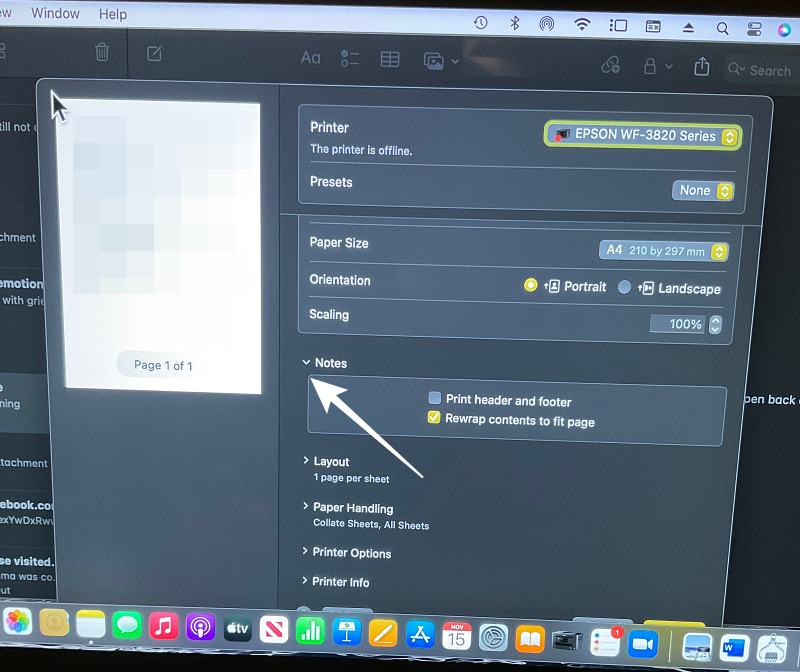
As you could see in the above image, the Note menu is expanded and hence it increases the Preview window size. So collapse it via the downward arrow and it will then push up the window, which in turn will bring up the Print button.
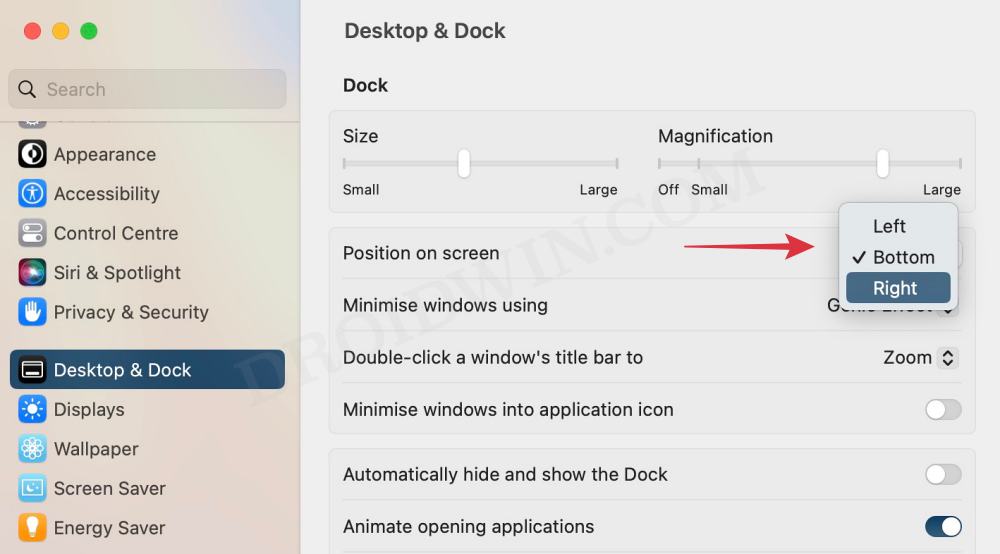
FIX 2: Move Dock to the Left/Right
You could also consider moving the Dock window to the left or right side of the desktop, instead of its default bottom position. Once you do so, you will then be able to easily access the print button. So refer to the below steps to give this tweak a try:
- Open System Settings and select Desktop & Dock from the left.
- Then go to Position on Screen and select either Left or Right.
- The Print button will no longer be hidden in Print Preview on Ventura.

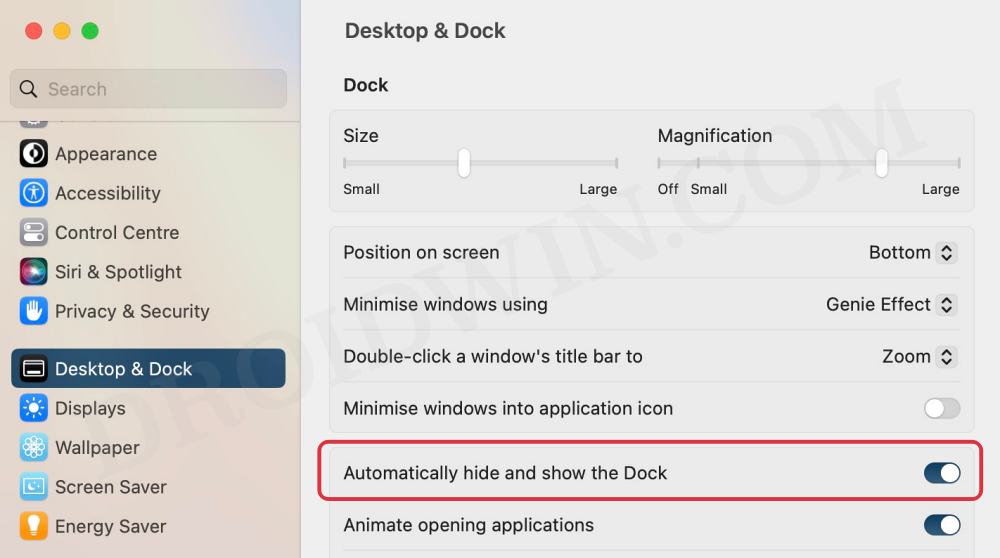
FIX 3: Auto Hide Dock
If you don’t want to permanently send the dock to the left or right side, then let it remain at the bottom but at the same time, enable its Auto Hide feature. So as soon as you take the away from the dock, it will hide and you will then be able to access the Print button. Here’s how all of this could be carried out:
- Open System Settings and select Desktop & Dock from the left.
- Then enable the toggle next to Automatically Hide and Show the dock.
That’s it. These were the three different methods that should help you fix the issue of the Print Preview screen being too large which in turn tends to hide the Print button in Ventura. If you have any queries concerning the aforementioned steps or know of other related tweaks that could prove to be useful in the current scenario, then do let us know in the comments section below.


Ian Bruce
None of these suggestions worked for me. If I click on the printer info option (or watermark) the print button appears as it should have in the first place.