In this guide, we will show you various methods to fix the issue of USB OTG not working on your Android device. The internal storage of today’s devices is on an ever-expanding horizon with some OEMs even touching the astonishing 1TB mark. While that is quite rare, but still most devices today easily boast 256-512GB storage. As a result of which, we are slowly seeing the demise of a dedicated slot for micro SD as well.
However, one cannot deny the fact that there are some fuels that are best kept in external storage. So with SD cards no longer the talk of the town, users are now more inclined toward USB OTG devices. Moroever, if you get hold of an OTG adapter/convertor, then you could even connect your Pen Drive, Flash Drive, and other types of external drives directly onto your device. However, all this is proving to be easier said than done.
Numerous users have voiced their concern that the USB OTG is not working along the expected lines on their Android devices. For some, the device simply refuses to acknowledge that OTG is connected whereas for others, the OTG is displayed in the File Manager app, but they cannot access any files inside it. if you are also getting bugged by any of these issues, then this guide will help you out. Follow along for the fix.
Table of Contents
Fix USB OTG not working on Android
It is recommended that you try out each of the below-mentioned workarounds and then see which one spells out success. So with that in mind, let’s get started.
FIX 1: Perform USB OTG Checks
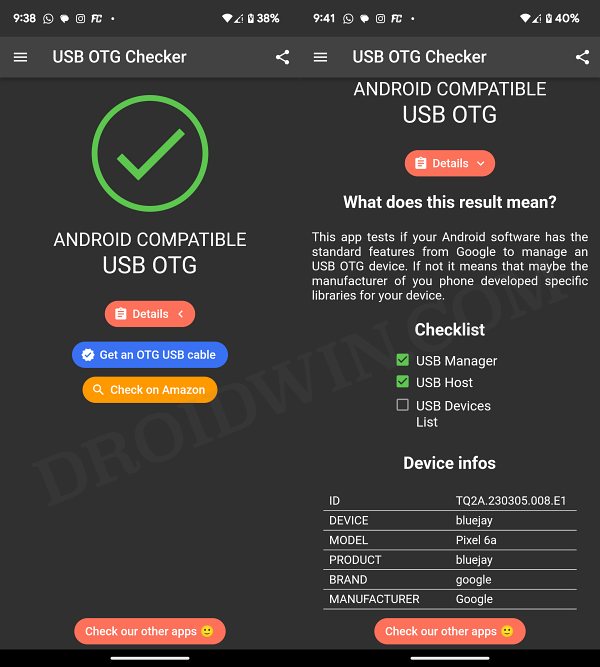
First and foremost, you should verify whether your Android device supports USB OTG or not. While most devices support USB Host, there are still a few out there that don’t support USB Manager via OTG and/or USB Device List via OTG. In order for the OTG to work properly, your device should pass at least two tests, namely USB Manager and USB Hosts. So before carrying out any further fixes, let’s first perform these checks.
- Download and install the USB OTG Checker Compatible app from Play Store.
- Then launch it and wait for a few seconds. It will perform the test and display the result.

- if it shows Android Compatible USB OTG then you are good to go ahead [you could also tap on Details to get more info about this result].
- However, if your device fails this test, then unfortunately, your device doesn’t support USB OTG.
FIX 2: Change Default USB Configuration
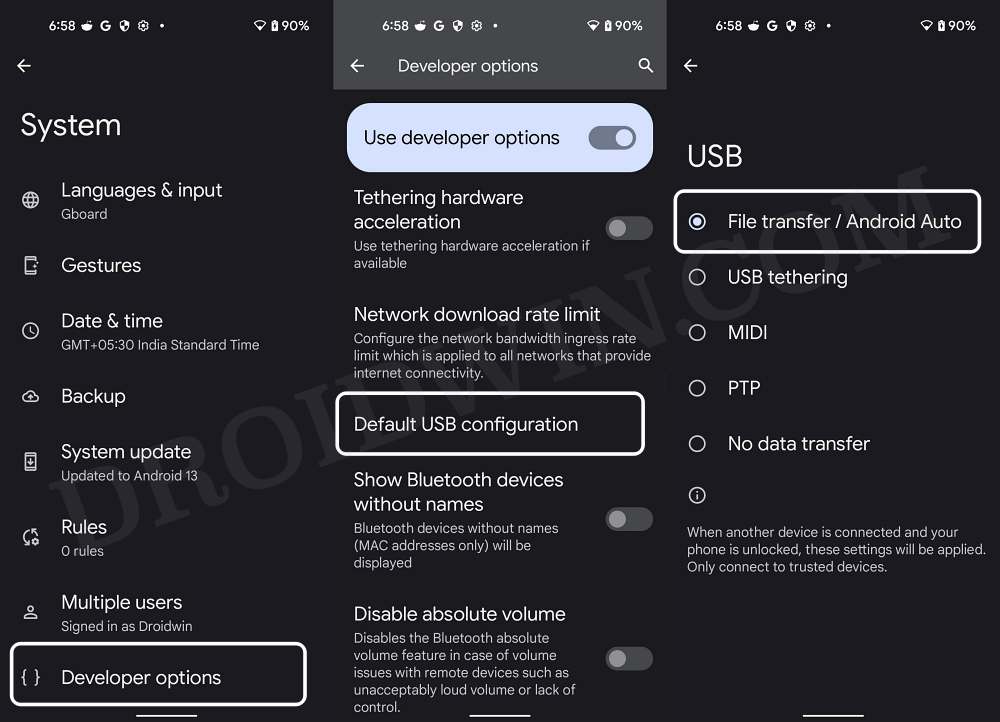
Next up, you should change your default USB configuration to File Transfer otherwise your device will not eb able to identify the connected OTG. Here’s how it could be done:
- Head over to Settings > System > About Phone > Tap on Build Number 7 Times.
- Then go to Settings > System > Developer Options > Default USB Configuration.
- Now select File Transfer and check if USB OTG is working on your Android device.
FIX 3: Disable Developer Options
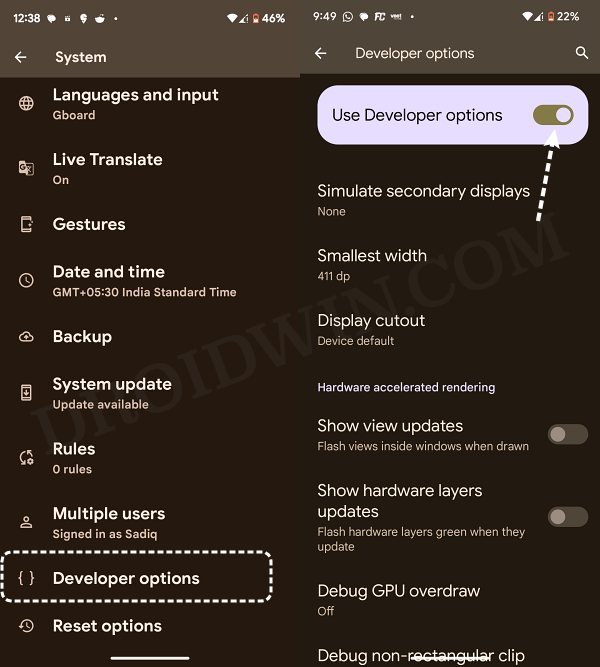
In some cases, the Developer Options might conflict with the proper functioning of the OTG. Therefore, once you have changed Default USB Configuration to File Transfer, consider disabling the Developer Options. Here’s how:
- Head over to Settings > System > Developer Options.
- Then disable the toggle next to Developer Options.
- Check if it fixes USB OTG not working on Android.
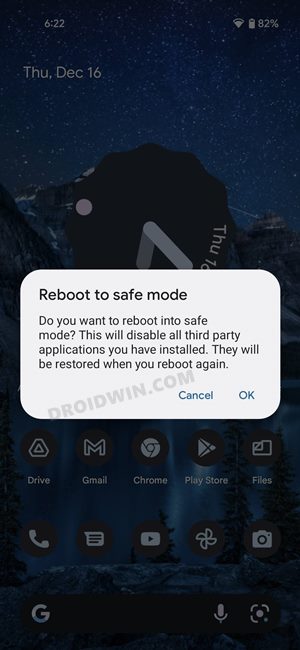
FIX 4: Boot to Safe Mode
In some instances, a third-party app or service could cause an issue or two with the OTG. Therefore, you should consider booting your device to Safe Mode and then test your OTG. Here’s how it could be done:
- Bring up the Power menu and long press on Reboot.
- You will get a Safe Mode prompt, tap OK. The device will now boot to Safe Mode.
- Once in this mode, connect your USB OTG and check if it is working now.
- If it is, then reboot your device back to normal mode.
- Then uninstall the recently installed apps, one at a time, until USB OTG is up and running again.
FIX 5: Format OTG to FAT32 or exFAT
The USB OTG that you are using should be in a FAT32 or exFAT [recommended] File Format. If that is not the case, then make sure to format it to that format otherwise your device will not be able to read any files on that OTG. It goes without saying that the process will wipe off all the data from your OTG, so please back them up beforehand.
- Connect your OTG to the PC and launch File Explorer.
- Then right-click on your OTG and select Format.
- Now choose either FAT32 or exFAT under File System and hit Start.
- The process will now begin and would only take a few minutes.
- Once done, transfer the data back to the OTG and then connect it to your device.
- Check if it fixes the USB OTG not working issue on your Android device.
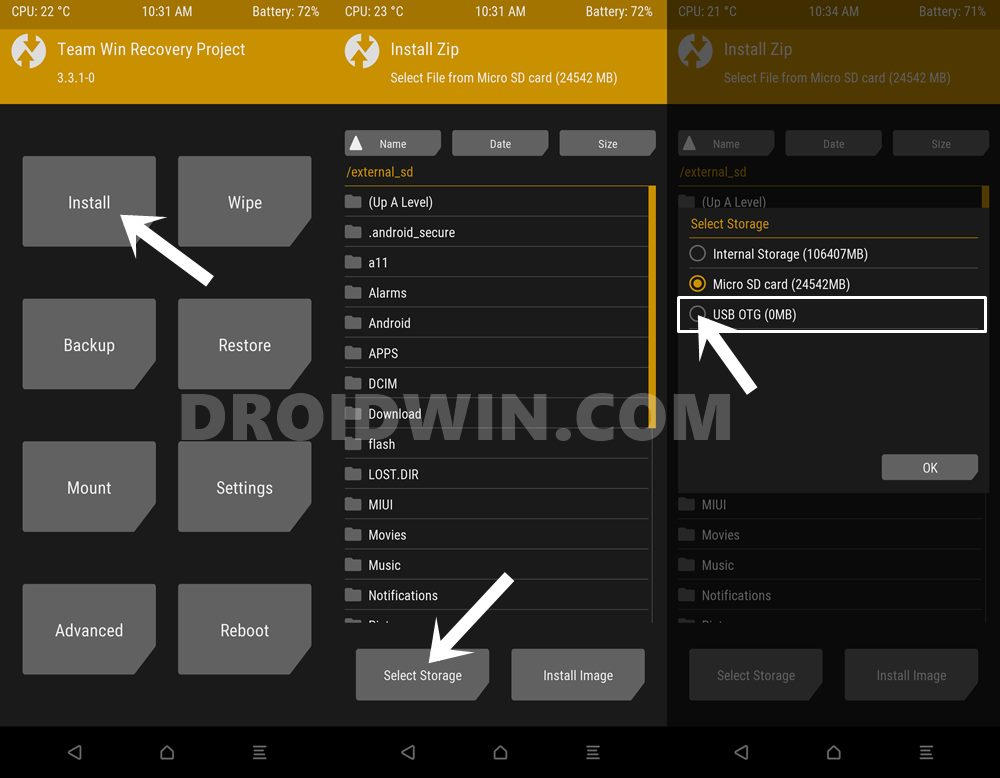
FIX 6: For TWRP Users
If you are using the TWRP Recovery and it’s not able to identify the connected OTG, then you’ll have to first mount it. Here’s how it could be done:
- From TWRP, go to Mount and checkmark USB OTG.
- Now go to Install, tap on Select Storage, and choose USB OTG.
- You should now be able to access and flash files via OTG from TWRP
That’s it. These were the various methods to fix the issue of USB OTG not working on your Android device. If you have any queries concerning the aforementioned steps, do let us know in the comments. We will get back to you with a solution at the earliest.


Vaseem
USB OTG not working isko jeld se jeld sehi kero