In this guide, we will show you the steps to install numerous custom ROMs on your Galaxy S20 FE 4G/5G device. The S series from the South Korean conglomerate has always been among the most popular players in town. Offering flagship-level specs and perhaps the best camera that any smartphone has to offer [with Pixel being an exception], its topmost position in the pecking order is hardly a secret.
However, this would then also translate to the fact that it would be on the higher side of the price spectrum as well. And that is indeed the case, with the S series proving to be among the costliest Android phones in the market and breaking the price barrier with each new iteration. Fortunately, there’s also a budget-friendly Fan Editon that gives you the same level of software experience that Samsung is known for without compromising too much on the hardware side either.
Combining all this, it turns out to be the perfect recipe for success, not just for the generic users, even the tech enthusiasts have set their eyes on this device. In this regard, the device was launched with Android 10 out of the box and has already received its fair share of 3 OS upgrades. But guess what, you could even welcome abode the latest One UI 6 based on Android 14 with the help of customized firmware.
Not only that, if the OEM’s underlying OS skin is not in sync with your requirement, then you may even install an AOSP-based ROM and get a clean stock usage experience with a few Pixel goodies. So without any further ado, let’s make you aware of the steps to install numerous custom ROMs on your S20 FE 4G/5G device.
Table of Contents
Install Custom ROMs on Galaxy S20 FE 4G/5G [One UI and AOSP]

Irrespective of the ROM you flash, it will wipe off all the data from your device, so please take a complete device backup beforehand. Droidwin and its members wouldn’t be held responsible in case of a thermonuclear war, your alarm doesn’t wake you up, or if anything happens to your device and data by performing the below steps.
Given below are the prerequisites that are required for every custom ROM. So anytime during the flashing process the need arises, you may refer to this section and carry out the desired task.
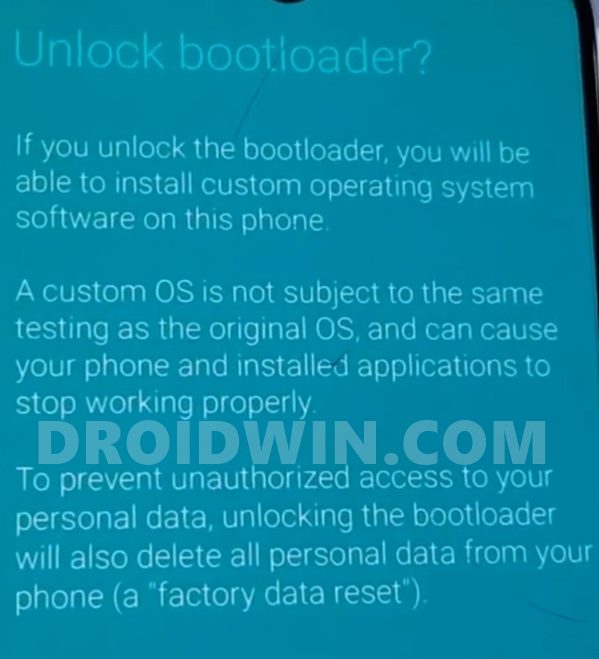
Unlock Bootloader
Your first course of action should be to unlock the bootloader on your device. Doing so will wipe off all the data and will trip Knox as well. If that’s well and good, then you could either refer to our detailed guide on How to Unlock Bootloader on any Samsung Device [New VaultKeeper Method] or check out the below shorter instructions:
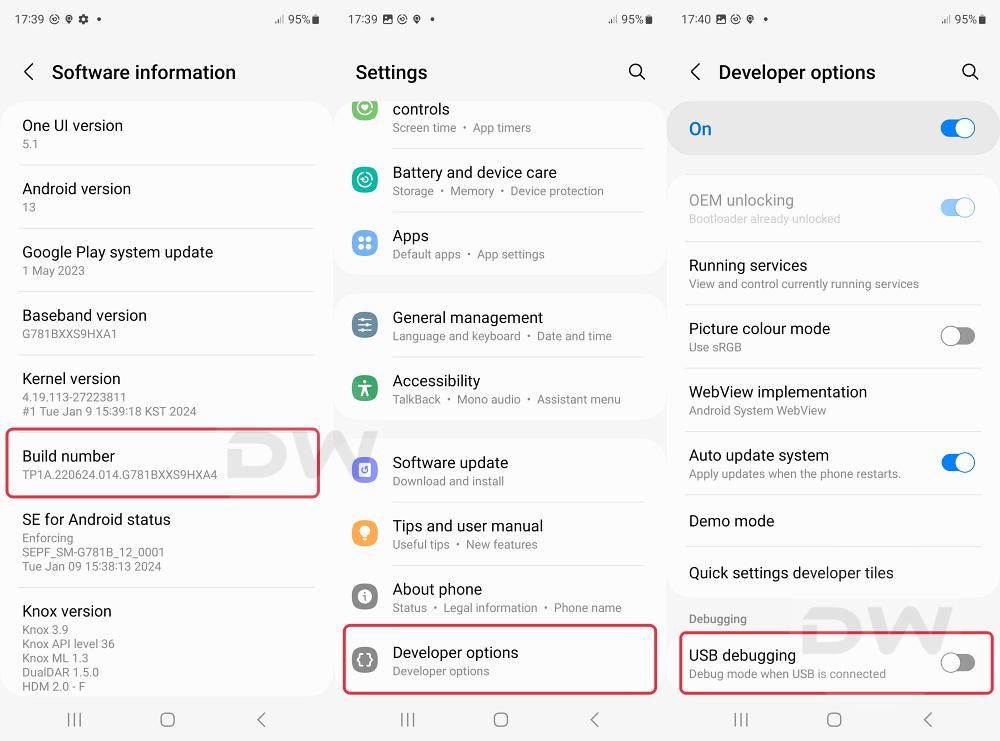
- To begin with, enable OEM Unlocking from Developer Options.
- Then connect your device to a PC and boot it to Download Mode.
- Finally, press the Volume Up key once to Unlock the Bootloader.
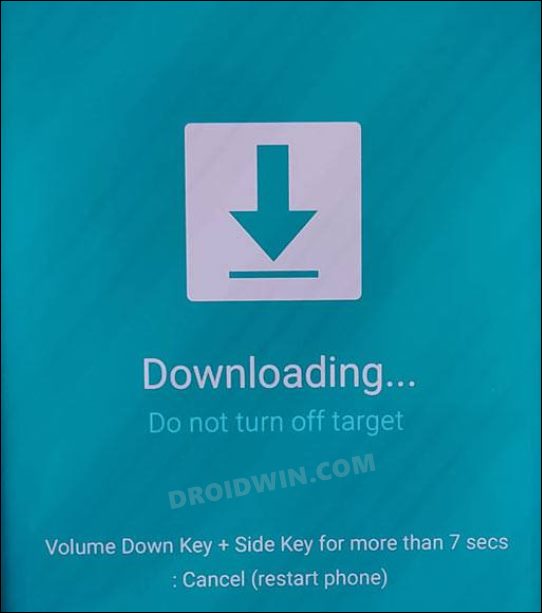
Boot to Download Mode
Your next course of action should be to boot your device to Download Mode. This is needed so that Odin is able to identify the device which in turn will allow you to flash the required files. Likewise, Download Mode will also come in handy if you are planning to flash a custom recovery. So. refer to our detailed guide on How to Boot any Samsung Device to Download Mode or check out the below shorter instructions:
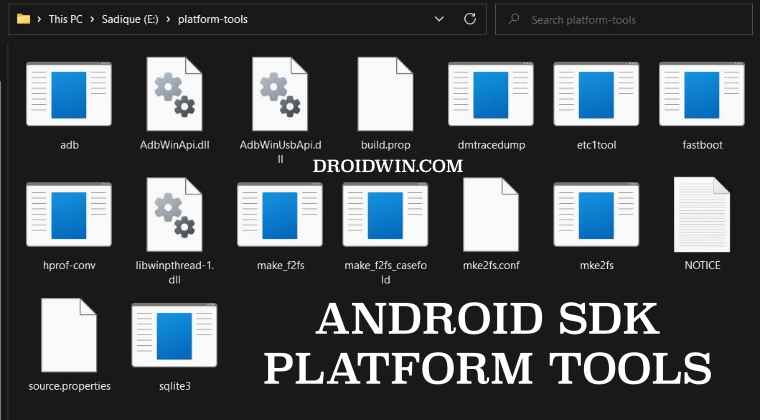
- To begin with, download and extract the Android SDK Platform Tools.
- Then enable USB Debugging and connect your device to a PC via a USB.
- Now type in CMD in the platform-tools folder address bar and hit Enter.
- This will launch the Command Prompt. Now type in the below command:
adb reboot download
- Your device will now reboot to the Download Mode in just a few seconds.

Install TWRP Recovery
TWRP Recovery is needed to flash the custom ROM on your device. So make sure to install it using our detailed guide on Install TWRP Recovery Samsung Galaxy [multidisabler/fbedisabler]. Here’s the shorter instruction:
- To begin with, unlock the bootloader on your Samsung.
- After that, boot your device to the Download Mode.
- Then download twrp.tar and disabled_vbmeta.tar files.
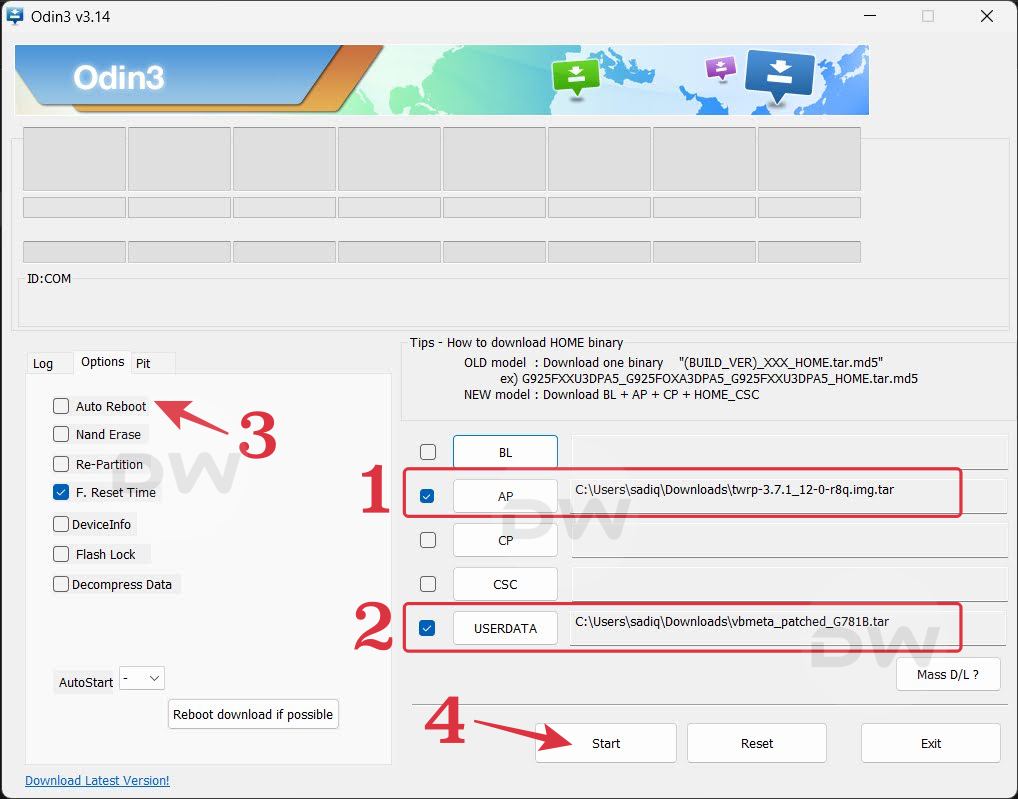
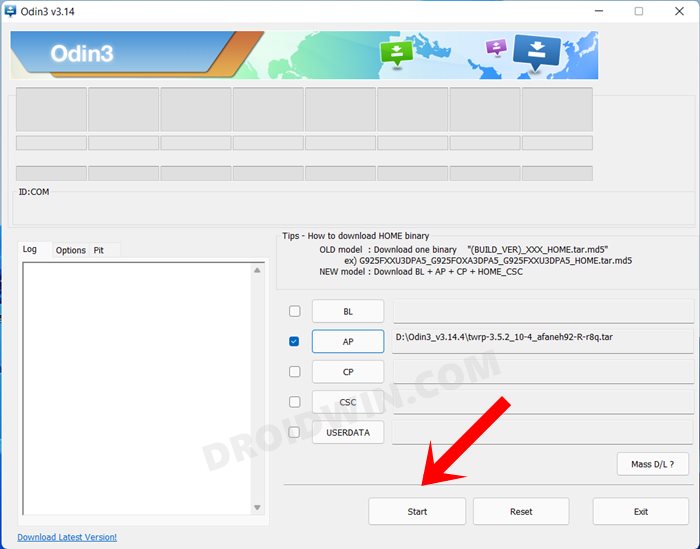
- Now download and extract Odin on your PC. Then launch it.
- Load the twrp.tar in the AP slot and vbmeta in the Userdata.

- Then hit Start. The flashing will start and will take a few seconds.
- Once done, immediately boot your device to the TWRP Recovery.
- For that, press and hold both the Power and Volume up buttons.
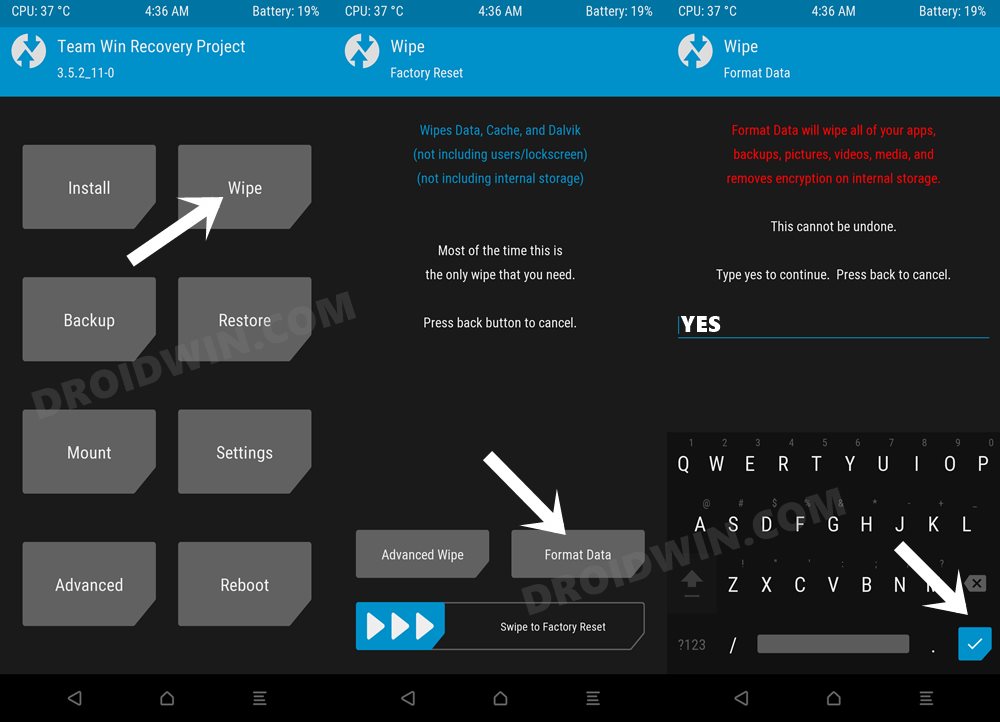
- Now from recovery, go to Wipe > Advanced Wipe > Wipe them:
DATA, METADATA, KEYDATA, and KEYREFUGE
- Now go to Wipe > Format Data > Type in YES > hit the checkmark.
- Finally, select Reboot > Recovery to boot to the newly flashed TWRP.
How to Install LineageOS 21 on Galaxy S20 FE [Exynos] [Unofficial]
If there’s one custom ROM that hardly needs an introduction of any sort, it has to be the offering from LineageOS. Offering a clean stock UI with just the required feature set, it is among the fastest and most lightweight AOSP ROMs out there.
- First off, download and extract Android SDK Platform Tools.
- Then open Command Prompt inside the platform tools folder.
- Now download the ROM and Recovery from the below links:
ROM | Recovery | GApps
- Then rename the rom to rom.zip and transfer it to platform-tools.
- Likewise, rename GApps to gapps.zip and transfer it to platform tools.
- Once done, unlock the bootloader on your device.
- Then boot it to Download Mode and flash the recovery via Odin.
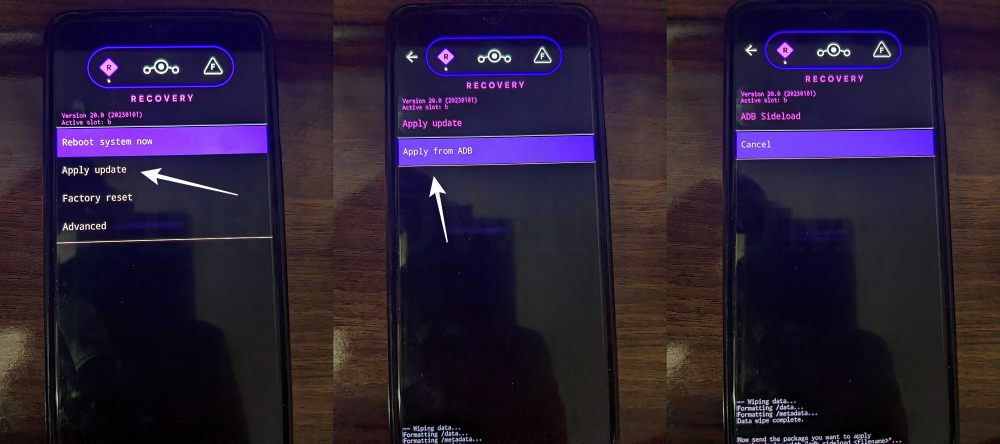
- Once done, straightaway boot your device to recovery.
- Then go to the ADB Sideload Mode on your recovery.
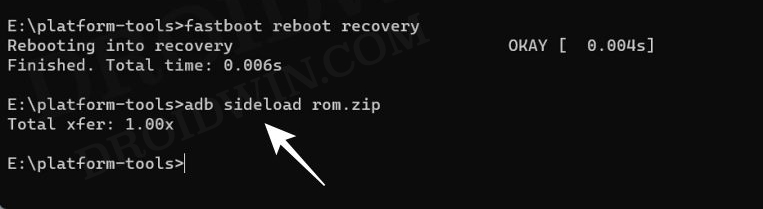
- Now, type in the below command to sideload the ROM:
adb sideload rom.zip
- [Optional] Then type in the below command to flash GApps:
adb sideload gapps.zip
- Now, do a Format Data from the recovery.
- Go to Wipe > Advanced Wipe > select Metadata and Cache Partitions and wipe them.
- Once done, you may now reboot your device to the System/OS.
How to Install LineageOS 21 on Galaxy S20 FE/5G [Official]
Well, the wait is finally over and we now have the official build for our device. Apart from all the perks that an official version brings with it, even the flashing process is now streamlined as it doesn’t require TWRP for flashing, instead that duty has now been assigned to the LineageOS Recovery.
Supported Devices
Galaxy S20 FE
Galaxy S20 FE [5G]
Not to be flashed on Exynos Variant
Installation Steps
- Make sure that you are on the Android 13 firmware.
- Download and extract Android SDK Platform Tools.
- Then unlock the bootloader on your Samsung device.
- Now download and extract the Odin Tool on your PC.
- Then download LineageOS Recovery for your device.
DOWNLOAD LINK [Same for S20 FE/5G]
- Transfer this recovery.img file to the platform tools.
- Now open the Command Prompt inside this folder.
- Then type the below command to TAR the recovery:
tar --format=ustar -cvf recovery.tar recovery.img
- Now boot your device to Download Mode for flashing.
- Launch Odin and make sure your device is listed there.
- Now go to its Options tab and uncheck the Auto Reboot.
- Then click on AP, navigate to recovery.tar, and select it.
- Now hit Start. The recovery will be flashed to your device.
- Then reboot your device directly to LineageOS Recovery.
- Now download the LineageOS ROM ZIP file from below.
DOWNLOAD LINK [Same for S20 FE/S20 FE 5G]
- Rename the file to rom.zip and transfer it to platform tools.
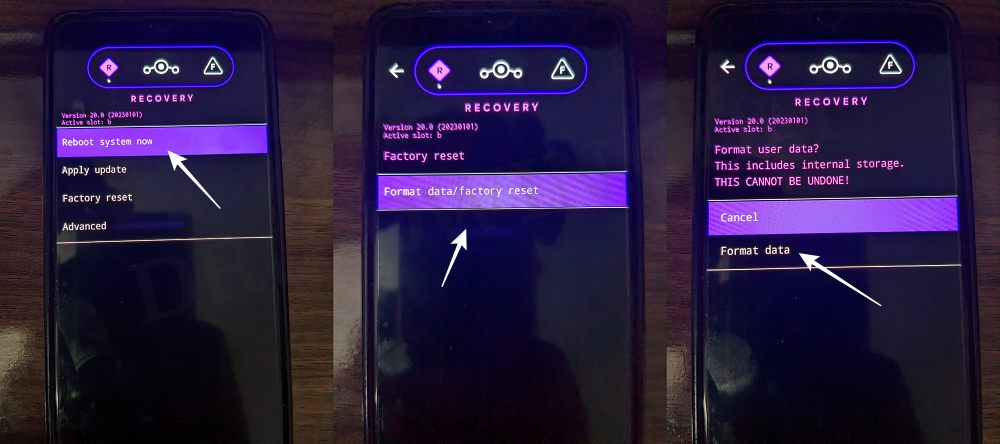
- From Lineage Recovery, go to Factory Reset > Format data.
- Once done, select Apply Update > Apply from ADB option.
- After that, type in the below command in the CMD window
adb sideload rom.zip
- The flashing will now start. Once done, tap on Reboot System.
- Your Galaxy S20 FE/5G will boot to LineageOS 21 Android 14!


How to Install LineageOS 21 on Galaxy S20 FE/5G [Unofficial]
NOTE: The official build of LineageOS 21 is now live for your device. So it’s highly recommended that you test that out instead of the one given below. The official one would directly be flashed via LineageOS Recovery instead of TWRP, which is another reason why you should opt for that build, apart from the obvious fact that, well, it’s official!
Supported Devices
- Samsung Galaxy S20 FE (SM-G780G)
- Samsung Galaxy S20 FE 5G (SM-G781B)
- Do not flash on Exynos models.
Bugs
- VoLTE/VoWIFI. (Samsung’s implementation doesn’t work on AOSP)
- Screen brightness is a bit glitchy while scanning a fingerprint
- 60 FPS recording only works for the front camera.
Flash Via TWRP’s Install Option
- First off, download the LineageOS ROM from below:
DOWNLOAD LINK
- After that, unlock the bootloader on your device.
- Then install the TWRP Recovery on your device.
- Once done, boot your device to TWRP Recovery.
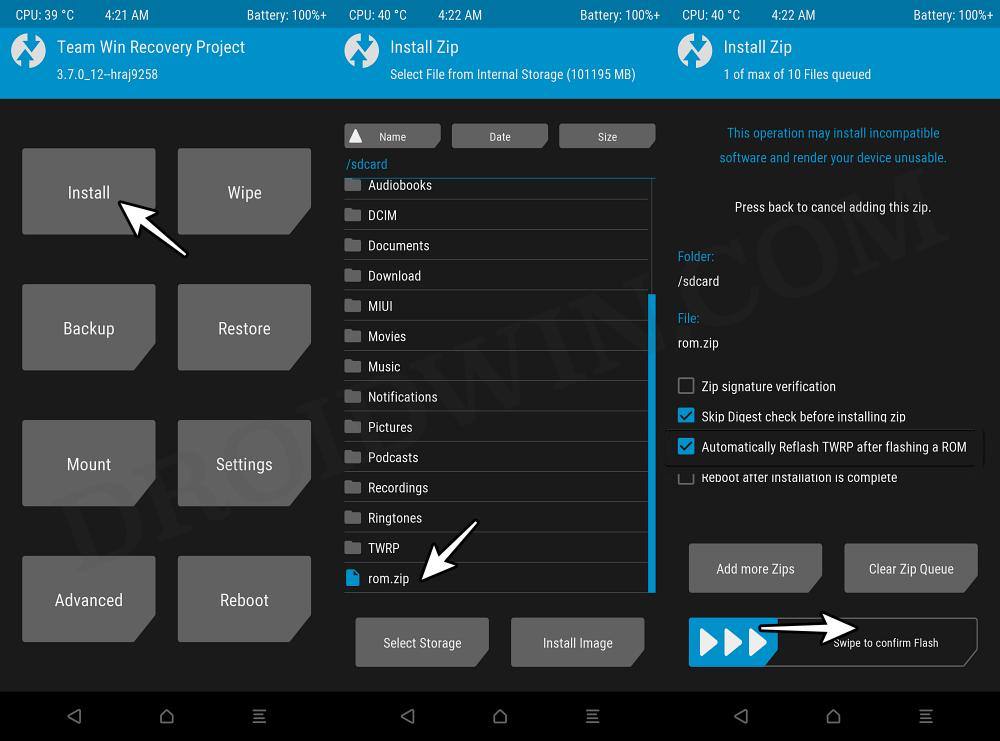
- Then go to Install, select the ROM.zip, and flash it.
- [Optional] Now download GApps and Magisk ZIP:
- Then flash them from the Install section as well.
- Now go to Wipe > Format Data > Type in YES.
- Go to Wipe > Advanced Wipe > select Metadata and Cache Partitions and wipe them.
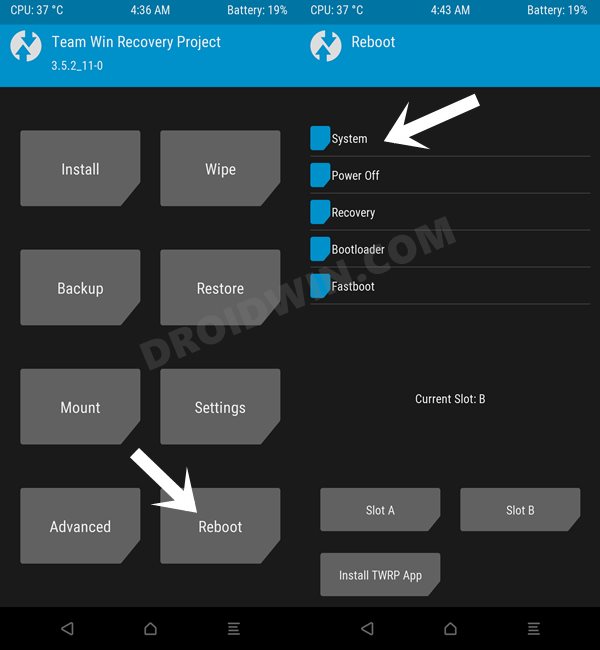
- Finally, go to Reboot > System to boot to the newly flashed OS!
Flash via ADB Sideload
- To begin with, download the LineageOS ROM:
DOWNLOAD LINK
- After that, unlock the bootloader on your device.
- Then install the TWRP Recovery on your device.
- Once done, boot your device to TWRP Recovery.
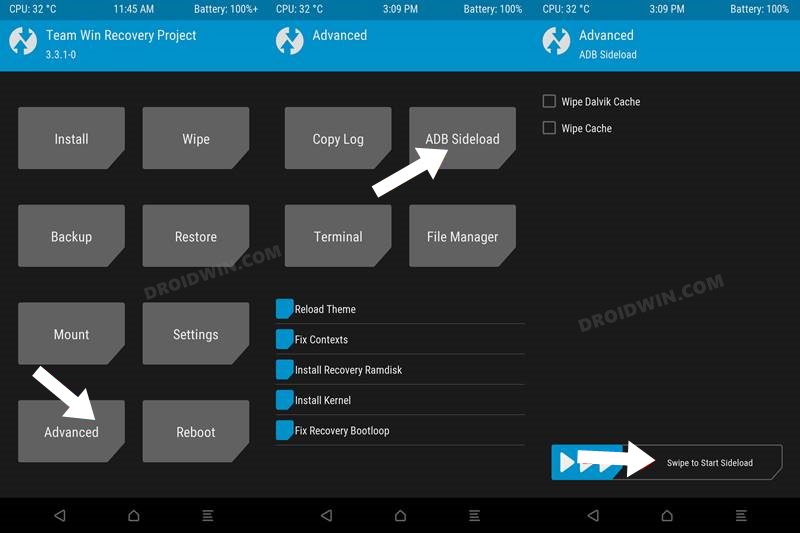
- From recovery, go to Advanced > ADB Sideload.
- Download and extract Android SDK Platform Tools.
- Then open Command Prompt inside platform tools.
- Now transfer the rom.zip inside the platform tools.
- Then type in the below command to start sideload:
adb sideload rom.zip
- [Optional] Now download GApps and Magisk ZIP:
- Then transfer them to the platform-tools folder too.
- Likewise, rename them to gapps.zip and magisk.zip.
- Sideload GApps and Magisk via the below command
adb sideload gapps.zip
adb sideload magisk.zip
- Now go to Wipe > Format Data > Type in YES > Enter.
- Then go to Wipe > Advanced > Metadata > Swipe to wipe.
- Now go to Reboot > System to boot to the newly flashed OS!
Flash Pixel Experience ROM on Galaxy S20 FE
If you are looking for a clean stock AOSP experience that offers some intriguing Pixel goodies but at the same time, manages to maintain an equilibrium between the overall features and device stability, then the Pixel Experience ROM might be your go-to choice.
Supported Devices
- Samsung Galaxy S20 FE SM-G780G
- Samsung Galaxy S20 FE 5G SM-G781B
- Do not flash on Exynos models.
Flash Via TWRP’s Install Option
- First off, download the Pixel Experience ROM:
DOWNLOAD LINK
- After that, unlock the bootloader on your device.
- Then install the TWRP Recovery on your device.
- Once done, boot your device to TWRP Recovery.
- Then go to Install, select the ROM.zip, and flash it.
- [Optional] Now download GApps and Magisk ZIP:
- Then flash them from the Install section as well.
- Now go to Wipe > Format Data > Type in YES.
- Now, go to Wipe > Advanced Wipe > select Metadata and Cache Partitions and wipe them.
- Finally, go to Reboot > System to boot to the newly flashed OS!
Flash Via ADB Sideload
- First off, download the Pixel Experience ROM:
DOWNLOAD LINK
- After that, unlock the bootloader on your device.
- Then install the TWRP Recovery on your device.
- Once done, boot your device to TWRP Recovery.
- From recovery, go to Advanced > ADB Sideload.
- Download and extract Android SDK Platform Tools.
- Then open Command Prompt inside platform tools.
- Now transfer the rom.zip inside the platform tools.
- Then type in the below command to start sideload:
adb sideload rom.zip
- [Optional] Now download GApps and Magisk ZIP:
- Then transfer them to the platform-tools folder too.
- Likewise, rename them to gapps.zip and magisk.zip
- Sideload GApps and Magisk via the below command
adb sideload gapps.zip
adb sideload magisk.zip
- Now go to Wipe > Format Data > Type in YES > Enter.
- Go to Wipe > Advanced > Metadata > Swipe to wipe.
- Finally, go to Reboot > System to boot to the new OS!
Flash Project Matrixx ROM on Galaxy S20 FE
Supported Devices
- Samsung Galaxy S20 FE (SM-G780G)
- Samsung Galaxy S20 FE 5G (SM-G781B)
- Do not flash on Exynos models.
Installation Steps
Since the TWRP is unable to decrypt data present in the Internal Storage, we will be transferring the file to the data partition and then flash the file from there you may transfer it to any partition of your choice, except sdcard]. Or you may also do a format data which will decrypt sdcard and you may then transfer the file to Internal Storage and flash it from there but that would just require an additional step. Anyway, the choice is all yours.
- First off, download the Project Matrixx ROM:
DOWNLOAD ROM | Kernel with KernelSU
- After that, unlock the bootloader on your device.
- Then install the TWRP Recovery on your device.
- Once done, boot your device to TWRP Recovery.
- Download and extract Android SDK Platform Tools.
- Then open Command Prompt inside platform tools.
- Now transfer the rom.zip inside the platform tools.
- Then type in the below command to transfer the file:
adb push rom.zip /data
- [Optional] Now download GApps and Magisk ZIP
- Transfer them to your device as well via ADB Push.
- Now from the TWRP, go to Install > data partition.
- Choose the rom.zip and do a right swipe to flash it.
- Then reboot to recovery and flash GApps [optional].
- Once done, go to Wipe > Format Data > YES > Enter.
- Go to Wipe > Advanced > Metadata > Swipe to wipe.
- Finally, go to Reboot > System to boot to the new OS!

Flash Project Sakura ROM on Galaxy S20 FE
Since the TWRP is unable to decrypt data present in the Internal Storage, we will be transferring the file to the data partition and then flash the file from there you may transfer it to any partition of your choice, except sdcard]. Or you may also do a format data which will decrypt sdcard and you may then transfer the file to Internal Storage and flash it from there but that would just require an additional step. Anyway, the choice is all yours.
Supported Devices
- Samsung Galaxy S20 FE (SM-G780G)
- Samsung Galaxy S20 FE 5G (SM-G781B)
- Do not flash on Exynos models.
Installation Steps
- First off, download the Project Matrixx ROM:
DOWNLOAD ROM | KernelSU
- After that, unlock the bootloader on your device.
- Then install the TWRP Recovery on your device.
- Once done, boot your device to TWRP Recovery.
- Download and extract Android SDK Platform Tools.
- Then open Command Prompt inside platform tools.
- Now transfer the rom.zip inside the platform tools.
- Then type in the below command to transfer the file:
adb push rom.zip /data
- [Optional] Now download GApps and Magisk ZIP
- Transfer them to your device as well via ADB Push.
- Now from the TWRP, go to Install > data partition.
- Choose the rom.zip and do a right swipe to flash it.
- Then reboot to recovery and flash GApps [optional].
- Once done, go to Wipe > Format Data > YES > Enter.
- Go to Wipe > Advanced > Metadata > Swipe to wipe.
- Finally, go to Reboot > System to boot to the new OS!
How to Flash crDroid on Galaxy S20 FE
This AOSP-based ROM offers the maximum amount of customizations and tweaks but at the same time, it makes sure that you don’t get a bloated usage experience, thanks to its clean stock AOSP adoption.
Supported Devices
- Samsung Galaxy S20 FE SM-G780G
- Samsung Galaxy S20 FE 5G SM-G781B
- Do not flash on Exynos models.
Bugs
- VoLTE/VoWIFI. (Samsung’s implementation doesn’t work on AOSP)
- The front camera captures images of around 70mb because of the CameraX framework. Use GCAM as a workaround. (AOSP bug, I’ll send a bug report.)
- Screen brightness is a bit glitchy while scanning a fingerprint.
Flash Via TWRP’s Install Option
- First off, download the crDroid ROM from below:
DOWNLOAD LINK
- After that, unlock the bootloader on your device.
- Then install the TWRP Recovery on your device.
- Once done, boot your device to TWRP Recovery.
- Then go to Install, select the ROM.zip, and flash it.
- [Optional] Now download GApps and Magisk ZIP:
- Then flash them from the Install section as well.
- Now go to Wipe > Format Data > Type in YES.
- Now, go to Wipe > Advanced Wipe > select Metadata and Cache Partitions and wipe them.
- Finally, go to Reboot > System to boot to the newly flashed OS!
Flash via ADB Sideload
- First off, download the crDroid ROM from below:
DOWNLOAD LINK
- After that, unlock the bootloader on your device.
- Then install the TWRP Recovery on your device.
- Once done, boot your device to TWRP Recovery.
- Then go to Install, select the ROM.zip, and flash it.
- [Optional] Now download GApps and Magisk ZIP:
- Then flash them from the Install section as well.
- Now go to Wipe > Format Data > Type in YES.
- Now, go to Wipe > Advanced Wipe > select Metadata and Cache Partitions and wipe them.
- Finally, go to Reboot > System to boot to the newly flashed OS!
Flash EvolutionX on Galaxy S20 FE
Flash Via TWRP’s Install Option
- First off, download the EvolutionX ROM:
DOWNLOAD LINK
- After that, unlock the bootloader on your device.
- Then install the TWRP Recovery on your device.
- Once done, boot your device to TWRP Recovery.
- Then go to Install, select the ROM.zip, and flash it.
- [Optional] Now download GApps and Magisk ZIP:
- Then flash them from the Install section as well.
- Now go to Wipe > Format Data > Type in YES.
- Now, go to Wipe > Advanced Wipe > select Metadata and Cache Partitions and wipe them.
- Finally, go to Reboot > System to boot to the newly flashed OS!
Flashing via ADB Sideload
- First off, download the EvolutionX ROM from below:
DOWNLOAD LINK
- After that, unlock the bootloader on your device.
- Then install the TWRP Recovery on your device.
- Once done, boot your device to TWRP Recovery.
- Then go to Install, select the ROM.zip, and flash it.
- [Optional] Now download GApps and Magisk ZIP:
- Then flash them from the Install section as well.
- Now go to Wipe > Format Data > Type in YES.
- Now, go to Wipe > Advanced Wipe > select Metadata and Cache Partitions and wipe them.
- Finally, go to Reboot > System to boot to the newly flashed OS!
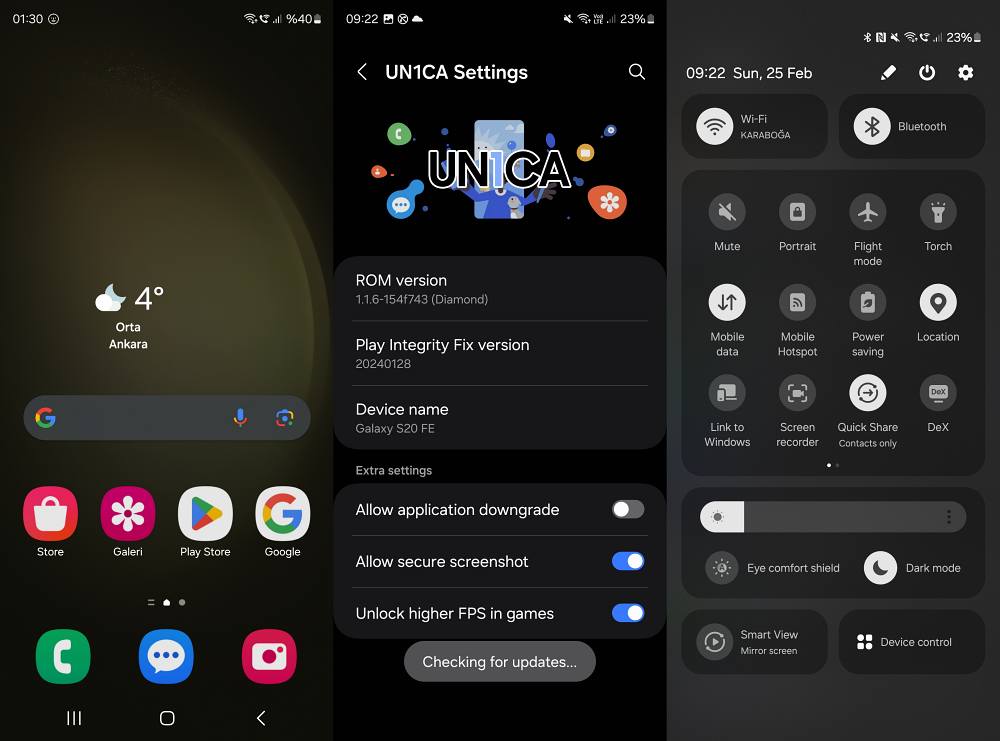
UN1CA One UI 6 [Android 14] for Galaxy S20 FE 4G/5G
If you are looking to stay within the One UI ecosystem but at the same time, want its more refined version with tons of intriguing goodies, then this ROM deserves your attention.
ROM Features
- Android 14 (One UI 6)
- Based on the latest stable Galaxy S23 firmware (S911BXXS3BWL3)
- January security patches (01/01/2024)
- Support for all the available bootloader revisions (up to rev 6)
- Minor system tweaks
- High-end animations
- AOD clock transition support
- Native/live blur support
- Picture remaster support
- Object, shadow, and reflection eraser support
- Image clipper support
- Samsung DeX support
- Camera privacy toggle support
- Slight debloat
- Enabled ADB at boot
- Play Integrity fix included (root required)
- BluetoothLibraryPatcher included
- KnoxPatch implemented in system frameworks
- China Device Care app included
- Patched GoodLock app by @corsicanu included
- Extra mods (Allow secure screenshot, FPS Unlock, Allow app downgrade)
- Extra CSC features (Call recording, Hiya, Network speed in status bar, Quick switch to Secure Folder)
Screenshots
ROM Bugs
- Camera app text recognition
- SmartView
- Rear portrait mode
- Wide lens (Temp solution: Enable location tags)
- WPA3 network connections
Supported Devices
All the Galaxy S20 FE device’s variants are supported. This includes:
- SM-G780G (r8qxx)
- SM-G781B (r8qxxx)
ROM Flashing Instructions
- Download the ROM for your device from below:
G780G | G781B
- After that, unlock the bootloader on your device
- Now install the TWRP Recovery on your device.
- Then reboot your device to the TWRP Recovery.
- Now go to Install, select the rom.zip, and flash it.
- Go to Wipe > Format Data > Type in Yes > Enter.
- Once done, go to Reboot > System to boot to OS.

Install Sputnik One UI 6 [Android 14] on Galaxy S20 FE
This ROM is based on the latest One UI 6 firmware, so you are about to welcome the latest Android 14 update, even though the device’s official update cycle has ended with Android 13! Another one of the many perks of having a custom ROM! NOTE: As of now, this ROM is only available with the Exynos variant of the device [i.e. S20 FE 4G].
- First off, download the Sputnik ROM from below:
DOWNLOAD LINK
- After that, unlock the bootloader on your device.
- Now install the TWRP Recovery on your device.
- After that, boot your device to TWRP Recovery.
- Now go to Wipe > Format Data > Yes > Hit Enter.
- Then go to Install, select the rom.zip, and flash it.
- Finally, go to Reboot and select System to boot to OS.

How to Flash Turbo UI on S20 FE
Features
 Performance Enhancements:
- Debloated OneUI Based Rom
- Build Prop Tweaks
- Multiuser Support
- Call Delay Fix
- Disable Error Checking
- Enhanced Jpg Quality (100%)
- Knox Disabled
- Faster Boot Time
- Disabled Built-In Error Reporting
- Tweaked Wifi Scanning Duration
- 3D Render Optimizations
- Launcher Memory Optimization
- Battery Saving Mode (No Performance Drop)
- Improved Signal Strength
 Audio and Video Enhancements:
- Enhanced Audio and Video Quality
- Crisp Call Voice Quality
- Game Settings
- Emperor Settings
- Dalvik Virtual Machine Tweaks
- Smoother Scrolling
- Asset Purge for RAM Optimization
 User Interface and Customization:
- Boot and Shutdown Animation Boost
- CSC Mods
- Volte, Screenshot, and Quick Settings Icons
- Mobile Data Toggle in Power Off Menu
- Activated Voice Recording (Excludes Wifi Calls)
- Knox Guard Disabled
- Real-Time Network Speed Indicator
- Camera Shutter Sound Button
- WIFI Calling Activation
- Additional Camera Features
- Fun Mode
- Dual Recording
- Auto Focus Enabled in All Video Modes
- Floating Feature Tweaks
- Google Feed Integration
- Super Fast Charging Option
- Samsung Marketing Disabler
- AOD Transition Effects
- Secure Folder Fix
- Theme Trial Patched
- Screenshot Enabled in Secure Apps
- Quick Reply in Lockscreen
- QS Tiles Number Customization
- Rom Info in About Settings
- Adaptive Brightness Enhancement
- Outdoor Mode Activation
- Unique Charging Animation and Indicator
- DPI Tweaks
- Smooth App Switching (UI Based)
- Custom Boot Animation
 Magisk and Modules
- Magisk (Credits: @topjohnwu)
- Knox Patch / Enhancer (Credits: @BlackMesa123)
- Shamiko (Credits: GitHub Link)
- Universal Safetynet Mod (Credits: @kdrag0n )
- Lsposed Framework (Credits: GitHub)
- Adaptive Refresh Rate (Credits: @sujayc27)
Supported Devices
SM-G781B / SM-G780G / SM-G780F
Installation Instructions
- First off, download the Turbo UI ROM from below.
DOWNLOAD LINK [November Build]
- Make sure you are on the same firmware as the ROM.
- Then unlock the bootloader on your device.
- Now install the TWRP Recovery on your device.
- Then boot your device to the TWRP Recovery.
- Now go to Wipe > Format Data > Type in Yes > Hit Enter.
- Go to Reboot > Recovery. Your device will reboot to TWRP.
- Now transfer the ROM.zip file to your device and flash it.
- Once done, select Reboot > System to boot to the new OS.
That’s it. These were the steps to install numerous Custom ROMs on your Galaxy S20 FE 4G/5G. If you have any queries concerning the above steps, do let us know in the comments. We will get back to you with a solution as soon as possible.