This guide will show you three different methods to view your USB Device History on your Windows 11 PC. The OS keeps a track of all the devices that you connect via USB and then logs them into the event viewer. It does so because the next time you connect that USB Device, it will already have all the required information and hence it will be able to identify the connected device in no time whatsoever.
Well, that’s the reason why the OS uses that data, but we could use them for other purposes as well, most predominantly to get hold of all the devices that are/were connected to your PC. But what’s the need for that? It is extremely important from the security point of view as nowadays the strongest attacks are hardware-based, and in that, the USB plays a major role.
So if you have shared your PC with someone else or have left your device unattended, then it is extremely crucial that you know the devices that were connected to your PC. And in this guide, we will help you with just that. Given here are three different methods through which you could view your USB Device History in Windows 11.
Table of Contents
How to View USB Device History in Windows 11
Given here are three different methods that will help you could get this job done. You may refer to the one that is in sync with your requirement.
Method 1: View USB Device History Via Third-Party Apps
It’s not every day that we list a ‘third-party app’ method at the top of the priority queue. But out of all three methods, this is the one that gives out the best results. These apps list out all the devices that are currently connected [highlighted in green] and the devices that were previously connected.
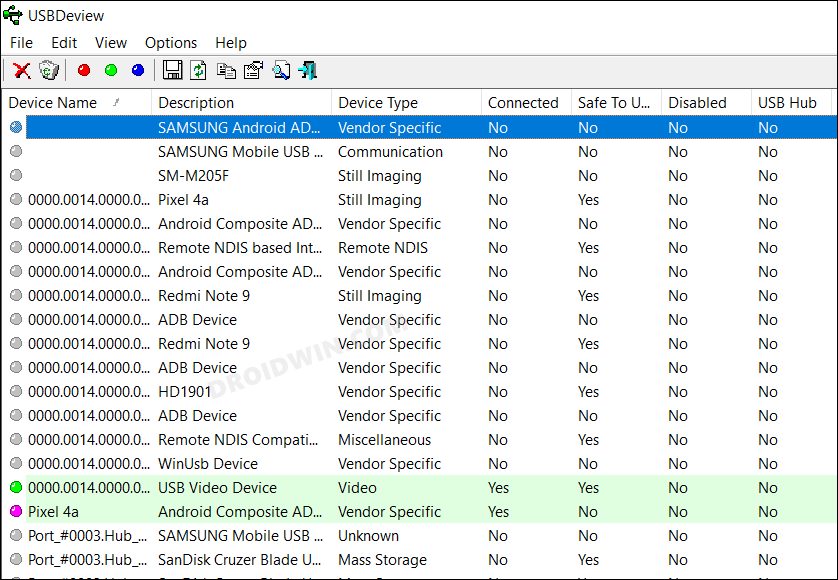
Along with that, it also gives out the plug-in and plug-out time and date, device name and description, and driver details, among others. So you could try out the USBDevice App [the one with the most information], FullEventLogView [it uses the Windows Event Log], or the USB History Viewer [it works on local networks as well].
Method 2: View USB Device History Via PowerShell
While this method is quite easy to execute, however, it only lists out the device name and its ID. Anyways, here’s how you could try it out-
- To begin with, launch Powershell as an administrator from the Start Menu.
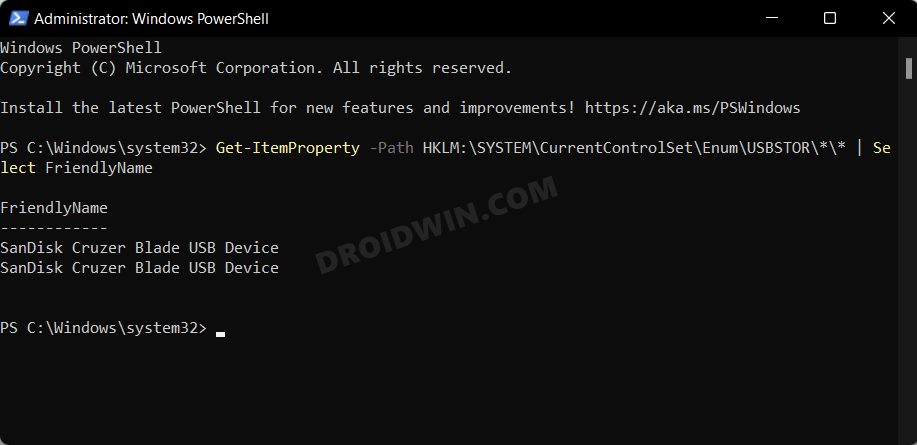
- Then execute the below command. This will list out the device names.
Get-ItemProperty -Path HKLM:\SYSTEM\CurrentControlSet\Enum\USBSTOR\*\* | Select FriendlyName

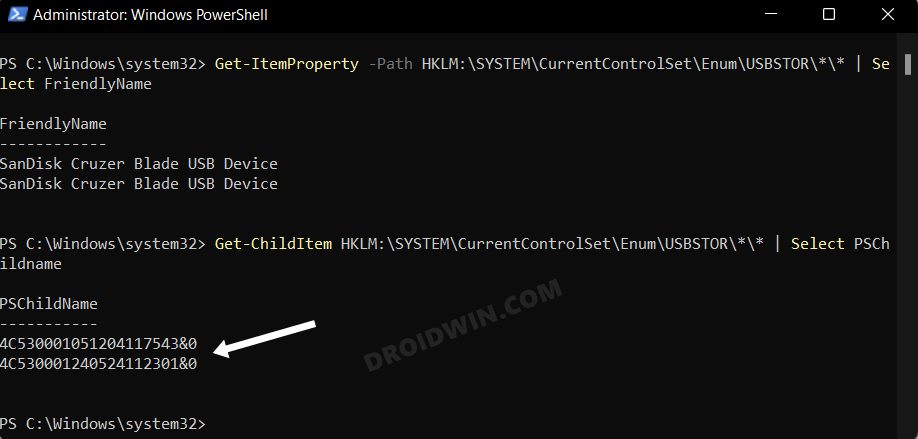
- On the other hand, if you wish to get hold of the device ID, then use the below command:
Get-ChildItem HKLM:\SYSTEM\CurrentControlSet\Enum\USBSTOR\*\* | Select PSChildname
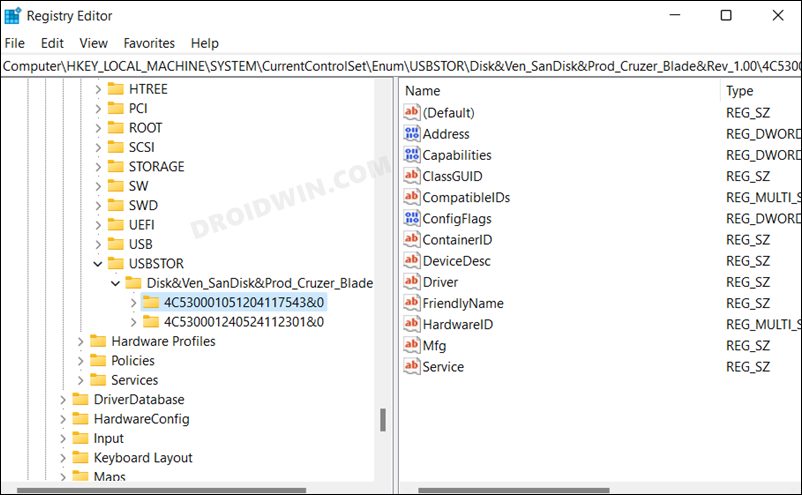
Method 3: View USB Device History Via Registry Editor
- To begin with, launch Registry Editor and head over to the below location
HKEY_LOCAL_MACHINE\SYSTEM\CurrentControlSet\Enum\USBSTOR
- You will now be able to see the list of all the apps under the USBSTOR folder.
- To get more information about any device, select it and refer to the data on the right-hand side.
That’s it. These were the three different methods through which you could view your USB Device History on your Windows 11 PC. If you have any queries concerning the aforementioned steps, do let us know in the comments. We will get back to you with a solution at the earliest.


Mutsu
For Windows 11:
Get-ItemProperty -Path HKLM:\SYSTEM\CurrentControlSet\Enum\USB\*\* | Select FriendlyName