In this guide, we will show you the steps to stop the automatic OS upgrades/updates on Android. Every OEM first releases the developer preview and beta builds of its underlying OS and only proceed ahead with the stable rollout once all the bugs have been ironed out. However, there have been a few instances wherein a few bugs manage to creep into the stable build as well.
Moreover, some users have also reported that there are usually a few app compatibility issues as well. In this regard, the ones who have already installed the updates have to take the difficult route of downgrading to the earlier stable build. However, the users who haven’t yet installed the updates could carry on the older build until everything falls in place. But, it is proving to be easier said than done.
Few of them have voiced their concern that the update automatically tends to get installed whereas others have reported that the constant update notification tends to disrupt their normal workflow. If you are also getting bugged with these issues, then this guide will make you aware of a couple of nifty workarounds to stop the automatic OS upgrades/updates on Android. Follow along.
Table of Contents
How to Stop Automatic Android OS Upgrades
in order to carry out this task, we will be blocking the DNS and the IP Address of the update server. The second approach will be to create a proxy connection and then disable the network access to the system updater app. All this has been explained in depth below, so without further ado, let’s put it to the test right away.
STEP 1: Disable Automatic System Updates
First and foremost, let’s disable the automatic system update functionality on your device. While we would anyways be blocking the network access for the updater app, but still, let’s be double sure and turn off the auto-updates as well. So refer to the below instructions to try it out-
- Head over to Settings > About Phone > Tap on Build Number 7 times.
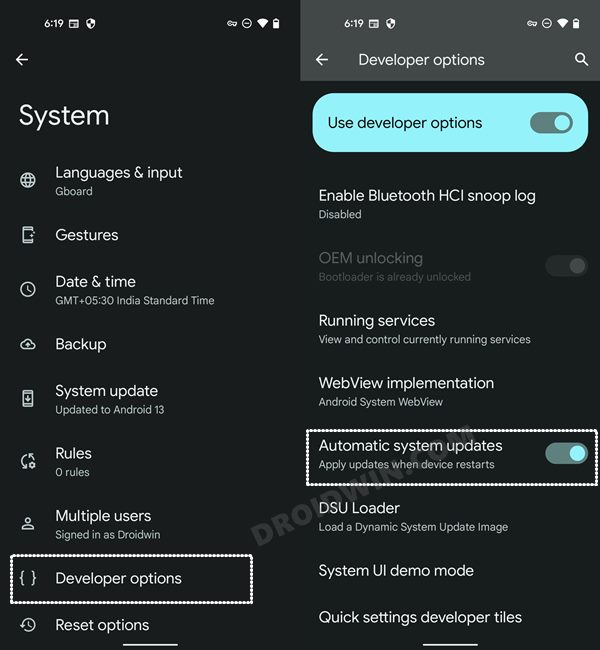
- This will enable Developer Options. Now go back to Settings > System.

- After that, go to Developer Options
- Finally, disable the toggle next to Automatic System Updates.
STEP 2: Disable Network Access for System Updater App
- Download and install the NetGuard- No Root Firewall app on your device [Play Store | GitHub].
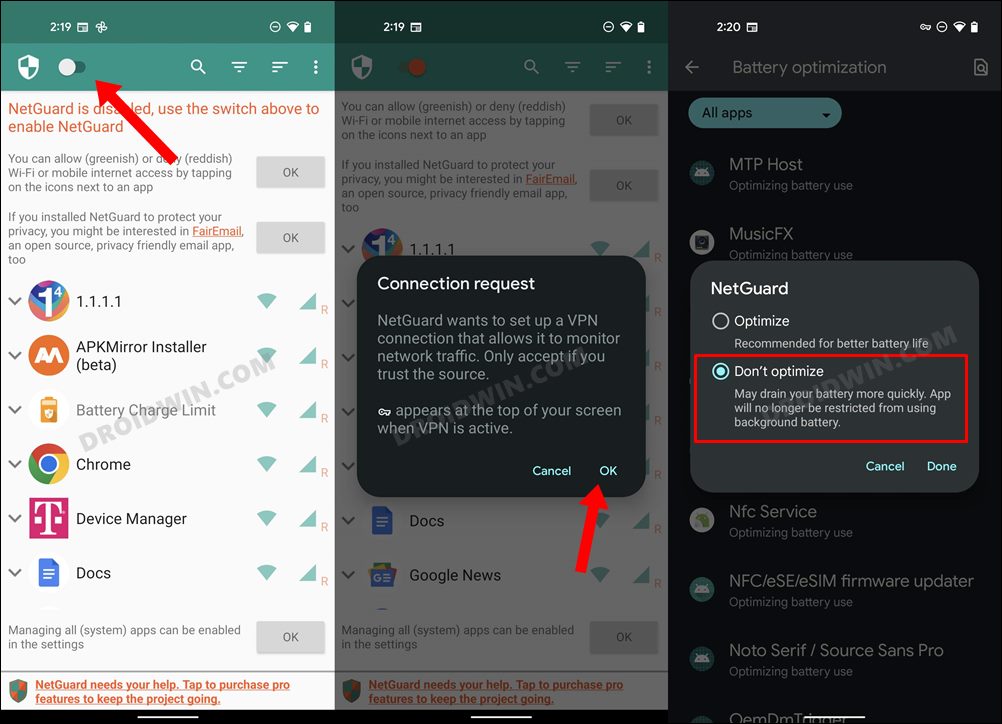
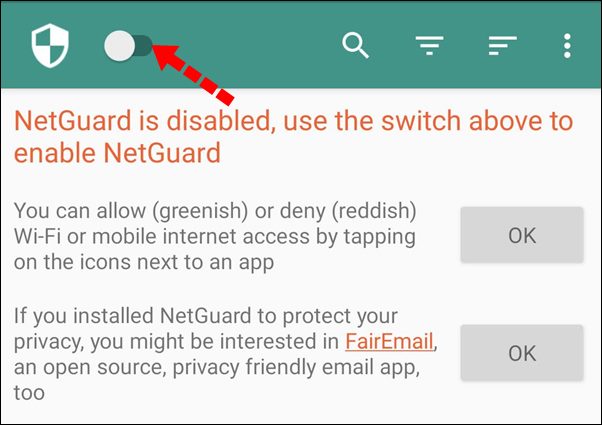
- Then launch the app and enable the toggle at the top left. You will get a VPN connection request, tap OK.
- After that, you will be taken to the Battery Optimization page, select Don’t Optimize for NetGuard.
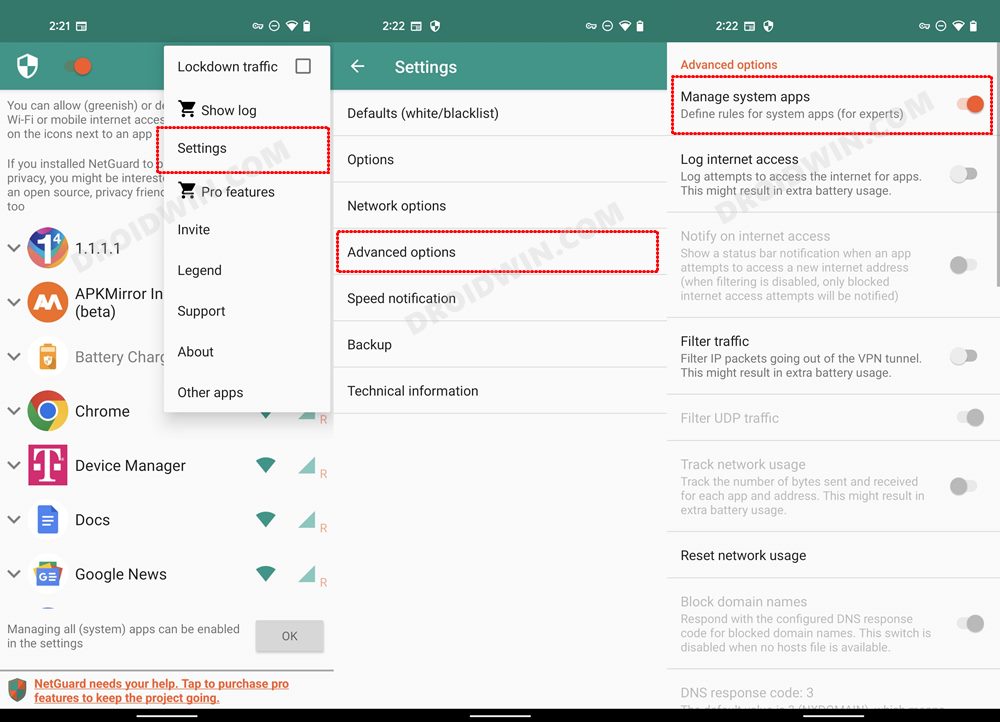
- Now go back to the app, tap on the overflow icon situated at the top right, and select Settings.
- Go to Advanced Options and enable the toggle next to Manage System Apps.
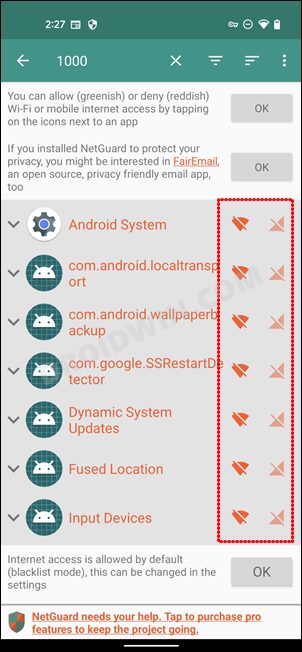
- Then come back to the app’s home screen and select the updater app from the list.
- After that, tap on the WiFi and Carrier Data symbol next to that app to disable its network access.
Reference Image
STEP 3: Block Update Server [via DNS Blocking]
You will now have to get hold of the update servers which is used by the updater app, or in other words, from where the updates are being sent to your device. For example, in the case of OnePlus, the update servers are gateway.oneplus.net and open.oneplus.net [at least before its codebase got unified with Oppo’s ColorOS]. It’s not an issue if there is more than one server as you could easily add multiple servers to the block list.
METHOD 1
- Head over to Netguard’s hosts page and copy all the contents via Ctrl-A.
- Then create a new Notepad file and paste the entire contents there.
- After that, type in 0.0.0.0 followed by the updater server DNS address.
- You could also use the loopback IP address [127.0.0.1] to block the servers.
- Now save the file as hosts.txt and send it to your device.
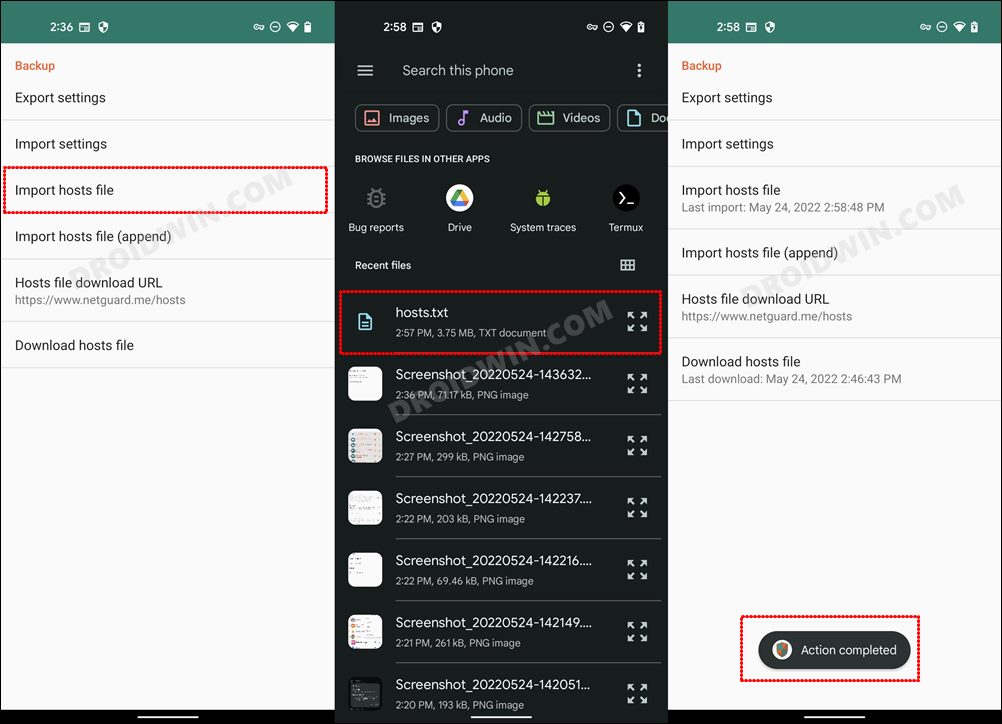
- After that, launch the Netguard app and go to Settings > Backup.
- Then tap on Import Hosts File and select the hosts.txt file that you had transferred to your device.
- This should block the update servers and hence your Android device wouldn’t check for updates any longer.

METHOD 2
If that doesn’t work out, then here’s an alternate approach that you could take-
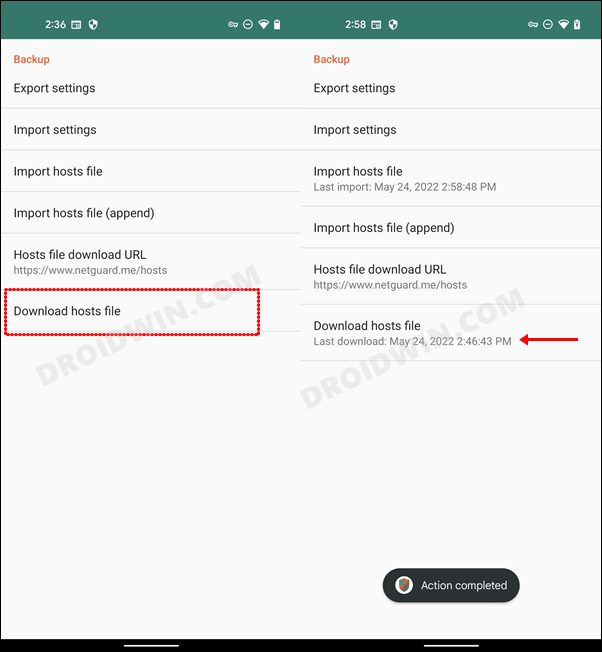
- Launch Netguard, go to Settings > Backup and tap on the Download Hosts File option.
- It will download and apply its host file from its official site.
- Once done, now create your own host text file and add the desired DNS address.
- You should use the same syntax that NetGuard has used in its host file.
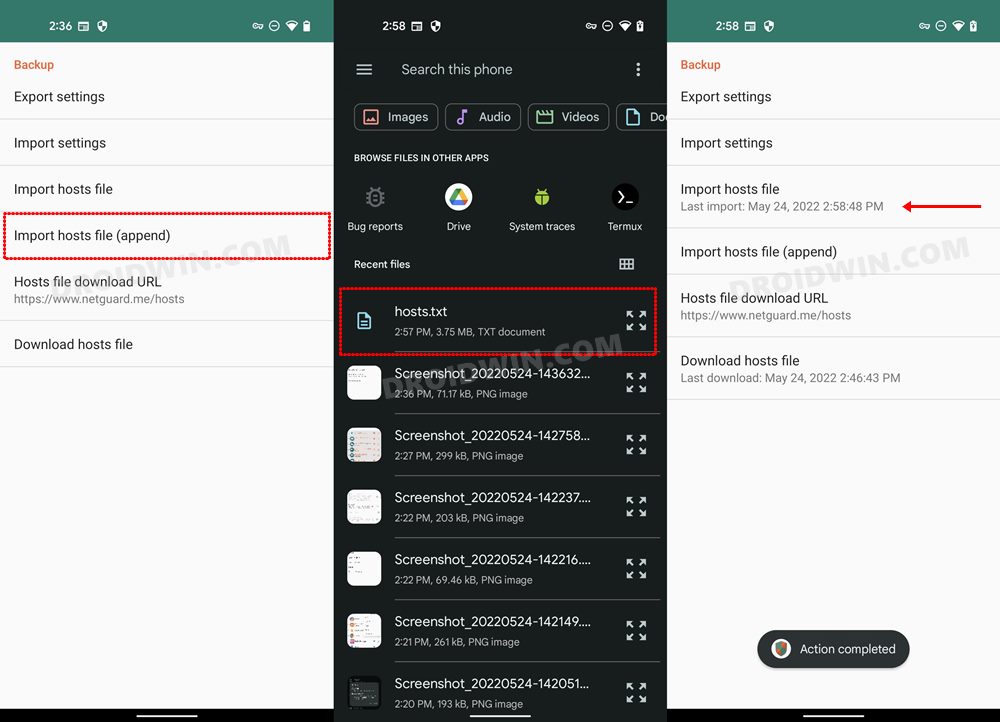
- Once created, transfer the host file to your device. Then tap on Import Hosts File [Append].
- It will now use its own host file in combination with the one that you have created.
- This should stop the automatic OS upgrades/updates on your Android device.
How to Resume Automatic Android OS Upgrades
If at any point in time, you wish to revert the change and resume the update rollout, then launch NetGuard and disable the toggle at the top left. Or for a permanent fix, just delete the app from your device.
Alternatives to NetGuard
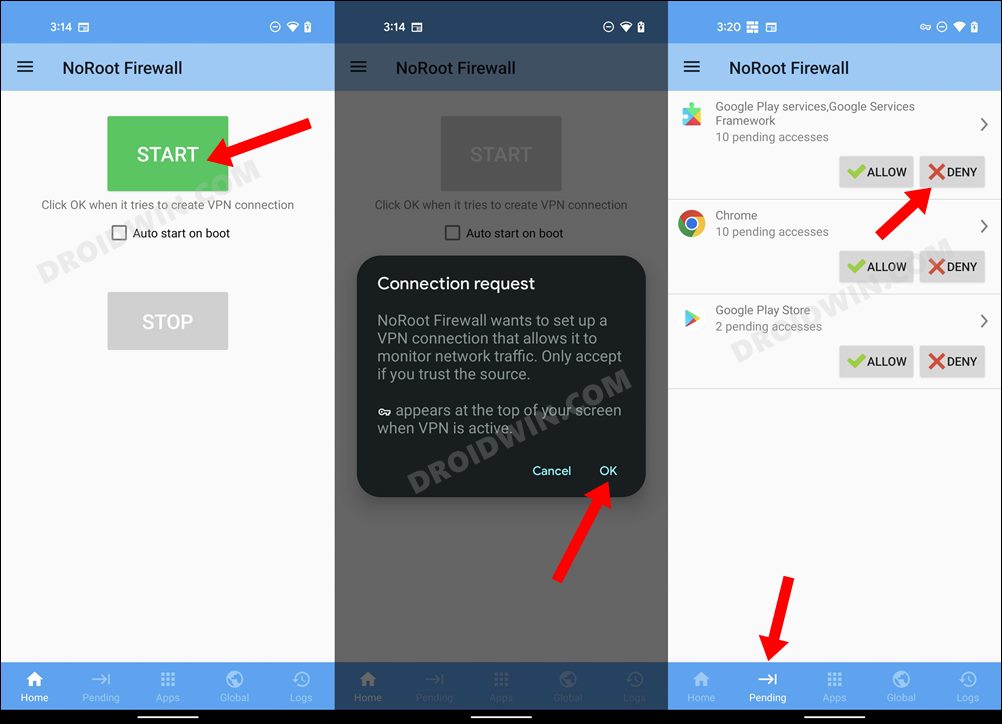
If NetGuard isn’t working along the expected lines or it didn’t give out the desired results, then you could try out apps like NoRoot Firewall or PCAP DROID. On the other hand, if you were blocking automatic OS upgrades on your device just because of compatibility issues with a few apps, then you don’t even need to take the technical route of blocking update servers. Rather, create a standalone environment for such apps using Island and then install the update. The apps part of that ecosystem wouldn’t be affected by this new update.
So on that note, we round off the guide on how you could stop the automatic OS upgrades/updates on your Android device. If you have any queries concerning the aforementioned steps, do let us know in the comments. We will get back to you with a solution at the earliest.


