In this guide, we will show you the steps to SIM Unlock your Pixel device in literally a couple of minutes. Carriers usually provide quite a few goodies alongside the device so that the users get inclined towards its offers. However, the benefits of these goodies begin to slowly fade away over the course of time. Not only that, these carriers do end up putting some restrictions that users get to know only after they have got hold of their device.
We have also seen Pixel devices wherein the carrier simply disabled the ability to even unlock the device’s bootloader by greying out the OEM Unlock toggle. Well, this is simply just not acceptable. But what else can be done? Well, there does exist a nifty workaround using which you could easily SIM Unlock your Pixel device without the need to use a PC. So without further ado, let’s show you how this could be carried out.
Table of Contents
How to SIM Unlock Pixel Device without PC!
Before starting with the process, there are a few caveats with this method that you need to keep in mind. First off, you’ll have to use the WiFi as metered or else the tweak will not work. Next up, the SIM will get once again locked after a reset. So you’ll have to carry out this process once again in such cases. Finally, the process itself requires a reset, so make sure to take a data backup beforehand.
Moroever, while we have successfully tested these steps on AT&T and Xfinity, but they should work across other carriers as well. Droidwin and its members wouldn’t be held responsible in case of a thermonuclear war, your alarm doesn’t wake you up, or if anything happens to your device and data by performing the below steps.
METHOD 1: Using Firewall VPN
- To begin with, remove the SIM card from your device.
- Factory Reset your device and go to the Welcome screen.
- Then set up the device offline and skip all the other stuff.
- Go to Settings > Apps > All Apps > Google Play Services.
- Now tap on Disable followed by Disable App in the prompt.
- Once that is done, connect your device to a WiFi network.
- Go to Chrome and download the Netpatch Firewall APK.
- Now install the app, launch it, and then enable the toggle.
- You’ll now get a connection request prompt, tap OK > OK.
- Select Unrestricted/Don’t Optimize for the Netpatch Firewall app.
- Now go back to app, select App Settings, and choose System Apps.
- Search Device Setup and turn off both the WiFi and Carrier Data.
- Make sure to disable them for both the Screen On and Screen Off.
- Likewise, disable WiFi and Carrier Data for the Carrier Setup apps.
- Now go to Settings > Network and Internet > VPN.
- Tap on the settings icon next to Netpatch Firewall.
- After that, enable the toggle next to Always-on VPN.
- Now enable Block connection without VPN > Turn On.
- Then enable Google Play Services and reinsert the SIM.
- That’s it. Your Pixel device is now SIM Unlocked.
METHOD 2: Via Third-Party App
- First off, download and install NetGuard from Play Store.
- Now launch it, tap on the overflow icon, and select Settings.
- Then go to Advanced Options and enable Manage System apps.
- Now disable both WiFi and Internet for Device Setup.
- Likewise, do the same for the Carrier Setup app as well.
- Once done, enable the toggle at the top left to start NetGuard.
- Finally, restart your device and then check out the results.
METHOD 3: Via ADB Commands [NEW]
- First off, take a backup of all the data on your device as the process requires a factory reset.
- Once that is done, go to Settings > System > Reset > Erase all data (factory reset).
- Then tap on the Erase All Data button situated at the bottom right.
- Once that is done, you shall be taken to the setup screen.
- You will now have to bypass the activation without using your SIM or WiFi.
- Once that is done and your device gets booted to OS, go to Settings > Apps.
- Then select Show All Apps/Show System. Next up select the Device Setup.
- After that, go to WiFi Data Usage and turn off Background Data and Unrestricted Data Usage.
- Now enable USB Debugging. So go to Settings > System > Tap on Build Number 7 times.
- Go back to Settings > System > Developer Options > Enable USB Debugging.
- Now download Android SDK Platform Tools and extract it to any convenient location on your PC.
- Then connect your device to the PC via the USB Cable.
- After that, head over to the platform-tools folder, type in CMD in its address bar, and hit Enter. This will launch the Command Prompt window.
- Now type in the below command in the CMD window and it shall bring in your device ID
adb shell
- Finally, execute the below command to SIM Unlock your Pixel 7/Pro device:
pm uninstall -k --user 0 com.google.android.apps.work.oobconfig
- That’s it, your device is now fully unlocked. Just keep in mind not to factory reset your device, or you will then have to restart this process again.
METHOD 4: Via ADB Commands
- First off, take a backup of all the data on your device as the process requires a factory reset.
- Once that is done, go to Settings > System > Reset > Erase all data (factory reset).
- Then tap on the Erase All Data button situated at the bottom right.
- Once that is done, you shall be taken to the setup screen.
- You will now have to bypass the activation without using your SIM or WiFi.
- Once that is done and your device gets booted to OS, enable USB Debugging.
- For that, go to Settings > System > Tap on Build Number 7 times.
- Go back to Settings > System > Developer Options > Enable USB Debugging.
- Now download Android SDK Platform Tools and extract it to any convenient location on your PC.
- Then connect your device to the PC via the USB Cable.
- After that, head over to the platform-tools folder, type in CMD in its address bar, and hit Enter. This will launch the Command Prompt window.
- Now type in the below command in the CMD window and it shall bring in your device ID
adb shell
- Finally, execute the below command to SIM Unlock your Pixel 7/Pro device:
pm uninstall -k --user 0 com.google.android.apps.work.oobconfig
- That’s it, your device is now fully unlocked. Just keep in mind not to factory reset your device, or you will then have to restart this process again.
METHOD 5: Via Device Reset Tweak
- To begin with, remove the SIM Card from your device.
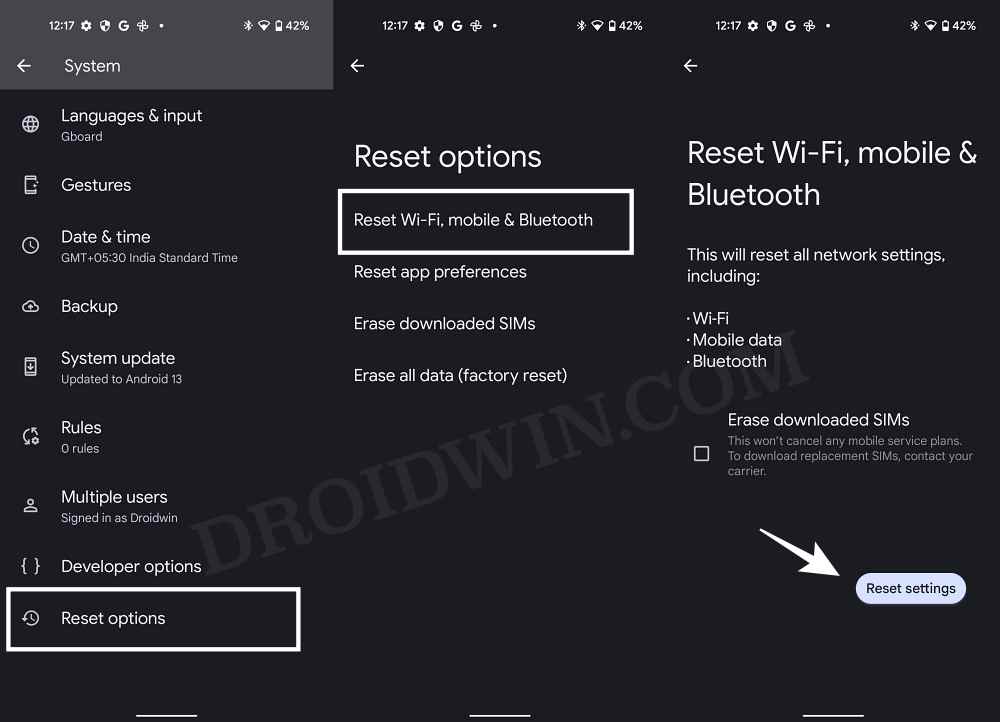
- Then go to Settings > System > Reset Options > Erase All Data.
- Once done, head over to Settings > Apps > See All Apps.
- Tap on the overflow icon at the top-right and select Show System.
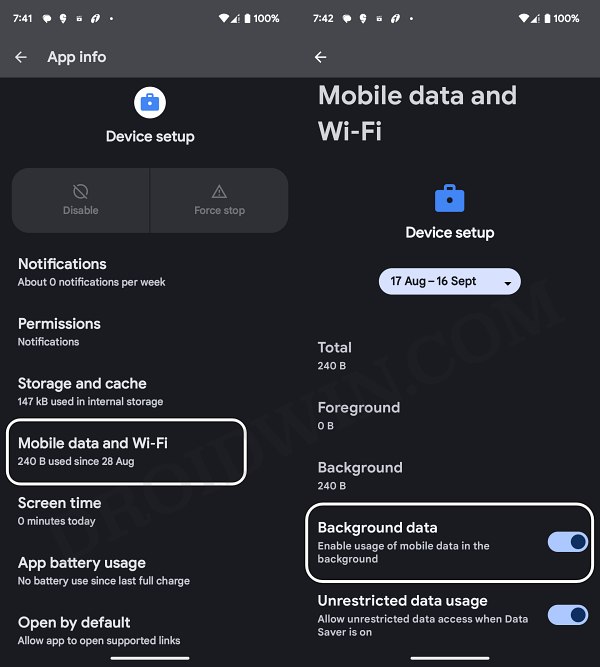
- Scroll to Device Setup > Mobile Data & WiFi > disable Background Data.
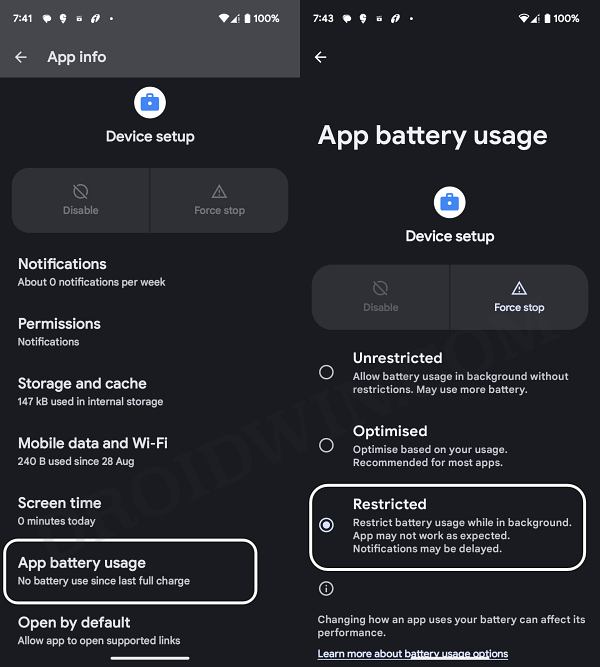
- Then go to Device Setup’s App Battery Usage and select Restricted.
- Finally, re-insert the SIM and check out the results.
That’s it. These were the steps to SIM Unlock your Pixel device. If you have any queries concerning the aforementioned steps, do let us know in the comments. We will get back to you with a solution at the earliest.