In this guide, we will show you the steps to install the TWRP Recovery onto Moto G40/G60. Motorola has always been that middle child that doesn’t usually get much attention. However, it is doing its bit to change this notion, and slowly but surely it is doing its bit to regain its lost glory. In this regard, the G40/G60 are the stepping stones to its path to success. Both these devices come with the Snapdragon 732G chipset under the hood, a massive 6.8-inch display, and a huge 6000 mAh battery with support for 20W fast charging.
If we turn our attention toward custom development, then they are quite an active player in this domain. Be it for flashing custom ROM or gaining administrative privileges over your device by rooting it via Magisk, there’s a lot to look forward to. And now, both these devices have been officially blessed with a custom recovery as well. As a result, flashings mods, ZIPs, and IMGs files are just a few taps away. So without any further ado, let’s make you aware of the steps to install the TWRP Recovery onto Moto G40/G60. Follow along.
Table of Contents
How to Install TWRP Recovery on Motorola Moto G40/G60
The below instructions are listed under separate sections for ease of understanding. Make sure to follow the same sequence as mentioned below. Droidwin and its members wouldn’t be held responsible in case of a thermonuclear war, your alarm doesn’t wake you up, or if anything happens to your device and data by performing the below steps.
STEP 1: Install Android SDK

To begin with, install the Android SDK Platform Tools on your PC. This is the official ADB and Fastboot binary provided by Google and is the only recommended one. So download it and then extract it to any convenient location on your PC. Doing so will give you the platform-tools folder, which will be used throughout this guide.
STEP 2: Enable USB Debugging and OEM Unlocking
Next up, you will have to enable USB Debugging and OEM Unlocking on your device. The former will make your device recognizable by the PC in ADB mode. This will then allow you to boot your device to Fastboot Mode. On the other hand, OEM Unlocking is required to carry out the bootloader unlocking process.
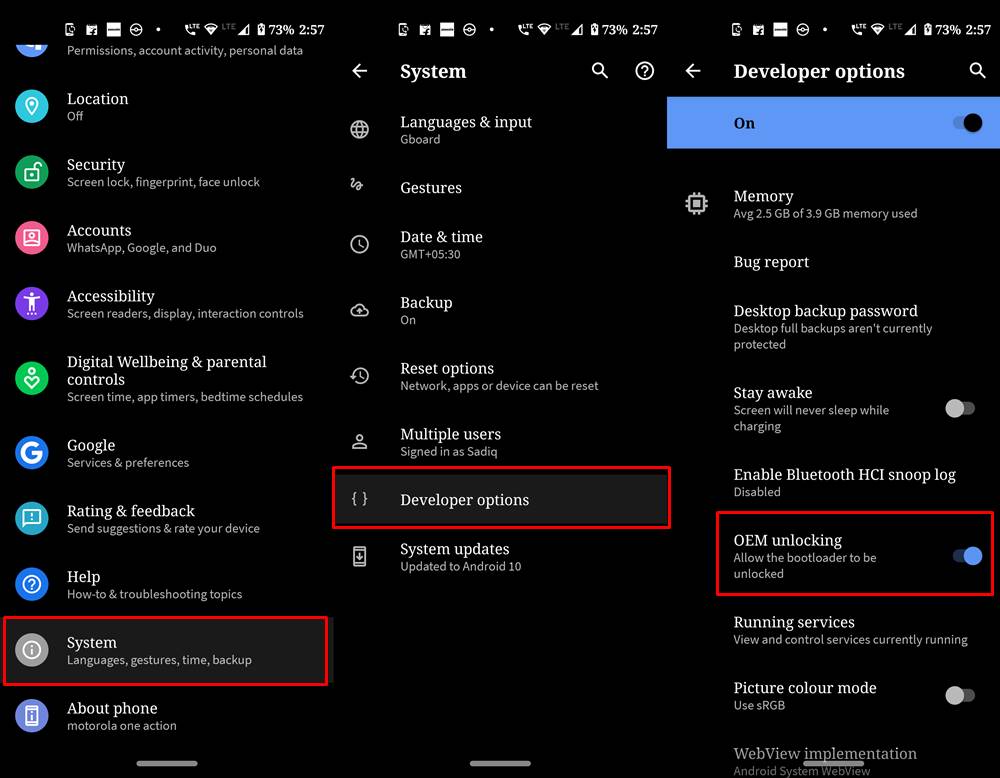
So head over to Settings > About Phone > Software Information > Tap on Build Number Number 7 times > Go back to Settings > System > Developer Options > Enable USB Debugging and OEM Unlocking.
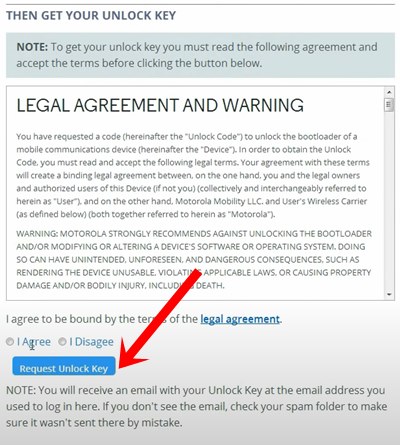
STEP 3: Unlock Bootloader on Motorola Edge 20
You will also have to unlock the bootloader on your device as well. Do keep in mind that doing so will wipe off all the data and might make the device’s warranty null and void as well. So if that’s well and good, then refer to our guide on How to Unlock the Bootloader on any Motorola Device.
STEP 4: Download TWRP for Moto G40/G60
- Get hold of the TWRP Recovery for your Moto G40/G60 from the below links
twrp-3.6.2_11-0-hanoip.img
- Once downloaded, rename the file to twrp, so that the complete name becomes twrp.img.
- Then transfer the twrp.img file to the platform-tools folder on your PC.
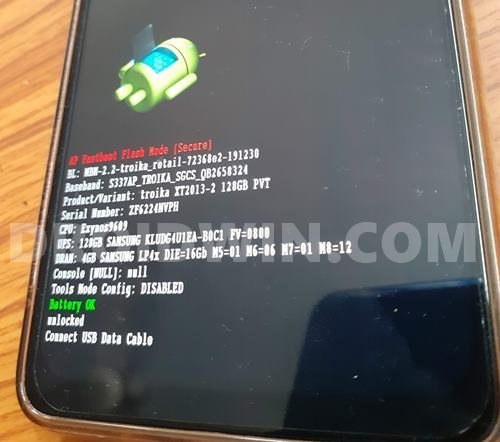
STEP 5: Boot to Fastboot Mode
- Connect your device to the PC via USB cable. Make sure USB Debugging is enabled.
- Then head over to the platform-tools folder, type in CMD in the address bar, and hit Enter. This will launch the Command Prompt.

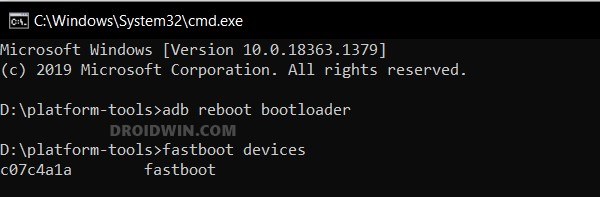
- After that, type in the following command in the CMD window to boot your device to Fastboot Mode
adb reboot bootloader
- To verify the Fastboot connection, type in the below command and you should get back the device ID.
fastboot devices

STEP 6: Install TWRP Recovery on Moto G640/G60
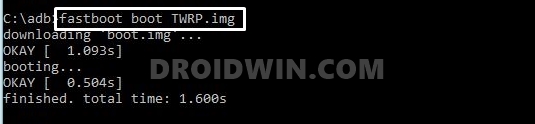
- To begin with, launch CMD inside the platform-tools folder.
- Then execute the below command to temporary boot your device to TWRP:
fastboot boot twrp.img
- Now within TWRP, go to Advanced and tap on Flash Current TWRP.
- TWRP will be permanently flashed onto your device. You may now flash the desired files.
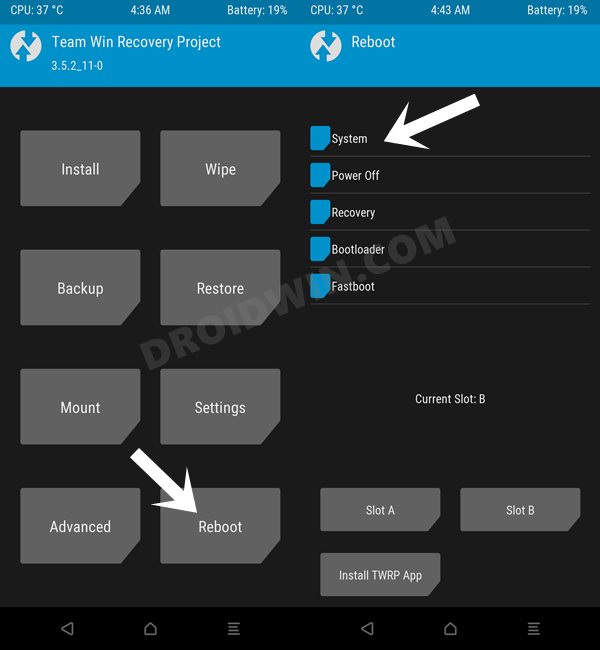
- Once done, go to Reboot and select System. Your device will boot to the OS.
 Now within TWRP, go to Advanced and tap on Flash Current TWRP.
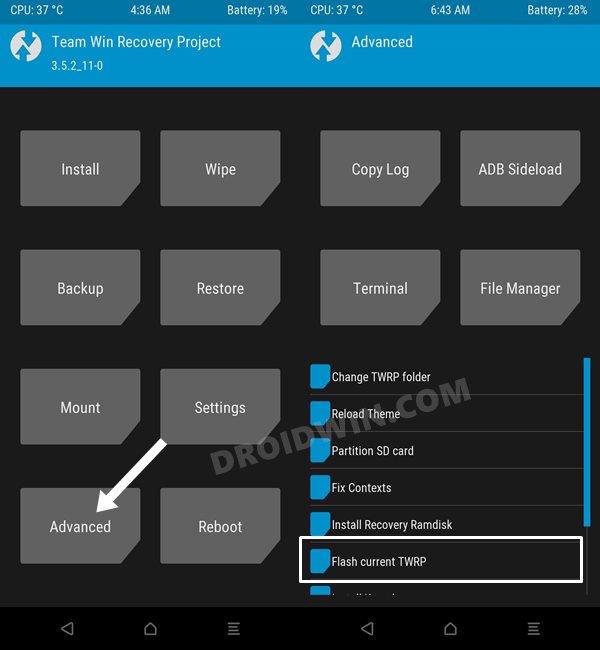
That’s it. These were the steps to install the TWRP Recovery on Moto G40/G60. If you have any queries concerning the aforementioned steps, do let us know in the comments. We will get back to you with a solution at the earliest.


Sooms
Hello everyone I am looking for help to create custom twrp for my Tecno camon 17 pro phone. (256g rom 8g ram mediatek Helios g95 mt6587 android 11 root a/b partion). I don’t have recovery.img but boot.img I saw it was compiled into boot.img and would like to know how to extract it or if there is a method to intall twrt recovery. thanks for the help