In this guide, we will show you the steps to install the latest LineageOS 20 GSI ROM based on Android 13 on your Android device. The list of Custom ROMs is growing every other day, with a plethora of AOSP-based ROMs making their presence felt every other day. However, even then, there are a few devices out there that haven’t been blessed with any custom ROMs.
As strange as it may sound, that is the unfortunate truth, mostly due to the fact that these devices are either not among the popular crowds or their underlying code base are way too much complicated for the developers to exert their valuable time and efforts. But even then, there is still some light at the end of the tunnel.
Even if your device doesn’t have any custom ROM, there are high chances of it being at least project Treble compatible. And this translates to the fact that you could welcome abode tons of Generic System Images. So making full advantage of the same, this guide will show you the steps to install the latest LineageOS 20 GSI ROM based on Android 13 on your Android device. Follow along.
Table of Contents
Install LineageOS 20 Android 13 GSI ROM on any Android via DSU Sideloader
Before starting, please take a backup of all the data on your device. Droidwin and its members wouldn’t be held responsible in case of a thermonuclear war, your alarm doesn’t wake you up, or if anything happens to your device and data by performing the below steps.
- To begin with, unlock the bootloader on your Android device.
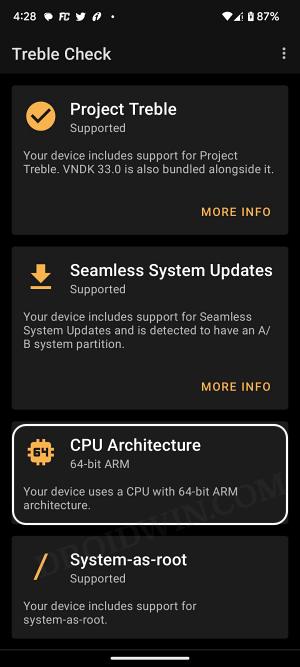
- Then install the Treble Check app and check out the results under the CPU Architecture section.

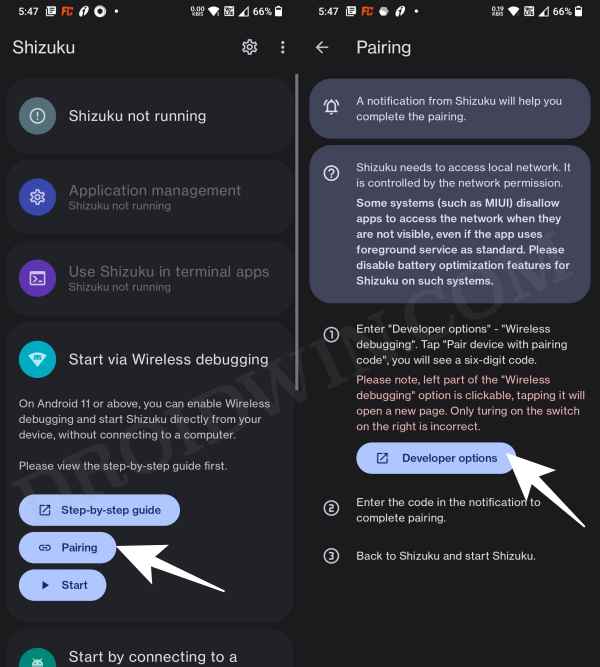
- Now download and install the Shizuku app from Play Store.
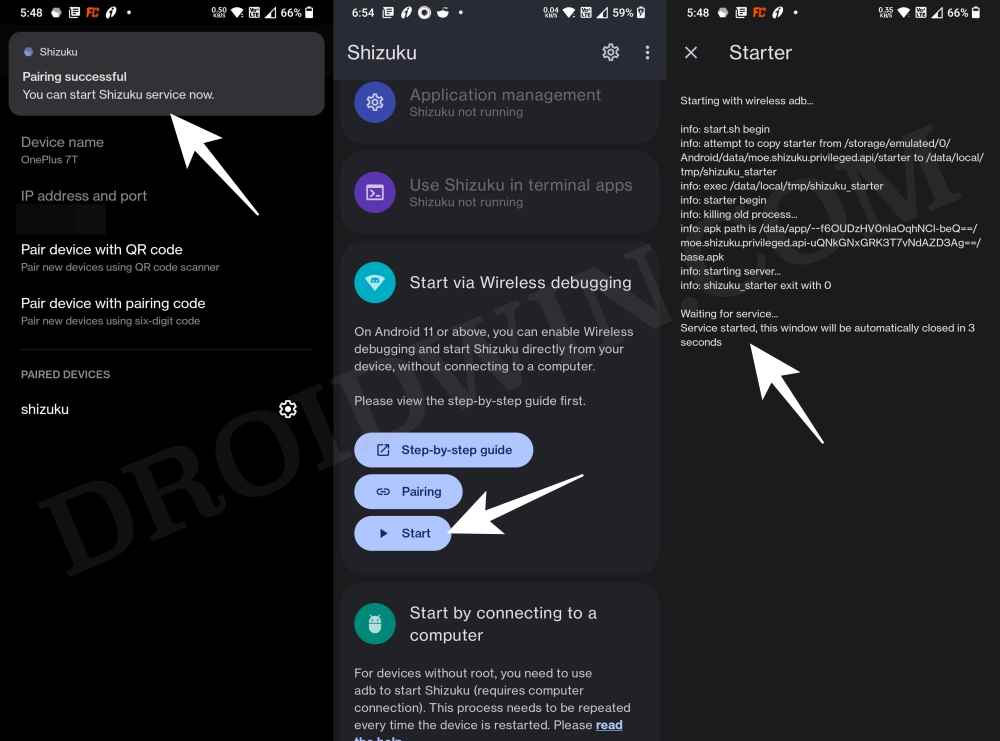
- Then launch it and tap on Pairing > Developer options.

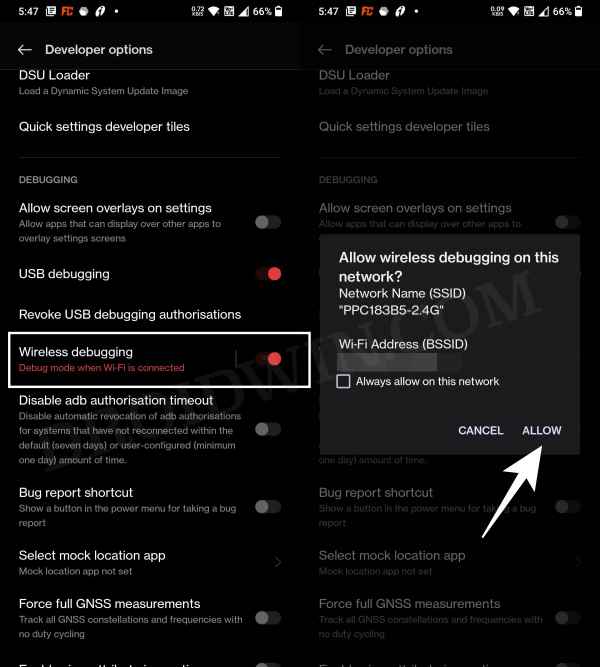
- Now enable the toggle next to Wireless Debugging.
- Then checkmark Always allow on this network and hit Allow.

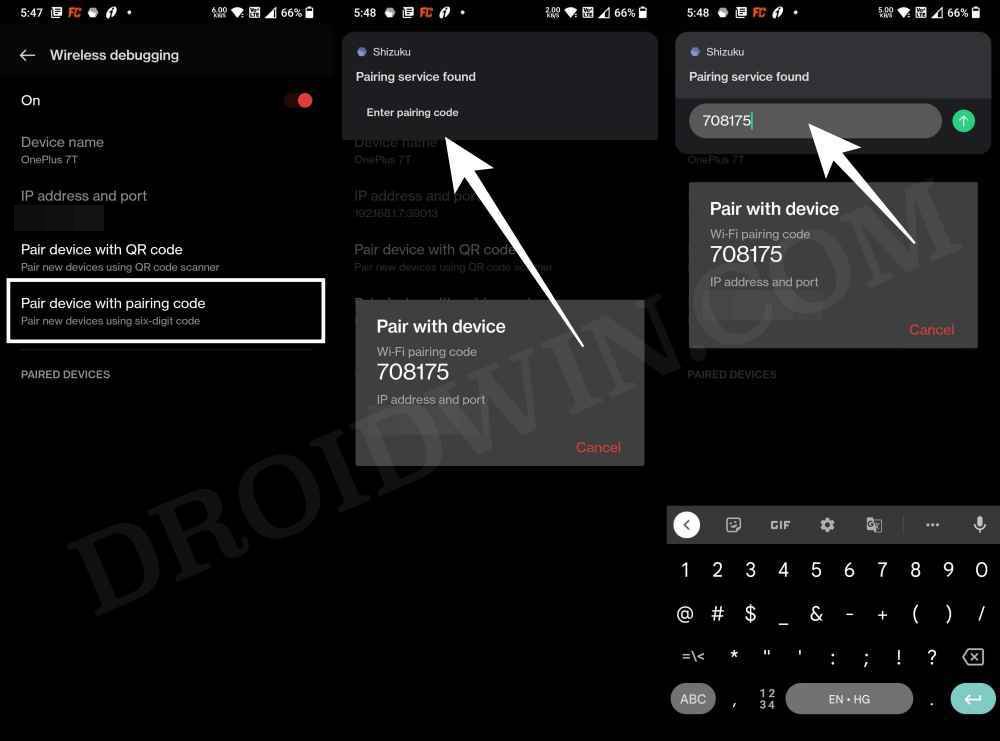
- Now go back to the app and tap on Pair device with pairing code.
- You will now get a six-digit code as well as a prompt from Shizuku to type in that code.

- So type in the code in that prompt and hit Enter. You should now get the Paring Successful message.
- Now go back to the app’s home screen and tap Start. It will now start the service and will notify you of the same.
- To verify, make sure you are getting the “Shizuka is running” message on its home page.

- Now download and install the DSU Loader App from GitHub.
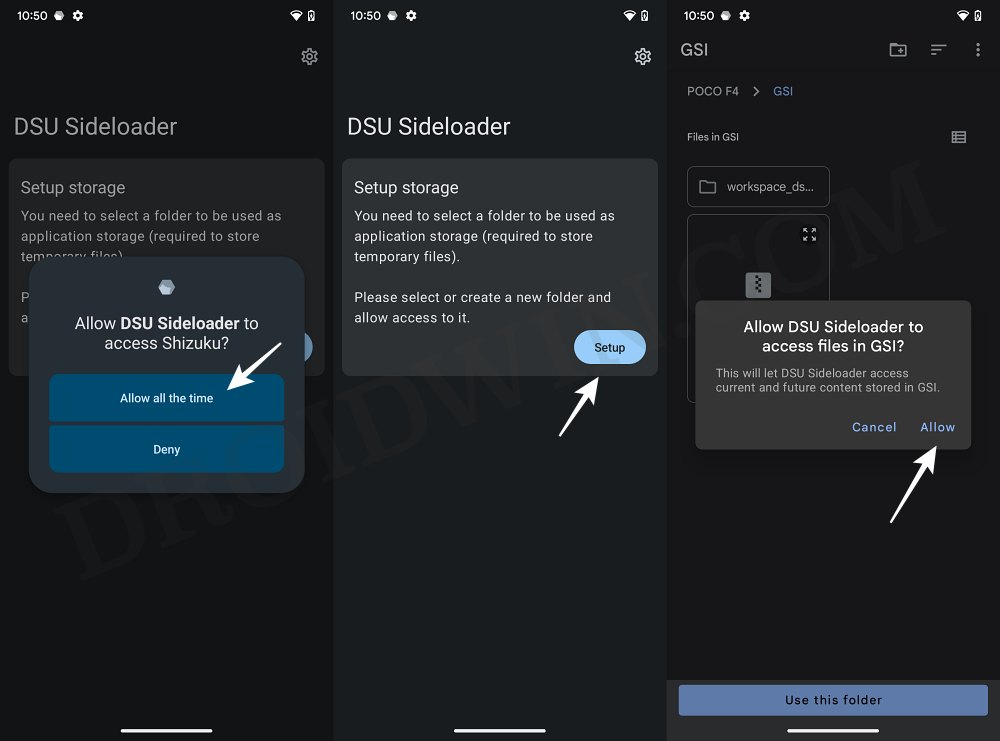
- Then launch DSU Loader, you’ll get a Shizuku prompt, tap Allow.
- Now download the LineageOS GSI for your device from here: DOWNLOAD LINK.
- Make sure to download the GSI that corresponds to your CPU Architecture [see STEP 2 above].
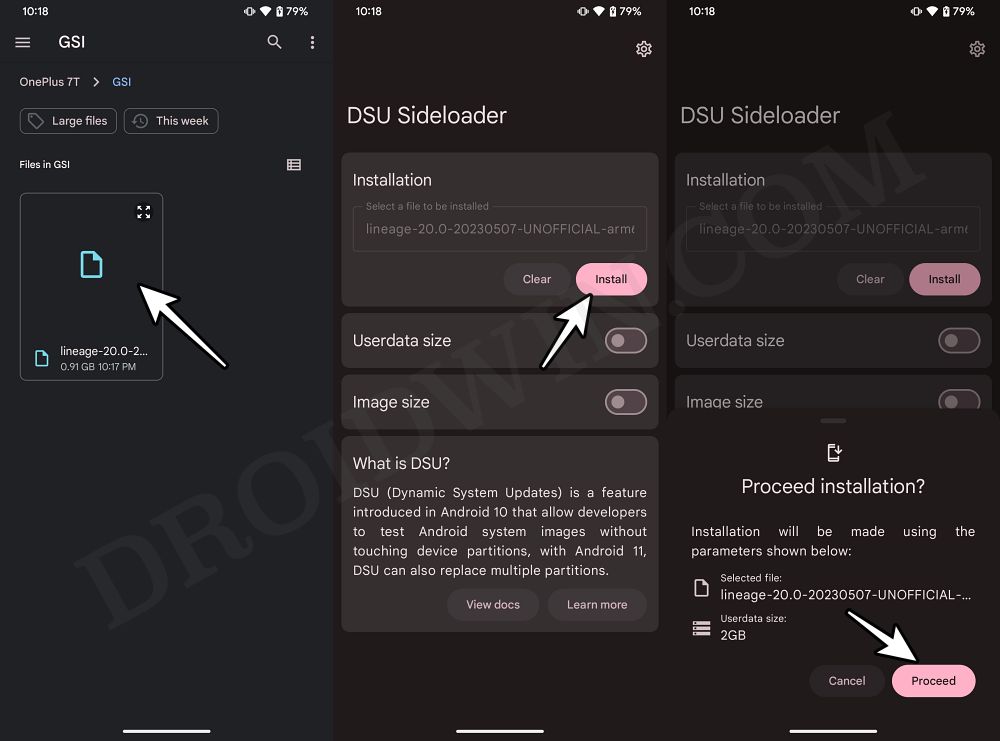
- Then create a new folder in the Internal Storage, name it GSI, and place the downloaded GSI ROM there.

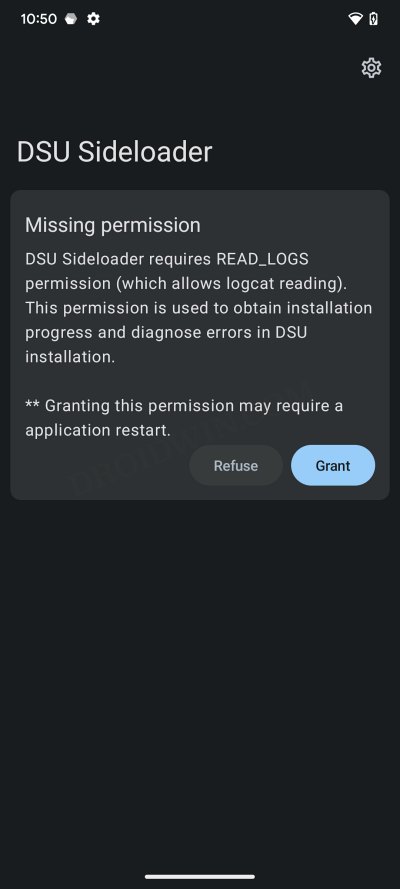
- Now go back to the DSU Loader App. You’ll now get the Missing Permission prompt, tap Grant.

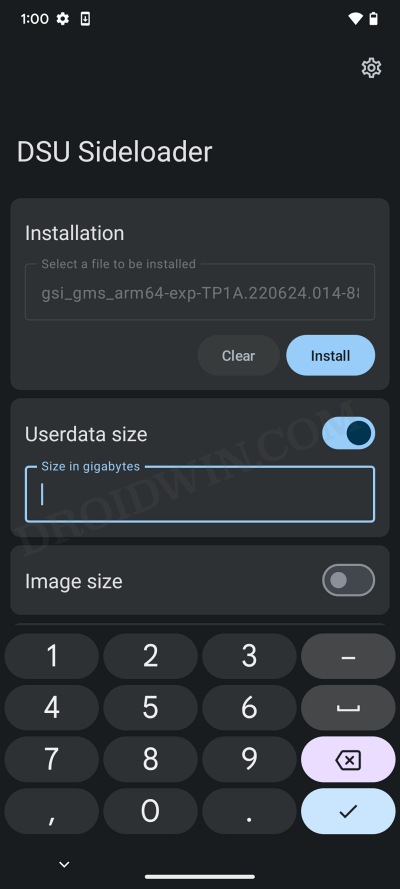
- Once done, tap on Select a file to be installed. Then navigate to the downloaded GSI ROM and select it.
- By default, the GSI ROM will be given a data partition of 2GB. If you want to expand it, then enable the toggle next to Userdata size and type in the desired value in gigabytes.

- While you could grant it as much storage as you want [the more the better], however, some Android device limits the storage to 40% of the total storage value.
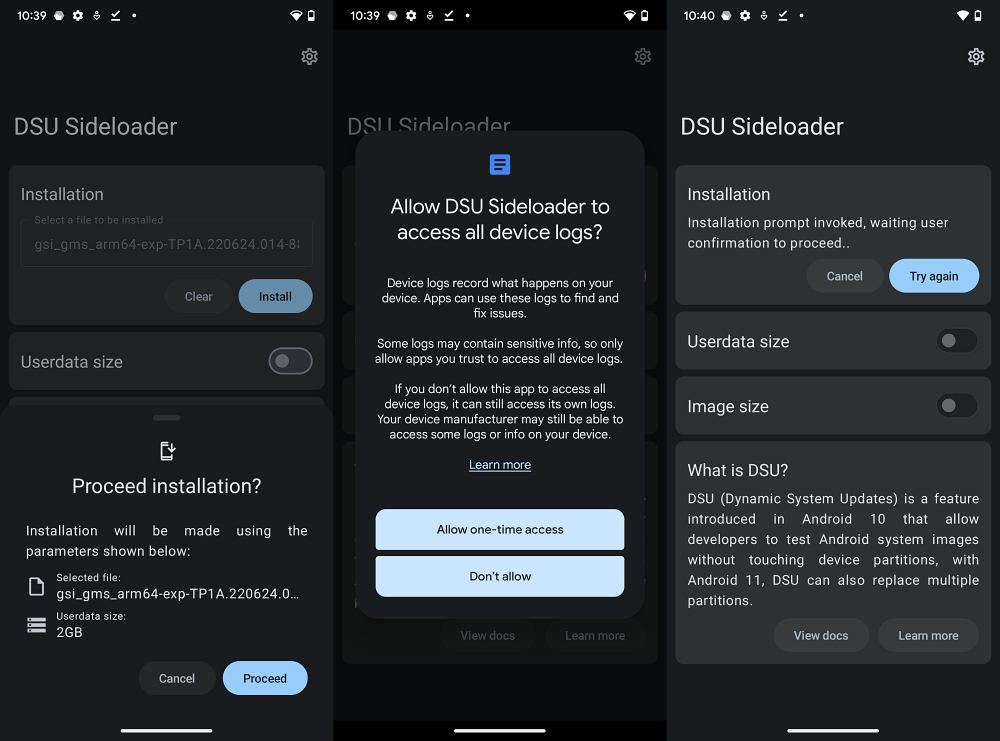
- Once that is done [Image Size should be left untouched], hit Install > Proceed.

- You will now get a prompt, tap Allow one-time access and hit Try Again. The flashing will now start and it could take a few minutes.

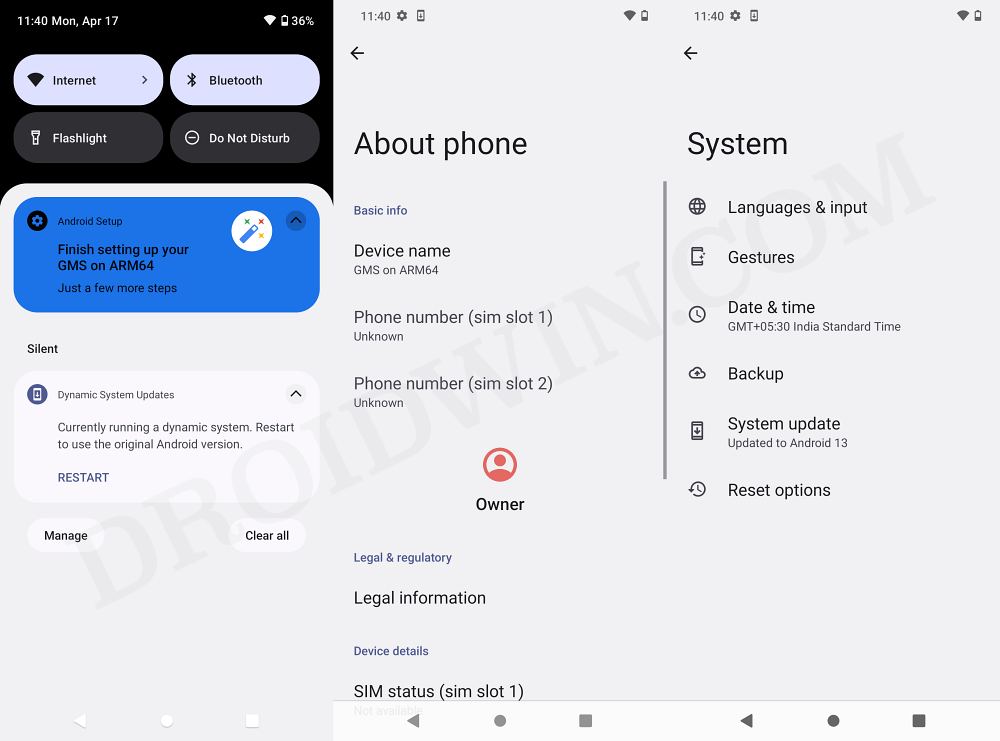
- Once done, just restart your device. Your device will now reboot to the newly installed GSI. Set it up as per your convenience and install the apps of your choice.
- Once you are done using the GSI ROM, just do a restart and you will be back to the stock ROM. To go back to the GSI ROM once again, simply do another restart!

- All the files, apps, and data stored in the GSI data partition could only be accessed when you are booted to the GSI ROM. It could not be accessed from the stock ROM [and vice versa].
- Moroever, if you want to make your device always boot to the GSI ROM [LineageOS] instead of the base firmware, then do check out the instructions given here.
Install LineageOS 20 Android 13 GSI ROM via Fastboot Commands
If you are planning to take a more technical approach, then you could also flash the LineageOS 20 GSI ROM via Fastboot Commands. As before, take a complete device data backup beforehand and only then proceed with the below steps.
STEP 1: Install Android SDK

First and foremost, you will have to install the Android SDK Platform Tools on your PC. This is the official ADB and Fastboot binary provided by Google and is the only recommended one. So download it and then extract it to any convenient location on your PC. Doing so will give you the platform-tools folder, which will be used throughout this guide to install LineageOS GSI ROM on your device.
STEP 2: Enable USB Debugging and OEM Unlocking
Next up, you will also have to enable USB Debugging and OEM Unlocking on your device. The former will make your device recognizable by the PC in ADB mode. This will then allow you to boot your device to Fastboot Mode. On the other hand, OEM Unlocking is required to carry out the bootloader unlocking.
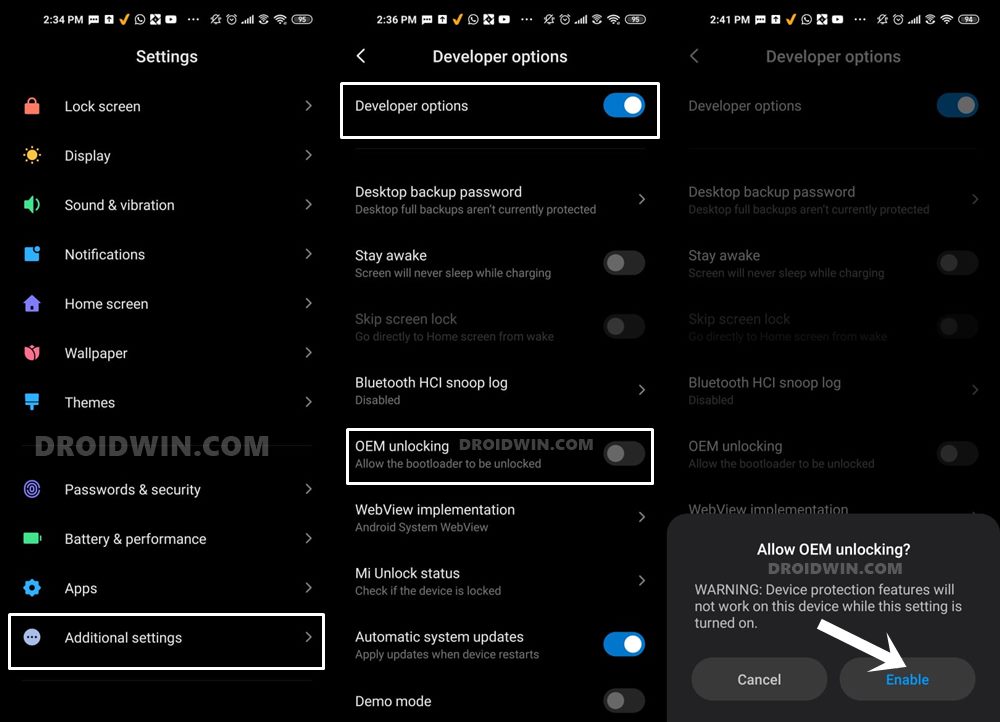
So head over to Settings > About Phone > Tap on Build Number 7 times > Go back to Settings > System > Advanced > Developer Options > Enable USB Debugging and OEM Unlocking.
STEP 3: Unlock Bootloader
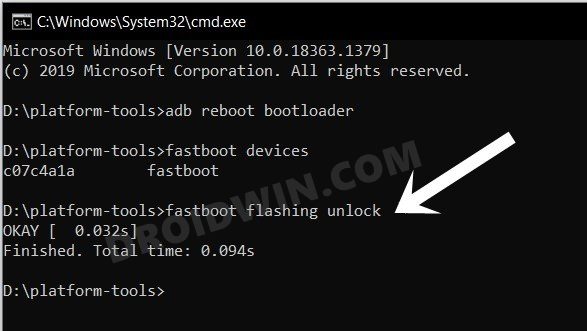
Next up, you will also have to unlock the device’s bootloader. Do keep in mind that doing so will wipe off all the data from your device and could nullify its warranty as well. So if that’s all well and good, then please refer to our detailed guide on How to Unlock Bootloader of Any Android Device.
STEP 4: Download LineageOS GSI ROM
- Grab hold of the GSI ROM for your device from the below link.
LineageOS 20 GSI ROM: DOWNLOAD LINK
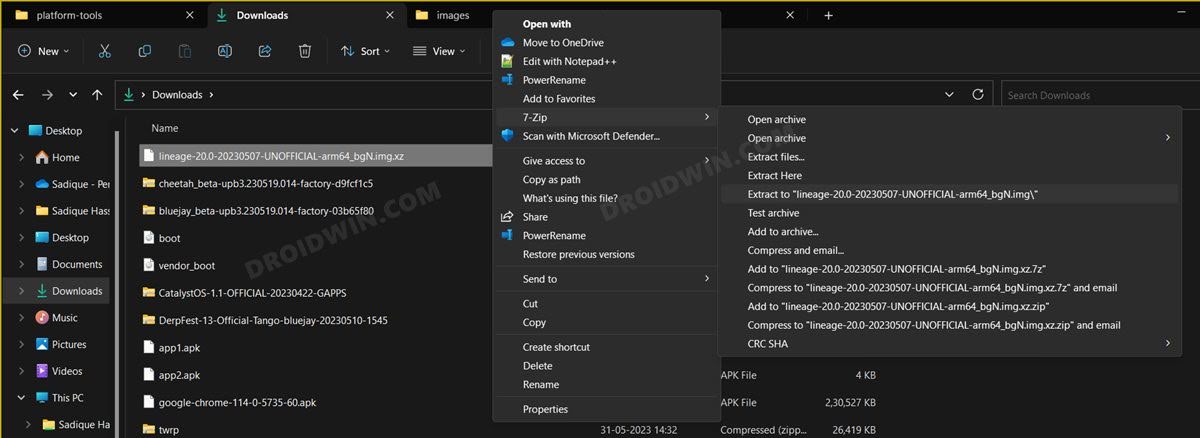
- Now extract it via 7-ZIP to the platform-tools folder on your PC.
- This will give you the system.img file, which will act as our GSI ROM.

STEP 5: Download vbmeta
- First off, download the stock firmware for your device from here.
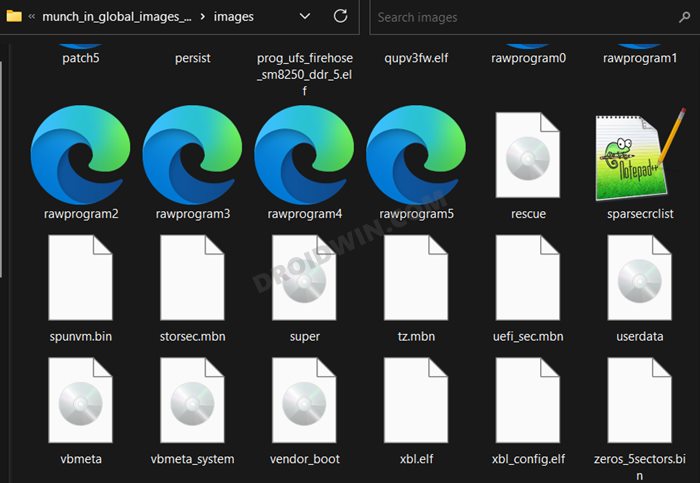
- Then extract it, go to the Images folder, and copy the vbmeta.img.
- Now transfer the vbmeta.img to the platform-tools folder on your PC.

STEP 6: Boot Device to Fastboot Mode
- First off, connect your device to the PC via a USB cable. Make sure USB Debugging is enabled.
- Then head over to the platform-tools folder, type in CMD in the address bar, and hit Enter. This will launch the Command Prompt.

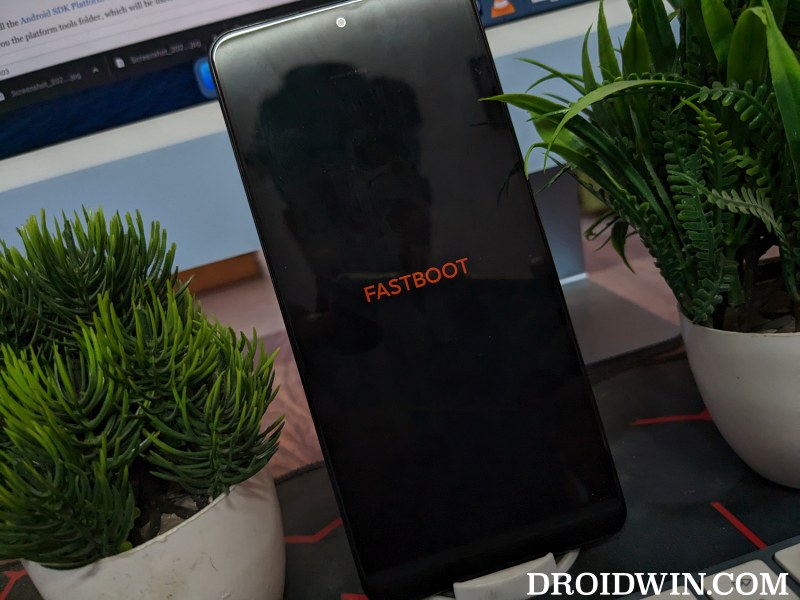
- Type in the following command in the CMD window to boot your device to Fastboot Mode
adb reboot bootloader

- To verify the Fastboot connection, type in the below command and you should get back the device ID.
fastboot devices

- If you are not getting any serial ID, then please install the Fastboot Drivers on your PC.
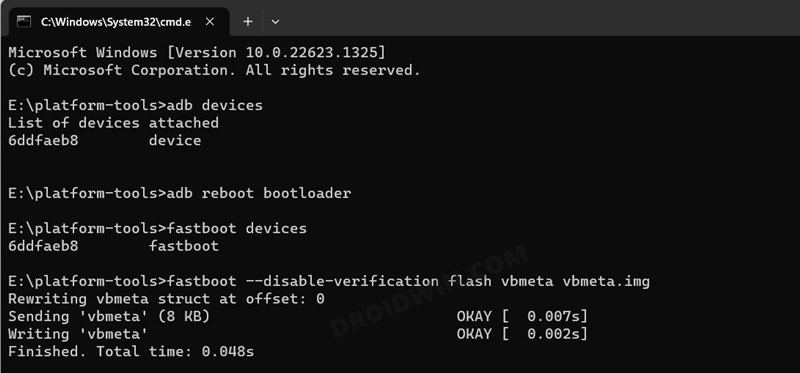
STEP 7: Disable Verity Check
Type in the below command to flash the vbmeta and hence disable the verification check of the vbmeta partition on your device
fastboot --disable-verification flash vbmeta vbmeta.img
STEP 8: Flash LineageOS 20 GSI ROM via Fastboot
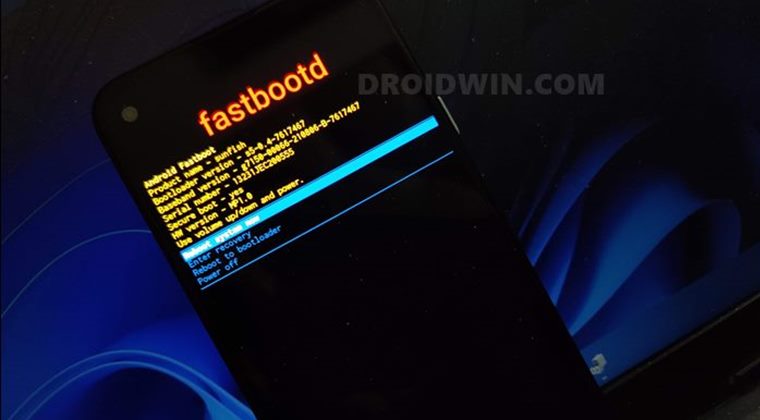
- As of now, your device will be in the Fastboot Mode. So type in the below command to boot to FastbootD Mode
fastboot reboot fastboot

- Now delete the logical partition to free up some space on your device:
fastboot delete-logical-partition product_a

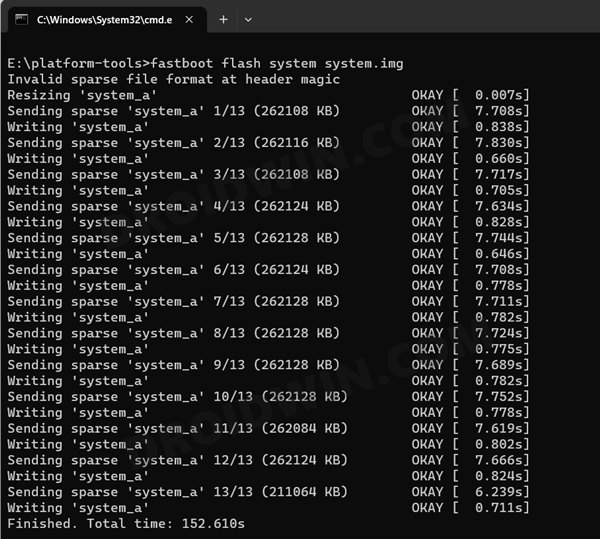
- You may now flash the GSI ROM via the below command [system.img is the name of the GSI ROM]
fastboot flash system system.img

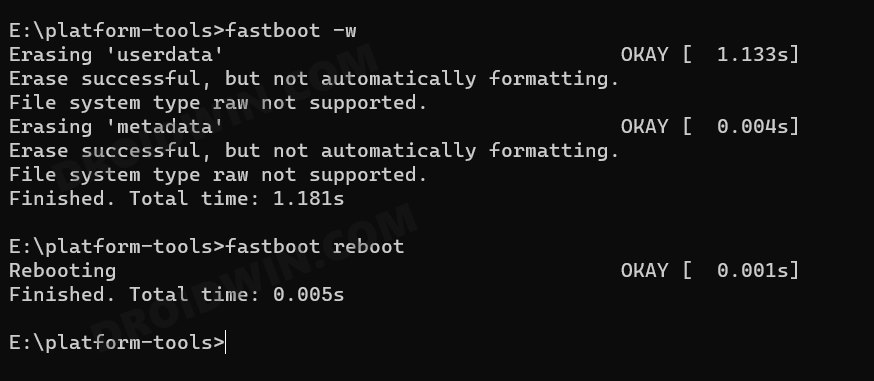
- Once done, you’ll now have to do a format data, so use the below command
fastboot -w

- Finally, reboot your device to the newly installed OS via the below command
fastboot reboot
That’s it. These were the steps to install the LineageOS 20 GSI ROM on your device via Fastboot Commands. If you have any queries concerning the aforementioned steps, do let us know in the comments. We will get back to you with a solution at the earliest. And do check out the below-linked guides to fix numerous GSI-related bugs and issues.
- Fix WiFi/Internet/Network not working in GSI ROM
- 5G, Bluetooth, 90Hz Display, DT2W not working in GSI ROM: How to Fix
- Fast Charging not working in GSI ROM: How to Fix
- Brightness Slider not working in GSI ROM: How to Fix
- Headphone Jack not working in GSI ROMs: How to Fix
- How to Resize System Partition to Install GSI ROM
