In this guide, we will show you the steps to install the Indian ROM on the Chinese OnePlus 10 Pro. The tenth iteration has just been released by the Chinese OEM and unlike in previous years, there is an element of uncertainty surrounding this device. The biggest reason for the same is the underlying OS skin, for which we have always been critical in the past. Along with that, many have said that it is only a minor upgrade from the ninth series, and the hike in price isn’t proportional to that.
While that is up for debate, what isn’t is the fact that the Chinese version of this device comes bloated with tons of additional bloatware and unnecessary customization features. In this regard, the Global variant also has the ColorOS, but unlike its counterpart, the bloated apps are on the lower side, thereby giving a much better usage experience. If you also echo this thought process, then this guide shall help you out. In this tutorial, we will show you the steps to install the Indian ROM on the Chinese OnePlus 10 Pro. Follow along.
Table of Contents
How to Install Indian ROM on Chinese OnePlus 10 Pro
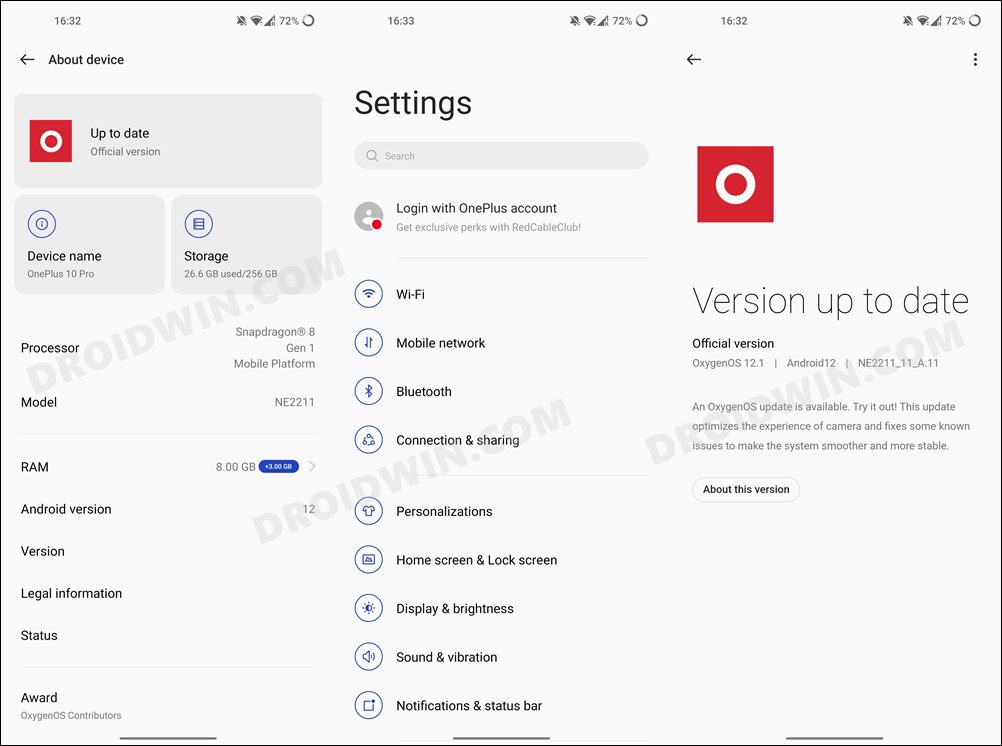
We have successfully flashed the Indian ROM having build number A11 onto the Chinese OnePlus 10 Pro that had the build number A13 installed without any issues. With that said, the below process will wipe off all the data, so take a backup beforehand. Droidwin and its members wouldn’t be held responsible in case of a thermonuclear war, your alarm doesn’t wake you up, or if anything happens to your device and data by performing the below steps.
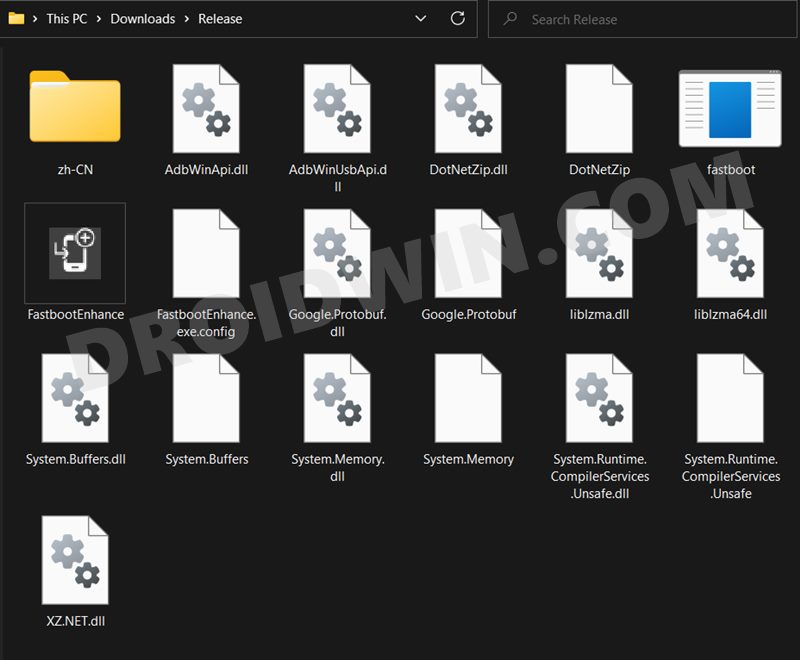
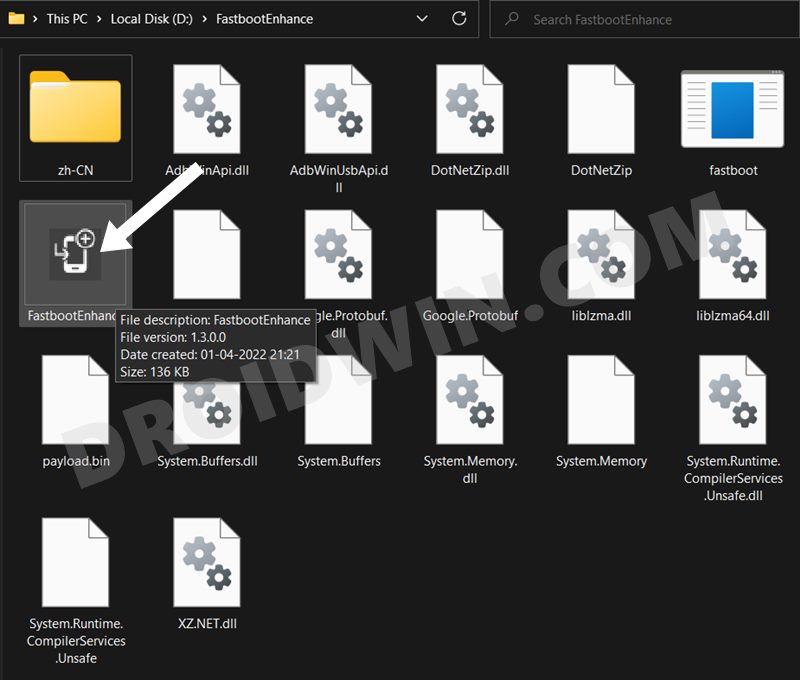
STEP 1: Download Fastboot Enhance Tool
Download the Fastboot Enhance Tool from GitHub [direct link][Credits: XDA Senior Member xzr467706992]. Once downloaded, extract it to any convenient location on your PC. The biggest advantage of this tool is that you could directory flash the payload.bin file, there is no need to extract it and get the resultant IMG files!
STEP 2: Download OnePlus 10 Pro Indian ROM
- Next up, get hold of the Indian ROM for your OnePlus 10 Pro from below:
OnePlus 10 Pro OxygenOS 12.1 A.11 IND
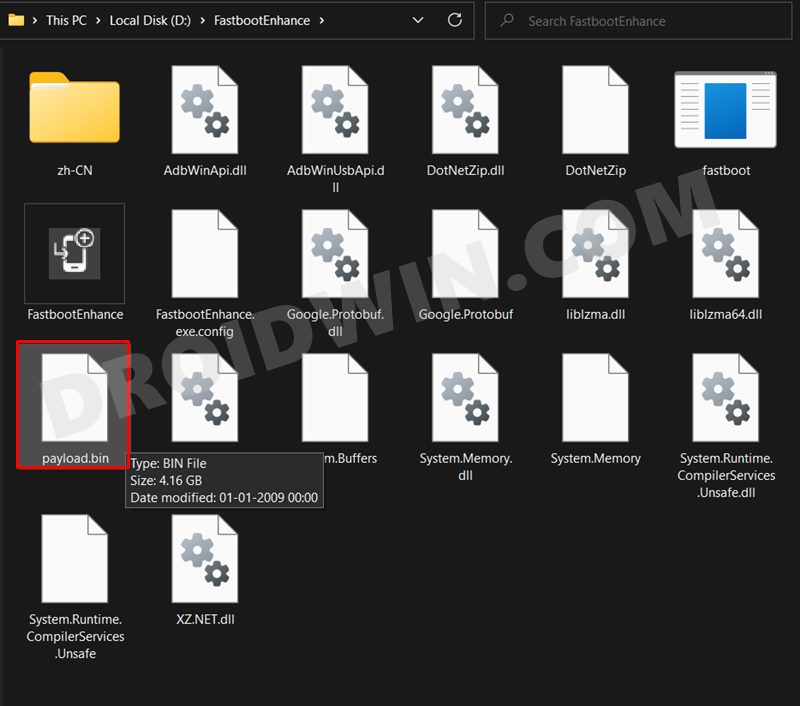
- Once downloaded, extract the payload.bin file to the Fastboot Enhance Tool folder.

STEP 3: Install Android SDK
First and foremost, you will have to install the Android SDK Platform Tools on your PC. This is the official ADB and Fastboot binary provided by Google and is the only recommended one. So download it and then extract it to any convenient location on your PC. Doing so will give you the platform-tools folder, which will be used throughout this guide.

STEP 4: Install Fastboot Drivers
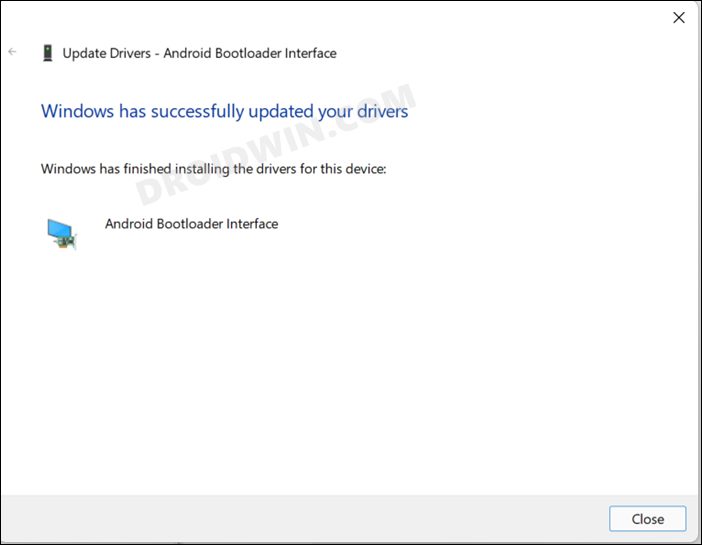
The tool doesn’t come with the Fastboot Drivers, so you will manually have to install it on your PC. For that, please refer to our guide on How to Install Fastboot Drivers in Windows 11. Likewise, make sure to install the OnePlus USB Drivers as well [they are usually automatically installed as soon as you connect your device to the Windows PC for the first time].
STEP 5: Enable USB Debugging and OEM Unlocking
Next up, you will have to enable USB Debugging and OEM Unlocking on your device. The former will make your device recognizable by the PC in ADB mode. This will then allow you to boot your device to Fastboot Mode. On the other hand, OEM Unlocking is required to carry out the bootloader unlocking process.
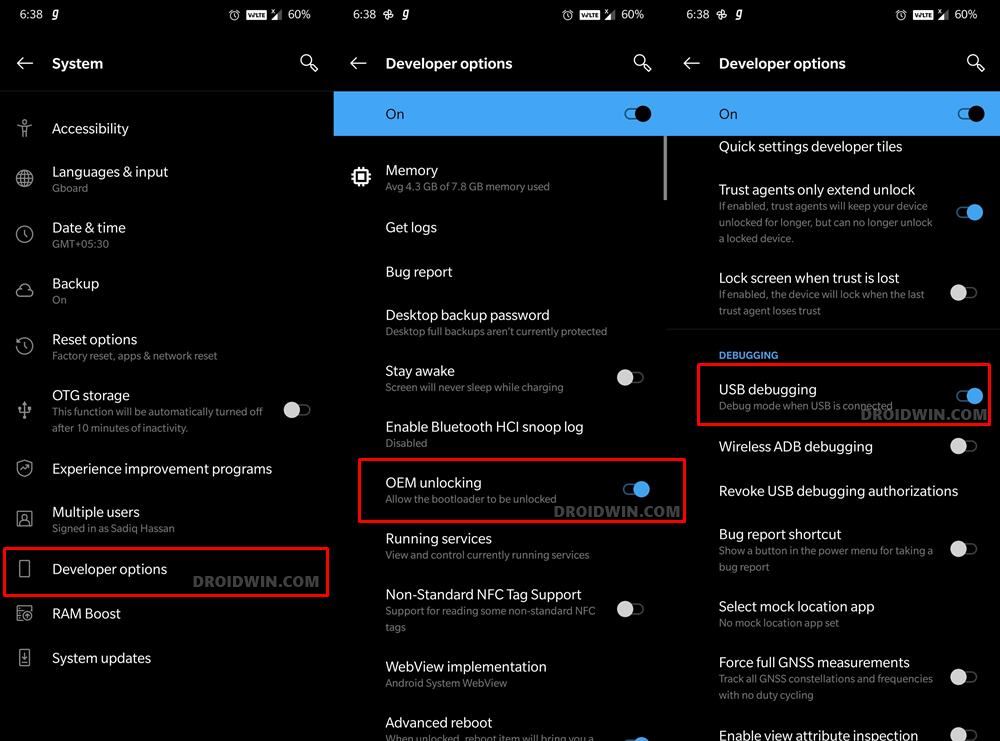
So head over to Settings > About Phone > Tap on Build Number 7 times > Go back to Settings > System > Advanced > Developer Options > Enable USB Debugging and OEM Unlocking.
STEP 6: Unlock Bootloader on OnePlus 10 Pro
You will now have to unlock the bootloader on your OnePlus 10 Pro device. Do note that doing so will wipe off all the data from your device and might nullify its warranty as well. If that’s well and good, then refer to our guide on How to Unlock Bootloader on OnePlus 10 Pro.
STEP 7: Boot to Fastboot Mode
- Connect your device to the PC via USB cable. Make sure USB Debugging is enabled.
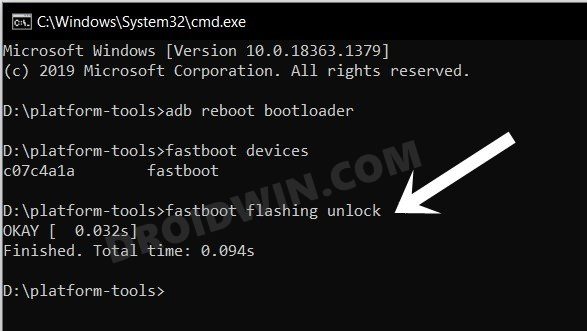
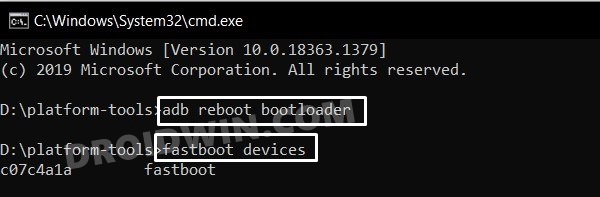
- Then head over to the platform-tools folder, type in CMD in the address bar, and hit Enter. This will launch the Command Prompt.
- After that, type in the following command in the CMD window to boot your device to Fastboot Mode
adb reboot bootloader
- To verify the Fastboot connection, type in the below command and you should get back the device ID.
fastboot devices
STEP 8: Install Indian ROM on Chinese OnePlus 10 Pro
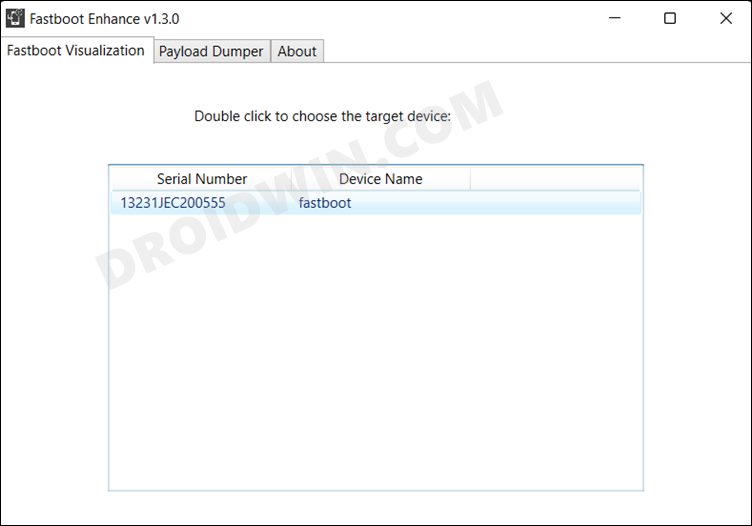
- To begin with, launch the Fastboot Enhance Tool via its EXE file.
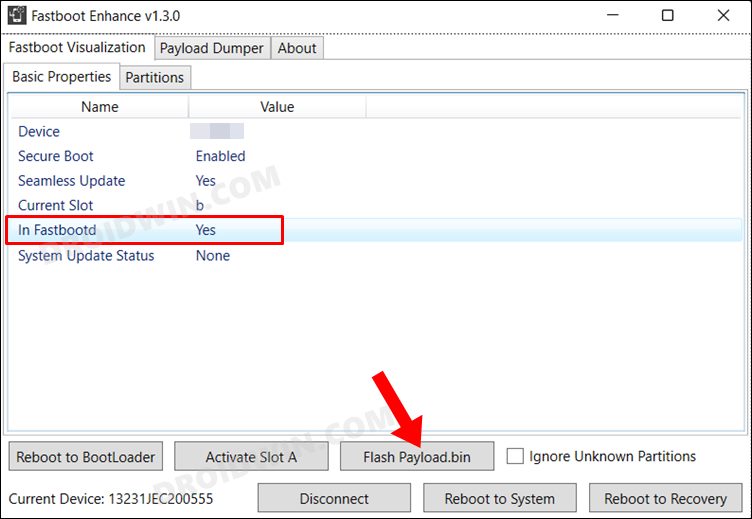
- Your device should be listed under the Fastboot Virtualization tab, select it.
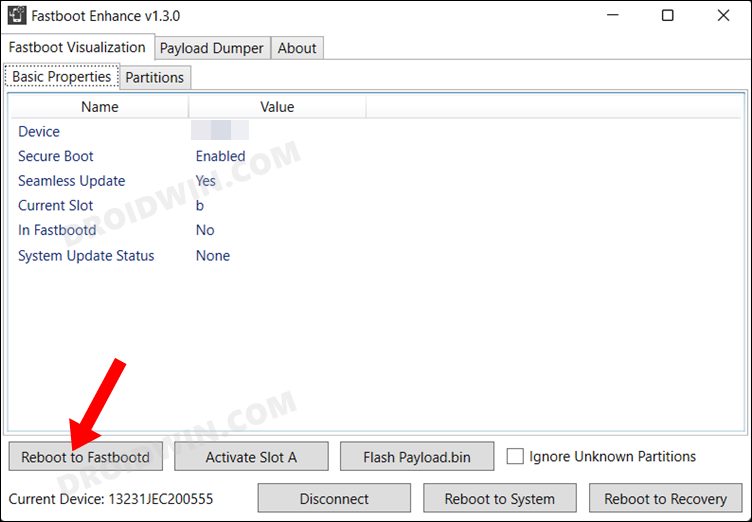
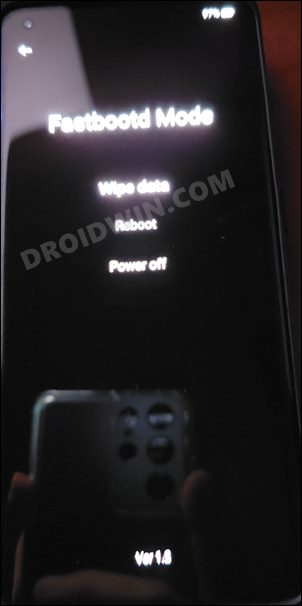
- After that, click on the Reboot to FastbootD button.
- Your device will boot to FastbootD Mode.
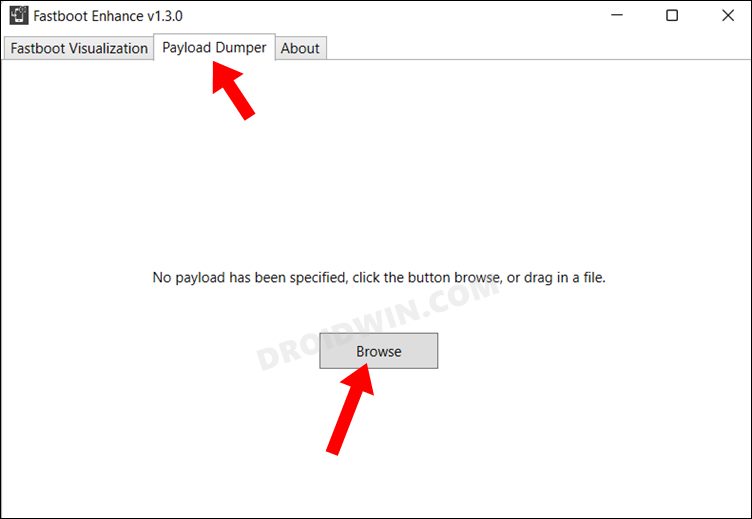
- Now go to the Payload Dumper tab and click on Browse.
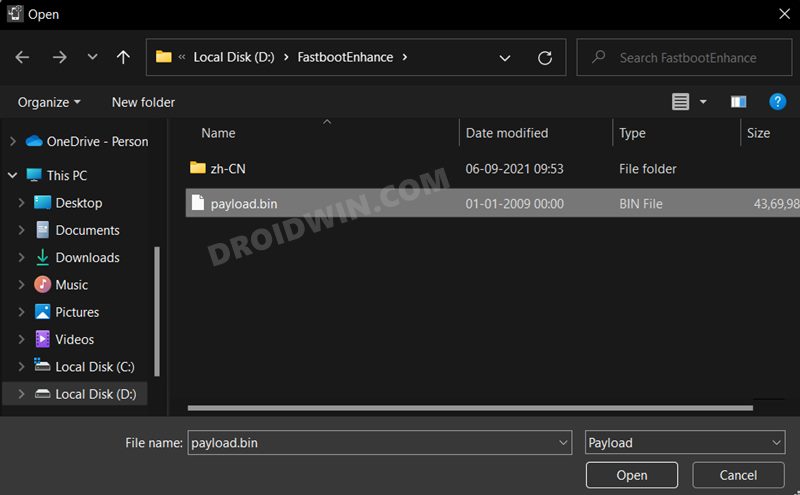
- Navigate to the payload.bin file, select it and click Open.
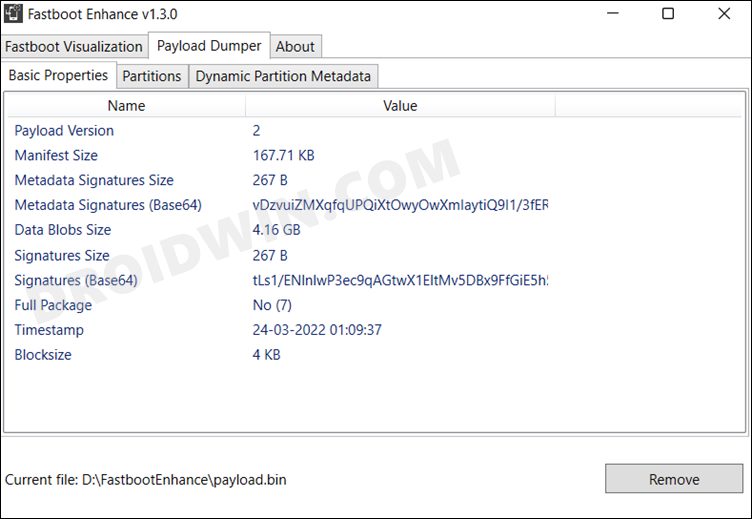
- The file will now be loaded in the tool, displaying the resultant information.
- Now go to the Fastboot Virtualization tab and click on Flash payload.bin. If the flashing starts, well and good.
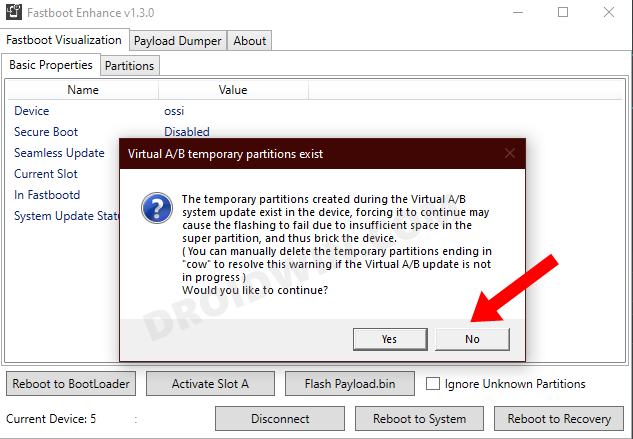
- However, if you get the ‘Virtual A/B temporary partitions exist’ popup, then click on No.
- After that, go to the Partitions tab and type in cow in the Filter by name box.
- Select all the partitions from the results that have cow in their name and hit the Delete button.
- Once done, click on Flash payload.bin. This time the flashing will start without any issues.
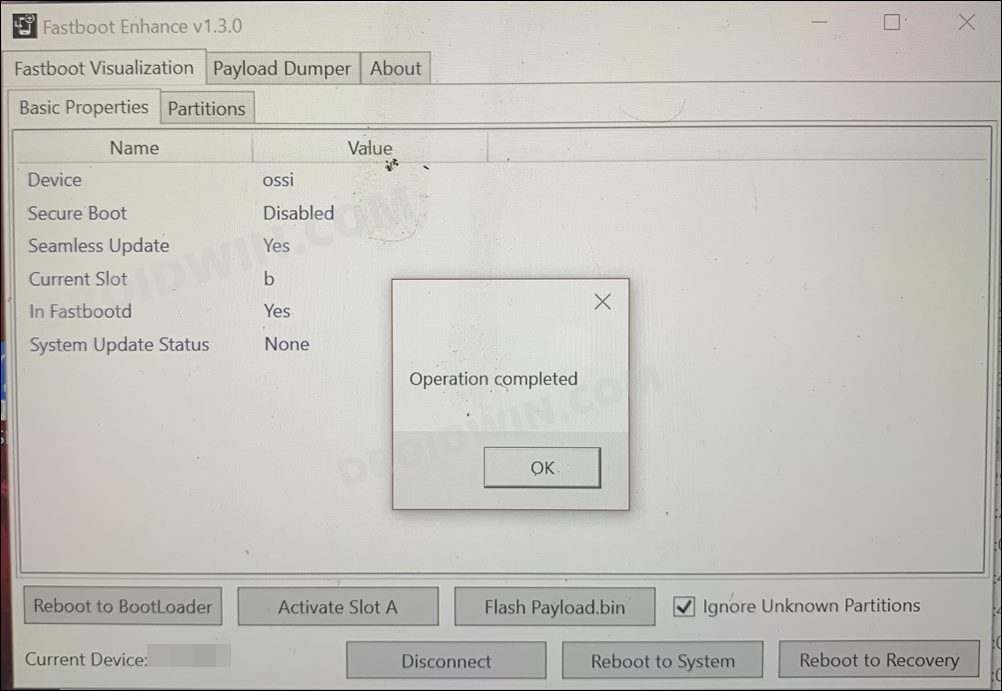
- Once complete, you will be notified of the same. You may now boot to the OS by clicking on Reboot to System.

That’s it. These were the steps to install the Indian ROM on the Chinese OnePlus 10 Pro. If you have any queries concerning the aforementioned steps, do let us know in the comments. We will get back to you with a solution at the earliest.


Cristian Quintero
After pushing Fastbootd mode for my phone to enter into it, the Fasboot Enhance tool doesn’t show the buttons to flash the payload. How can I fix this?
Derrick
This guide is way more extensive compare to some youtube videos. Appreciate buddy!
BUT, i am pretty stuch at the flash payload process. As in:
STEP 8: Install Indian ROM on Chinese OnePlus 10 Pro
1. To begin with, launch the Fastboot Enhance Tool via its EXE file – DONE
2. Your device should be listed under the Fastboot Virtualization tab, select it – DONE
3. After that, click on the Reboot to FastbootD button. – DONE
4. Your device will boot to FastbootD Mode – DONE
5. Now go to the Payload Dumper tab and click on Browse. – DONE
6. Navigate to the payload.bin file, select it and click Open. – DONE
7. The file will now be loaded in the tool, displaying the resultant information – DONE
8. Now go to the Fastboot Virtualization tab and click on Flash payload.bin. If the flashing starts, well and good. – STUCK
*** The moment I click on Flash payload.bin, pop up window of selecting payload appears. I cant re-select the same payload.bin fin
Please advise.
veerendra
Dear Sir, kindly send me the steps to install Indian rom in MI redmi note 12
Carlos Eduardo
Olá, boa noite, eu sou brasileiro, e comprei o OnePlus 10 pro Rom global, estou tendo problemas com o sinal da operadora “Claro” até funciona nos 2 slot, porém do nada o sinal da operadora cai, ou o sinal da internet dos dados móveis cai do mesmo jeito, já até atualizei o celular que tinha uma atualização pendente e continua do mesmo jeito, e não permanece o sinal por muito tempo, troquei o chip do slot 1 para o 2, e vice versa, deixei no 2 agora e continua do mesmo jeito, já até atualizei o celular pra ver se era isso e não é, você pode me ajudar a resolver esse problema? Já testei chip da Oi e da Vivo tem o mês.k problema de queda você tem a ROM da Versão Global, se tiver poderia me ajudar ?
Muhammad Ismail
salam.. i need oneplsu 10 pro, 9RT imei repair solution
Achman
After deleting all files with “COW” with their names, going on to select flash playload.bin tells me the process cannot access the file because it is being used by another program.
Joel Acevedo
for a Oneplus 9 pro Chinese version, how can I put the global ROM?
Andy
Hi when I press flah payload.bin I keep getting this error “the following partitions to flash may not be known: Modem”
The only difference is where it says secure boot mine says disabled
Any ideas?
pascal
Cow files do not exist on version NE2215_11
yekangi
I am unable to delete any file with the extension cow..when I select all the files starting with cow, delete button is disabled
elvio
I turned to fastbootd mode and thats ok. Then when I pressed flash payload.bin same fastboot enhancer application told me device is not detected, so for that reason I couldnt complete guide. can you please help me?
Rolf
Your instructions are so clear that even at my advanced age (>70) I am tempted to try. Do you think the same instructions would also be valid for a GLOBAL ROM? And if so, which ROM is the latest version?
A bit of feedback: I received the NE2210 from a friend in HK while I was in Europe. I had no issues until I reached the U.S. Here, I had to go back to my 8T (global version). The Chinese NE2210 version will not connect to the local networks. Sometimes I can dial but then all input from the screen is ignored – not even the DISCONNECT or END CALL button is recognized.
Sadique Hassan
thanks for the encouraging words Rolf.
Yes, this should also work with the Global ROM, though as of now, only the Indian and EU version ROM is available. As and when I get hold of the Global ROM, I’ll add it to this guide- OnePlus 10 Pro: Download Fastboot ROM and Stock Firmware
Likewise, another approach will be to do this via MSM Download Tool. However, this is also currently unavailable. Once it gets live, I’ll update it here- Download MSM Download Tool: Unbrick any OnePlus Device
Now coming back to your issue, have you tried resetting the APN, removing, and then reinserting the SIM? Likewise, did you try resetting the Network settings on your device? If you haven’t done so then you may give it a try and let me know the results [resetting the network will remove all the saved wifi and paired Bluetooth devices].
Juanra
Hi, Is it the same process for European or global ROM?
Thanks!
Yao
Hi Sadiquee, after i clicked on the Reboot to FastbootD button, my phone had into FastbootD Mode but Fastboot Enhance Tool “In Fastbootd” still showed No. Thus, i could not move to next step. May i know what the problem is?
Thank you.
Mark
Thanks for this in-depth explanation. It worked like a charm! Deleting the cow partition seemed a little scary initially, but thankfully didn’t face any issues.
Sadique Hassan
You’re welcome Mark, and yes, deleting the temporary COW partitions seems scary on paper but if done correctly, there wouldn’t be any issues (as you would have noticed).
mido
ido every thing u tell us now my mopile not open just make restart all time not open plz help me to solve
sorin
can not delete cow partition