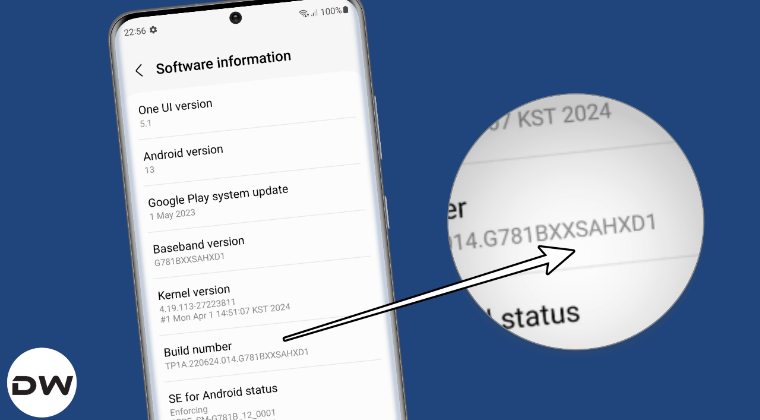
In this guide, we will show you the steps to extract the currently installed boot.img via MSM Download Tool. When it comes to rooting your OnePlus device, then your first course of action is to download the firmware which corresponds to the device’s build number. This full firmware package nowadays ranges across 4-5GB which not only calls for unnecessary bandwidth consumption but also leads to a waste of your precious time.
So what else could be done? Well, most of you might not be aware of but MSM Tool comes with a hidden ReadBack Mode which allows you to extract individual partition files from the firmware which is currently installed on your device [and not the OPS firmware that it comes with]. Granted it might sound like a tough nut to crack when it comes to dealing with MSM Tool and EDL Mode, however, this setup is only needed for one-time usage.
From the subsequent times, the entire process will only take a few seconds. Moreover, the best part is that you don’t even need to download the firmware for your device, thereby saving both your time and network. So on that note, let’s show you the steps to extract the currently installed boot.img via MSM Download Tool.
Table of Contents
How to Extract currently installed Boot.img via MSM Download Tool
Before starting, please take a backup of all the data on your device, just to be on the safer side. Droidwin and its members wouldn’t be held responsible in case of a thermonuclear war, your alarm doesn’t wake you up, or if anything happens to your device and data by performing the below steps.
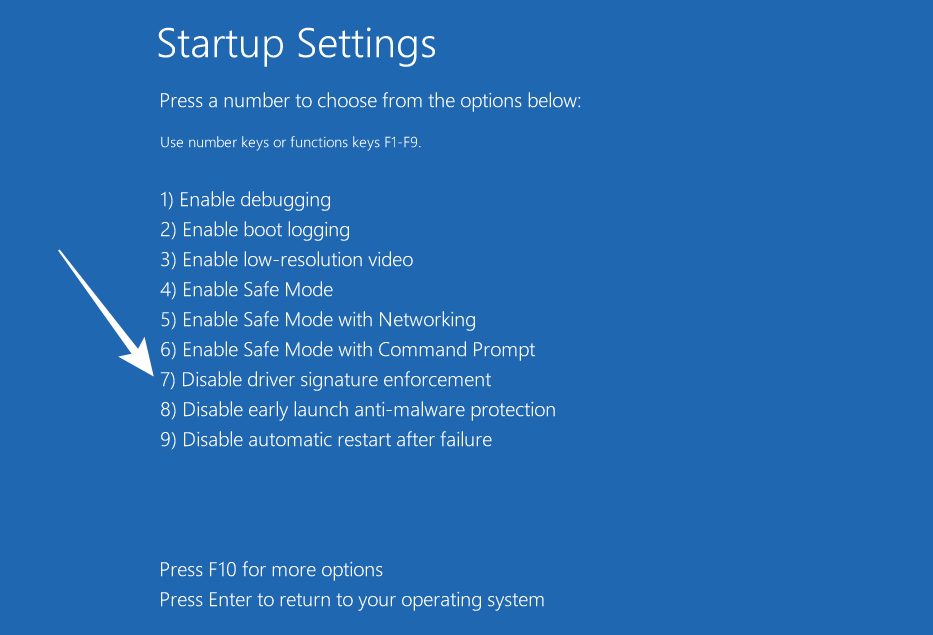
STEP 1: Disable Driver Signature Verification
- To begin with, press and hold the Shift key, and while doing so, click Restart.
- Your PC will now boot to Windows Recovery Environment.
- Select Troubleshoot > Advanced Options > Startup Settings > Restart.
- Then press F7 or 7 and your PC will reboot to the OS with Driver Signature Verification disabled.

STEP 2: Boot to EDL Mode
- To begin with, power off your device. Likewise, connect one end of the USB cable to your PC but keep the other end empty.
- Then press and hold the Volume Up and Volume Down keys and while holding both keys, connect your device to the other end of the US cable.
- You will soon hear a connection prompt signifying that the device is booted to EDL and you now leave the pressed keys.
STEP 3: Verify EDL Connection
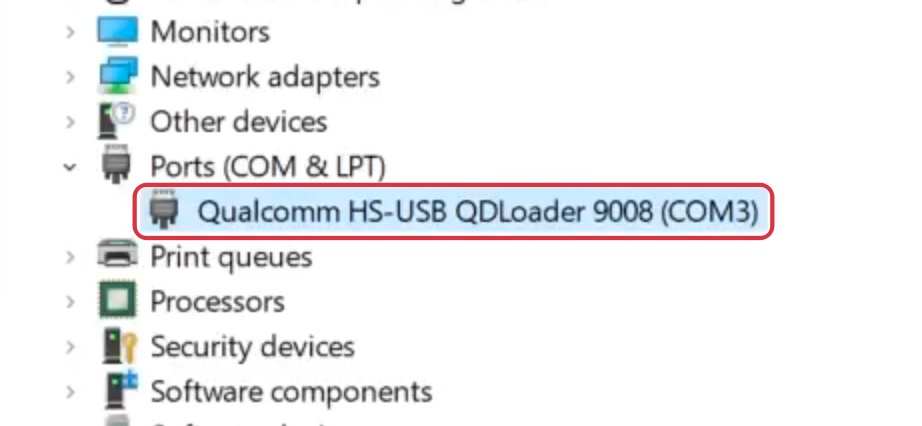
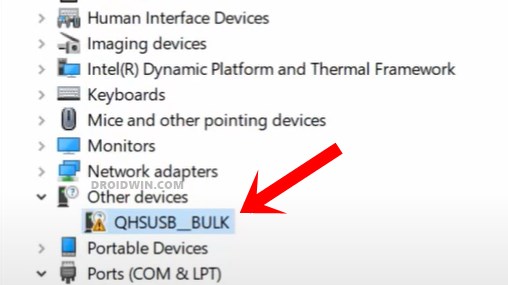
- Right-click on the Start menu and select Device Manager. Then expand the Ports section.
- If your device is listed as Qualcomm HS-USB QDLoader 9008, then you are good to go ahead.
- However, if it is listed as QHUSB_BULK, then install the Qualcomm US Drivers.
- Once you have successfully installed the drivers, boot your device back to the OS!
STEP 4: Check Current Active Partition
- Download and extract Android SDK Platform Tools on your PC.
- Then enable USB Debugging on your device and connect it to PC.
- Now go to platform-tools folder address bar, type in CMD, and hit Enter.
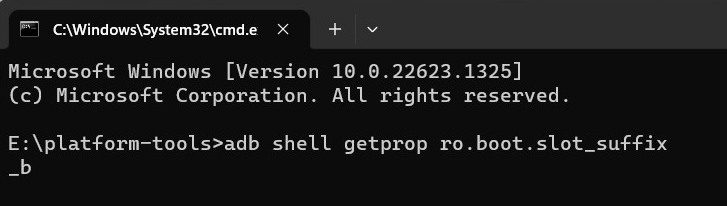
- Then execute the below command to get the current active partition.
adb shell getprop ro.boot.slot_suffix
STEP 5: Enable Read Back Mode in MSM Download Tool
- First off, get hold of the MSM Download Tool for your device from here.
- Now launch the MSM Tool, select others under Login, and click Next.
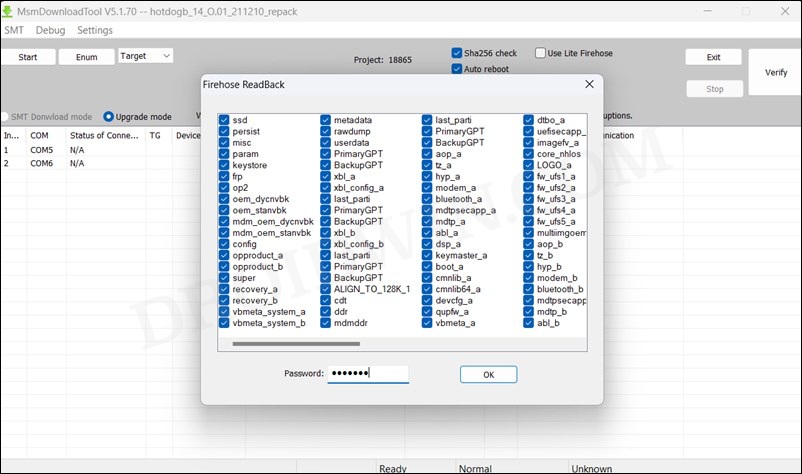
- Once the MSM Tools loads up, press the F8 [or Fn+F8] key. It will bring up the Read Back prompt.
- Select the boot_a or boot_b partition, depending on your result in STEP 4.
- Then type in oneplus under Password and hit OK. You should now see the Read Back button.
STEP 6: Extract Boot.img via MSM Download Tool
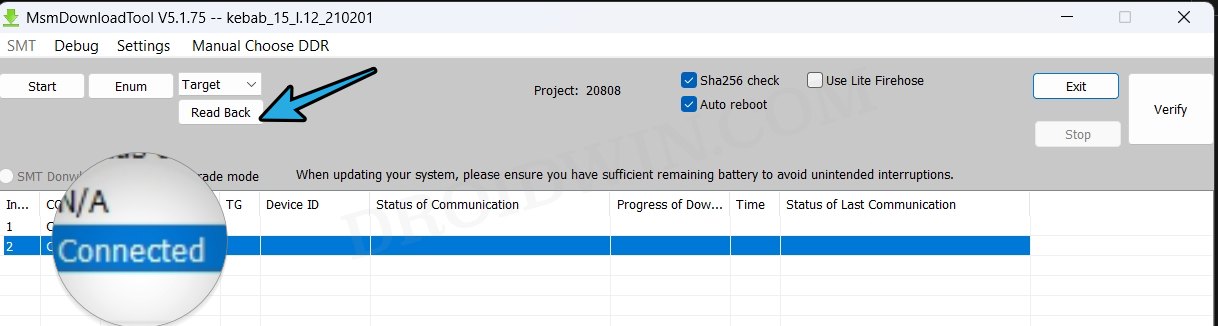
- Boot your device to EDL Mode via the below command:
adb reboot edl
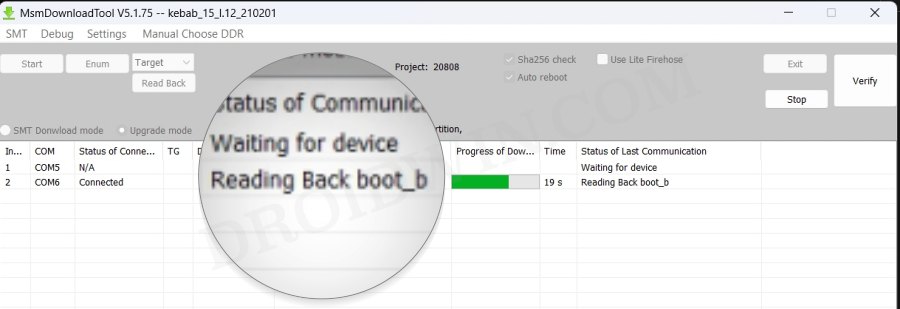
- Your phone should now show as Connected in MSM Tool. Now click on Read Back.
- It will now start extracting the boot.img from your device.
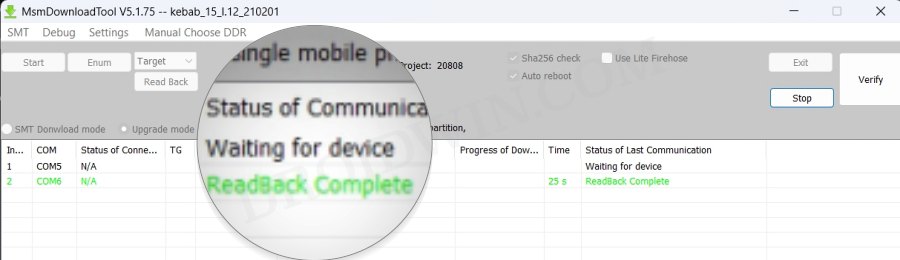
- Once done, you’ll be notified of the same and the file will be placed in C Drive.
- You could use it to root your device via Magisk.
These were the steps to extract the currently installed boot.img via MSM Download Tool. If you have any queries concerning the aforementioned steps, do let us know in the comments. We will get back to you with a solution at the earliest.