In this guide, we will show you the steps to delete the display cache on your Windows 11 PC. Out of the various components on your PC, it is the one related to display that accumulates an astronomical amount of temporary files. Be it for configuration, themes, colors (including the accent colors), personalizations, or calibration, every time you make any change to any of these settings, the cache associated with that gets repopulated. However, this could end up having some negative consequences as well.
First off, if a plethora of such temporary data keeps on getting accrued over the due course of time, then it might slow down the entire system. Likewise, if any of these cache files get corrupted, then its negative consequences might be felt across the entire display as a whole. Therefore, in all these cases, the best bet is to delete these display cache files on your Windows 11 PC. And in this guide, we will show you how to do just that. Follow along.
How to Delete Display Cache in Windows 11

Before starting off with the process, it is recommended to take a backup of the registry files on your PC. Moreover, there is a possibility of some of the display settings getting reverted to their default state. So to be on the safer side, take a note of the personalization setting somewhere, or simply take their screenshots! Once that is done, you may then refer to the below instructions and bid adieu to these cache files once and for all.
- Head over to the Start Menu, search Registry Editor, and open it.
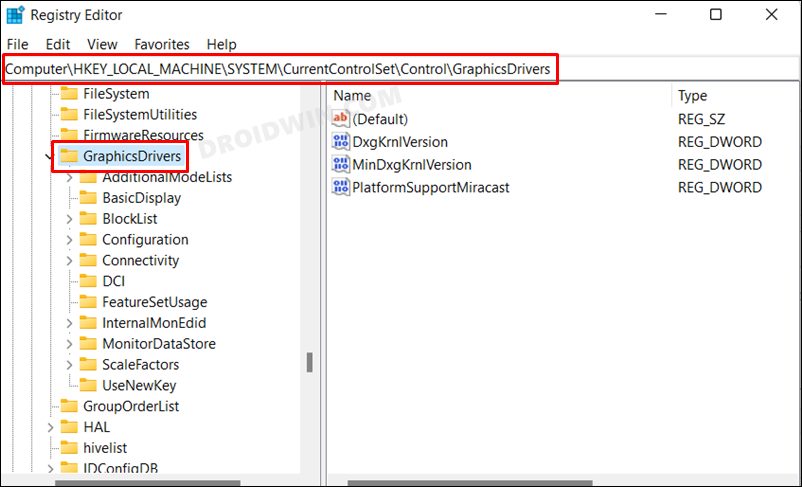
- Then copy-paste the below location in its address bar and hit Enter:
HKEY_LOCAL_MACHINE\SYSTEM\CurrentControlSet\Control\GraphicsDrivers

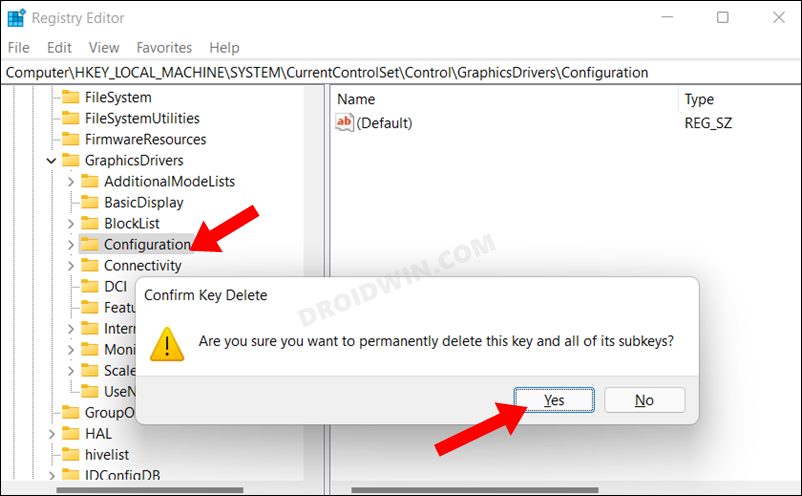
- Now select the Configuration folder under GraphicsDriver and hit Delete. Reply YES in the confirmation dialog box.
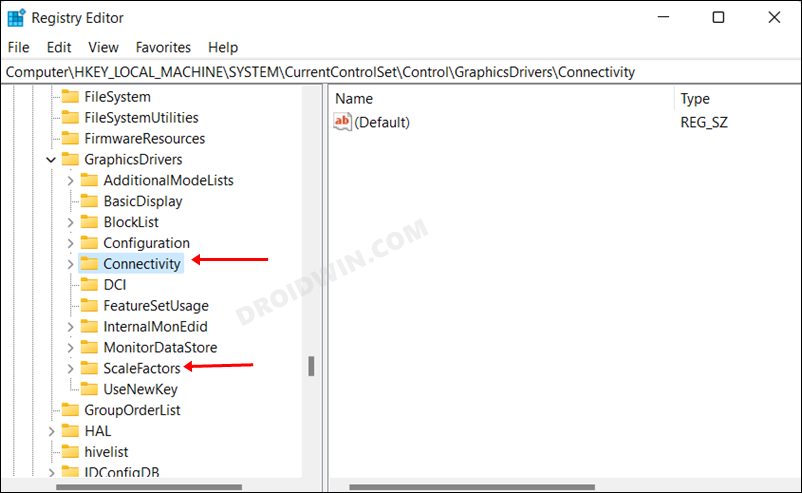
- Likewise, delete the Connectivity and ScaleFactors folders present under GraphicsDriver.
That’s it. The display cache is now deleted from your Windows 11 PC. Do note that all these three folders will automatically be created within seconds. So for best results, it is recommended to delete these folders at regular intervals. On that note, we round off this guide. If you have any queries concerning the aforementioned steps, do let us know in the comments. We will get back to you with a solution at the earliest.


Loup
This worked wonderfully, thank you!
I had a screen that went black every time I plugged it in and this resolved the issue