In this guide, we will show you two different methods to check the DM Verity and Verification status on your Android device. Gaining administrative access by rooting your device via Magiks patched boot/init_bot is always at the top of the priority queue for many users as it opens the gateway to welcome a plethora of tweaks and mods. On the flip side though, it might also ease out the entry point for some malicious apps to make their way to your device.
To prevent that from happening, Google has put into a place a stringent security mechanism called Device Mapper Verity, which prevents such apps from executing their normal functionalities. However this Device Mapper also tends to end up conflicting with numerous custom ROMs, recoveries and kernels, therefore the developers recommend disabling it beforehand.
While disabling it is fairly simple, however, it is quite a time taking task. Therefore, many users prefer to first check the DM Verity and Verification status on their Android device so that if it is already disabled, then they would be saved from carrying out that lengthy process. If you also echo this thought, then this guide will show you two different methods to carry out this check. Follow along.
Table of Contents
Check DM Verity and Verification Status via ADB Commands
There exist two different methods to get this job done- via ADB commands and using a Magisk Module. While the module method is the shorter of the two but it was specially designed for Pixel 7 Pro and may or may not work with other devices [though it worked on my OnePlus 7T running Pixel Experience ROM]. Droidwin and its members wouldn’t be held responsible in case of a thermonuclear war, your alarm doesn’t wake you up, or if anything happens to your device and data by performing the below steps.
- To begin with, download and extract the Android SDK Platform Tools on your PC.

- Then enable USB Debugging on your device and connect it to your PC via a USB cable.
- Now download avbctl [GitHub] and transfer it to the platform-tools folder on your PC.
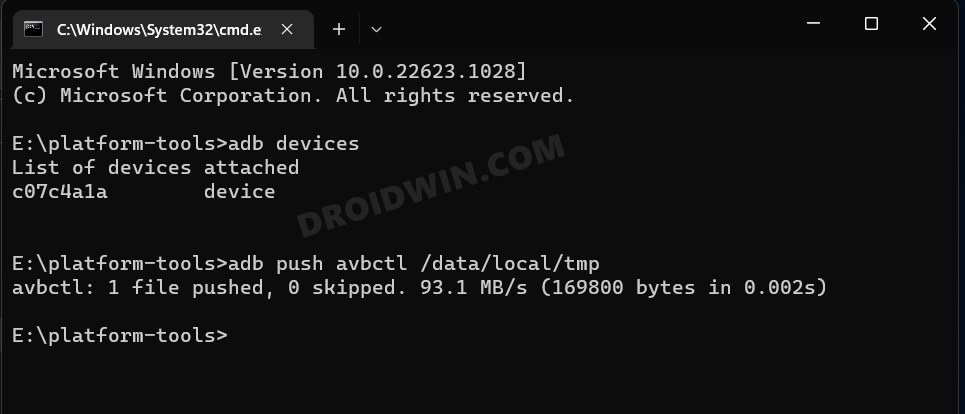
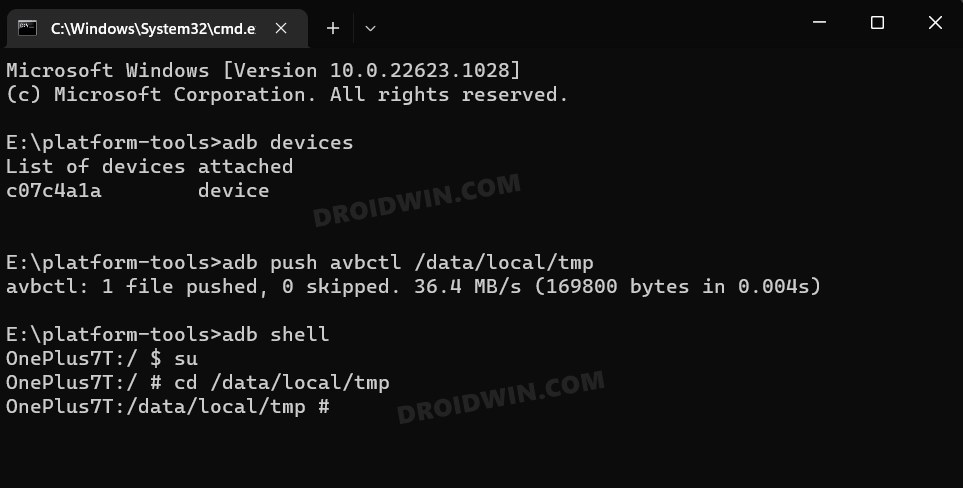
- Then execute the below command to send the avbctl file to the tmp directory on your device
adb push avbctl /data/local/tmp
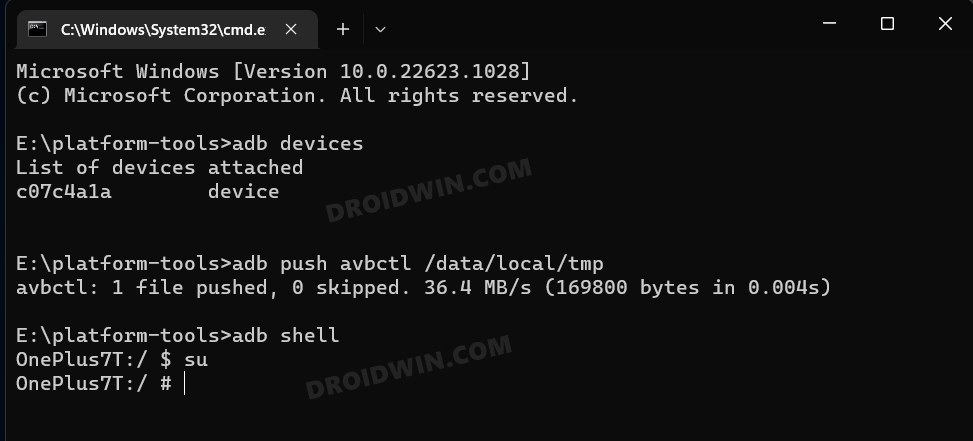
- Now execute the below command to open the shell environment.
adb shell
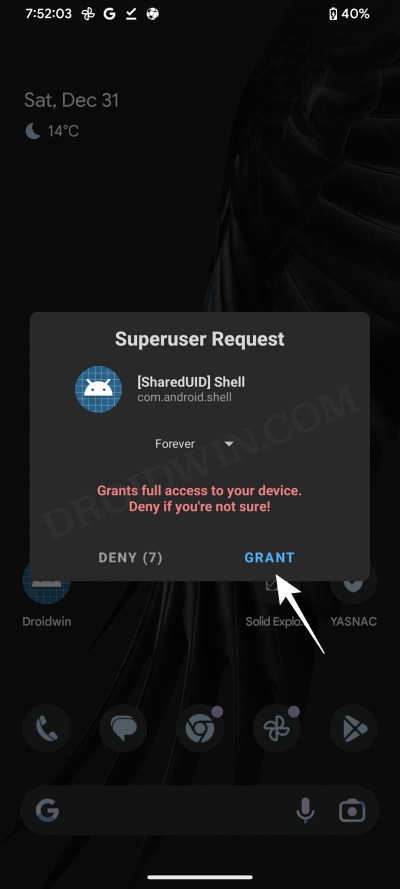
- Then invoke the root request via the below command. You will get a Magisk prompt, tap Grant.
su
- Now change the current directory to tmp using the below command
cd /data/local/tmp
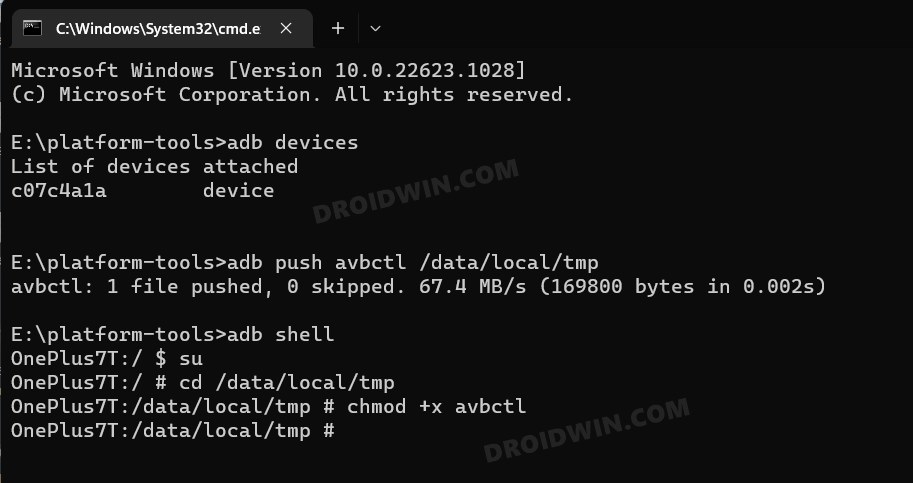
- After that, type in the below command:
chmod +x avbctl
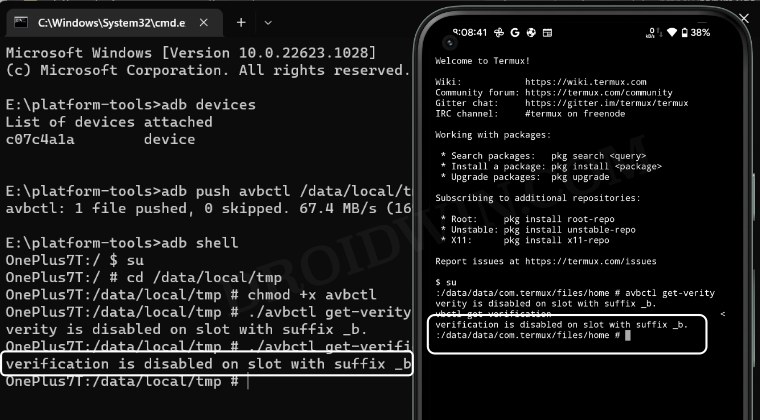
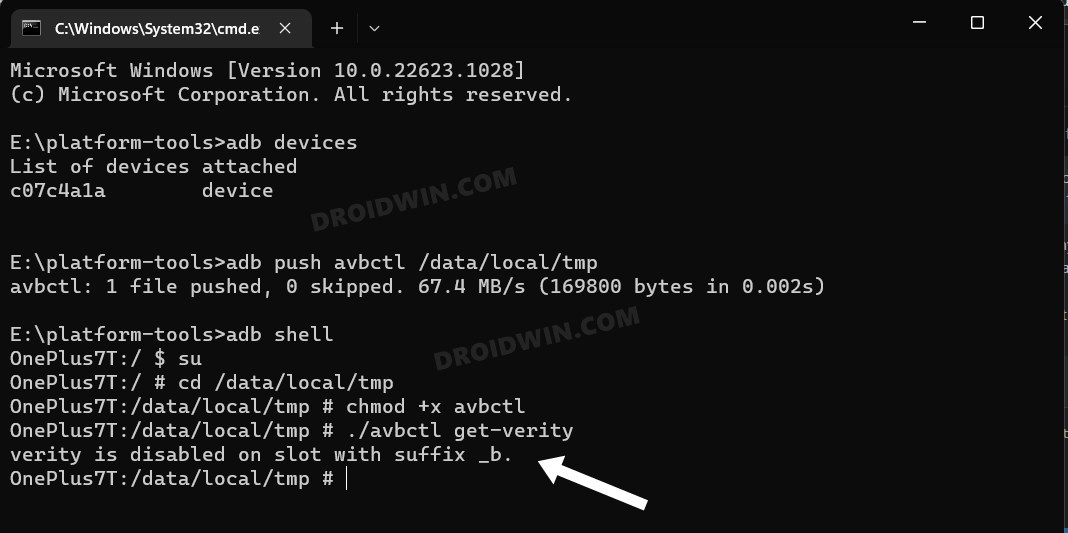
- Now type in the below command to get the current verity status:
./avbctl get-verity
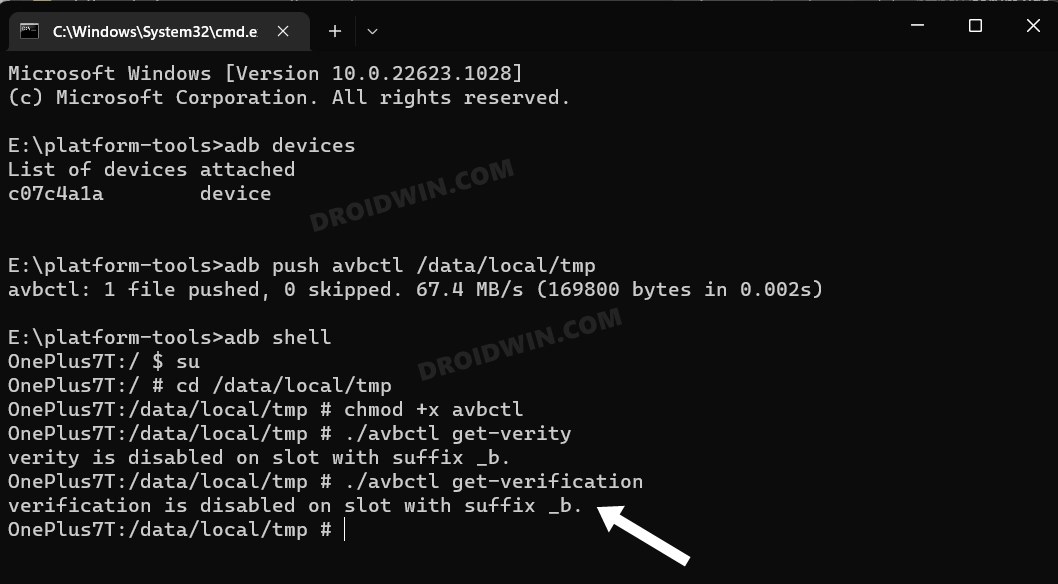
- Likewise, execute the following command to get the current verification status:
./avbctl get-verification

That’s it. These were the steps to check the DM Verity and Verification status on your Android device using ADB commands. Let’s now check how the same could be carried out via a Magisk Module.
Check DM Verity and Verification Status via Magisk Module
- Download the avbctl Magisk Module [GitHub] and send it to your device.
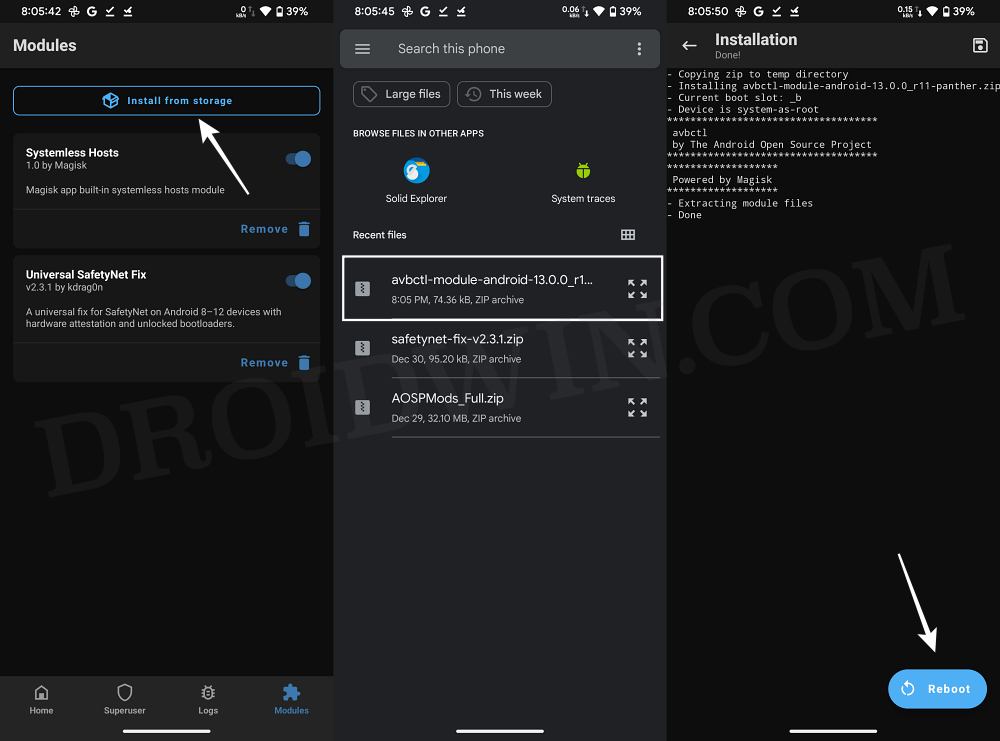
- Then launch Magisk, go to Modules, and tap on Install from Storage.
- Now select the avbctl module and it will be flashed. Once done, hit Reboot.
- Then download and install a terminal emulator app like Termux from Play Store.
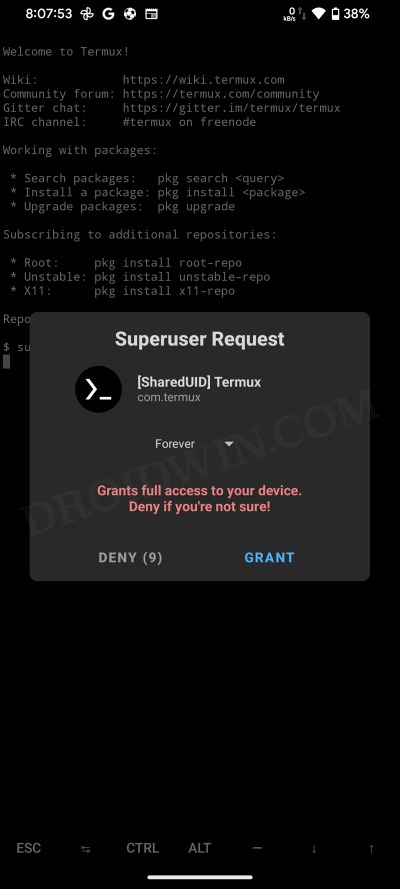
- Now launch it and execute the below command. You will get a SuperUser request, tap Grant.
su
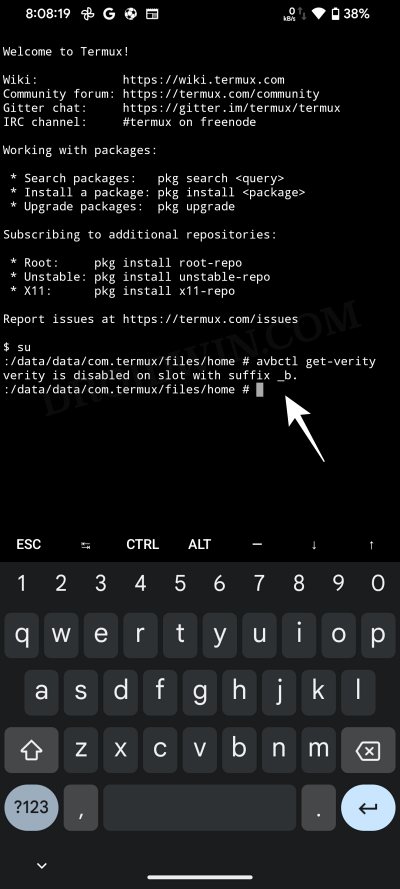
- Then type in the below command to get the current verity status:
avbctl get-verity
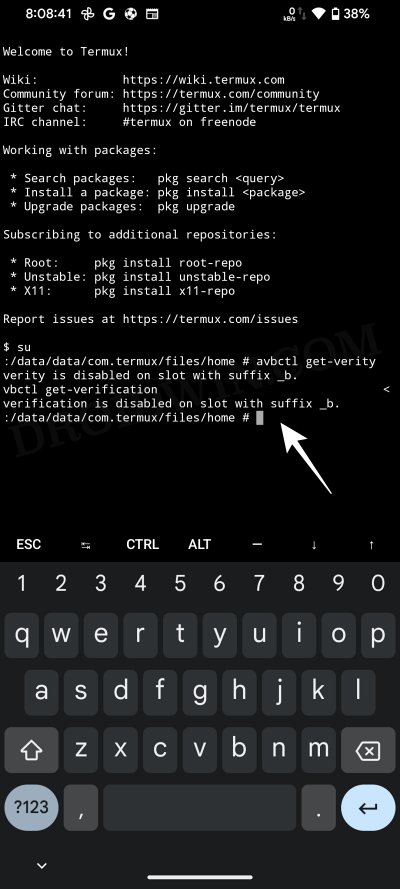
- Finally, execute the following command to get the current verification status:
avbctl get-verification
That’s it. These were the two different methods to check the DM Verity and Verification status on your Android device. If you have any queries concerning the aforementioned steps, do let us know in the comments. We will get back to you with a solution at the earliest.
How to Disable DM Verity on Android
- Download the same version of stock firmware that is currently installed on your device. You may verify the same from the Build Number.
- Then extract it, copy the vbmeta.img from there, and transfer it to the platform-tools folder.
- Now open Command Prompt inside the platform-tools folder.
- Then type in the below command to boot your device to Fastboot Mode.
adb reboot bootloader
- Now use any one of the three commands listed below to disable verity and verification on your Android device.
fastboot flash vbmeta --disable-verity --disable-verification vbmeta.img
fastboot --disable-verity --disable-verification flash vbmeta vbmeta.img
fastboot flash vbmeta vbmeta.img --disable-verity --disable-verification


