In this guide, we will show you the steps to downgrade your Vivo X80/Pro from Android 13 to Android 12. With the launch of the thirteenth iteration of the OS build, there is a plentitude of features that you are about to welcome on your device. These include the likes of expansion of the Material You theme from 4 to 16, per-app language settings, QR Code scanner in Quick Settings, revamped clipboard, the ability to choose between two clock styles on the lock screen, and a few under-the-hood changes. However, this is just one side of the coin.
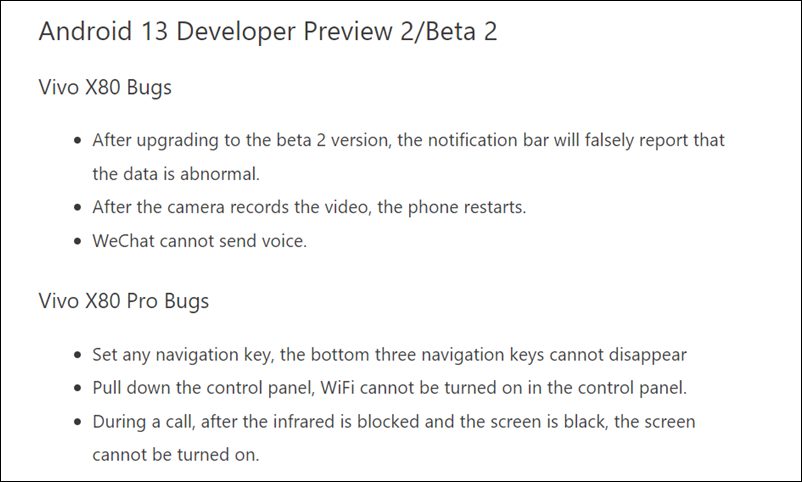
Since the OS is currently in the developer preview/beta stage, you are likely to come across quite a few bugs, performance issues, system instability, and erratic behavior of some apps. Likewise, Vivo has also listed a few issues that you would face in this latest OS, as is evident from the above screenshot. So if these bugs are proving to be a hindrance to the normal functioning of the device, then you should consider downgrading your Vivo X80/Pro from Android 13 to Android 12. And in this guide, we will show you how to do just that. Follow along.
Vivo X80/Pro: Download Android 13 to Android 12 Downgrade Firmware
You could grab hold of the downgrade firmware for your device from the below link:
Vivo X80: PD2183_A_12.0.15.3.W10.V000L1-update-full.zip
Vivo X80 Pro: PD2185_A_12.0.10.5.W10.V000L1-update-full.zip
How to Downgrade Vivo X80/Pro from Android 13 to Android 12
- Transfer the downloaded firmware to your device’s Internal Storage [but not inside any folder].
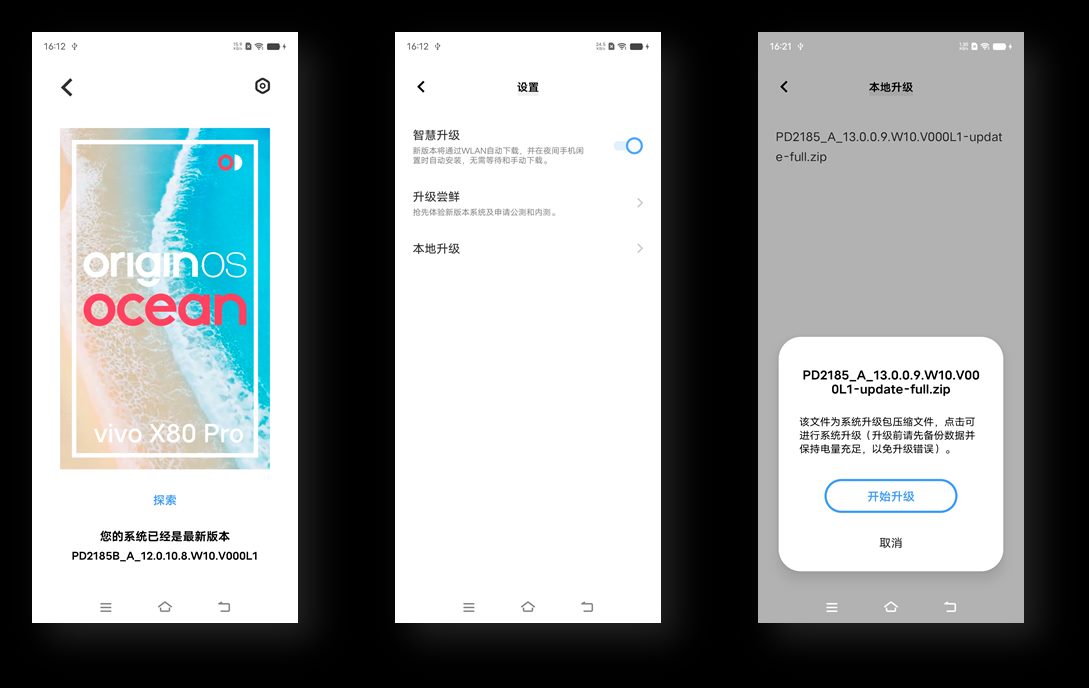
- Then go to Settings > System Upgrade > Local Upgrade and select the Android 12 firmware.

Credits: Vivo - The firmware package will be verified and then subsequently installed.
- Once done, your device will boot to Android 12.
That’s it. These were the steps to downgrade your Vivo X80/Pro from Android 13 to Android 12. If you have any queries concerning the aforementioned steps, do let us know in the comments. We will get back to you with a solution at the earliest.


Geovanni
El down grade borra información del teléfono?
weber
hi thx so much for the up and downgrade tutorial.
i want to know if u know a way to flash global rom on Chineserom
its looks complicatedbut maybe you know some tips .
thx
kevin
Dave
I tried all ways even renaming it, it seems that the device ai refuse to allow flashing from China rom to any other rom in the device even with bootloader unlock.