This guide will show you the steps to change the screen density/DPI/display size in the Galaxy Watch 4. As soon as I unboxed my smartwatch, my first reaction wasn’t getting in awe of the Android-based OS, rather it was the large icon size in the app drawer. While it did cause a few hiccups initially, but then I got used to it over the due course of time. However, every now and then, there was a need to sideload an app and install it onto the watch, and this is what probably gave birth to this article.
You see, the thing is you could easily install and run third-party apps on your watch [outside of Play Store]. However, there was one major roadblock-the display size of those apps. Since these apps aren’t optimized for the watch’s screen size, they all appeared zoomed in. So even to interact with a button, I had to keep on scrolling. Well, in some apps, I wasn’t even able to tap on the button as it was beyond the display [it was a button to verify captcha which I wasn’t able to pass].
However, then I realized that since the underlying OS is Android-based, whatever tweaks I had carried out on my smartphone should be applicable on the watch as well. And that was indeed the case. So keeping that in mind, this guide will show you the steps to change [decrease or increase] the screen density/DPI/display size on your Galaxy Watch 4 and set it as per your desired level. Follow along.
Table of Contents
How to Change Screen Density/DPI/Display Size in Galaxy Watch 4
The below instructions are listed under separate sections for ease of understanding. Make sure to follow the same sequence as mentioned.
STEP 1: Install Android SDK
First and foremost, you will have to install the Android SDK Platform Tools on your PC. This is the official ADB and Fastboot binary provided by Google and is the only recommended one. So download it and then extract it to any convenient location on your PC. Doing so will give you the platform-tools folder, which will be used throughout this guide.

STEP 2: Enable ADB Debugging in Galaxy Wach 4
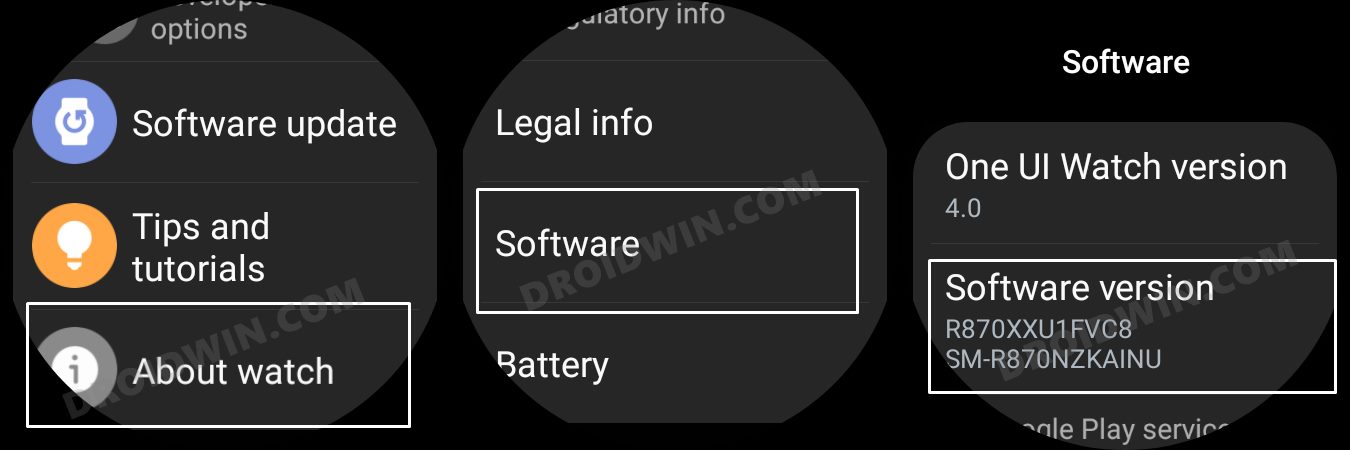
- Head over to the Settings > About Watch > Software and tap Software Version 7 times.

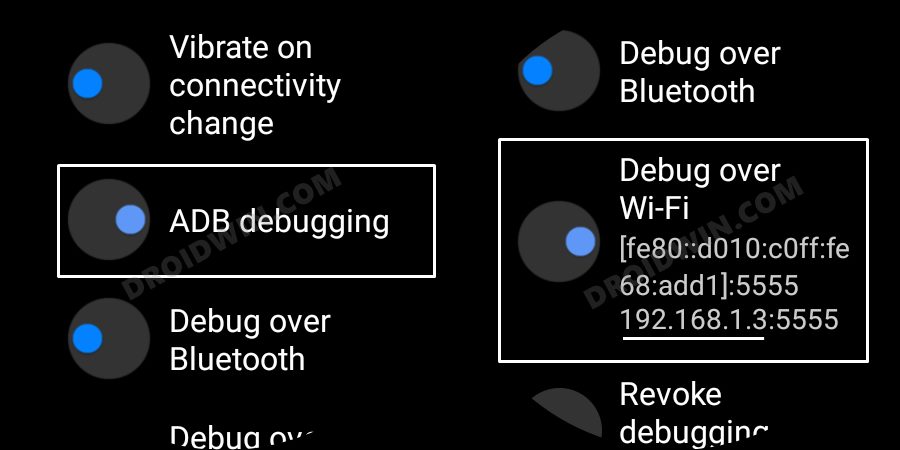
- Then go to Developer Options and enable the toggle next to ADB Debugging.
- After that, scroll down a little bit and enable the toggle next to Debug over WiFi.
- It will now bring up the IP Address, note it down somewhere [do not include the port number, i.e. values after the colon].
- For example, if the entire value is 192.168.1.3:5555, then your IP will be 192.168.1.3.
STEP 3: Connect Galaxy Watch 4 to PC via ADB Command
- Head over to the platform-tools folder, type in CMD in its address bar, and hit Enter. This will launch Command Prompt.
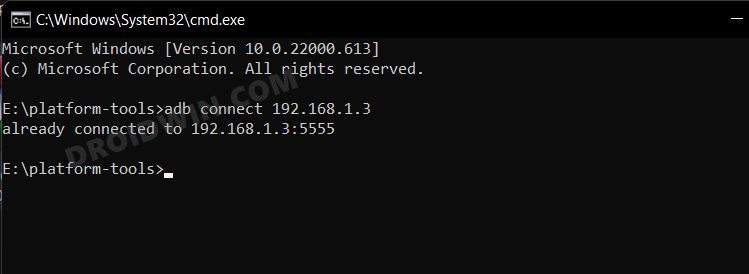
- Now type in the below command in this CMD window [make sure to replace IP accordingly].
adb connect IP
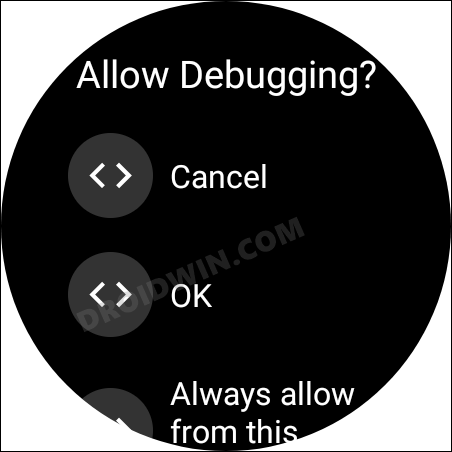
- You will now get a prompt on your watch, tap OK or Always Allow from this computer.
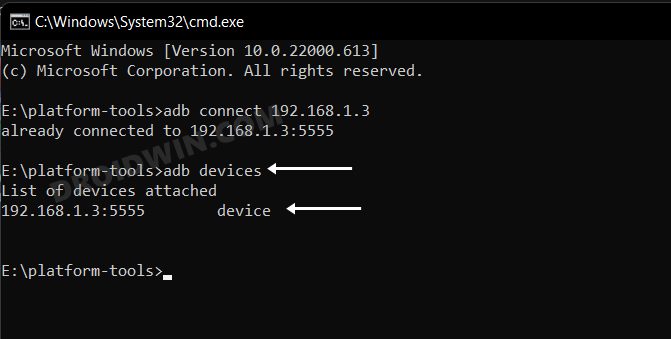
- Finally, execute the below command to verify the ADB Connection between your watch and PC
adb devices
- You will now get your IP Address and port number, followed by the ‘device’ keyword. This signifies that the connection has been successfully established.

STEP 4 Change Screen Density/DPI/Display Size in Galaxy Watch 4
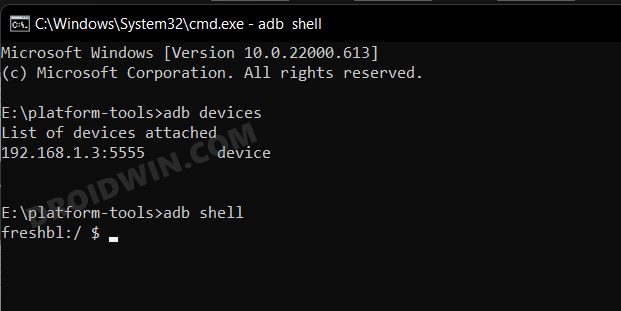
- To begin with, open the shell environment by executing the below command
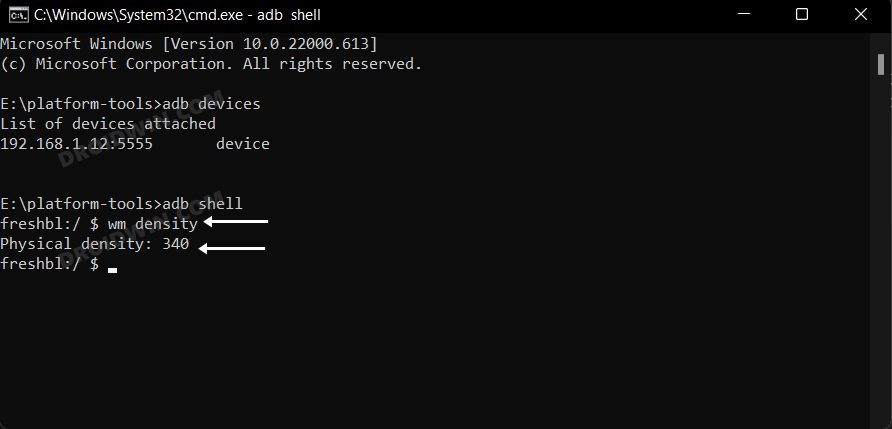
adb shell
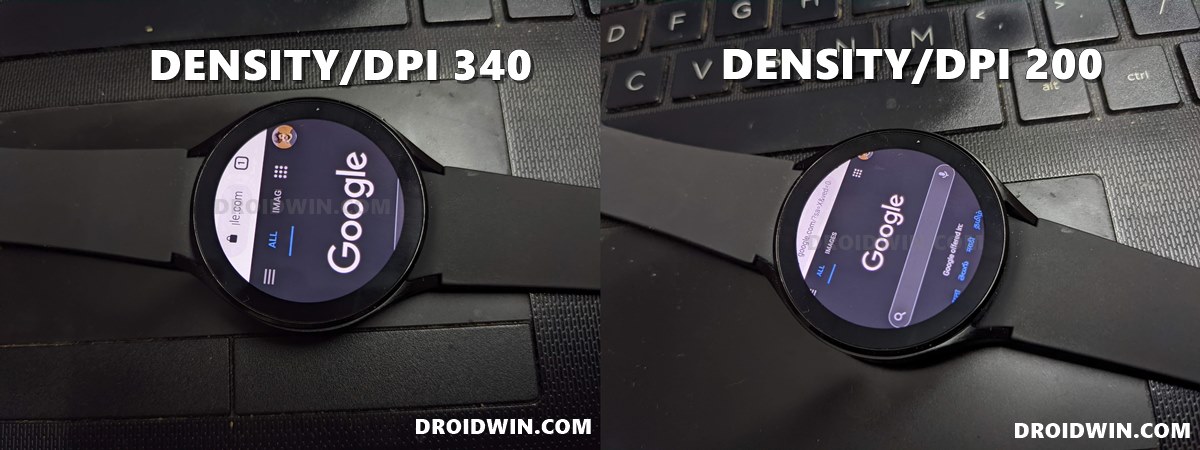
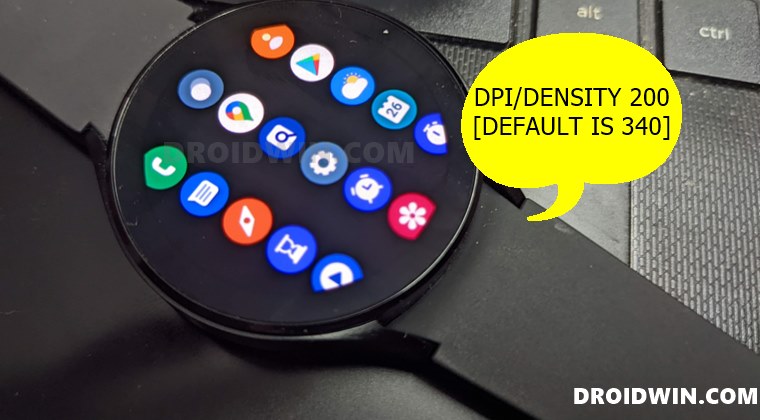
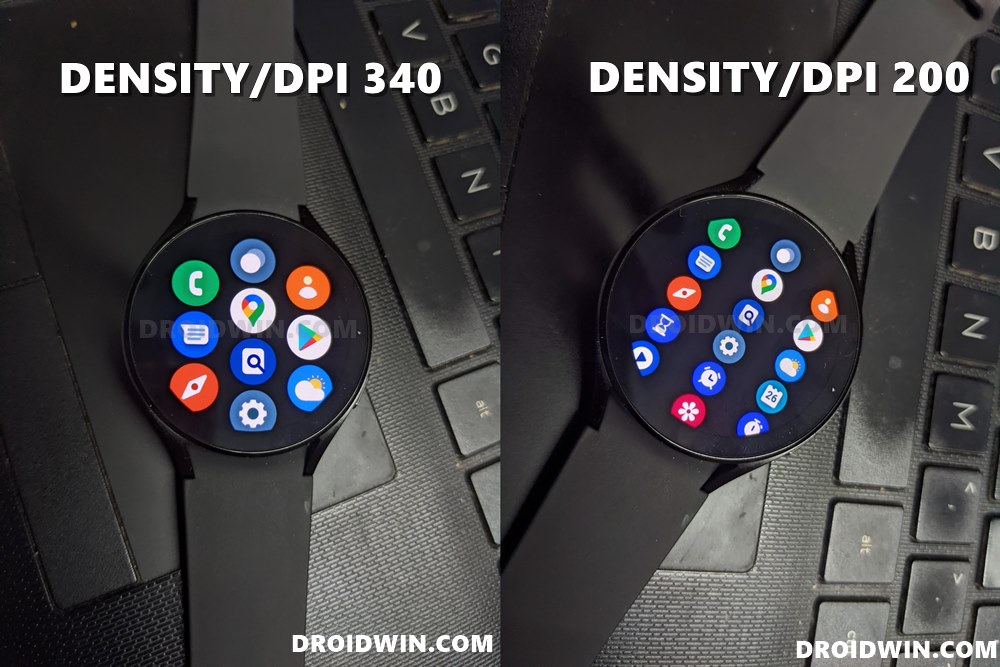
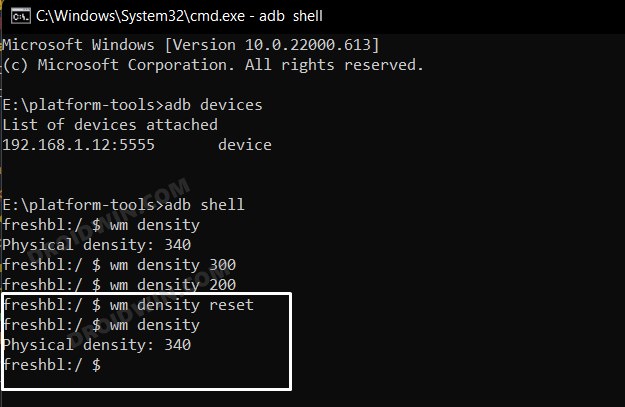
- Then execute the following command to get hold of the current display density [it’s 340 in my case].
wm density
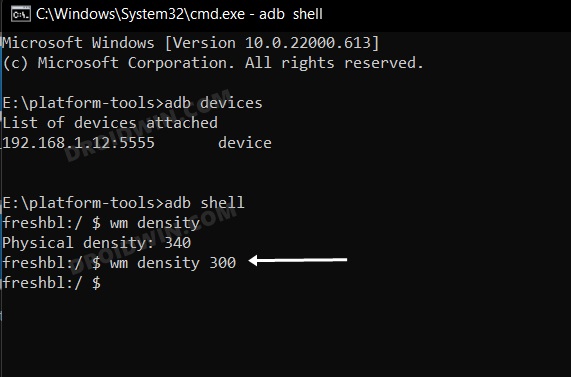
- After that, execute the below command, replacing xxx with the desired density
wm density xxx
- For example, let’s change the density to 300, so the above command will transform to
wm density 300
- Let’s lower it down even further, say to 200
wm density 200
- To revert to the original value, just reset the density via the below command
wm density reset
- Or, input the original value in the wm density xxx command, which in our case will be
wm density 340
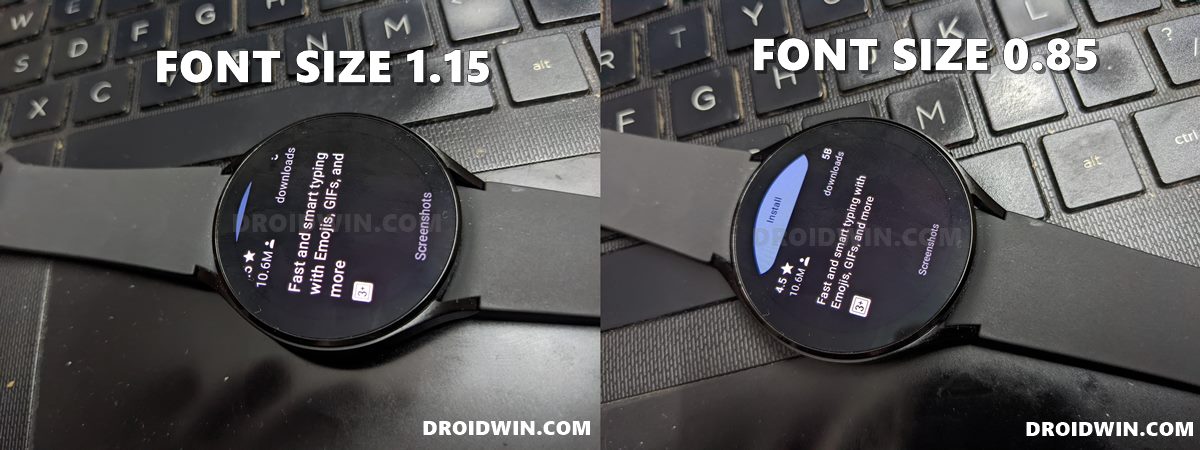
- Moreover, to get the best result, you could consider changing the font size of the concerned app or the entire OS as well.
That’s it. These were the steps to change the screen density/DPI/display size in the Galaxy Watch 4. If you have any queries concerning the aforementioned steps, do let us know in the comments. We will get back to you with a solution at the earliest.


