In this guide, we will show you various methods to fix the issue of scroll not working in the Apple Magic Mouse on your Windows 10/11 PC. Keeping the aesthetics aside, one major reason why the wireless mouse from the Cupertino giant is so popular among the masses is the plethora of nifty gestures that it beholds.
From swiping left and right for switching pages and apps, to double tapping to zoom in/out, or moving your fingers up and down for scroll, its usage experience is literally unparalleled. Owing to this, it’s no hidden secret why many Windows users are also inclined towards this mouse.
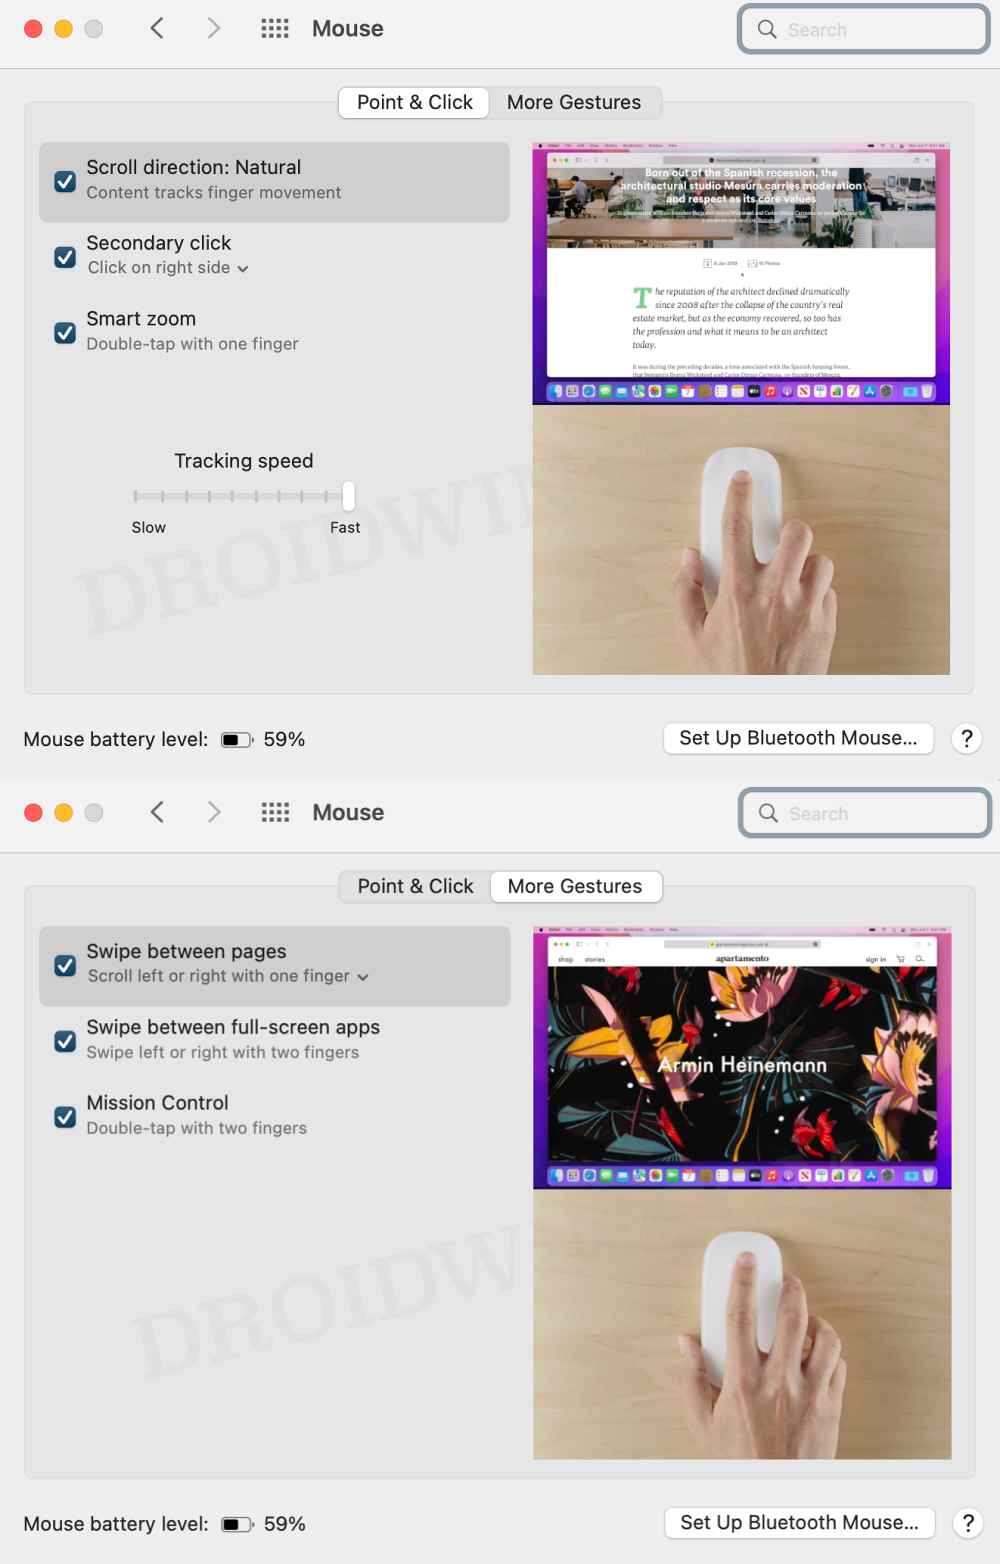
But while they are able to successfully pair their Apple Magic Mouse with their Windows 10/11PC, they are unable to use the scrolling gesture. If you are also in the same boat, then this guide shall help you out. Follow along for the fixes.
Table of Contents
Fix Apple Magic Mouse Scroll not working in Windows 10/11
It is recommended that you try out each of the below-mentioned workarounds and then see which one spells out success for you. So with that in mind, let’s get started.
FIX 1: Install AppleWirelessMouse64
AppleWirelessMouse64 is the Windows driver software from Apple for your Magic Mouse. This is the first prerequisite that your PC should have before you could use the mouse or any of these gestures. So if you haven’t installed it yet, then do so right away.
- To begin with, download the official Boot Camp Support Software from Apple.
- Once downloaded, extract it to any convenient location on your PC.

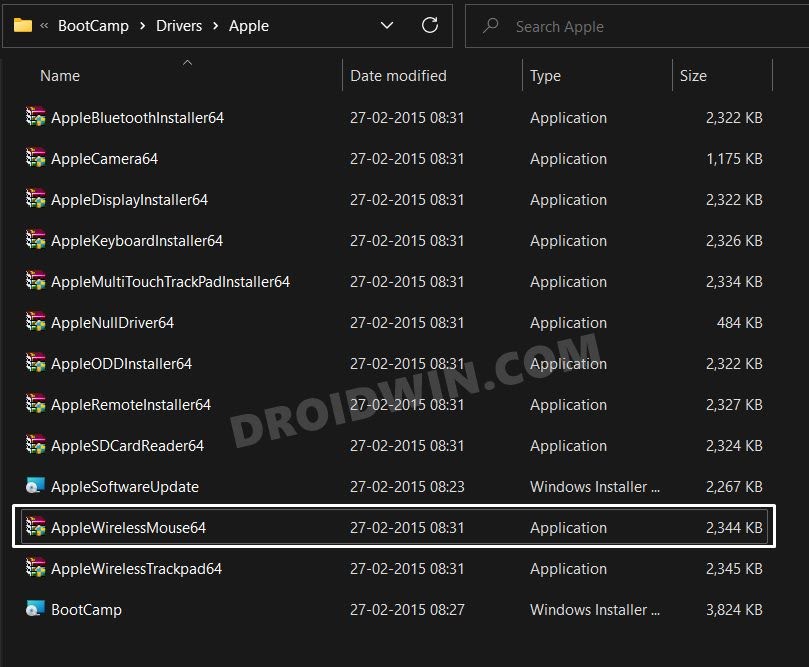
- Then go to the extracted folder > BootCamp > Drivers > Apple.
- Now double-click on the applewirelessmouse64.exe file to launch the setup.

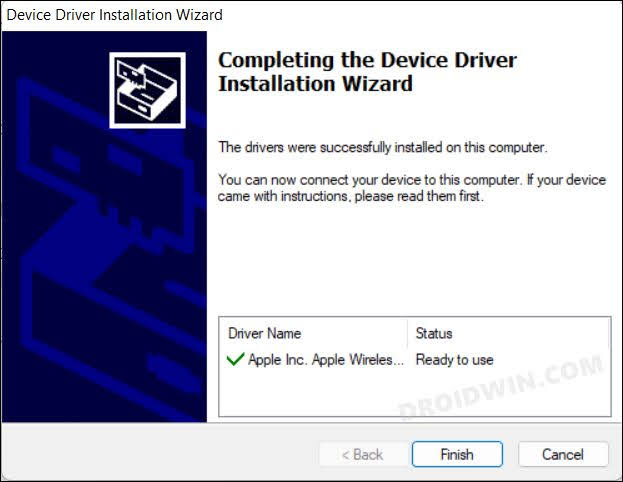
- Then proceed with the on-screen instructions to complete the setup.

- Once done, check if it fixes the scroll not working in the Apple Magic Mouse in Windows 10/11.
FIX 2: Install Magic Utilities
Many users were able to resolve this issue after trying out the Magic Utilities third-party app. Do note that it only comes with a 28-day free trial version after which you’ll have to shell out some bucks. So with that in mind, let’s get started.
- To begin with, download the Magic Utilities app on your PC.
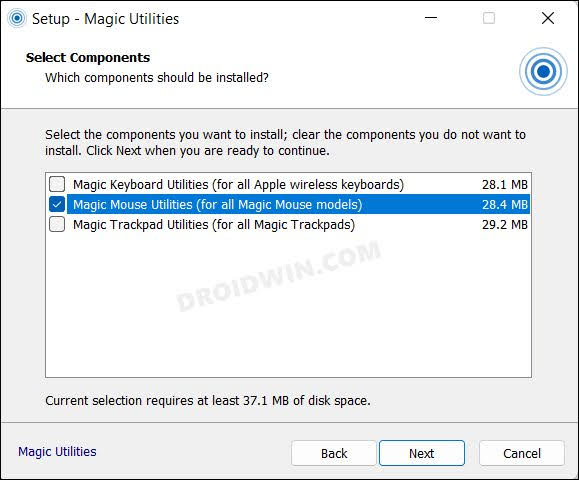
- Then launch it, check Magic Mouse Utilities, and click Next.

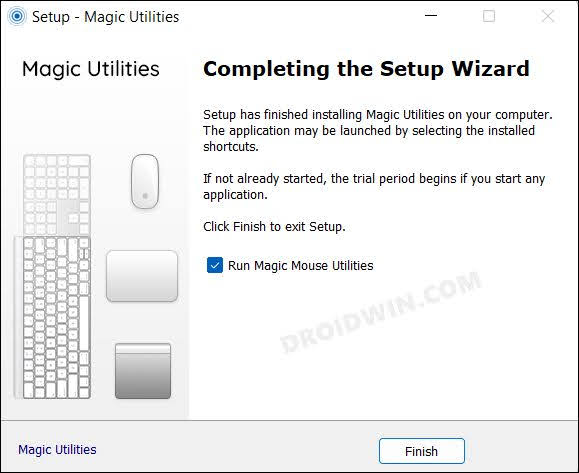
- The installation will now begin. Once done, hit Finish.

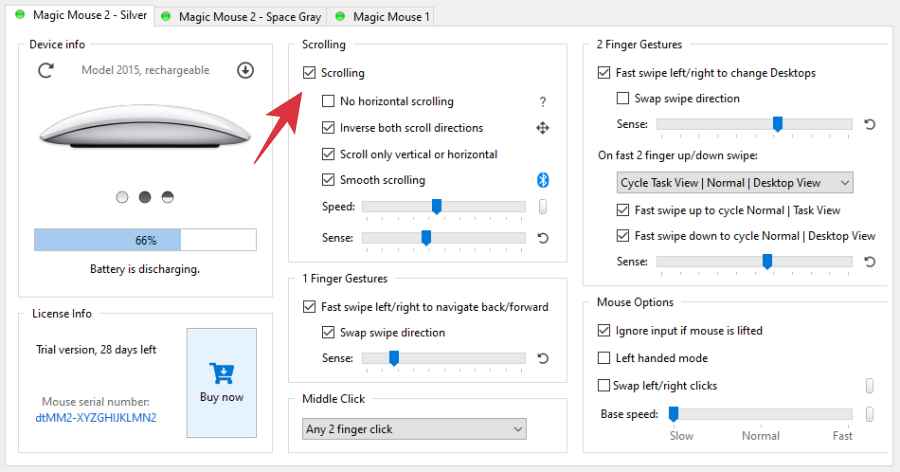
- Magic Utilities will now launch, check Scrolling to enable it.

- Then tweak the rest of the scrolling settings as per your requirement.
- Check if it fixes the scroll not working in the Apple Magic Mouse in Windows 10/11.
FIX 3: Re-Pair Magic Mouse
Your next course of action should be to unpair your mouse from your PC and then re-pair it. This will refresh the underlying Bluetooth settings of your mouse and could well resolve the underlying issue as well. So let’s put this fix to the test and check out the results.
- Launch the Settings menu via Windows+I shortcut keys.
- Then go to Bluetooth & Devices section from the left menu bar.
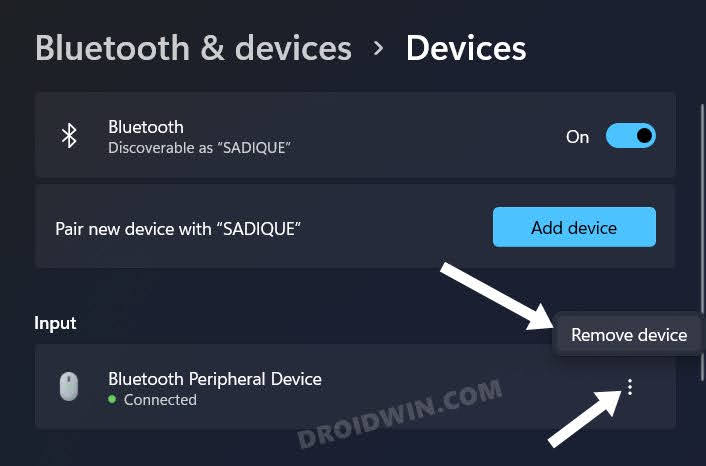
- Now click on the overflow icon next to your mouse and select Remove Device.

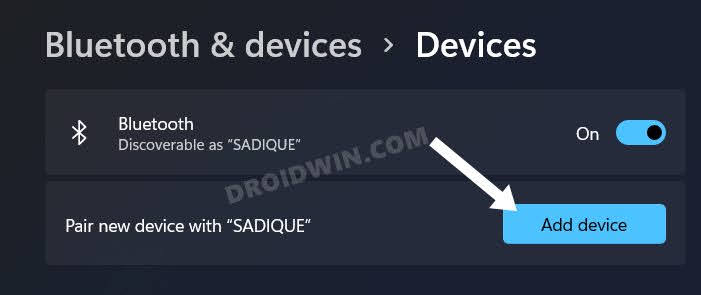
- Once done, go to Bluetooth and Devices and click on Add Device.

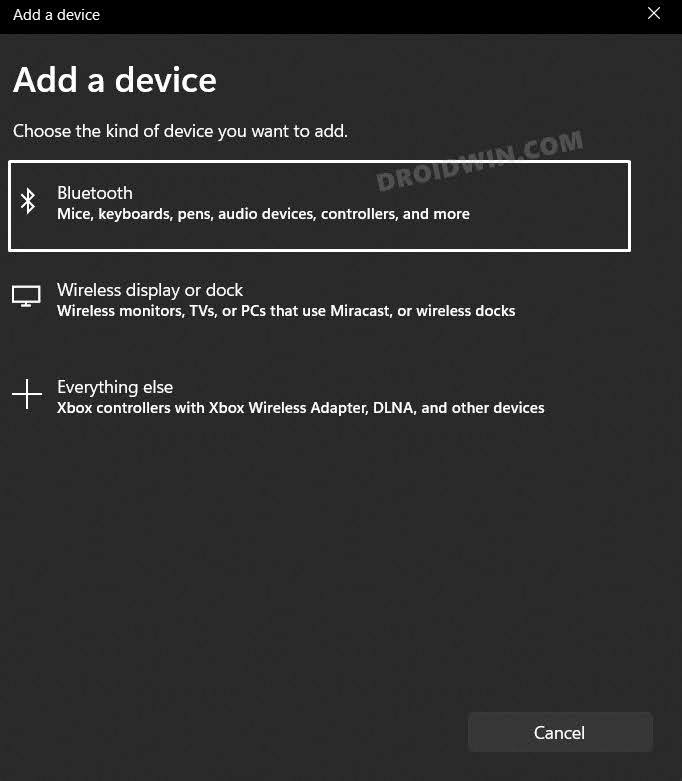
- After that, select Bluetooth from the list.

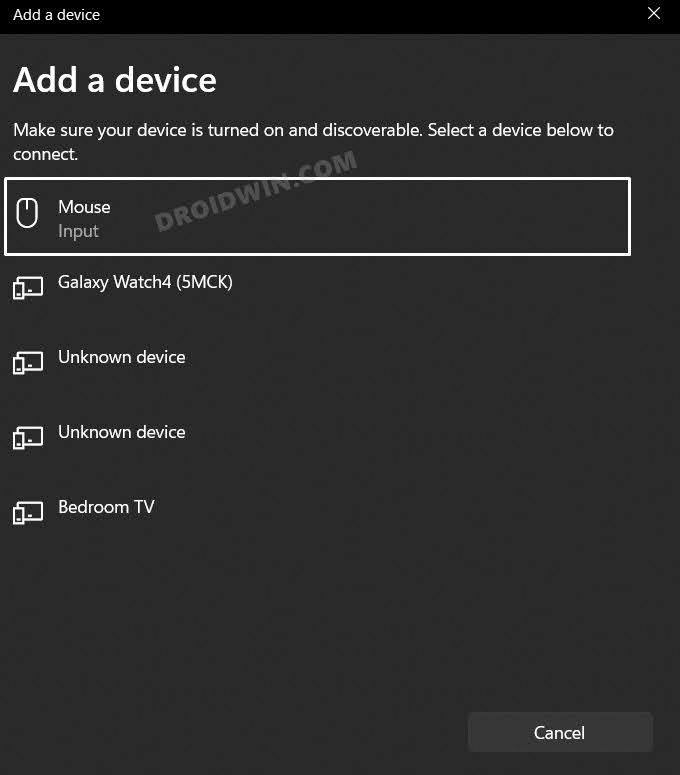
- Now click on Mouse from the list of devices. That’s it.

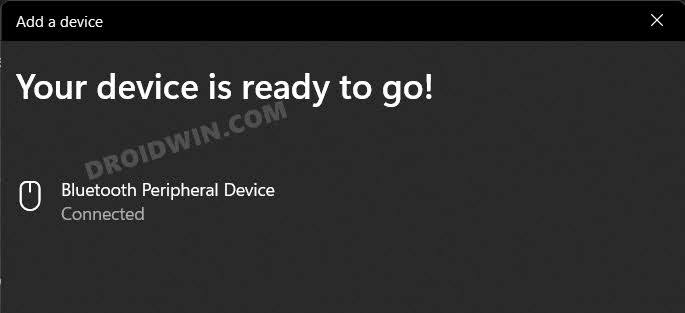
- Your Apple Mouse is now paired and connected with your Windows 10/11 PC.

- Check if it fixes the scroll not working in the Apple Magic Mouse in Windows 10/11.
FIX 4: Uninstall Third-Party Apps
If you have any other mouse-related third-party software installed on your PC, then it might conflict with the normal functioning of the mouse. Therefore, it is recommended to remove all those apps and then check out the results.
- Bring up Run via Windows+R shortcut keys.
- Then type in the below keyword and hit Enter.
appwiz.cpl
- Now select the conflicting third-party app from the list and hit Uninstall.

- Check if it fixes the scroll not working in the Apple Magic Mouse in Windows 10/11.
FIX 5: Disable Third-Party Services
A third-party service could also create a few roadblocks in the scroll functioning of your mouse. Therefore, you should consider disabling all the non-Microsoft-related services and then test out the results. Here’s how it could be done:
- Head over to the Start Menu, search System Configuration, and open it.
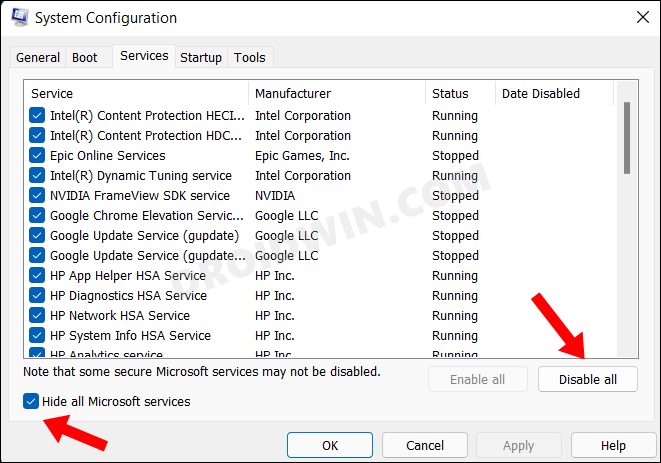
- Then go to the Services tab, checkmark Hide All Microsoft Services, and click on the Disable All button.

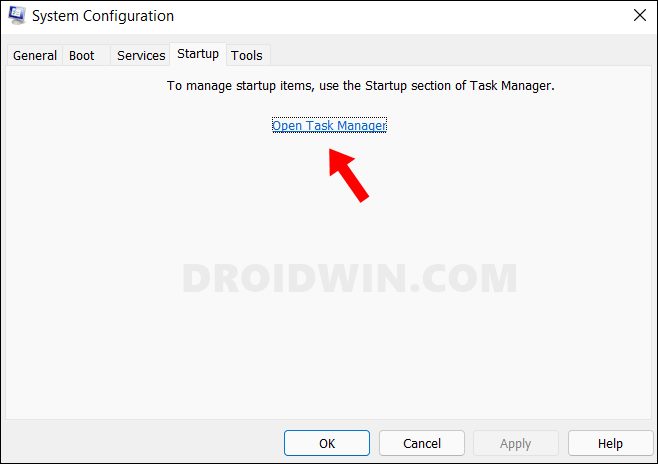
- Then go to the Startup tab and click on Open Task Manager.

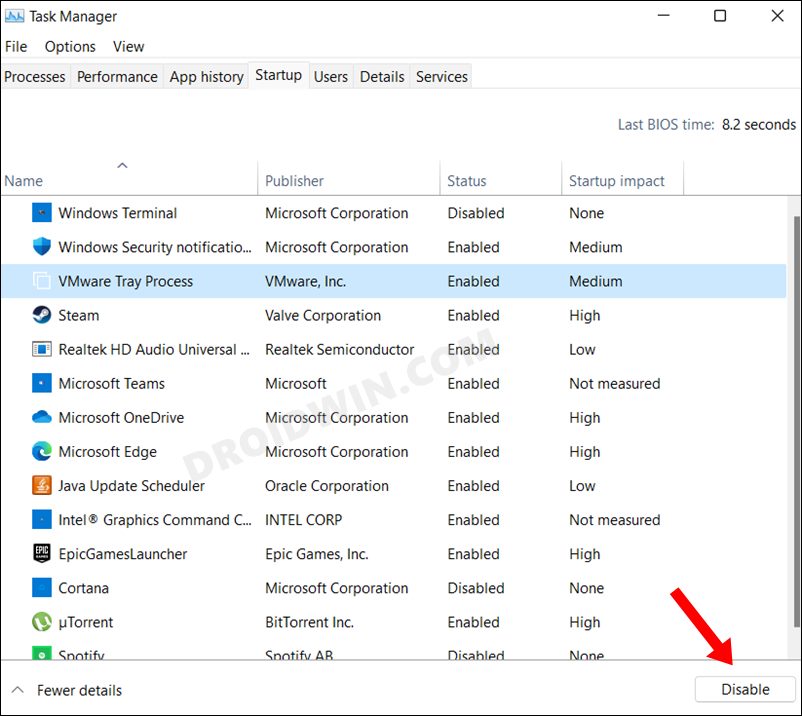
- Now select a process from the list and click Disable. Do so for all the running services.

- Once done, restart your PC, and check if it fixes the scroll not working in the Apple Magic Mouse in Windows 10/11.
FIX 6: Boot to Safe Mode
In some instances, a third-party app might conflict with the normal data exchange process. The best way to verify and hence rectify this issue is to boot your PC to Safe Mode. Doing so will disable all the third-party apps and give you the stock environment with just the system apps. If you are able to install the app in this mode, then the culprit is indeed a third-party app or software. Therefore, you should consider uninstalling it right away. Here’s how:
- Bring up the Run dialog box via Windows+R shortcut keys.
- Then type in the below command and hit Enter to open the System Configuration menu
msconfig
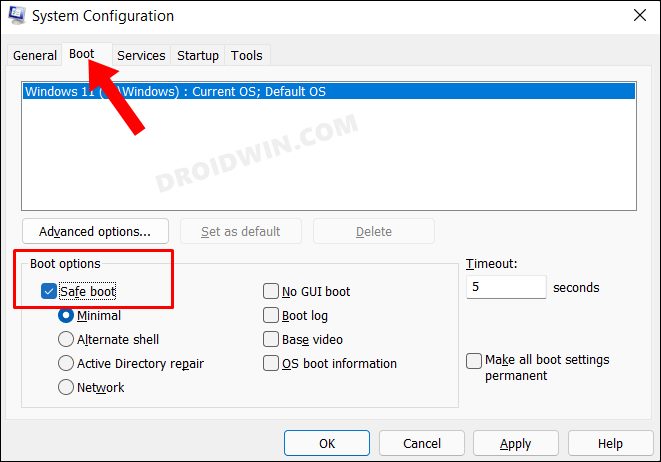
- Now go to its Boot tab and checkmark Safe Mode under Boot Options.

- Finally, click OK followed by Restart in the confirmation dialog box.
- Your PC will now boot to Windows Recovery Environment.
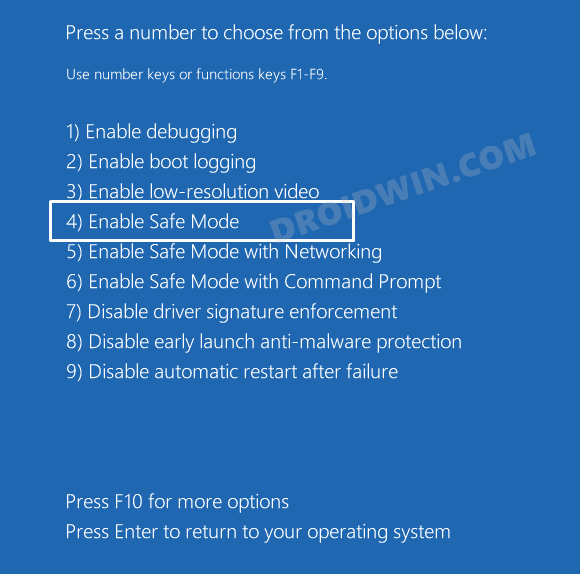
- Go to Troubleshoot > Advanced options > Startup Settings > Click Restart > Press 4 to boot to Safe Mode.

- Check if it fixes the scroll not working in the Apple Magic Mouse in Windows 10/11. If it does, then one of the third-party apps is indeed the culprit.
- So boot your PC to the normal mode and then uninstall the recently installed apps after which you started facing this issue.
That’s it. These were the various methods to fix the issue of the scroll not working in the Apple Magic Mouse on your Windows 10/11 PC. If you have any queries concerning the aforementioned steps, do let us know in the comments. We will get back to you with a solution at the earliest.

