In this guide, we will show you the steps to add the DirectX Diagnostic Tool option to Windows 11 context menu. This tool, also known as DxDiag, provides a wealth of useful information related to system, display, render, sound, and input devices. You could easily get information pertaining to Windows build number, underlying chipset and GPU name/version, total available display and graphical memory, the list of all the input devices connected to your PC, and a plethora of other nifty information. That’s not it. DxDiag also gives you an option to save all this information as a text file on your PC.
Owning to all these perks that it beholds, various tech enthusiasts and gamers interact with this quite regularly. Regarding which, there are a plethora of methods through which you could access this tool. These include the Start menu, CMD, Run, Right-Click menu, etc. For many users, it is the last option that scores the maximum when it comes to ease of user interface. If you also echo this thought, then this guide shall come in handy. In this guide, we will show you the steps to add the DirectX Diagnostic Tool option to Windows 11 context menu. Follow along.
How to Add DirectX Diagnostic Tool to Windows 11 Context Menu
To carry out this task, we will be tweaking a few registry values of the Windows right-click menu. So before proceeding ahead, it is highly recommended to take a backup of the registry. Once done, you may then start off with the below instructions.
- Head over to the Start Menu, search Registry Editor, and open it.
- Then copy-paste the below location in its address bar and hit Enter:
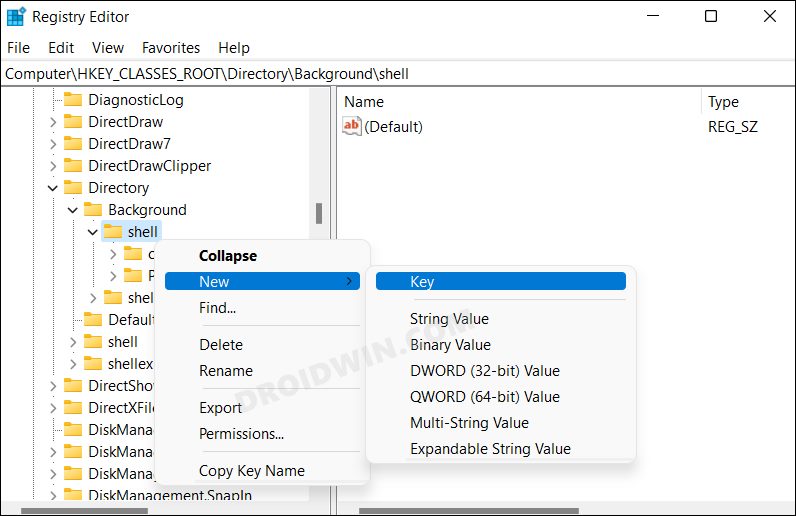
Computer\HKEY_CLASSES_ROOT\Directory\Background\shell

- Now right click on the Shell folder and select New > Key. Name it DirectX Diagnostic Tool.
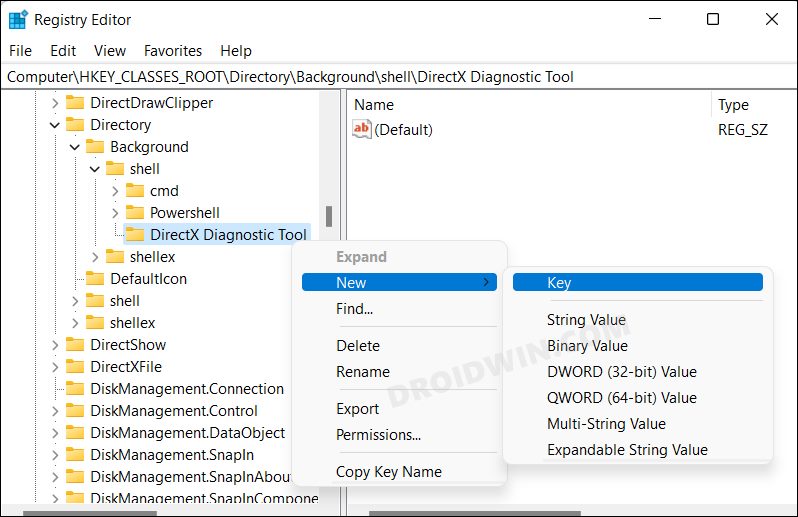
- After that, right-click on DirectX Diagnostic Tool and select New > Key. Name it command.
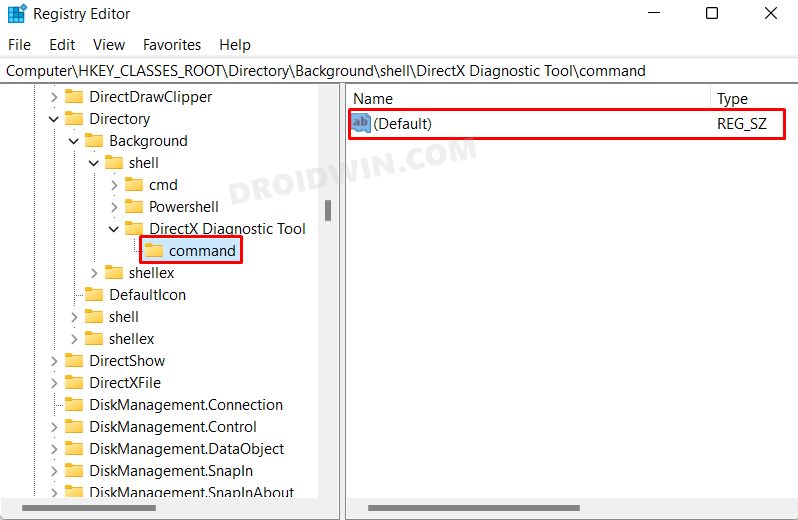
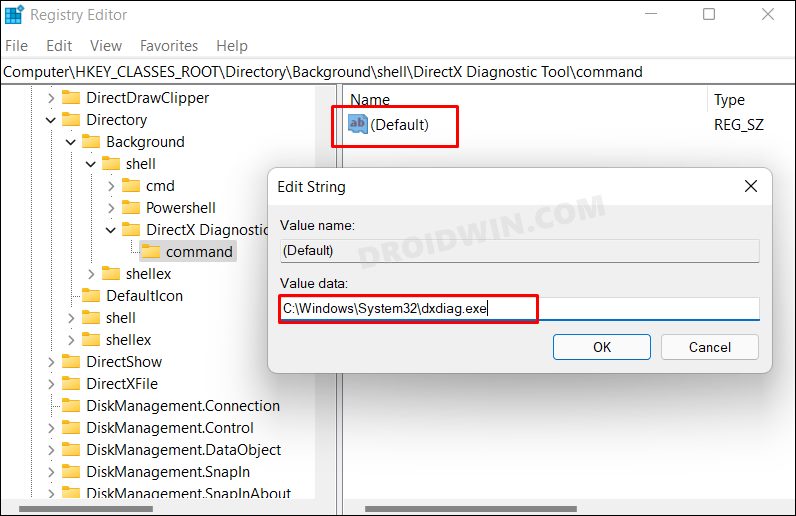
- Select the command folder and double-click on the Default file present on the right-hand side.
- Type in the below location in its Value Data field and click OK to save it. That’s it.
C:\Windows\System32\dxdiag.exe
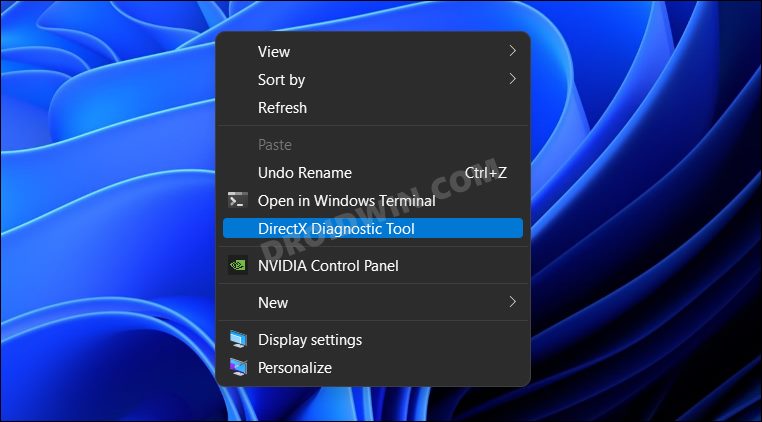
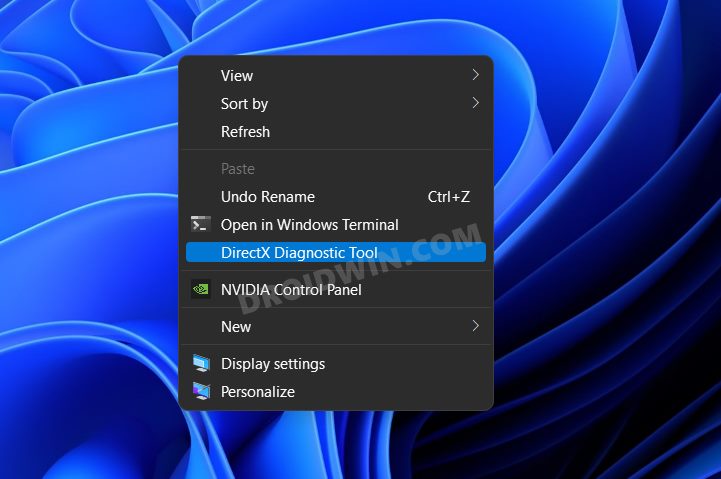
- Let’s now test it. So right-click on an empty location on the desktop, select Show More Options and you should now see the DirectX Tool.

So these were the detailed steps to add the DirectX Diagnostic Tool option to Windows 11 context menu. If you have any queries concerning the aforementioned steps, do let us know in the comments. We will get back to you with a solution at the earliest.


